Nail art with dotting tool designs are surprisingly easy to master! With just a few simple tools and a little practice, you can create beautiful, professional-looking manicures right at home. This guide will show you how to use a dotting tool for effortless, stunning nail art.
Are you dreaming of gorgeous, salon-worthy nails but think intricate designs are out of reach? Don’t let complicated patterns intimidate you! Nail art doesn’t have to be difficult or time-consuming. The secret weapon for stunning, easy manicures is a humble yet mighty tool: the dotting tool. Even if you’re a complete beginner, you can unlock a world of creativity. Get ready to transform your nails with simple techniques and beautiful results. We’ll walk you through everything you need to know in this easy-to-follow guide.
What You’ll Need: Your Dotting Tool Toolkit
Before we dive into the fun designs, let’s gather our essential supplies. You might be surprised at how little you need to get started with beautiful nail art. The star of the show is, of course, the dotting tool, but a few other bits and bobs will make your experience even smoother.
The Hero: The Dotting Tool
A nail dotting tool is incredibly versatile. It usually has a metal tip with a rounded ball at the end. They come in various sizes, which is fantastic because different sizes create different-sized dots! Many kits include multiple tools with different ball sizes, allowing for a range of effects.
Other Essential Supplies
Nail Polish: Choose your favorite colors! For beginners, opaque, creamy polishes tend to work best as they provide good coverage and a nice surface for dotting.
Base Coat: Essential for protecting your natural nails and helping your polish last longer.
Top Coat: This seals your design, adds shine, and prevents chipping.
Nail Polish Remover & Cotton Swabs: For cleaning up any mistakes and keeping your workspace tidy.
A Palette or Piece of Foil: This is where you’ll put a tiny drop of polish to dip your dotting tool into. A clean piece of aluminum foil or even a plastic palette works perfectly.
Getting Started: Basic Dotting Techniques
The beauty of a dotting tool lies in its simplicity. With just a few dips and dabs, you can create magic. Here are the fundamental techniques to get you started:
The Perfect Dot
1. Load Your Tool: Dip the ball end of your dotting tool into a small amount of nail polish on your palette. Don’t overload it; a little goes a long way.
2. Place the Dot: Gently touch the tip of the loaded dotting tool to your nail.
3. Lift and Repeat: Lift the tool straight up. You should have a clean, round dot! If the dot is too small, you might need a bit more polish. If it’s too smudged, you might have pressed too hard or had too much polish.
4. Clean As You Go: If you’re switching colors or notice polish building up on your tool, wipe it clean with a cotton swab dipped in nail polish remover.
Creating Lines and Swirls
Once you’ve mastered the single dot, you can start connecting them!
Lines: Place two dots close together, then use the side of your dotting tool to gently drag the polish between them, creating a line. Alternatively, you can use a steady hand to draw a line with the polish on your tool.
Swirls: To create swirls, place a few dots in a curved pattern. Then, use your dotting tool to gently connect them, swirling the polish together. You can also drag a dot into a curved line.
Varying Dot Size
Smaller Dots: Use a smaller-sized dotting tool or pick up less polish on your tool.
Larger Dots: Use a larger-sized dotting tool or pick up more polish. You can also gently “stamp” the dotting tool twice in the same spot to slightly enlarge it.
| Nail Polish Color | Base Color | Dot Color(s) | Design Idea | Ease |
|---|---|---|---|---|
| Classic Polka Dot | Any | Contrasting | Simple dots evenly spaced. | Easy |
| Ombre Dots | Any | Shades of one color | Dots gradually get lighter or darker. | Easy |
| Floral Accent | Light color | Bright colors | One larger dot for center, several smaller dots around it for petals. | Medium |
| Geometric Grid | Any | Contrasting | Lines of dots forming a grid pattern. | Medium |
Effortless Dotting Tool Nail Art Designs for Beginners
Now for the fun part! Here are some super-easy, yet incredibly chic, nail art designs you can create using your dotting tool. These are perfect for anyone just starting out.
1. The Classic Polka Dot Mani
This is the quintessential dotting tool design, and for good reason! It’s simple, effective, and always stylish.
How to Create It:
1. Prep Your Nails: Apply a base coat and let it dry.
2. Apply Base Color: Paint your nails with your chosen base color. For the best contrast, pick a color that pops against your dot color. Let this dry completely.
3. Load Your Dotting Tool: Dip your dotting tool (a medium-sized ball works well) into your contrasting polish color.
4. Start Dotting: Place dots evenly across your nail. You can make them all the same size, or mix in a few slightly larger or smaller ones for a more dynamic look. Place them in neat rows, or go for a more random, playful scattering.
5. Clean Up: Use a fine brush dipped in nail polish remover to neaten up any blurry edges or stray polish around your cuticles.
6. Seal the Deal: Apply a top coat to lock your dots in place and add shine.
2. The Elegant Gradient Dot
This design uses dots to create a subtle, beautiful gradient effect. It’s sophisticated and surprisingly easy!
How to Create It:
1. Prep and Base: Apply base coat and your chosen base color. Let it dry fully. A sheer nude or a soft pastel works wonderfully here.
2. Choose Your Dots: Select two or three shades of polish that blend seamlessly, for example, a pale pink, a medium pink, and a deep rose. You’ll also need a dotting tool.
3. Start at the Tip: Using the lightest shade and a medium dotting tool, start placing dots near the free edge of your nail.
4. Add the Next Shade: With the medium shade, place dots slightly below the first layer, overlapping them just a little.
5. Deepen the Color: Use the darkest shade and apply dots closer to your cuticle, again overlapping slightly with the previous layer.
6. Soften the Blend (Optional): If you want a smoother transition, you can gently drag a clean, slightly damp dotting tool vertically along the edges where the colors meet. Be very light-handed!
7. Top Coat Magic: Apply a generous layer of top coat to meld the dots together and create a smooth finish.
3. The Simple Flower Accent
Add a touch of floral charm with this easy accent nail design. It’s perfect for adding a feminine detail.
How to Create It:
1. Base and Finish: Apply your base coat, followed by your main nail color and a top coat. Let this dry completely. You might want lighter colors for the petals and a contrasting, brighter color for the center.
2. Create the Petals: Choose a bright polish for your petals. With a medium-sized dotting tool, place five or six dots in a circular pattern on your accent nail, leaving a small gap in the center. These are your petals.
3. Add the Center: Dip a smaller dotting tool into a contrasting color (like yellow or a darker shade of your petal color) and place a single dot right in the middle of your petal arrangement.
4. Let it Dry: Allow the design to dry completely before applying another top coat to protect your delicate floral art.
4. The Minimalist Dot Line
For those who love a clean, modern look, a simple line of dots is incredibly chic.
How to Create It:
1. Choose Your Base: Apply a nude, white, or black base polish. Let it dry thoroughly.
2. Pick Your Dotter and Polish: Select a fine-tipped dotting tool and a contrasting polish.
3. Draw the Line: Starting from one side of your nail (near the cuticle or tip), carefully place a series of small, evenly spaced dots in a straight line. You can go horizontally across the nail, vertically from tip to cuticle, or diagonally.
4. Consistency is Key: Try to keep the pressure and the amount of polish on your dotting tool consistent for uniform dots.
5. Seal: Finish with a top coat.
5. The Scattered Stars Effect
This design is playful and perfect for adding a bit of sparkle. It looks more complicated than it is!
How to Create It:
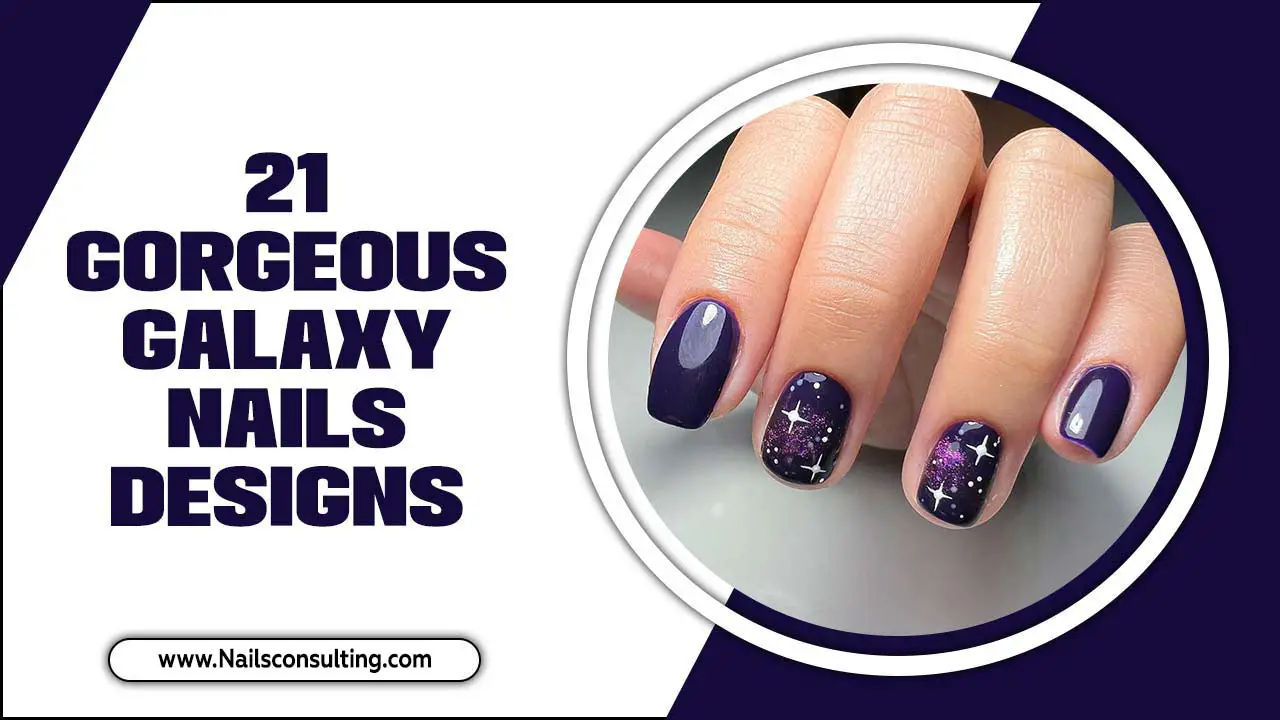
1. Dark Base: Apply a dark nail polish like navy, black, or deep purple as your base. Let it dry completely.
2. White or Silver Dots: Load a fine-tipped dotting tool with a very small amount of white or silver polish.
3. Place Randomly: Lightly “flick” or tap the dotting tool onto the dark base color in a scattered pattern all over the nail. Don’t aim for perfection; the random placement is what makes it look like scattered stars or confetti. You can even place a few dots slightly larger than others for variation.
4. Add Sparkle (Optional): For extra magic, dab a tiny bit of glitter polish over some of the dots with your dotting tool.
5. Top Coat: Apply a clear top coat to seal everything.
6. The Subtle French Tip Dots
A fun twist on the classic French manicure using dots.
How to Create It:
1. Nude Base: Apply a sheer nude or light pink polish as your base color. Let it dry.
2. Dot the Tips: Using a fine-tipped dotting tool and a contrasting color (white, black, or a metallic like gold or silver), carefully place a line of small dots along the free edge of your nail, mimicking the shape of a French tip.
3. Connect the Dots: You can either leave the dots as is for a dotted tip effect or gently connect them with the side of your dotting tool to create a solid line.
4. Top Coat Finish: Apply a top coat.
Advanced Techniques and Tips
Ready to take your dotting tool skills up a notch? Here are some tips and techniques for more intricate designs.
Handling Different Nail Polish Viscosities
Thicker Polish: Thicker polishes create bolder, more defined dots. They are excellent for opaque designs. Be sure to pick up just a small amount on your tool.
Thinner Polish: Thinner polishes can be trickier. They might create smaller dots or smudges if you’re not careful. You might need to load your tool a bit more or make multiple passes to get a good-sized dot. They are great for delicate designs and connecting dots. For inspiration on polish formulations, check out resources like the NailCareHQ guide on nail polish ingredients to understand how different formulations behave.
Using Gradient Tools with Your Dotter
Many nail art kits come with makeup sponges designed for gradient effects. You can use a slightly damp sponge to GENTLY blur the edges of your dots for a softer, airbrushed look. Be extremely careful not to smudge your design!
Combining Dotting with Other Nail Art Elements
Stamping: Create background patterns with stamping plates, then add dots on top.
Gems & Glitter: Place small dots of polish, then carefully position tiny gems or glitter pieces onto the wet polish before it dries. Your dotting tool can be used to pick these up!
Freehand Lines: Use your dotting tool to create a series of dots, then use a fine nail art brush to connect them into lines or shapes.
Troubleshooting Common Dotting Tool Problems
| Problem | Cause | Solution |
| :————————– | :——————————————– | :———————————————————————— |
| Dots are too big/smudged | Too much polish on the tool, or pressed too hard. | Use less polish, lift tool straight up. Try a smaller dotting tool. |
| Dots are too small | Not enough polish on the tool. | Dip the tool into polish a little deeper, or reload more frequently. |
| Uneven dots | Inconsistent pressure or polish amount. | Practice loading your tool the same way each time and use light pressure. |
| Polish dragging or streaking | Polish is too wet, or tool wasn’t cleaned. | Ensure base color is fully dry. Clean your dotting tool after each color. |
| Dots are not perfectly round | Tool tip is dirty or polish is too thick. | Clean your tool thoroughly. Try a different polish or thinner product. |
Nurturing Your Dotting Tools
Proper care will ensure your dotting tools last and perform beautifully.
Cleaning: After each use and color change, gently wipe the ball end of your dotting tool with a cotton swab soaked in nail polish remover. For a deeper clean, you can soak the tips in acetone for a few minutes.
Drying: Always ensure the tips are completely dry before storing them.
Storage: Store your dotting tools in a dry, protected place. Many kits come with protective cases or caps for the tips, which are ideal for preventing damage and keeping them clean.
Keeping Your Nail Art Looking Fresh
A good top coat is your best friend! Applying a fresh layer of top coat every couple of days can help protect your dot art and keep it looking shiny and chip-free for longer. For intricate designs, sometimes just adding a bit more top coat can help smooth out any slightly raised dots and give a seamless finish.
Frequently Asked Questions About Dotting Tool Nail Art
Q1: Do I need a special nail polish for dotting?
No, you can use any regular nail polish! Opaque, creamy formulas tend to work best for beginners as they give good coverage and create distinct dots. Lighter, sheerer polishes can be used for more subtle effects or blending.
Q2: How do I clean my dotting tool?
After each use, wipe the ball end with a cotton swab dipped in nail polish remover. For a more thorough clean, you can soak the tips in acetone for a minute or two. Ensure they are completely dry before storing.
Q3: I’m getting smudges when I dot. What am I doing wrong?
This usually happens if your base color isn’t fully dry, you’re pressing too hard, or you have too much polish


