Quick Summary:
Get ready for your next music festival with gorgeous, long-lasting music festival nails! This guide offers genius, beginner-friendly designs and essential tips to ensure your manicure shines from the first act to the last encore. We cover everything from vibrant colors to dazzling accents that perfectly capture the festival vibe.
Music Festival Nails: Genius & Essential Looks for Every Vibe
Hey there, nail lovers! Lisa Drew here from Nailerguy, and I’m so excited to talk about one of my favorite ways to express yourself: music festival nails! Festivals are all about vibrant energy, freedom, and letting your unique style shine. And what better way to complement your festival outfit and amplify your fun than with a killer manicure? We’ll dive into some amazing, easy-to-do designs that will make your nails the talk of the festival. Get ready to unleash your inner artist and adorn your fingertips with pure festival magic!
Why Your Music Festival Nails Matter
Festivals are more than just music; they’re an experience! They’re a chance to embrace carefree vibes, bold fashion, and of course, spectacular nails. Think about it: your hands are busy holding your drink, taking pictures, and dancing the night away. Having nails that look as amazing as the festival atmosphere adds that extra sparkle to your entire experience. A great manicure can boost your confidence and make you feel truly ready to seize the moment. Plus, it’s a fun way to try out trends you might not wear every day!
Choosing Your Festival Nail Vibe
Before we get into the nitty-gritty of designs, let’s chat about matching your nails to your festival persona. Are you all about boho-chic, edgy statements, or pure, unadulterated glitter bombs? Identifying your vibe will help guide your design choices.
Boho-Chic: Think earthy tones, floral accents, dainty details, and maybe a touch of fringe-inspired art or woven patterns.
Edgy & Bold: Embrace darker colors, geometric shapes, metallic finishes, and maybe even some subtle stud accents.
Glitter & Glam: Go all out with glitter, rhinestones, holographic finishes, and bright, eye-catching colors. This is your time to shine!
Groovy & Retro: Dip into psychedelic swirls, tie-dye patterns, smiley faces, and vibrant, clashing colors.
Essential Tools for Festival-Ready Nails
You don’t need to be a pro to create stunning music festival nails. Here are some must-have tools that will make the process a breeze for beginners:
Base Coat: Protects your natural nails and helps polish adhere better.
Top Coat: Seals your design, adds shine, and makes your manicure last longer – super important for festival durability!
Nail Polish Remover & Cotton Pads: For quick fixes and clean-up.
Tweezers: Perfect for picking up small rhinestones, glitter, or decals.
Dotting Tools: Create perfect dots for simple patterns. They come in various sizes for different effects.
Thin Nail Art Brushes: For drawing lines, swirls, and other finer details.
Nail File & Buffer: To shape your nails and smooth out any rough edges.
Fun Embellishments: Glitter, rhinestones, studs, holographic flakes, nail stickers, or even small charms!
Genius Music Festival Nail Design Ideas (Beginner-Friendly!)
Now for the fun part! Let’s explore some music festival nail designs that are not only eye-catching but also totally achievable for beginners.
1. The Glitter Gradient
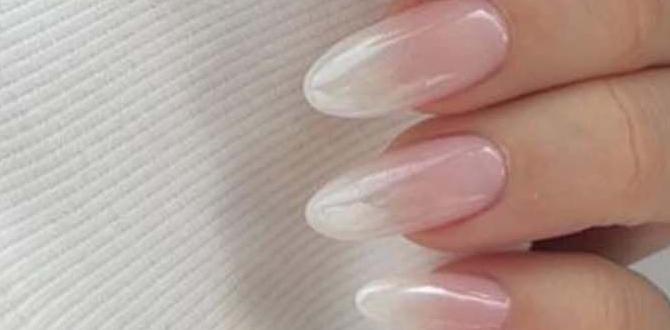
This is a classic for a reason! A glitter gradient looks super chic and festive, and it’s incredibly easy to create.
How-to:
- Start with a base coat and your chosen solid color polish. Apply two thin coats and let them dry completely.
- Open your favorite glitter polish.
- Using the brush from the glitter polish, apply it to the tip of your nail, blending downwards slightly onto the solid color. You can create a sharp line or blend it more softly.
- For more intensity, add a second layer of glitter, focusing on the tips and blending a little less.
- Let it dry thoroughly before applying a generous coat of top coat to seal in all that sparkle and prevent glitter fallout.
Nailerguy Tip: If you find blending difficult, use a makeup sponge! Dab some glitter polish onto a clean makeup sponge and gently tap it onto the tip of your nail, blending downwards.
2. The Boho-Chic Accent Nail
This design focuses the artistic flair on one or two nails, keeping the others simple. It’s stylish and easy to manage.
How-to:
- Paint all nails with a neutral or earthy-toned polish (like beige, terracotta, or olive green).
- On one or two nails, paint a simple design. Think:
- Tiny half-moons at the base of the nail in a contrasting color (like white or gold).
- Delicate, thin lines using a nail art brush or polish with a fine tip. You can create abstract lines or faux-feather patterns.
- Small floral dots. Use a dotting tool to place a few tiny dots to form a simple flower shape.
- Allow the accent nail art to dry completely.
- Finish all nails with a durable top coat.
3. The Neon Pop
Embrace the electric energy of a festival with bright, bold neon colors. This is all about fun and vibrancy!
How-to:
- Apply a white or light-colored base polish to all nails. This will make your neon colors pop even brighter! Let it dry completely.
- Apply your chosen neon polish. You might need two coats for full opacity.
- Option A (Solid Neon): Simply apply a second coat of neon.
- Option B (Neon Accents): Use a thin brush or dotting tool to add small neon details to a neutral base, or create a French tip with neon polish.
- Once dry, seal with a strong top coat.
4. The Cosmic Swirl
This design is perfect for those channeling a dreamy, psychedelic vibe. It looks complex but is surprisingly simple to achieve with a swirling technique.
How-to:
- Start with a dark base color, like navy blue or deep purple, as your canvas.
- While the base coat is still slightly wet (this is key!), carefully drip or brush on a few drops of lighter colors like pink, teal, or silver.
- Use a toothpick or a fine nail art brush to gently swirl the colors together. Don’t over-swirl, or you’ll muddy the colors. Just a few gentle pulls of the brush will create a marbled effect.
- Let it dry for a bit, then apply a clear top coat. For extra shimmer, mix some fine glitter into your top coat before applying.
5. All About the Accent Gems
Sometimes, all you need is a little sparkle! Adding rhinestones or small gems can instantly elevate a simple manicure.
How-to:
- Paint your nails your desired color.
- Let the polish dry until it’s no longer tacky but not completely hard.
- Using a dotting tool or tweezers, pick up a rhinestone or gem.
- Dip the gem into a tiny dot of top coat placed on a palette or piece of foil, or simply place it onto the slightly wet polish.
- Gently press the gem onto your nail where you want it.
- Apply a generous amount of top coat around the gem, being careful not to cover it completely, to secure it. You want to anchor the base of the gem.
Durability: Making Your Festival Nails Last
Music festivals involve a lot of action, from dancing in the sun to dusty fields. You want your music festival nails to withstand it all!
Key to Longevity: Preparation is Everything
Clean Nails: Ensure your nails are free of oils and old polish. Wash your hands and dry them thoroughly.
Proper Shaping: File your nails to a smooth, snag-free edge.
Buffing: Gently buff the surface of your nails to create a smooth canvas and remove any natural oils. This helps polish adhere better.
The Power of the Base and Top Coat
This is non-negotiable for festival nails! A good quality base coat will prevent staining (especially with dark or vibrant colors) and create a smooth surface for polish. A high-shine, quick-drying top coat is your best friend for sealing in the design, adding incredible shine, and most importantly, preventing chips and extending the life of your manicure. For festivals, consider a gel-like top coat for extra durability, or even a glitter top coat to add another layer of fun and disguise minor imperfections.
Application Techniques for Staying Power
Thin Coats: Apply polish in thin, even layers. Thicker coats take longer to dry and are more prone to smudging and chipping.
Cap the Edges: When applying your base coat, color polish, and especially your top coat, run the brush lightly across the free edge (the very tip) of your nail. This “caps” the edge and significantly reduces the chance of chipping.
Allow Drying Time: Resist the urge to dive into activities too soon! Let each coat dry sufficiently before applying the next. Give your final top coat at least 15-20 minutes to set properly, and take care for a few hours afterward to avoid dents or smudges.
Dealing with Unexpected Chps
Even with the best preparation, life happens! Here’s a quick fix:
If you have a spare polish: Gently file down any rough edges around the chip. Apply a thin layer of your base color, let it dry, and then carefully touch up the chipped area. Finish with a dot of top coat.
If you have glitter polish: Glitter can be a lifesaver! Apply a bit more glitter polish over the chipped area and blend it out. A new layer of top coat will seal it.
Temporary Fix: For a quick, though temporary, fix, a tiny piece of clear tape can hold a loose nail art piece in place until you can properly repair it.
Festival Nail Trends to Watch
While classics are always great, keeping an eye on trends can inject some fresh inspiration into your music festival nails.
Shimmer & Shine: Metallic and Holographic Finishes
These finishes are perfect for festivals because they catch the light beautifully, adding an almost ethereal quality to your nails. Think chrome powders, holographic polishes, and metallic foils.
Texture Play: 3D Embellishments and Textured Polishes
Going beyond flat glitter, 3D elements like small charms, pearls, or sculpted nail art can make your nails truly stand out. Textured polishes, like sugar or sand finishes, also add an unexpected tactile element.
Abstract Art: Freeform Designs and Color Blocking
Forget perfect symmetry! Abstract swirls, splatters, and bold color blocks are incredibly on-trend and forgiving for DIY attempts. They’re all about spontaneous creativity.
Maintaining Your Nails on the Go
Let’s face it, festivals can be tough on our hands. You might not have access to a full nail station, but a few items can help keep your music festival nails looking great.
Festival Survival Kit Essentials
Mini Nail File: For quick edge smoothing.
Top Coat Pen or Mini Bottle: For reapplying shine and sealing edges.
Cuticle Oil Pen: To keep your cuticles hydrated and looking neat, especially in dry festival conditions.
Nail Polish Remover Wipes: For accidental smudges or quick clean-ups.
Band-Aids: For protecting any small cuts or hangnails.
A Note on Nail Health
Remember, while the goal is fabulous festival nails, your natural nail health is paramount!
Hydration: Dry air and sun can dehydrate your nails and cuticles. Use cuticle oil regularly, especially after the festival.
Breaks: If you’re wearing polish or extensions constantly, give your nails a break to breathe and recover. This is a great time for nourishing treatments or simple buffing.
Gentle Removal: Always use an acetone-based remover for glitter and gel polishes to avoid damaging your natural nails. Soak your nails rather than trying to peel or scrape.
Frequently Asked Questions About Music Festival Nails
Q1: What are the easiest music festival nail designs for beginners?
The easiest designs are glitter gradients, solid neon colors, or simple accent nails with dots or thin lines. Adding rhinestones with tweezers and top coat is also very beginner-friendly and makes a big impact!
Q2: How can I make my festival nails last an entire weekend?
The key is preparation and protection. Start with clean, buffed nails. Always use a good base coat and multiple thin layers of color. Most importantly, apply a durable top coat, ensuring you “cap” the free edge of your nails. Avoid activities that might chip your nails immediately after painting.
Q3: Can I use press-on nails for music festivals?
Absolutely! Press-on nails are a fantastic option for festivals. They offer instant full coverage and can be incredibly durable when applied correctly with strong nail glue or adhesive tabs. Plus, you can create them ahead of time and have a stunning look ready to go.
Q4: What colors are best for music festival nails?
Bright, bold, and vibrant colors are perfect for festivals! Think neons, electric blues, hot pinks, sunny yellows, and vibrant oranges. Earthy tones, metallics, and holographic shades also work wonderfully to capture different festival aesthetics.
Q5: How do I prevent glitter from falling off my nails at a festival?
The best way to prevent glitter fallout is to use a dense, high-quality glitter polish and seal it very well with at least two generous coats of a strong top coat. Ensure the top coat fully encases the glitter particles. For extra security, consider a gel top coat if you have access to a UV/LED lamp.
Q6: Are there any eco-friendly options for festival nails?
Yes! Look for water-based or “5-free,” “7-free,” or “10-free” nail polishes that avoid harsh chemicals. Biodegradable glitter is also becoming more widely available. For reusable options, consider high-quality press-on nails that you can care for and reapply.
Conclusion: Rock On With Your Festival Nails!
There you have it! From dazzling glitter gradients to chic boho accents and vibrant neon pops, your music festival nails* are ready to shine. Remember, the most important element is to have fun and express your unique style. With these beginner-friendly tips and design ideas, you’re well-equipped to create a manicure that’s as memorable as the festival itself. Don’t forget your top coat, keep a mini-kit for touch-ups, and get ready to dance under the stars with nails that are truly festival-ready. Now go forth, create something beautiful, Nailerguy style, and let your nails be the ultimate accessory to your unforgettable festival adventure!

