Monogram initials on accent nails are a chic and personalized way to elevate your manicure. This guide offers beginner-friendly designs and easy techniques to create effortlessly elegant initial accent nails that express your unique style.
Want to add a touch of personal flair to your nails? Monogram initials on accent nails are a super popular trend, and for good reason! They’re sophisticated, unique, and a beautiful way to show off your personality. But if you’re new to nail art, the thought of painting tiny letters might seem a little daunting. Don’t worry! You don’t need to be a pro to create stunning monogram accents. We’re going to break it down with simple steps and brilliant design ideas that will have your nails looking salon-ready in no time. Get ready to discover just how easy and fun it is to make your accent nails truly yours!
Why Monogram Initials On Accent Nails Are a Must-Try
Monogramming has long been associated with elegance and personal touch, from stationery to fashion. Bringing this classic concept to your nails is a modern and delightful way to express yourself. An accent nail featuring your initial, or even the initials of loved ones, transforms a simple manicure into a statement piece. It’s a subtle yet striking detail that catches the eye and sparks conversation. Beyond just looking pretty, monogram nails offer a fantastic opportunity for creativity. You can play with different fonts, colors, and embellishments to match your mood, outfit, or a special occasion.
Personalization Meets Style
In a world where we love to personalize everything, why should our nails be any different? Monogram accent nails are the ultimate form of nail self-expression. Whether it’s your first initial, your wedding initials, or even a fun nickname, having it artfully displayed on your nails is a constant little reminder of what’s special to you. It’s a trend that’s both timeless and contemporary, making it a fantastic choice for anyone looking to add a sophisticated and individualistic touch to their look.
Effortless Sophistication
One of the best things about monogram nails is their inherent sophistication. Even the simplest design can look incredibly chic. This is especially true when you choose a classic font and a complementary color palette. It’s an easy way to elevate your everyday manicure to something a bit more special without being over the top. This effortless elegance makes them perfect for work, a night out, or even a wedding!
A Canvas for Creativity
While the idea is simple—your initial on a nail—the possibilities are endless! You can experiment with:
- Color Combinations: From bold contrasts to subtle tone-on-tone looks.
- Font Styles: Classic serifs, modern sans-serifs, elegant script fonts, or even playful block letters.
- Embellishments: Rhinestones, glitter, foils, accent patterns on other nails, or even 3D elements.
- Placement: Centered, off to the side, or even split across multiple nails.
This versatility means your monogram nails can be as unique as you are.
Ready to dive in and create your own amazing monogram nail art? Let’s get started with the basics!
Getting Started: Your Monogram Nail Art Toolkit
Before we jump into designing, let’s gather the essentials. You don’t need a professional salon setup to create beautiful monogram nails at home. Most of these items are likely already in your nail polish collection or are easy to find at your local drugstore or beauty supply store.
Essential Tools for Monogram Nails
Having the right tools makes all the difference when you’re working on intricate designs – even simple ones! Here’s what you’ll want to have on hand:
- Base Coat: Protects your natural nails and provides a smooth surface for polish.
- Top Coat: Seals your design, adds shine, and helps your manicure last longer.
- Your Chosen Polish Colors: At least two – one for the nail base and one for your initial.
- Fine-Tipped Nail Art Brushes: These are crucial for drawing clean lines and details. Look for synthetic bristles for easy cleaning. You can often find multipacks with various tip sizes.
- Dotting Tools: Great for creating perfect dots and as a guide for lettering if you prefer.
- Tweezers: Handy for placing small gems or rhinestones.
- Nail Polish Remover & Cotton Swabs: For any little “oops!” moments and cleaning up edges.
- Optional: Clear Nail Gems or Rhinestones: For adding a touch of sparkle.
- Optional: Sticker Stencils or Decals: If you prefer not to freehand, these are fantastic shortcuts!
Choosing Your Accent Nail(s)
Typically, the ring finger is the go-to for accent nails because it’s easily visible and often considered the star of the manicure. However, you can choose any nail you like – your thumb, index finger, or even all your nails can have a subtle monogram element if you wish. For a classic look, sticking to one or two accent nails is usually best.
Genius Monogram Initial Designs for Beginners
Now for the fun part – the designs! We’ll start with super simple techniques that build confidence, then explore a few more creative ideas. Remember, practice makes perfect, and the goal is to have fun!
Design 1: The Classic Freehand Initial
This is the most direct way to add your initial. It looks incredibly elegant with minimal effort.
- Prep Your Nails: Start with clean, filed nails. Apply a base coat and let it dry completely.
- Apply Base Color: Paint your accent nail (or nails) with your chosen main color. Let it dry thoroughly. You might need two coats for opaque coverage.
- Choose Your Initial Color: Select a contrasting color or a metallic shade for your initial.
- The “Drawing” Step:
- Dip your fine-tipped nail art brush into the polish for your initial. Wipe off any excess on a paper towel.
- Gently paint your initial onto the dried base color. Start with the main strokes of the letter. For example, for an ‘L’, make a vertical stroke, then a horizontal one.
- Don’t worry if it’s not perfect! Small imperfections add character. If you make a mistake, dip a cotton swab in nail polish remover and carefully clean it up before the polish dries.
- Add Detail (Optional): Once the initial is dry, you can add a thin outline in another color or a metallic shade for extra pop.
- Seal the Deal: Apply a layer of clear top coat over the entire nail to protect your design and add shine.
Design 2: The Dotting Tool Outline
This method uses dots to create the shape of your initial, which can be easier for those less confident with freehand lines. It gives a unique, pixelated look.
- Prep and Base: Follow steps 1 and 2 from Design 1.
- Create Your Dots: Using a dotting tool dipped in your initial color, carefully place small dots on your accent nail to form the shape of your initial. Think of it like connect-the-dots!
- Fill It In (Optional): Once you have your outline of dots, you can use a smaller dotting tool or a fine brush to gently fill in the space between the dots, creating a more solid letter.
- Refine Edges: Use a fine brush with a tiny bit of polish remover to neaten any stray dots or uneven lines.
- Seal: Apply a generous layer of top coat.
Design 3: The Stencil or Decal Method
This is the easiest way to get a flawless, crisp initial, especially for beginners!
- Prep and Base: Follow steps 1 and 2 from Design 1. Ensure your base color is completely dry.
- Apply Stencil/Decal:
- Stencils: Carefully place a sticker stencil of an initial onto your accent nail. Gently press down the edges to ensure no polish seeps underneath.
- Decals (Water-Transfer): Cut out your desired decal. Dip it briefly in water according to the product instructions. Slide the decal off the backing paper and onto your damp nail, positioning it as desired.
- Apply Initial Color:
- For Stencils: Using a makeup sponge or a fine brush, gently dab or carefully paint your initial color over and around the stencil. Avoid using too much polish, which can cause bleeding.
- For Decals: Water decals often have a clear outer layer that you can paint over. For printed decals, place them carefully on the nail.
- Reveal Your Initial:
- For Stencils: Once the polish is almost dry but not quite set (this is crucial!), carefully peel off the stencil using tweezers. If you wait too long, the polish will lift with the stencil.
- For Decals: Once placed and slightly tacky, you may gently press them down with a fingertip or a dotting tool.
- Clean Up: Use a fine brush and polish remover to clean up any smudges around the initial.
- Seal: Apply a generous top coat. For decals, ensure the top coat seals the edges to prevent peeling.
Design 4: Glitter Initial Sparkle
Add some bling! This can be done freehand or with a stencil.
- Prep and Base: Follow steps 1 and 2 from Design 1.
- Glitter Application:
- Freehand: Mix a bit of fine glitter with a clear polish or use a glitter polish. With your fine brush, carefully paint your initial shape onto the nail.
- Stencil: Apply a stencil. Using your brush, “paint” clear nail glue or a sticky base coat over the stencil area. Sprinkle loose glitter over the glue/base coat. Tap off the excess when dry. Carefully peel off the stencil.
- Seal the Sparkle: Once the glitter initial is dry, carefully apply a top coat. You might need a couple of layers of top coat to fully encapsulate the glitter and create a smooth finish.
Design 5: Two-Tone Sophistication
This plays on subtlety, using two shades of the same color or complementary neutrals.
- Prep and Base: Follow steps 1 and 2 from Design 1, using a slightly lighter or darker shade of your main color for the accent nail.
- Outline Your Initial: Using a darker or lighter shade than your accent nail color, freehand a simple outline of your initial using a fine nail art brush.
- Add a Shadow (Optional): For extra depth, you can add a very thin “shadow” line on one side of your initial using an even lighter or darker shade, or a metallic.
- Seal: Apply top coat.
Advanced Touches: Elevating Your Monogram Design
Once you’re comfortable with the basics, why not try these ideas to make your monogram nails even more special?
Adding Rhinestones and Gems
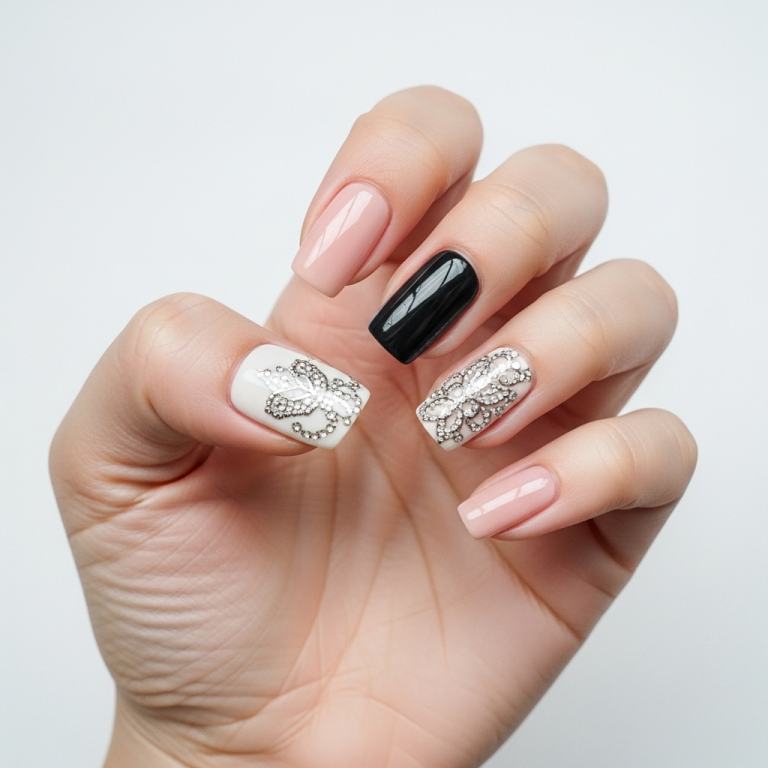
This can take your initial from pretty to absolutely dazzling! You can outline your initial with tiny rhinestones, place a single larger gem at the center, or create a small cluster around your initial. Clear, silver, or colored gems all work beautifully.
- Apply Polish: Have your base color and your initial (painted or stenciled) completely dry on your accent nail.
- Apply Adhesive: Place a tiny dot of clear nail glue or a bit of top coat where you want your gem to go.
- Place the Gem: Use tweezers to carefully pick up your rhinestone or gem and place it onto the adhesive.
- Secure: Gently press down with your dotting tool or the tip of your tweezers to ensure it’s secure.
- Top Coat Carefully: Apply top coat, but be careful not to flood the gems, which can make them look cloudy. You can also carefully apply top coat around the gems.
Incorporating Other Nail Art Elements
Your monogram doesn’t have to be alone! Consider adding complementary designs to your other nails:
- Subtle French Tips: A classic white or colored French tip on the other nails can frame your monogram nicely.
- Glitter Ombre: A gradient of glitter on the other fingers can provide a beautiful backdrop.
- Polka Dots or Stripes: Simple patterns that complement your initial color scheme.
- Geometric Designs: Clean lines and shapes can add a modern edge.
- Marble Effect: A subtle marble design on other nails can add texture and interest without competing with your initial.
Playing with Different Finishes
Don’t forget that polish comes in many finishes! Consider using:
- Matte Top Coat: This transforms a glossy design into a sophisticated, velvety look. Apply over a dry, glossy manicure.
- Chrome Powder: A subtle shimmer or full chrome effect on other nails can make your monogram pop.
- Holographic Polish: Use a holographic polish for your initial or as a base color for an extra touch of magic.
Monogram Style Inspiration & Color Palettes
Choosing the right colors and style for your monogram can tie your whole look together. Think about what vibe you’re going for!
| Style Vibe | Suggested Color Palettes | Initial Font/Style | Accent Nail Ideas |
|---|---|---|---|
| Classic Elegance | Navy blue & Gold; Black & Silver; Cream & Rose Gold; Deep Burgundy & Ivory | Serif or Script | Solid base color with metallic initial; Initial outlined with tiny pearls or rhinestones. |
| Modern & Chic | White & Black; Grey & Blush Pink; Nude & Metallic Bronze; Olive Green & Gold | Clean Sans-serif or simple Block Letters | Negative space initial (clear polish as the initial); Geometric accent on other nails; Matte finish. |
| Playful & Fun | Pastel Pink & Mint; Bright Yellow & Teal; Coral & Light Blue; Lavender & White | Bubbly or bubbly Script | Glitter initial; Initial with tiny dots; Other nails with polka dots or stripes. |
| Glamorous & Bold | Deep Red & Gold Glitter; Black & Hot Pink Rhinestones; Emerald Green & Silver; Royal Purple & Crystal Clear Gems | Ornate Script or Bold Block | Full glitter accent nail with a contrasting initial; Initial encrusted with gems; Contrast color block on other nails. |
Maintaining Your Monogram Manicure
To keep your beautiful monogram nails looking their best for as long as possible, a little bit of care goes a long way.
- Reapply Top Coat: Every 2-3 days, apply a fresh layer of top coat. This is the best way to protect the polish and any embellishments.
- Protect Your Nails: Wear gloves when doing chores, washing dishes, or using cleaning products. Harsh chemicals can break down polish.
- Moisturize: Keep your hands and cuticles hydrated with cuticle oil and hand cream. Healthy cuticles make for a polished look.
- Avoid Using Nails as Tools: Resist the urge to pick, scratch, or pry with your nails. This can lead to chipping and damage.
- Touch-Ups: For minor chips, you might be able to carefully touch them up with your base color or top coat without needing a full redo.
Frequently Asked Questions About Monogram Nails
Q1: How do I ensure my initial is centered on the nail?
A: You can lightly sketch a faint guideline with a pencil (which will be buffed away later) or simply freehand it. For a more precise approach, use a dotting tool to place a dot in the center of the nail as a reference point and build your letter around it.
Q2: My lines are shaky. How can I get cleaner initials?
A: The key to clean lines is a steady hand, a good quality fine-tipped brush, and not overloading your brush with polish. Rest your pinky finger on a stable surface for support. Practice makes perfect! You can also use stencils or decals for a perfectly crisp look.
Q3: Can I use regular nail polish or do I need special nail art polish?
A: Regular nail polish is perfectly fine for both the base and the initial! However, many brands offer polishes with finer (‘liner’) brushes specifically designed for nail art, which can make detail work easier. Metallic or glitter polishes also add a beautiful touch.
Q4: What’s the best way to remove nail art without messing up the design on other nails?
A: For detailed removal around a specific design or initial, use a fine-tipped


