Minimalist nail designs offer chic, effortless style with clean lines and simple accents. Perfect for beginners, these designs focus on subtle elegance, making them easy to achieve for a polished look that complements any outfit.
Ever look at your nails and wish they had a little something more, but without being over the top? You’re not alone! Finding that perfect balance between simple and stunning can feel like a challenge. Sometimes, we just want a manicure that looks put-together and stylish without hours of work or complicated art. That’s where the magic of minimalist nail designs comes in. These looks are all about subtle sophistication, clean finishes, and clever details that make a big impact. Ready to elevate your nail game with looks that are easy to recreate and always on-trend? Let’s dive in!
Why Minimalist Nail Designs Are Your New Best Friend
Minimalist nail designs are having a major moment, and for good reason! They’re incredibly versatile, fitting seamlessly into any personal style, occasion, or wardrobe. Think of them as the little black dress of the nail world – always chic, always appropriate. They’re also fantastic for beginners because they teach you the fundamentals of clean application and subtle detail. Plus, they often require fewer colors and tools, making them budget-friendly and super accessible.
The beauty of minimalist nails lies in their simplicity. It’s about intentionality. Every element, whether it’s a single dot, a thin line, or a chic solid color, is chosen to enhance, not overwhelm. This approach can make your hands look more elegant and your overall appearance more refined. Ready to explore the essentials?
Essential Tools for Your Minimalist Manicure
Setting up your minimalist nail station doesn’t require a professional salon’s worth of supplies. A few key items will help you achieve that clean, polished look every time. Investing in good basic tools is like getting your foundation right for any makeup look – it makes all the difference!
- Nail Polish Remover: Essential for a clean slate. Opt for an acetone-free version to protect your nails.
- Cotton Pads or Balls: For applying the remover and cleaning up any stray polish.
- Nail File: To shape your nails perfectly. A glass or fine-grit file is gentle and effective. Learn more about proper nail filing techniques from resources like the American Academy of Dermatology.
- Cuticle Pusher or Orange Stick: To gently push back your cuticles for a neat foundation.
- Base Coat: Crucial for protecting your natural nails from staining and helping polish adhere better.
- Top Coat: Seals your design, adds shine, and prolongs the life of your manicure. A quick-dry top coat is a lifesaver!
- Thin Nail Art Brush or Dotting Tool: For creating delicate lines, dots, or other small details.
- Your Chosen Polish Colors: Think neutrals, soft pastels, classic reds, or deep tones.
Getting Started: The Perfect Base for Minimalist Art
Before any design, clean nails are key. Start by removing any old polish. Then, gently file your nails into your desired shape. Push back your cuticles with care – this is what gives your nails that long, elegant look. Wash your hands to remove any dust or oils. Now, apply a good base coat. This protects your nails and gives your polish something to grip onto.
Once the base coat is dry, apply your main polish color. For minimalist designs, one or two thin coats are usually perfect. Ensure each coat is fully dry before moving on to avoid smudges. This clean canvas is the foundation for your stunning, simple art!
Stunning Minimalist Nail Design Ideas for Beginners
Let’s get to the fun part! These designs are easy to master and look incredibly chic. They’re perfect for trying out your new tools and building your confidence.
1. The Classic French Tip (with a Twist!)
The French manicure is a timeless classic. For a minimalist update, try a ’micro-French’ with a super-thin white or colored line along the tip. Or, switch up the color – think a soft nude base with a black tip, or a clear polish with a metallic accent.
How-To: Micro-French Tip
- Apply your preferred nude or clear base polish and let it dry completely.
- Dip a very fine nail art brush into white (or your chosen accent color) polish.
- Gently swipe the brush along the very edge of your nail tip, creating a thin, precise line.
- Alternatively, you can use a silicone stamper upside down to guide your line if freehand is tricky.
- Let it dry, then apply a clear top coat.
2. Single Dot Elegance
This is perhaps the easiest minimalist design. A single, perfectly placed dot on each nail adds a subtle pop of interest. It’s sophisticated without being complicated.
How-To: Single Dot
- Paint all your nails a solid color – nudes, grays, or even a soft blush are perfect. Let them dry.
- Dip a dotting tool (or the rounded end of a bobby pin!) into a contrasting polish color.
- Carefully place a single dot near the cuticle or in the center of the nail.
- Repeat on all nails.
- Seal with a top coat.
3. Subtle Geometric Lines
Thin lines are the bread and butter of minimalist nail art. A single vertical line down the center, a horizontal line across the nail, or a few parallel lines can add a modern edge.
How-To: Thin Geometric Line
- Apply your base color and let it dry thoroughly.
- Using a striping brush or a fine-tipped art brush, load it with your accent color.
- Carefully draw a single, clean line. For a modern look, try a vertical line starting just above your cuticle and extending to the tip.
- Alternatively, place a few thin horizontal lines across the nail.
- Allow to dry and finish with a top coat.
4. Negative Space Designs
Negative space means leaving parts of your natural nail visible. This is inherently minimalist and looks incredibly chic. Think of designs where only a section of the nail is painted, or where a shape is outlined.
How-To: Negative Space Outline
- Apply a clear or nude base coat.
- Once dry, use tape (like painter’s tape or nail art tape) to create a stencil shape on some or all of your nails.
- Carefully paint over the tape with your desired polish color.
- While the polish is still slightly wet, gently peel off the tape to reveal the negative space shape.
- Let it dry completely and apply a top coat.
- Pro Tip: Ensure the tape adheres well to avoid polish bleeding underneath.
5. Two-Tone Elegance
This simply involves using two complementary or contrasting colors on a single nail. You can divide the nail in half horizontally, vertically, or diagonally. Or, paint one nail a different color from the rest.
How-To: Diagonal Two-Tone
- Paint your nails with your first color, letting them dry completely.
- Once dry, apply nail art tape from one side of the nail to the other, creating a diagonal line.
- Paint the exposed section with your second color.
- Gently remove the tape while the second color is still slightly wet.
- Let dry and apply a top coat.
6. Sheer Color & Shine
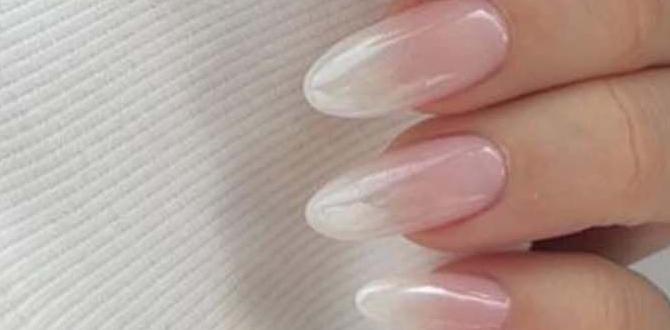
Sometimes, the most minimalist designs are the simplest. A sheer, milky polish or a clear top coat with a hint of shimmer is incredibly elegant. It’s all about healthy-looking nails with a touch of gloss.
How-To: Sheer Polish
- Ensure your nails are clean, filed, and your cuticles are tidy.
- Apply one or two thin coats of a sheer polish (like a milky white, pale pink, or soft sheer gray).
- Let each coat dry before applying the next.
- Finish with a hydrating cuticle oil for extra shine.
- No top coat is strictly necessary if you want a more matte, natural look, but a clear top coat will add longevity and gloss.
Minimalist Nail Colors to Keep in Your Collection
Choosing the right colors can instantly elevate a minimalist design. Think neutrals, muted tones, and classic shades that always look sophisticated.
| Color Family | Shades to Consider | Why It Works for Minimalism |
|---|---|---|
| Neutrals | Beige, Cream, Taupe, Light Gray, Off-White | Understated, pairs with everything, creates a clean canvas. |
| Soft Pinks | Pale Pink, Dusty Rose, Blush | Feminine, natural-looking, adds a gentle touch of color. |
| Classic Whites | Pure White, Off-White | Sharp for accents (like French tips), clean and bright. |
| Deep Tones | Navy, Deep Burgundy, Forest Green, Charcoal Gray | Sophisticated, adds depth without being loud, great for contrasts. |
| Metallics | Gold, Silver, Rose Gold (used as accents) | Adds a subtle sparkle or modern sheen, perfect for lines or dots. |
| Sheers | Milky White, Clear with Shimmer, Tinted Nudes | Enhances natural nail color, adds a polished, healthy look. |
The Benefits of Embracing Minimalism
Minimalist nail designs aren’t just about aesthetics; they offer practical benefits too. For busy individuals, they mean less time spent on intricate nail art, saving precious minutes in your day. They also tend to be more durable and less prone to chipping because they don’t have bulky elements. A well-done minimalist design can make short nails look longer and perfectly shaped nails even more striking.
Furthermore, the simplicity of these designs reduces the need for a vast collection of polishes and tools. You can achieve a multitude of looks with just a few carefully chosen colors and basic applicators. This makes it an economical choice for those looking to keep their beauty routines streamlined and effective.
Troubleshooting Common Minimalist Nail Issues
Even with simple designs, a few hiccups can happen. Here’s how to fix them:
- Smudged Polish: If you smudge a wet design, gently use a clean brush dipped in a tiny bit of polish remover to carefully clean up the area. Let it dry, then reapply the affected polish. For minor smudges on dry polish, a bit of clear top coat might blend it out.
- Wiggly Lines: Don’t be discouraged! Practice makes perfect. For cleaner lines, use less polish on your brush and work slowly. You can also use nail art tape as a guide. If a line is slightly imperfect, a tiny dot or strategic placement of another design element can disguise it.
- Polish Chips Quickly: Ensure you’ve applied a base coat and a good quality top coat. Always cap the free edge of your nail with your top coat – paint a tiny strip across the very edge to seal it.
- Uneven Color Application: Thin coats are key! If your polish looks streaky, apply a third thin coat rather than a thick one. Make sure your polish isn’t too old or goopy; thin it out with a professional nail polish thinner if needed.
FAQ: Your Minimalist Nail Design Questions Answered
Q1: Are minimalist nail designs good for short nails?
A1: Absolutely! Minimalist designs are fantastic for short nails. Simple lines, dots, or solid colors can make short nails look elegant and intentionally styled. They avoid overwhelming the nail bed, which is perfect for shorter lengths.
Q2: How long do minimalist nail designs usually last?
A2: With a good base coat, a quality polish, and a solid top coat, minimalist designs can last as long as any other manicure, typically 7-14 days. Ensuring the free edge is capped with your top coat will significantly increase longevity.
Q3: Do I need special tools for minimalist nail art?
A3: Not really! While specialized dotting tools and fine brushes help, you can achieve great minimalist looks with everyday items. The tip of a toothpick, a fine ballpoint pen (with the ink removed and cleaned), or even a bobby pin can work for dots. A steady hand is your best tool!
Q4: What’s the difference between minimalist and negative space nails?
A4: Minimalist nails are a broad category focusing on simplicity. Negative space nails are a type of minimalist design where sections of the natural nail are intentionally left unpainted to create the design. So, all negative space nails are minimalist, but not all minimalist nails use negative space.
Q5: Can I do minimalist nail designs with gel polish at home?
A5: Yes! Gel polish offers great durability and a super-glossy finish, perfect for minimalist styles. The application process is similar – base coat, color coats, design, and then cure each layer under a UV/LED lamp. You’ll need a lamp and gel-specific products.
Q6: What’s the best way to achieve a clean, sharp line for minimalist designs?
A6: For the sharpest lines, use a fine-tipped nail art brush or a striping brush. Load it with a moderate amount of polish (not too much!) and paint slowly and steadily. Using nail art tape as a stencil can also guarantee precision, especially for beginners.
Conclusion: Your Minimalist Nail Journey Begins!
There you have it – your guide to essential and stunning minimalist nail designs! We’ve explored why these looks are so popular, the simple tools you need, and how to create chic designs like micro-French tips, elegant dots, and geometric lines. You’ve learned about the color palette that complements this style and how to troubleshoot common issues. Minimalist nail art is about embracing simplicity, enhancing your natural beauty, and expressing your style with confidence. It’s achievable, beautiful, and perfectly suited for anyone looking to add a touch of polish to their everyday look. So grab those polishes, your trusty tools, and start creating!

