Create breathtaking Milky Way nail art! This beginner-friendly guide shares essential stunning designs and easy-to-follow steps. Learn to capture the cosmic beauty of the night sky on your fingertips with simple techniques and beautiful color palettes. Get ready to shine like the stars!
Dreaming of nails that twinkle like the night sky? Milky Way nail art is a magical way to bring the cosmos to your fingertips. It might look intricate, but with a few simple tricks, even beginners can create out-of-this-world designs. Forget struggling with complicated patterns; we’re here to make cosmic nails totally achievable and super fun! Get ready to explore stunning designs that are as unique and beautiful as the galaxy itself.
Why Milky Way Nail Art is a Star Among Designs
The allure of the Milky Way nail art lies in its captivating blend of deep, mysterious darks and shimmering, ethereal lights. It’s a design that evokes wonder and cosmic beauty, allowing for endless creativity. Whether you love subtle hints of stardust or a full-blown galactic swirl, this trend offers something for everyone. It’s a fantastic way to express your personality and add a touch of celestial magic to your everyday look. Plus, who wouldn’t want to carry a little piece of the universe with them?
Your Cosmic Toolkit: Essential Supplies for Milky Way Nails
Before we dive into the dazzling designs, let’s gather your cosmic toolkit. You don’t need a galaxy’s worth of supplies to create stunning Milky Way nail art. Here’s what will help you on your celestial journey:
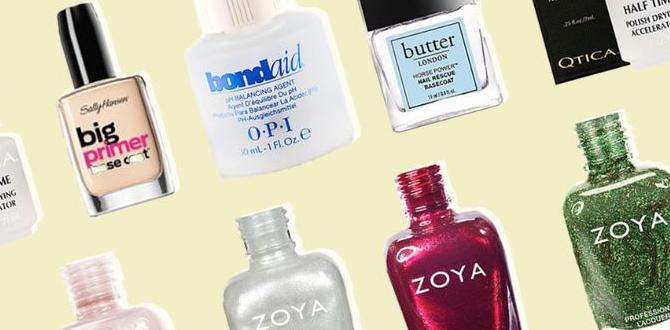
- Base Coat: To protect your natural nails and ensure your polish lasts longer. A good quality base coat is crucial for any manicure.
- Black or Deep Navy Polish: This is your night sky canvas. A rich, opaque dark polish is key.
- Various Blue, Purple, and Pink Polishes: These will create the nebulae and swirling clouds of the Milky Way. Think of a gradient effect.
- White or Silver Polish: For stars, stardust, and highlights. Fine glitter polish works wonders here too!
- Fine-Tip Brush or Dotting Tool: For creating delicate stars and accent details.
- Sponge (Makeup Sponge or Kitchen Sponge): For creating soft, blended gradients, mimicking the ethereal look of nebulae.
- Top Coat: To seal your design, add shine, and protect it from chipping. A glitter top coat can enhance the starry effect.
- Optional: Holographic or Iridescent Flakes/Glitter: For that extra touch of cosmic sparkle that shifts with the light.
- Nail Polish Remover & Cotton Pads: For cleaning up mistakes and getting those sharp edges.
Having these basics on hand will make your Milky Way nail art creation smooth and enjoyable. Remember, nail art is all about experimentation, so don’t be afraid to improvise with colors and tools!
The Essential Milky Way Nail Art Designs for Beginners
Ready to paint the galaxy? We’ve broken down some stunning Milky Way nail art designs that are perfect for getting started. We’ll focus on techniques that are easy to master and deliver maximum cosmic impact!
Design 1: The Classic Swirl Nebula
This is the quintessential Milky Way look, featuring blended colors and starry accents. It’s universally recognized and surprisingly simple to achieve.
What You’ll Need:
- Base Coat
- Black or Deep Navy polish
- Light Blue, Pink, and Purple polish
- White or Silver polish
- Sponge
- Fine-tip brush or dotting tool
- Top Coat
Step-by-Step Guide:
- Prep Your Nails: Start with clean, dry nails. Apply a base coat and let it dry completely.
- Lay the Dark Base: Apply two thin coats of black or deep navy polish. This dark base is your universe. Let it dry thoroughly.
- Create the Nebula Swirl:
- Take your sponge and dab small amounts of light blue, pink, and purple polish onto it. Don’t overdo it; a little goes a long way.
- Gently dab the sponge onto your nail, starting from the cuticle area and moving upwards. You’re aiming to create soft, blended streaks of color.
- Repeat with different colors on the sponge and dab more areas as needed, building up the nebula effect.
- Allow this layer to dry for a minute.
- Add the Stars and Stardust:
- Dip your fine-tip brush or dotting tool into white or silver polish.
- Lightly tap the brush or tool onto your nail to create small dots for stars. You can also flick the brush for a “splatter” effect to mimic stardust.
- For a more scattered look, you can also use a stiff brush (like an old toothbrush) and very lightly flick white polish onto the nail.
- Seal the Galaxy: Once everything is dry, apply a generous layer of top coat. This will smooth out the textured sponge application and seal your cosmic creation. For extra sparkle, use a glitter top coat!
Design 2: The Gradient Galaxy
This design focuses on a smooth transition of colors, mimicking the vastness of space without needing complex swirling. It’s elegant and modern.
What You’ll Need:
- Base Coat
- Black or Deep Navy polish
- Three or four shades of blue, purple, and pink polish
- Makeup sponge (slightly denser than for the swirl design)
- White or Silver polish for stars
- Fine-tip brush or dotting tool
- Top Coat
Step-by-Step Guide:
- Start with the Base: Apply base coat and then two coats of your dark polish. Let it dry completely.
- Create the Gradient:
- On a clean surface or a piece of foil, create stripes of your lighter colors (e.g., purple, pink, light blue) next to each other.
- Take your makeup sponge and gently press it onto the stripes, picking up a mix of the colors.
- Begin dabbing the sponge onto your nail, starting from the tip and working your way down, blending the colors seamlessly. You are essentially “stamping” the gradient onto the nail.
- Reapply colors to the sponge and repeat the dabbing/stamping motion as needed to achieve depth and a smooth transition. Clean off excess polish from the edges of your nails with remover & cotton swabs at this stage.
- Add Celestial Highlights: Use your white or silver polish with a fine brush to add small dots for stars, especially concentrated in lighter areas.
- Final Seal: Apply a clear top coat to give your gradient galaxy a glossy, finished look.
Design 3: The “Black Hole” Accent Nail
Prefer a more minimalist yet impactful look? This design uses a darker, more intense center with fading colors, making one nail a focal point. It’s a great way to practice blending!
What You’ll Need:
- Base Coat
- Black polish
- Dark Blue or Purple polish
- Silver or White polish
- Small, dense sponge or the edge of a makeup sponge
- Fine-tip brush
- Top Coat
Step-by-Step Guide:
- Base and Black Core: Apply your base coat and one coat of black polish. Let it dry. On one accent nail, apply a second coat of black, but slightly less concentrated in the center. This darker center will act as your “black hole.”
- Blend the Edges: On the dense sponge, apply a small amount of dark blue or purple polish. Gently dab around the edges of the black center on your accent nail, allowing the color to fade outwards. Clean up any stray marks with a precise brush and nail polish remover. This creates a subtle, expanding galaxy effect.
- Sprinkle the Stars: Using your fine-tip brush and silver or white polish, add tiny specks and dots around the blended edges to represent distant stars. Less is more here for a sophisticated look.
- Finish with Shine: Apply your top coat to seal and enhance the depth of your “black hole” accent nail.
Pro Tips for Achieving Stellar Milky Way Nail Art
Even with simple designs, a few pro tips can elevate your Milky Way nail art from good to absolutely breathtaking. Here are some insider secrets:
- Practice Patience: Nail art, especially detailed designs, takes time. Don’t rush the drying process between layers. This prevents smudging and ensures a cleaner look.
- Less is More with Sponge Dabbing: When using a sponge for gradients or swirls, start with a light hand. You can always add more color and blend further. Over-saturating the sponge can lead to a muddy or splotchy effect.
- Clean Up as You Go: Keep a fine-tipped brush dipped in nail polish remover nearby. Cleaning up any smudges or polish on your skin immediately after application makes a huge difference in the final polished look.
- Experiment with Color Combinations: While blues, purples, and pinks are classic, don’t be afraid to try other palettes! Teal and gold, deep reds and blacks, or even pastels can create unique cosmic vibes.
- Consider Glitter Placement: Place finer glitters or holographic flakes where the “light” of your nebula would be brightest. This adds dimension and catches the eye. You can also use glitter to fill in gaps or add extra sparkle.
- Layer, Layer, Layer: For a truly deep space effect, build up your colors in thin layers rather than one thick application. This allows for better blending and a more realistic depth.
- Top Coat is Your Best Friend: Don’t skimp on the top coat! A good quality top coat not only protects your art but also melds the layers together, creating a smoother, more professional finish and ensuring longevity. Gel top coats offer even more durability.
Understanding Nail Polish Ingredients for Healthier Nails
While we’re focused on creating beautiful art, it’s also good to be aware of what’s in your nail polish. Understanding common nail polish ingredients can help you make informed choices for healthier nails, especially when you’re frequently applying and removing polish for art projects.
Traditional nail polishes often contain a blend of solvents, plasticizers, film-formers, pigments, and colorants. Some commonly discussed ingredients include:
- Formaldehyde: A common preservative, but can cause allergic reactions and is a known carcinogen. Many brands now offer “3-free,” “5-free,” or “10-free” polishes, meaning they exclude formaldehyde and other harsh chemicals from their formulas.
- Toluene: A solvent that helps polish flow smoothly and dries quickly. It can be harmful if inhaled in large amounts and is linked to reproductive health concerns.
- Dibutyl Phthalate (DBP): A plasticizer that makes polish flexible, preventing chipping. It’s often grouped with formaldehyde and toluene as chemicals to avoid due to potential endocrine disruption.
“Free-from” polishes are formulated without these and other potentially controversial ingredients. For example, the National Library of Medicine provides extensive information on the nature and effects of formaldehyde.
Choosing polishes that are formulated without these ingredients, often labeled as “3-Free,” “5-Free,” etc., can be a good choice for those concerned about chemical exposure. It’s always a good idea to research brands and look for certifications or ingredient transparency. Remember, even with safer formulas, proper nail care is essential!
Tool Spotlight: The Magic of Sponges in Nail Art
You might have a drawer full of brushes, but don’t underestimate the power of a simple sponge in your nail art arsenal! Sponges are incredible for creating diffusion, blending, and ombre effects, making them perfect for achieving the soft, ethereal look of nebulae.
Here’s a quick look at different sponge types and their uses:
| Sponge Type | Texture/Density | Best For | Milky Way Application Tips |
|---|---|---|---|
| Standard Makeup Wedge Sponge | Medium | Ombre, soft gradients, blending colors for a diffused look. | Apply colors directly to the sponge in stripes, then dab onto the nail. Good for general nebula blending. |
| Dense Beauty Blender-Style Sponge | Dense, porous | Seamless blending, achieving a smooth, airbrushed effect. | Can be used like the wedge sponge, but offers more control for subtle gradients. Great for precise color transitions. |
| Kitchen Sponge (Cut Pieces) | Varying | Stamping, texture, larger, bolder color blocks. | Cut small pieces. Dab colors onto the sponge and then onto the nail for a more textured nebulae. Can create a “cloudy” effect. |
| Fine Craft Sponge (e.g., for watercolor) | Very Fine | Delicate gradients, stippling, fine dust effects. | Ideal for adding subtle color washes or a very soft stardust effect over your base colors. |
When using a sponge, remember to use it dry unless the specific effect calls for it. Clean off excess polish from the edges of your nails with a brush and remover before applying top coat. This attention to detail makes a world of difference!
FAQ: Your Milky Way Nail Art Questions Answered
What kind of nail polish works best for Milky Way designs?
Creamy, opaque polishes are generally best for building up the base colors of your nebula. For stars and highlights, a good quality white or silver polish with a fine tip is ideal. Glitter polishes and holographic top coats add that crucial sparkle and depth. Always ensure your polishes are not too thick or too thin.
How do I prevent my Milky Way nails from looking muddy?
The key is to use clean tools and build colors gradually. For sponge techniques, clean the sponge between color applications or use separate parts of the sponge for each color. Also, allow each layer of color to dry slightly before adding the next. Avoid over-blending; the goal is distinct but soft transitions.
Can I use actual glitter instead of polish for stars?
Yes, absolutely! You can use fine cosmetic glitter sprinkled over still-tacky polish or use glitter polish. For larger, more distinct stars, consider using loose glitter with a detail brush and top coat to adhere it. Holographic or iridescent flakes also mimic distant stars and celestial dust beautifully.
How long do Milky Way nail art designs usually last?
With proper application—including a good base coat, careful layering, and a strong top coat—your Milky Way nail art can last anywhere from 5 to 10 days. Using a gel top coat can extend the life of your manicure even further, sometimes up to two weeks, provided it’s cured under a UV/LED lamp.
My nebula colors look too harsh, how can I soften them?
This usually happens when the colors are applied too opaquely or blended too aggressively. Try using a slightly drier sponge with a lighter touch when dabbing. You can also go over the colors with a very light, sheer white or iridescent polish applied with a clean, dry sponge to soften edges. For a more advanced technique, you can even use a translucent polish over the top.
What if I don’t have all the colors you mentioned?
No problem! The beauty of Milky Way nail art is its versatility. You can adapt the color palette to your liking. Try deep blues and greens for a different cosmic feel, or use warmer tones like deep reds and oranges for a sunset galaxy effect. Even a single contrasting color blended into black can create a stunning effect. Focus on the blending technique!
Taking Your Milky Way Art to the Next Level
Once you’ve mastered the basics, you might be curious about adding even more flair. Consider incorporating holographic foils or iridescent powders. You can apply these over a sticky top

