Milky beige nails are the ultimate go-to for a chic, sophisticated, and effortlessly put-together look. This versatile shade offers a soft, creamy finish that complements any skin tone and attire, making it perfect for everyday wear, special occasions, and everything in between.
Tired of nail colors that clash with your outfit or feel too bold for your everyday style? You’re not alone! Finding that perfect shade that’s both elegant and understated can feel like a quest. But what if I told you the secret to effortless chic is already within reach? Milky beige nails are incredibly popular because they’re like a neutral hug for your fingertips – subtle, soft, and always stylish. They’re the chameleon of nail colors, blending seamlessly with everything from your work wardrobe to your weekend casuals. Get ready to discover why this understated hue is a game-changer for your manicure routine!
Why Milky Beige Is Your New Go-To Shade
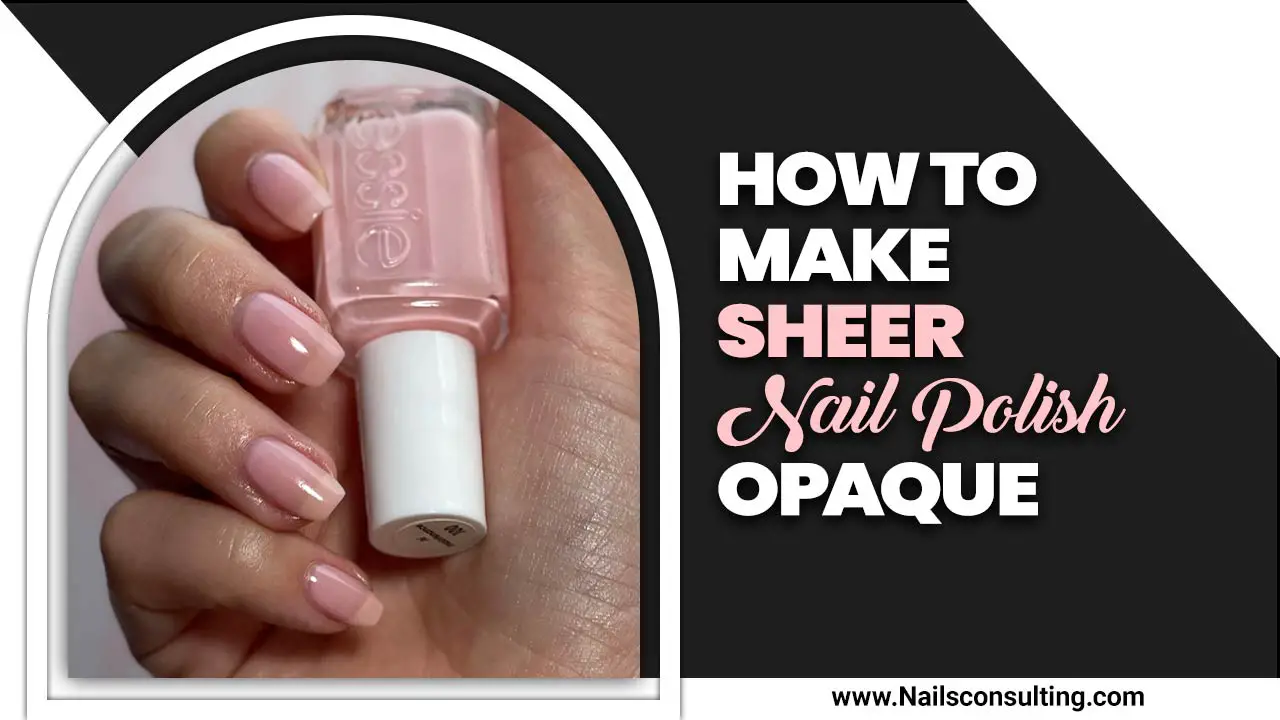
Milky beige, often described as a creamy, opaque, or slightly translucent nude with warm undertones, has taken the nail world by storm. It’s not just another beige; it’s the elevated version, offering a polished, sophisticated finish that’s both modern and timeless. Think of it as your favorite cozy sweater for your nails – comforting, chic, and always appropriate.
This shade stands out for its incredible versatility. It’s a fantastic choice for anyone seeking a professional look without being boring. It adds a touch of understated glamour that brightens the hands and makes them look impeccably groomed. Unlike stark whites or pale pastels, milky beige often has a softness that feels universally flattering.
Here’s why you’ll fall in love with milky beige:
- Universally Flattering: It suits almost every skin tone, from fair to deep. The creamy undertones create a beautiful balance.
- Effortlessly Chic: It instantly elevates any look, making your hands appear polished and sophisticated.
- Subtly Brightening: It adds a healthy glow to your nails without being overpowering.
- Long-Lasting Impression: It’s a classic color that never goes out of style, offering a consistently elegant appearance.
- Perfect for Any Occasion: From the boardroom to a brunch date, it’s the ideal shade for every event.
Achieving the Perfect Milky Beige Manicure: A Step-by-Step Guide
Getting that flawless milky beige manicure at home is easier than you think! It all comes down to proper prep and a little bit of patience. Follow these simple steps to achieve salon-worthy results right on your own couch.
Step 1: Prep Your Nails
A great manicure starts with great nail prep. This ensures your polish adheres well and lasts longer. Think of it as building a solid foundation!
- Remove Old Polish: Start by completely removing any existing nail polish using a good quality acetone-free nail polish remover. This is gentler on your nails and cuticles.
- Shape Your Nails: Gently file your nails to your desired shape. A soft file is best to avoid damaging your nail beds. Aim for a uniform length and shape across all nails.
- Push Back Cuticles: Use a cuticle pusher to gently push back your cuticles. Never cut your cuticles, as this can lead to infection. If they’re very dry, you can apply a little cuticle oil first. Proper cuticle care is essential for healthy-looking nails. For a deeper dive into nail health, check out resources from the American Academy of Dermatology on nail care.
- Buff Gently: Lightly buff the surface of your nails with a fine-grit buffer. This helps to smooth out any ridges and provides a slightly porous surface for the polish to adhere to. Be gentle – you’re not trying to thin your nails!
- Cleanse: Wipe each nail with a nail cleanser or rubbing alcohol on a lint-free pad to remove any oils or dust. This is a crucial step for polish longevity.
Step 2: Apply a Base Coat
Don’t skip this! A base coat is your best friend for a smooth application and to prevent staining. It creates a barrier between your natural nail and the colored polish.
- Apply one thin, even layer of a clear base coat or a base coat specifically designed for nude or lighter polishes.
- Allow it to dry completely. This typically takes about a minute.
Step 3: The Milky Beige Polish Application
This is where the magic happens! The key to a perfect milky beige finish is often two thin coats, rather than one thick one. This ensures even coverage and prevents streaking.
- First Coat: Apply a thin layer of your chosen milky beige polish. Start with a bead of polish in the center of your nail, then brush downwards. Follow with a stroke up each side. Keep the coats thin to avoid globs and ensure quicker drying.
- Wait for It to Dry: Allow the first coat to dry for at least 2-3 minutes. It doesn’t need to be bone dry, but it should be tacky enough that the next coat won’t lift it.
- Second Coat: Apply a second thin coat of the milky beige polish, following the same technique as the first. This coat will deepen the color and ensure opacity.
- Third Coat (Optional): If you desire a more opaque finish or if the color isn’t quite there with two coats, apply a third thin layer. Again, ensure each layer is adequately dry before proceeding.
Step 4: Apply a Top Coat
The grand finale! A top coat seals your polish, adds shine, and protects your manicure from chips and wear. This is where you really lock in that effortless chic.
- Apply one layer of a high-shine, quick-drying top coat. Make sure to cap the free edge of your nail by running the brush along the tip. This helps prevent chipping.
- Allow your nails to dry completely. Quick-dry drops or sprays can speed this process up.
Step 5: Final Touches
Once your polish is dry to the touch, it’s time for the finishing touches to make your manicure truly complete.
- Cuticle Oil: Apply a nourishing cuticle oil to your cuticles and massage it in. This rehydrates the skin and makes your manicure look fresh and finished.
- Hand Cream: Finish with a rich hand cream to keep your hands soft and moisturized.
Choosing Your Perfect Milky Beige Shade
Milky beige isn’t just one color; there are subtle variations that can make a big difference depending on your skin tone and desired look. Some lean more pink, some more peachy, and others are a pure, creamy neutral.
Here’s a quick guide to finding your ideal milky beige:
- Fair Skin Tones: Look for milky beiges with a touch of pink or soft peach undertones. These can prevent the shade from looking too stark or chalky and add warmth.
- Medium Skin Tones: Most milky beiges work beautifully. Shades hitting the middle ground – not too pale, not too deep – with warm, creamy undertones are often perfect.
- Deep Skin Tones: Opt for milky beiges that have a richer, deeper base, perhaps with slightly more brown or caramel undertones. These will provide a beautiful contrast and a sophisticated finish.
When in doubt, it’s always best to swatch the polish on your nail before buying if possible. Consider the finish, too – a creamy opaque finish is classic milky beige, but subtle pearlescent finishes can add an extra layer of dimension.
Essential Tools for Your Milky Beige Manicure
To achieve that professional, effortless chic look at home, having the right tools makes all the difference. You don’t need a whole salon’s worth, just a few key items!
Here’s a list of essentials:
- Nail Polish Remover: An acetone-free formula is ideal for gentleness.
- Cotton Pads or Lint-Free Wipes: For removing polish and cleansing nails.
- Nail Files: A medium-grit file for shaping and a fine-grit buffer for smoothing.
- Cuticle Pusher: A metal or orange wood stick for gently pushing back cuticles.
- Base Coat: Crucial for protection and adhesion.
- Milky Beige Nail Polish: Your star player!
- Top Coat: For shine and durability.
- Cuticle Oil: To nourish and moisturize.
- Hand Cream: For that final, soft touch.
- Optional: Quick-Dry Drops/Spray: For impatient drying times.
Investing in good quality tools can make your DIY manicures more enjoyable and the results more impressive. For instance, a reusable glass nail file can be a great eco-friendly option and is excellent for preventing nail splitting.
Milky Beige: Beyond the Solid Color
While a classic solid milky beige is incredibly chic, don’t be afraid to play with variations! This versatile shade is a perfect canvas for subtle nail art or enhancements.
Subtle Accents
Add a touch of personality without compromising the elegance:
- Thin Gold or Rose Gold Stripe: A delicate line painted horizontally or vertically down the nail can add a modern, luxe feel.
- Tiny Dot: A single, tiny dot of contrasting color (like black or a metallic) at the base of the nail can be a chic detail.
- French Tips with a Twist: Opt for a milky beige base with a white or pearlescent tip for a subtle take on the classic French manicure.
Ombre Effect
Blend milky beige with related shades like a soft pink, peach, or a slightly deeper nude for a beautiful, gradient effect. This looks stunning on longer nails.
Milky Beige with Glazed Donut Finish
Recreate the popular “glazed donut” look by applying a pearly chrome powder over a milky beige base. It gives a subtle, iridescent shimmer that’s incredibly eye-catching yet still sophisticated.
Matte Finish
For a different texture, try a matte top coat over your milky beige polish. This gives it a velvety, sophisticated appearance that’s perfect for cooler months.
Troubleshooting Common Nail Polish Woes
Even with the best intentions, sometimes nail polish doesn’t turn out perfectly. Don’t get discouraged! Here are some common issues and how to fix them:
1. Streaky Application
Problem: The polish looks uneven and streaky, especially on the first coat.
Why it happens: Often due to a thick first coat, or not enough polish on the brush.
Solution: Ensure your coats are thin and even. Wipe excess polish from one side of the brush before applying. For the second coat, use a slightly heavier bead of polish to even out any streaks from the first. Let each coat dry sufficiently before the next. If it’s still streaky, you might need a third thin coat or a polish with better coverage.
2. Bubbles in Polish
Problem: Little air bubbles have appeared on your nail surface.
Why it happens: Applying polish too thickly, applying a new coat before the previous one is dry, or shaking the bottle vigorously.
Solution: Always apply thin coats. Make sure each layer is tacky but not wet before the next. Instead of shaking your polish bottle (which introduces air bubbles), roll it gently between your hands. If you already have bubbles, you might need to gently buff them down and apply a very thin top coat.
3. Chipping Polish
Problem: Your manicure starts chipping within a day or two.
Why it happens: Lack of proper prep, no base or top coat, not capping the free edge, or your nails might be naturally prone to chipping.
Solution: Diligently follow the prep steps, especially cleaning the nail free of oils. Always use a base and top coat. Be sure to “cap” the free edge by swiping the brush along the tip of your nail with both the base, color, and top coats. If chipping persists, consider a strengthening base coat or a long-wear polish line. Check out tips from reputable beauty science sources on nail polish longevity.
4. Polish Not Drying
Problem: Your nails are still smudgy hours later.
Why it happens: Polish applied too thickly, or using polishes that take longer to dry.
Solution: Thin coats are key! Use a quick-dry top coat or quick-dry drops/spray. You can also try submerging your nails in a bowl of ice-cold water for a few minutes once they seem dry to the touch. This helps to harden the polish from the underside.
Anatomy of a “Milky” Polish
What makes a nail polish “milky”? It’s all about the formulation! Milky polishes typically use specific pigments and opacifiers to achieve that soft, opaque, yet sometimes slightly translucent effect. They are different from sheer polishes which allow your natural nail color to show through, and from fully opaque creams which can sometimes look flat.
The ideal milky beige strikes a balance. It provides enough coverage to look polished and hide imperfections, but it retains a certain softness and luminosity, almost like a milky gemstone. This carefully crafted opacity is what gives milky beige its signature chic and effortless appeal. It’s a sophisticated finish that feels luxurious and modern.
Here’s a quick breakdown of what creates that “milky” effect:
| Component | Function | Effect on Polish |
|---|---|---|
| Pigments (Beige/Nude Tones) | Provide the base color. | Determines the hue – from warm sandy beige to cooler taupe-beige. |
| Opacifiers (e.g., Titanium Dioxide) | Increase opacity and whiteness. | Creates the “milky” look, making the polish less sheer. |
| Pearlescent Pigments (Optional) | Create shimmer or sheen. | Can add a subtle glow or iridescence for a “glazed” effect. |
| Binders & Solvents | Hold pigments together and allow for smooth application. | Ensure smooth, streak-free application and proper drying. |
The careful blend of these ingredients results in a polish that’s creamy, smooth, and has that distinctive milky finish we love.
Frequently Asked Questions About Milky Beige Nails
What exactly are “milky beige nails”?
Milky beige nails refer to manicures painted with a nail polish shade that is an opaque or semi-opaque beige with creamy, milky undertones. It looks soft, sophisticated, and almost like a muted version of a classic nude.
Are milky beige nails suitable for all skin tones?
Yes! Milky beige shades are celebrated for their universal flattery. Different undertones within the milky beige spectrum can be found to perfectly complement fair, medium, and deep skin tones, making them a fantastic choice for everyone.
How many coats of milky beige polish should I use?
Typically, two thin coats of milky beige polish are recommended for even coverage and the perfect opaque-yet-soft look. A third thin coat can be used if you desire deeper opacity, but always ensure each coat is adequately dry before applying the next.
Can I wear milky beige nails to work?
Absolutely! Milky beige is considered a professional and polished shade. Its neutral tone makes it appropriate for almost any workplace environment, offering a subtle elegance that’s never distracting.
How do I make my milky beige manicure last longer?
For extended wear, proper prep is key: ensure nails are clean, smooth, and oil-free. Always use a good quality base coat, apply thin coats of polish, cap the free edge with your color and top coat, and finish with a durable top coat. Reapply top coat every few days if needed.
What’s the difference between milky beige and regular beige polish?
Regular beige polish can sometimes be sheerer, have a more matte finish, or lean more towards a true brown or yellow undertone. Milky beige specifically refers to shades with a creamy, opaque finish and often softer, sometimes slightly pink or peachy undertones, giving it that characteristic “milky” appearance.
Conclusion
Milky beige nails are more than just a trend; they are a statement of effortless chic, a nod to understated elegance, and a testament to the power of a perfectly chosen neutral. Whether you’re a seasoned nail art enthusiast or just starting your DIY manicure journey, this versatile shade offers a sophisticated and universally flattering option that’s always in style.
By following the simple prep and application steps, you can achieve a

