Micro beads accent nails design offers a chic, textured look perfect for adding subtle detail and a touch of elegance to any manicure. This guide breaks down the simple steps to achieve this popular nail art trend right at home, even if you’re a complete beginner! Get ready to elevate your nail game with this easy-to-master technique for stunning, eye-catching accents.
Are you looking for a way to add a unique sparkle and dimension to your nails without being an art pro? Micro beads are tiny, adorable little gems that can transform a plain manicure into something truly special. They’re incredibly versatile, letting you create delicate lines, full-nail coverage, or just a pop of something extra. Many beginners find nail art intimidating, but with micro beads, the process is surprisingly straightforward. Don’t worry if you think you don’t have a steady hand – I’m here to break it down so you can create beautiful micro bead accent nails with confidence. We’ll go through everything you need, from choosing your beads to sealing your design for a long-lasting finish. Let’s get those nails looking fabulous!
What Are Micro Beads for Nails?
Micro beads, also often called caviar beads or nail pearls, are minuscule spheres, typically made of glass or plastic, that are used to decorate nails. They are incredibly small, often measuring less than a millimeter in diameter. These tiny beads come in a vast array of colors, finishes, and even iridescent or metallic options, allowing for immense creativity. When applied to the nail, they create a textured, 3D effect that’s both eye-catching and sophisticated. Think of tiny decorative balls that add a luxurious feel and visual interest to your nail art.
Why Choose Micro Beads for Accent Nails?
Micro beads offer a unique charm that sets them apart from other nail embellishments. Their popularity stems from several key advantages, especially for accent nail designs:
- Subtle Sophistication: Unlike chunky rhinestones, micro beads provide a more refined and delicate accent. They add texture and shimmer without being overpowering.
- Versatile Application: You can use them to create intricate patterns, delicate borders, full nail coverage for a unique texture, or even just a few scattered beads for a minimalist touch.
- Easy to Work With: For beginners, micro beads are much easier to handle and position than larger charms or intricate hand-painted designs.
- Affordability: A little goes a long way, and many micro bead kits are quite budget-friendly, making them an accessible way to experiment with nail art.
- Durability (with proper sealing): When applied and sealed correctly, micro bead designs can last for a significant period, holding up well against daily activities.
- Trendy Texture: This is a highly sought-after nail art trend that adds a modern, bespoke feel to your manicure.
Getting Started: Essential Tools and Materials
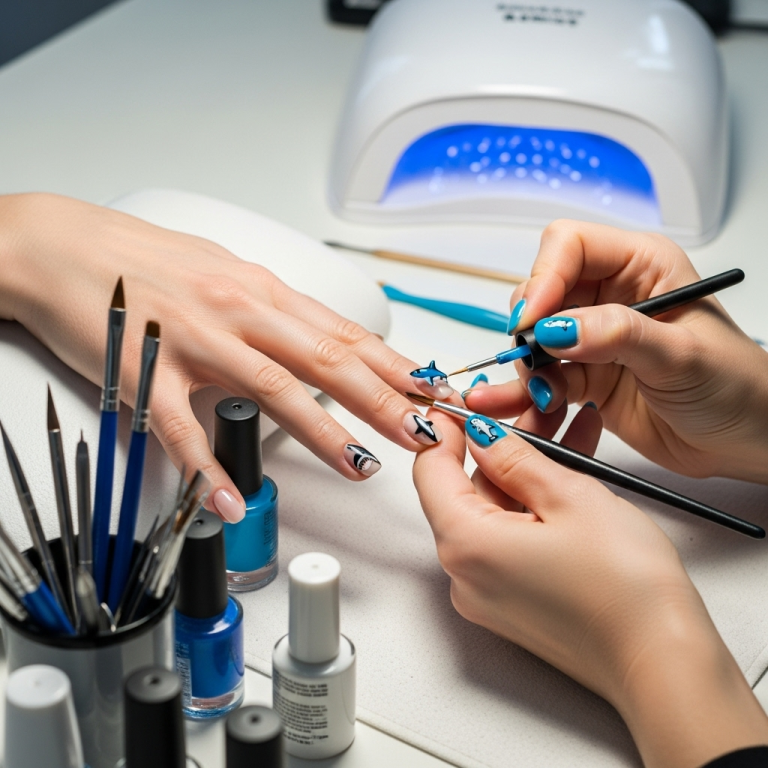
Before we dive into the fun part – creating the design – let’s gather everything you’ll need. Having all your supplies ready will make the process smooth and enjoyable. Think of this as your micro bead nail art toolkit!
The Must-Haves:
- Base Coat and Top Coat: Essential for nail health and sealing your design. A good top coat is crucial for keeping those tiny beads in place and adding shine.
- Nail Polish Colors: Choose your favorite colors for the base of your nails and the accent design.
- Micro Beads: Available in countless colors and finishes. You can buy them in small vials or larger bulk containers. Many kits come with a small funnel for easy application.
- Adhesive: This is key! You can use a sticky layer of your wet top coat or a specialized nail glue. For beginners, using the tacky layer of a wet top coat is often the easiest and safest method.
- Application Tools:
- Tweezers: Fine-tipped tweezers are perfect for picking up individual beads or placing them precisely.
- Small Brush or Applicator Tool: A silicone-tipped tool, a fine-tipped detail brush, or even a toothpick can be used to pick up and position beads.
- Funnel (Optional): If your beads didn’t come with one, a small paper funnel or even a rolled-up piece of paper can help you pour excess beads back into their container without much mess.
- Clean-up Tools:
- Rubbing Alcohol or Nail Polish Remover: For cleaning up any stray beads or polish smudges.
- Cotton Swabs or Cotton Pads: For precise clean-up.
Optional but Helpful:
- Dotting Tool: Great for applying adhesive or picking up beads.
- Tray or Plate: To pour out some beads and work with, making cleanup easier.
Don’t feel overwhelmed by the list! You likely already have most of these supplies for your regular manicures. The micro beads themselves are the main new addition. You can find beautiful micro bead sets at most beauty supply stores or online retailers like Amazon. For a good quality, long-lasting top coat, I often recommend looking for brands that offer a “gel-like” finish without needing a UV lamp, as these tend to be more durable.
Step-by-Step: Creating Your Micro Beads Accent Nails Design
Let’s transform your nails into miniature works of art! This guide focuses on the most common and beginner-friendly method: using a sticky top coat as your adhesive. It’s less messy and very forgiving.
Step 1: Prepare Your Nails
Start with clean, dry nails. Push back your cuticles gently and file your nails to your desired shape. Apply your favorite base coat to protect your natural nails and ensure a smooth canvas. Let it dry completely.
Step 2: Apply Your Base Color
Paint your nails with your chosen base color polish. For accent nails, you’ll typically paint all nails with one color, or perhaps paint all but one or two nails with a base color. Apply two thin coats for best coverage, allowing each coat to dry adequately between applications. Remember, we want a smooth surface for our micro beads!
Step 3: Apply the “Adhesive” Layer
This is where the magic happens! On the nail(s) you want to turn into an accent nail, apply a thin, even layer of your sticky top coat. Here’s a crucial tip: Don’t let this top coat dry completely. You need it to remain wet and tacky so the micro beads can adhere to it. Work on one nail at a time, as the top coat will start to set.
Step 4: Apply the Micro Beads
Now for the fun! Gently pick up your micro beads using your tweezers or applicator tool. Carefully place them onto the wet top coat on your accent nail.
Design Ideas for Applying Beads:
- Full Coverage: Pour a small amount of beads onto the wet top coat and gently press them to ensure they adhere evenly. You can use a tray to catch excess beads.
- Lines and Borders: Use tweezers to carefully place beads along the edge of your nail, around the cuticle, or to create stripes.
- Patterns: Create simple dots, swirls, or even fill in shapes with beads.
- Scattered Effect: Lightly sprinkle beads over the wet top coat for a “confetti” or “stardust” look.
Beginner’s Tip: If you’re new to this, start with a simple design like a border or a few scattered beads. You can always try more complex patterns as you get more comfortable. Press gently with your applicator tool or fingertip to ensure each bead is sunk slightly into the wet polish, creating a better bond.
Step 5: Clean Up Excess Beads
Once you’re happy with the placement of your beads on the wet top coat, it’s time to clean up. Gently tilt your hand to allow any loose beads to fall onto your tray or paper. You can also use a dry, stiff brush (like a clean makeup brush) to gently sweep away any stray beads. Be careful not to disturb your design!
Step 6: Seal the Design
This is the most important step for longevity! Once you’ve applied your beads and cleaned up the excess, carefully apply another layer of top coat over the micro bead design.
- For Full Coverage: Gently brush the top coat over the beads, ensuring each bead is coated. You might need two light coats to fully encapsulate them.
- For Accent Designs (Lines, Borders): Be extra delicate. You want to seal the beads without washing them away or shifting them. A very light touch is key.
Important Note: For micro beads that cover the entire nail, you might need to apply multiple thin layers of top coat, letting each dry slightly in between, to fully “cap” the beads and create a smooth surface. This helps prevent snagging. If you’re using a particularly glossy top coat, one good layer might suffice for lighter designs.
Allow your top coat to dry completely. This can take longer than usual because of the added texture. Resist the urge to touch them too soon!
Step 7: Final Touches
Once everything is completely dry, you can apply cuticle oil to moisturize the skin around your nails. Admire your stunning micro bead accent nails!
Different Micro Bead Design Techniques
Micro beads are incredibly versatile. Beyond the basic application, here are a few popular ways to use them to create stunning accent nails:
1. The Classic Caviar Nail
This is the most iconic micro bead look. It involves covering the entire accent nail with a dense layer of micro beads, creating a textured, almost fuzzy appearance. It’s luxurious and eye-catching.
2. Delicate Borders and French Tips
Use fine-tipped tweezers to meticulously place micro beads along the free edge of the nail or around the cuticle. This creates a chic, refined outline that adds just a touch of sparkle.
3. Scattered Sparkle
For a minimalist approach, apply a few micro beads randomly over a wet top coat on your accent nail. This looks like a sprinkle of tiny stars or confetti, adding subtle visual interest without being overwhelming.
4. Pattern Play
With a bit of patience, you can create simple shapes. Apply a few beads in a line for a subtle stripe, a small cluster for a “jewel” effect, or even form a heart shape on your accent nail.
5. Ombre Micro Beads
This is a more advanced technique but stunning! You can create a gradient effect by using two or more colors of micro beads. Start with one color at the cuticle and gradually blend into another color towards the tip, or vice versa. This often involves applying beads in sections.
Troubleshooting Common Micro Bead Nail Issues
Even with the best intentions, sometimes things don’t go perfectly. Here are common issues and how to fix them:
Issue: Beads are falling off.
Solution: This usually means your adhesive layer wasn’t sticky enough, or you didn’t apply enough top coat to seal them properly. Ensure your top coat is still wet when applying beads, and always generously cap the beads with your final top coat layers. Consider using a nail glue specifically for larger embellishments if top coat isn’t holding for very dense applications.
Issue: My design looks messy or uneven.
Solution: Patience is key! Work slowly and deliberately. For dense designs, ensure you’re pressing the beads gently into the wet polish to they get a good grip. For precise lines, practice often with your tweezers. You can carefully remove a misplaced bead with a fine-tipped tool before the polish dries.
Issue: Beads snag on everything.
Solution: This happens when the beads aren’t fully encapsulated by the top coat. Make sure you apply enough top coat to cover all surfaces of the beads, especially for full-coverage designs. You may need multiple thin layers. The smoother the final top coat application, the less snagging you’ll experience. You can also try gently filing the top layer of the top coat to smooth it down before applying a final, glossy layer. For any embellishments, check out resources on proper application and sealing by organizations like the U.S. Food and Drug Administration (FDA) on cosmetic safety, which includes nail products.
Issue: My micro beads look dull.
Solution: The top coat application can sometimes dull shiny beads. Ensure you are capping them adequately with a good quality, glossy top coat. Sometimes, a specific “glaze” or “glass” top coat can help restore shine. Applying a final, thick, glossy layer that’s designed not to chip will help maintain their luster.
Caring for Your Micro Bead Accent Nails
To keep your beautiful micro bead designs looking fresh and intact for as long as possible, follow these simple care tips:
- Be Gentle: Avoid using your nails for tasks that involve prying or scraping, as this can snag and lift the beads.
- Moisturize: Keep your hands and cuticles hydrated with cuticle oil. Healthy nails and skin are less prone to issues.
- Avoid Harsh Chemicals: When cleaning or doing dishes, wear gloves to protect your nails from harsh detergents and prolonged water exposure, which can weaken the polish and adhesive.
- Reapply Top Coat (Optional): If you notice any wear on your top coat after a few days, you can carefully apply another thin layer to refresh the shine and protection.
Micro Beads vs. Other Nail Embellishments
It’s helpful to see how micro beads compare to other popular nail decorations:
| Feature | Micro Beads | Rhinestones / Gems | Glitter | 3D Charms |
|---|---|---|---|---|
| Texture | Fine, granular, 3D | Smooth, faceted, 3D | Powdery to chunky, can be flat or slightly raised | Distinct shapes, very 3D |
| Application Difficulty (Beginner) | Easy to Moderate | Moderate (needs good adhesive) | Easy | Moderate to Difficult (needs strong glue) |
| Durability | Good to Very Good (with proper sealing) | Good (can snag) | Very Good | Moderate (can fall off if not glued well) |
| Look/Style | Chic, textured, caviar-like, subtle sparkle | Glamorous, sparkly, statement | Sparkly, festive, can be subtle or bold | Bold, statement, playful |
| Best For | Textured accents, elegant borders, full textured nails | Adding focal points, high shine | Shimmer, accent nails, full coverage sparkle | Creating a focal point, adding dimension |
As you can see, micro beads offer a unique balance of texture, subtlety, and glamour that other embellishments might not match. Their fine size makes them perfect for delicate artistry and comfortable wear.
FAQ: Your Micro Bead Nail Questions Answered
Q1: Do micro beads damage my natural nails?
A1: When applied and removed correctly, micro beads themselves do not damage your natural nails. The key is proper application and removal. Avoid picking or prying off the beads, as this can peel away layers of your nail. Always use a good quality nail polish remover or soak your nails to loosen the polish and beads.
Q2: Can I use regular nail polish instead of gel for micro bead designs?
A2: Absolutely! While gel polish offers a harder finish that some find easier for full micro bead coverage, regular nail polish works perfectly fine, especially for accent designs. The important part is ensuring your polishes are fully dry before applying the top coat for the beads, and then using a good, durable top coat to seal everything in.
Q3: How long do micro bead accent nails last?
A3: With proper application and care, micro bead accent nails can last anywhere from 5 to 10 days, similar to a regular manicure. Full coverage caviar nails might last a bit longer if very well sealed, as the beads protect the base polish. The lifespan depends on the quality of your polish and top coat, and how gently you treat your nails.
Q4: Are micro beads heavy on the nails?
A4: No, micro beads are incredibly lightweight due to their tiny size. You won’t feel them weighing down your nails, making them a comfortable option for everyday wear, even when used for full nail coverage.
Q5: Where can I buy micro beads for nails?</p


