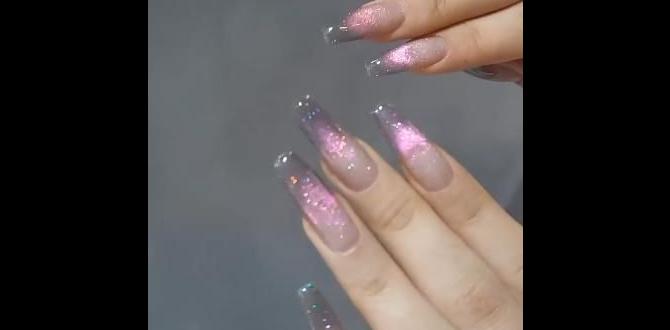
Make your next night out shine with dazzling metallic nail designs! Discover simple, stunning ideas perfect for beginners, from shimmering chrome to glamorous glitter, to elevate your look effortlessly.
Getting ready for a night out is so exciting! You’ve picked out your outfit, planned your hair, and now it’s time to complete the look with the perfect nails. Sometimes, finding that extra sparkle can feel a little tricky, but it doesn’t have to be! We’re diving into the fabulous world of metallic nails, which are basically magic wands for your fingertips, turning a simple manicure into a showstopper. Metallic finishes add instant glam. They catch the light beautifully and just scream “celebration!” Whether you’re a total nail art newbie or just looking for quick, chic ideas, we’ve got you covered. Let’s make your nails the talk of the town!
How to Choose Your Metallic Nail Vibe
Choosing the right metallic nail design for a night out depends on your personal style and the overall vibe you’re going for. Think about your outfit, the occasion, and how bold you want to be. Metallic nails can range from super subtle shimmers to full-on disco ball vibes!
Here’s a quick guide to help you decide:
- Subtle Shine: If your outfit is already quite statement-making, or you prefer a more understated elegance, opt for a sheer metallic polish or a fine shimmer. Think a soft rose gold or a pearly silver.
- Bold Glamour: For a true night-out feel, go for opaque metallics like chrome, deep bronze, or a vibrant, shimmery blue. These colors pack a punch and will definitely turn heads.
- Edgy & Modern: Matte metallics or metallic accents on a dark base can create a more contemporary and edgy look.
- Glitter Focus: If you love sparkle, a glitter-packed metallic polish is your best friend. You can do a full glitter look or just use it as an accent.
Essential Metallic Nail Design Ideas for Beginners
Nail art doesn’t have to be complicated to be stunning. Metallic finishes are fantastic because they often look impressive with minimal effort. Here are some beginner-friendly ideas that will have you party-ready in no time!
1. The Single Metallic Accent Nail
This is perhaps the easiest way to incorporate metallic into your manicure and it looks super chic!
- What you need:
- Your favorite nail polish color (e.g., black, navy, deep red, nude)
- A metallic nail polish (silver, gold, rose gold, or even a jewel tone like emerald or sapphire)
- Top coat
- How to do it:
- Apply your base color to all your nails except for one finger on each hand. For example, you might choose your ring finger.
- Let the base color dry completely.
- Apply your chosen metallic polish to the accent nail(s). You might need two coats for full opacity.
- Once the metallic polish is dry, apply a good top coat over all your nails to seal and add shine.
This creates a lovely contrast and draws the eye without being overwhelming. It’s sophisticated and easy to achieve!
2. Full-Coverage Metallic Manicure
Sometimes, all you need is one stunning color. A full-coverage metallic manicure is timeless and incredibly impactful.
- What you need:
- A high-quality metallic nail polish (e.g., liquid gold, chrome silver, rose gold shimmer)
- Top coat
- How to do it:
- Start with clean, prepped nails.
- Apply one to two thin coats of your metallic nail polish, allowing each coat to dry slightly in between. Most metallic polishes have great color payoff in just two coats.
- For extra shine and longevity, finish with a clear top coat.
Look for polishes with a smooth, reflective finish. Chrome and liquid metal finishes are particularly popular for this look. Brands like OPI, Essie, and Sally Hansen often have beautiful metallic shades in their collections.
3. Metallic Tips or Half-Moons
This technique adds a playful touch of metallic without covering your entire nail.
- What you need:
- Your base nail polish color
- Metallic nail polish
- Fine nail art brush or striping tape/dotting tools
- Top coat
- How to do it (for tips):
- Paint all your nails with your base color and let it dry completely.
- Once dry, you can freehand the metallic tips with a fine brush, or use striping tape. Place the tape where you want the line between your base color and metallic tip to be, paint the tip with metallic polish, and carefully remove the tape while the polish is still slightly wet.
- For half-moons, you can use the same tape method, or use small circular stickers to map out the area you want to leave as the base color.
- Let dry and apply a top coat.
Metallic French tips are a modern twist on a classic. Half-moon manicures (also known as lunulas) at the base of the nail can look extremely elegant.
4. Glitter Gradient with a Metallic Flair
This is a favorite for a reason – it’s easy, forgiving, and looks incredibly festive.
- What you need:
- A base polish color (optional, but can add depth)
- A chunky or finely milled metallic glitter polish
- A makeup sponge or a nail art brush
- Top coat
- How to do it:
- Apply your base color if using, and let it dry.
- Apply a layer of your metallic glitter polish to the tip of your nail.
- Using a makeup sponge (dabbed lightly) or a brush, gently blend the glitter down towards the cuticle. The goal is to have the most glitter at the tip and gradually fade it out.
- Apply another coat of glitter polish to build up the density at the tip if needed.
- Once dry, apply a thick layer of top coat to smooth out the glitter texture. You might need a couple of coats of top coat to make it perfectly smooth.
This looks amazing with gold, silver, or even iridescent glitters. It gives that celebratory shimmer without the need for intricate freehand work.
5. Metallic Stamping or Decals
For those who want intricate designs without the skill, metallic stamping or decals are your best friend.
- What you need:
- Your base nail polish color
- Metallic stamping polish or metallic nail stickers/decals
- Stamping plate and stamper (for stamping)
- Top coat
- How to do it (stamping):
- Paint your nails with your base color and let it dry completely.
- Apply a thick layer of metallic stamping polish onto your chosen design on the stamping plate.
- Scrape off the excess polish quickly with a scraper card.
- Immediately roll the stamper over the design to pick it up.
- Gently roll the stamper onto your nail.
- Let it dry for a minute, then apply a top coat.
- How to do it (decals):
- Paint your nails with your base color and let it dry.
- Peel off your metallic nail decal and carefully apply it to your nail, smoothing out any bubbles or wrinkles.
- Apply a generous top coat over the decal to seal it in and protect it.
Nail stamping plates come with countless designs, from geometric patterns to delicate florals. Metallic decals offer a quick, no-fuss application of a pre-made design. You can find great stamping plates from brands like Born Pretty and MoYou-London, and decals are available from many beauty retailers.
Popular Metallic Finishes and Colors for Night Outs
The world of metallics is vast and exciting! Here are some of the most popular finishes and colors that are perfect for adding that extra oomph to your night-out nails.
| Finish Type | Description | Best For | Example Colors |
|---|---|---|---|
| Chrome/Mirror | An ultra-high-shine, reflective finish that looks like polished metal. Requires special powders or polishes. | A sleek, modern, and bold statement. | Silver, Gold, Rose Gold, Iridescent Chrome |
| Liquid Metal | A very pigmented, metallic polish that mimics the look of molten metal. Usually opaque in 1-2 coats. | A sophisticated and luxurious feel without needing special application. | Gold, Bronze, Copper, Pewter |
| Shimmer/Metallic Fleck | Polishes containing fine metallic particles or larger flecks that catch the light. | Adding subtle sparkle and dimension. Great for gradients and accents. | Champagne, Rose Gold Shimmer, Silver Fleck, Deep Blue Shimmer |
| Glitter Metallic | Contains glitter particles in metallic shades, ranging from fine dust to chunky pieces. | Maximum sparkle and festive fun. | Gold Glitter, Silver Glitter, Holographic Glitter, Multi-colored Metallic Glitter |
Color Palette Suggestions
While silver and gold are classic choices, don’t shy away from other metallics:
- Classic Gold: Always elegant and pairs with almost any outfit.
- Cool Silver: Sleek, modern, and often feels a bit more edgy.
- Warm Rose Gold: Trendy and flattering on many skin tones, offering a softer metallic glow.
- Glamorous Bronze/Copper: Rich and warm, these are perfect for a sophisticated evening look.
- Jewel-Toned Metallics: Think emerald green, sapphire blue, or ruby red with a metallic finish for a truly eye-catching manicure.
- Holographic/Iridescent: These catch the light and shift colors, offering a mesmerizing, multi-dimensional effect.
Achieving the Perfect Metallic Finish: Tips and Tricks
Getting that flawless, high-impact metallic look can be a little different than regular polish. Here are some key tips to ensure your nails look professionally done, even if you’re doing them yourself!
Nail Prep is Key
Just like any manicure, starting with properly prepped nails is crucial. This means ensuring your nails are clean, dry, and free from any old polish or oils. Buffing them gently can help your polish adhere better. For a truly smooth metallic finish, ensure your nails are filed to your desired shape and any ridges are smoothed down. You can find excellent guides on proper nail preparation from resources like the Mayo Clinic, which emphasize hygiene and gentle care for nail health.
Base Coat Matters
A good base coat is your best friend, regardless of the polish finish. For metallic polishes, especially chrome or mirror finishes, a smooth, streak-free base coat is vital. It helps prevent staining and ensures an even application. Sometimes, a tinted base coat that matches your metallic shade can enhance the finish.
Application Technique
- Thin Coats: Apply metallic polish in thin, even coats. It’s better to do two or three thin coats than one thick, streaky one.
- Steady Hand: Try to keep your hand steady. For full coverage, many people find it easier to paint the sides of the nail first, then the middle.
- Avoid Streaks: If you notice streaks, wait for the coat to dry slightly and apply the next one very gently. Sometimes, a quick-drying top coat can help to blend out minor imperfections as it dries.
- Chrome Powder Application: If you’re using chrome powder (which gives that true mirror effect), it’s usually applied over a no-wipe gel top coat. You’ll need a special applicator sponge or silicone tool to rub the powder into the uncured or cured gel surface. This technique requires a bit more specific supplies and practice but offers an unparalleled effect.
Top Coat Magic
A high-quality top coat is essential for sealing your metallic manicure and adding that extra gleam. For glitter or textured metallic polishes, a thicker, smoothing top coat can help create a smooth surface. Gel top coats, even over regular polish, can give an amazing glossy finish and added durability. For chrome finishes, a specialized gel top coat is often recommended.
Dealing with Texture
Some metallic polishes, especially those with larger glitter particles, can feel textured once dry. This is where your top coat plays a starring role. Apply a generous amount of a smoothing top coat, and don’t be afraid to apply a second coat after the first has dried to really level out the surface and make it feel smooth to the touch. You can also use a “glitter smoother” top coat designed specifically for this purpose.
Metals and Manicures: A Quick Cheat Sheet
Here’s a handy table to quickly reference some popular metallic nail design ideas and their suitability for different occasions or styles.
| Design Idea | Metallic Color/Finish | Vibe | Effort Level (Beginner) | Best For |
|---|---|---|---|---|
| Full Chrome Nails | Silver or Gold Chrome Powder | Ultra-modern, futuristic, bold | Medium (requires practice/tools) | Clubbing, special events, fashion-forward looks |
| Liquid Gold Tips | Liquid Gold Polish | Luxurious, classic, elegant | Easy | Dinner dates, cocktail parties, formal events |
| Rose Gold Glitter Gradient | Rose Gold Glitter Polish | Sparkly, romantic, festive | Easy | Weddings, parties, holiday gatherings |
| Bronze Accent Nail | Opaque Bronze Polish | Grounded, sophisticated, earthy glam | Very Easy | Casual evening out, adding a touch of warmth |
| Metallic Stamped Swirls | Any Metallic Stamping Polish | Intricate, artistic, personalized | Medium (requires stamping kit) | Any occasion where you want unique nail art |
| Gunmetal Half-Moons | Gunmetal Grey Metallic Polish | Edgy, chic, understated cool | Easy | Concerts, late-night hangouts, rock-inspired looks |
Frequently Asked Questions About Metallic Nail Designs
Q1: Are metallic nails difficult for beginners?
Not at all! Many metallic nail designs are incredibly beginner-friendly. Simple solid metallic polishes, accent nails, or glitter gradients are easy to achieve with just a few basic supplies. Techniques like chrome powder application require a little more practice, but there are plenty of ways to get a beautiful metallic look without them.
Q2: Can I use regular nail polish for metallic designs?
Yes, absolutely! While chrome powder gives a true mirror effect and often requires gel polish, there are many fantastic regular nail polishes available in metallic finishes like liquid metal, shimmer, and glitter. These work just like regular polish and are perfect for DIY manicures.
Q3: How do I avoid streaks with metallic polish?
The key to avoiding streaks is thin, even coats. Make sure each coat is fully dry before applying the next. Applying polish in fluid, steady strokes and ensuring you have


