Matte nail design ideas offer a sophisticated, modern twist on manicures, providing a chic, velvety finish that’s incredibly versatile and always on-trend. From subtle elegance to bold statements, matte nails elevate any look with their unique texture and refined aesthetic.
Want to try a new nail look that feels instantly sophisticated? Matte nails are your answer! They’re all over the runways and social media for good reason. Forget that super-shiny finish for a moment; a matte topcoat transforms any color into something chic and modern. It’s like a velvety cloud for your fingertips! Even if you’re new to nail art, achieving a beautiful matte finish is easier than you think. We’ll walk through everything, from tips and tricks to stunning design ideas that you can totally do yourself. Get ready to discover your new favorite manicure style!
Why Choose Matte Nails? The Chic Appeal Explained
So, what’s the big deal about matte nails? It’s all about the finish! Unlike glossy nails that reflect light, matte nails absorb it, creating a soft, diffused look. This unique texture makes colors appear richer and more subdued, offering a sophisticated vibe that’s hard to beat.
Here’s why matte finishes are so popular:
- Chic & Modern Aesthetic: Matte nails instantly feel more grown-up and stylish. They have a subtle elegance that pairs beautifully with both casual and formal outfits.
- Color Transformation: A matte topcoat can make even the brightest neons or deepest jewel tones look more refined and less… flashy. It adds a depth that a glossy finish sometimes can’t achieve.
- Hides Imperfections: The non-reflective surface of a matte finish can be more forgiving of minor nail imperfections or slight unevenness in polish application compared to a high-gloss finish.
- Versatility: Matte works with almost any color and can be incorporated into countless nail art designs, from minimalist to intricate.
- Trend-Proof: While glossy nails have their place, the matte look has a timeless quality that keeps it consistently on-trend.
Whether you’re aiming for an understated look or a bold statement, matte nails offer a fantastic way to express your personal style.
Getting Started with Matte Nails: Your Beginner’s Guide
Ready to dive into the world of matte nails? It’s super beginner-friendly! You don’t need a salon to achieve this chic finish. Here’s what you need and how to get started.
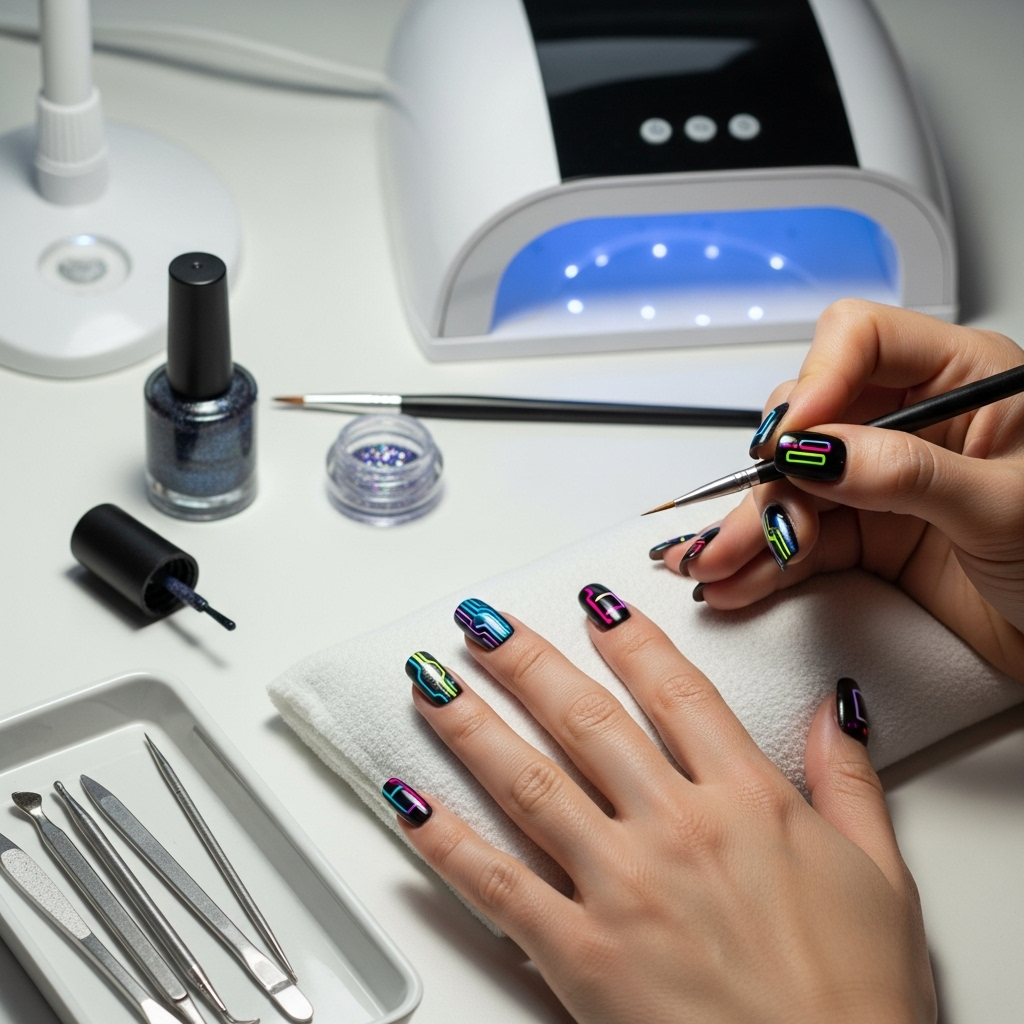
The Essential Tools for Matte Nails
You probably have most of these already!
- Nail Polish: Any color you love!
- Base Coat: Protects your natural nails.
- Matte Top Coat: This is the magic ingredient!
- Nail File & Buffer: For shaping and smoothing.
- Cuticle Pusher: To gently tidy up your cuticles.
- Optional: Nail Polish Remover & Cotton Pads: For any oopsies!
Step-by-Step: Achieving a Flawless Matte Manicure
Let’s get those fab matte nails!
- Prep Your Nails: Start with clean, dry nails. Gently push back your cuticles with a cuticle pusher. Shape your nails with a nail file to your desired length and shape. Buff your nail surface lightly to create a smooth canvas.
- Apply Base Coat: A thin layer of base coat is essential for protecting your natural nails and ensuring your polish lasts longer. Let it dry completely.
- Apply Your Color: Paint on 1-2 thin coats of your chosen nail polish. Allow each coat to dry thoroughly between applications. This is key for a smooth finish!
- Apply Matte Top Coat: Once your color coats are completely dry, apply your matte top coat evenly over each nail. This is what gives you that beautiful, velvety finish!
- Let It Dry: Allow your matte top coat to dry fully. Avoid touching anything for a few minutes to prevent smudging.
And voilà! You have gorgeous, matte nails. It’s that simple!
Matte Nail Design Ideas: Chic & Essential Looks
Now for the fun part! Matte nails are a beautiful base for so many creative designs. Whether you love minimalist chic or something a bit more daring, there’s a matte design for you.
1. The Effortless Monochromatic Matte
Sometimes, the simplest look is the most elegant. A single, solid matte color is timeless.
- Why it works: It’s sophisticated, low-maintenance, and lets the texture of the matte finish shine.
- Colors to try: Deep burgundy, forest green, classic black, creamy beige, or a muted rose pink.
- How to achieve: Follow the basic matte manicure steps above with your chosen color.
2. Two-Tone Matte Magic
Playing with two complementary or contrasting matte colors adds a modern twist.
- Why it works: It’s visually interesting without being too complicated.
- Ideas:
- Matte black paired with a matte deep red.
- Matte nude with a matte French tip in a slightly darker shade.
- Matte grey with a matte pastel accent nail.
- How to achieve: Apply your first matte color. Once dry, use striping tape or a fine brush and nail polish (either matte or glossy) to create a clean line or design, and then carefully apply your second matte color. Or, use your matte top coat over both colors after they’ve dried.
3. Matte with a Glossy Pop
The contrast between matte and glossy finishes is incredibly chic and surprisingly easy to do.
- Why it works: The subtle difference in texture is eye-catching and adds dimension.
- Design ideas:
- Matte base with glossy French tips.
- Matte nails with glossy polka dots on one or two accent nails.
- Create geometric shapes or lines with glossy polish over a matte background.
- How to achieve: Apply your matte color and matte top coat first. Once completely dry, use a fine brush and glossy top coat or colored polish to add your glossy design elements. For things like French tips, you can use guides or carefully freehand.
A great example of this contrast is often seen in professional nail art, where designers masterfully blend textures. For more inspiration on professional techniques, you can explore resources from leading beauty institutions, like those that might offer nail art competitions and training, which often showcase advanced techniques involving different finishes.
4. Subtle Shine: Matte with Glitter Accents
Glitter and matte are a surprisingly harmonious pairing. Instead of a full glitter nail, use small accents for a touch of sparkle.
- Why it works: It adds a festive touch without being overwhelming.
- How to achieve:
- Apply your matte color and matte top coat.
- While the matte top coat is still slightly wet (or after it has dried, using a thin layer of a glitter glue or clear polish), carefully place fine glitter onto a specific area – like the cuticle line, the tip, or as a small accent on an art brush.
- You can also use glitter polish and then go over it with a matte top coat, which will dull the glitter’s shine for a more subtle sparkle.
5. Geometric & Minimalist Matte
Clean lines and simple shapes look incredibly stylish on a matte background.
- Why it works: It’s modern, sophisticated, and perfect for those who prefer understated elegance.
- Design ideas:
- Thin black lines across a nude or grey matte nail.
- A single metallic stripe at the tip of a matte nail.
- Half-and-half designs using two different matte colors with a sharp dividing line.
- How to achieve: Use striping tape for crisp lines. Apply your base matte color, let it dry, place the tape, apply the accent color (matte or glossy), remove tape while wet, and then apply your matte top coat over the whole nail (or just the base color if using glossy accents).
6. Matte Ombré
The gradient effect of ombré is stunning in a matte finish.
- Why it works: It’s a smooth transition of color that feels very chic.
- How to achieve: Use a makeup sponge to gently dab and blend two or three matte colors together on the nail. Once dry, apply your matte top coat over the entire nail.
- Tip: Start with lighter shades for a softer look or darker shades for a dramatic effect.
7. Textured Matte Nails
Take your matte nails to the next level with a bit of subtle texture.
- Why it works: It adds a tactile and visual interest that’s truly unique.
- Ideas:
- Velvet Nails: Apply a matte top coat, then immediately sprinkle specialized velvet flocking powder over the wet polish. Gently tap off the excess. This creates a super-soft, plush feel.
- Sand Nails: Use polishes that have a sandy, textured finish. These are often formulated to dry to a matte, gritty texture.
Choosing Your Perfect Matte Color Palette
The beauty of matte nails is their ability to complement virtually any color. But some shades really shine with that velvety finish.
Best Matte Colors by Season
Spring: Soft pastels like matte lilac, mint green, pale pink, and creamy peach.
Summer: Muted brights like matte coral, dusty rose, soft turquoise, and a matte off-white.
Fall: Rich, earthy tones like matte mustard yellow, deep olive green, terracotta, warm taupe, and classic burgundy.
Winter: Jewel tones and deep, moody colors like matte sapphire blue, emerald green, deep plum, charcoal grey, and crisp black.
Matte Neutrals: The Ultimate Chic Choice
Neutrals are a matte nail’s best friend. They exude understated sophistication.
- Nude/Beige: Perfect for a clean, polished look that goes with everything.
- Grey: From light dove grey to deep charcoal, matte grey is modern and cool.
- Cream/Off-White: A softer alternative to stark white, these shades are chic and refined.
- Black: Always a statement, matte black is edgy and undeniably stylish.
Matte vs. Glossy Nails: A Quick Comparison
Here’s a simple breakdown to help you choose your finish.
| Feature | Matte Nails | Glossy Nails |
|---|---|---|
| Finish: | Velvety, non-reflective | Shiny, reflective |
| Aesthetic: | Modern, sophisticated, understated | Classic, vibrant, high-shine |
| Durability: | Can be prone to smudging if not fully dried; some find it chips less noticeably. | Can show chips more prominently; generally durable with a good top coat. |
| Application: | Requires careful drying; matte top coat is essential for the look. | Standard application, often benefits from a glossy top coat for shine and protection. |
| Design Versatility: | Excellent base for contrast designs (with glossy, metallic, glitter); textures pop. | Great for vibrant color and intricate detailed art; reflections can be part of the design. |
| Imperfection Hiding: | More forgiving of minor surface marks. | Can highlight minor surface imperfections. |
Tips for Long-Lasting Matte Nails
Want your chic matte look to last? Follow these tips:
- Ensure Polish is COMPLETELY Dry: This is the MOST important step. If your colored polish isn’t fully dry before applying the matte top coat, it can drag and create streaks. Give it extra time!
- Apply Thin Coats: Whether it’s your color or your top coat, thin, even coats are always best for manicures.
- Seal the Edges: After applying your final top coat (matte or glossy), run the brush along the free edge of your nail. This “sealing” action helps prevent chips.
- Wear Gloves: When doing household chores like washing dishes or cleaning, wear rubber gloves. This protects your nails from harsh chemicals and excessive moisture, which can break down polish.
- Avoid “Matte Over Glossy”: While you can put glossy designs over a matte base, a matte top coat over a fully dried glossy polish usually just dulls the gloss without giving a true matte effect. It’s best to apply matte top coats directly over colored polish.
- Be Gentle: Try not to use your nails as tools. Avoid picking at things or scraping surfaces, as this can chip any manicure.
FAQ: Your Matte Nail Questions Answered
Q1: Can I make any nail polish color matte?
A1: Yes! The easiest way is to use a dedicated matte top coat over any of your regular nail polish colors. Just apply it after your color coats have dried.
Q2: How do I fix a smudge on my matte nails?
A2: Minor smudges can be tricky! For a quick fix, you might be able to gently smooth the area with a tiny bit of clear polish or carefully reapply a dot of your matte top coat. However, for best results, it’s often easier to clean the nail and reapply the color and matte top coat.
Q3: Do matte nails chip more easily than glossy nails?
A3: It really depends on the formula and application. Some people find matte finishes last just as well, or even better, because chips are less noticeable. Others find they need to be more careful during application. Sealing the tips and wearing gloves can help significantly.
Q4: What’s the difference between a matte top coat and a matte polish?
A4: A matte polish is colored polish that dries to a matte finish. A matte top coat is a clear polish that you apply over your colored polish to turn it matte. Using a matte top coat gives you the flexibility to make any of your existing polish colors matte!
Q5: How long does it typically take for matte top coats to dry?
A5: Matte top coats usually dry quite quickly to the touch, often within a couple of minutes. However, it’s crucial to let them fully cure (harden) for at least 10-15 minutes before resuming normal activity. Be extra careful in the first hour or so.
Q6: Can I put decals or nail stickers over matte polish?
A6: Absolutely! You can apply decals or stickers directly onto your dried matte polish. For extra protection and to seal them down, you can carefully apply a clear top coat over the decal, and then finish with your matte top coat around the decal to maintain the matte effect on the rest of the nail. Or, apply your matte top coat first, let it dry, and then apply decals and seal them with a thin layer of glossy top coat.
Conclusion: Embrace Your Chic Matte Manicure
See? Matte nails are incredibly chic, surprisingly easy to achieve, and wonderfully versatile. From the pure elegance of a single matte shade to creative designs incorporating different textures and finishes, there’s a matte mani for every mood and occasion. They offer a sophisticated alternative to the ever-popular glossy look, giving your hands a modern, refined touch.
Don’t be afraid to experiment! Grab that matte top coat, pick your favorite polish, and start creating. Whether you’re a seasoned nail art pro or just dipping your toes into nail design, matte nails are your perfect canvas for self-expression. You’ve got this! Enjoy rocking your fabulous, velvety-soft nails.