Mastering Matte Black and Gold Foil Nails: Your Easy Guide to Chic Manicures. Get stunning, sophisticated matte black nails instantly elevated with sparkling gold foil for a luxurious, modern look. This tutorial makes achieving this trendy design simple for any skill level.
Ready to transform your nails into a statement piece? Matte black and gold foil nails are the ultimate blend of chic sophistication and dazzling glamour. They’re perfect for adding a touch of luxury to any outfit, whether you’re heading to a special event or just want to feel fabulous every day. Thinking this sounds complicated? Don’t worry! We’re going to break down exactly how to create these stunning looks right at home. You’ll be surprised at how easy it is to achieve a salon-worthy manicure that turns heads.
This guide will walk you through everything, from essential tools to simple design ideas, making matte black and gold foil nail art accessible to everyone. Get ready to elevate your nail game!
Why Matte Black and Gold Foil Nail Art is a Must-Have
Matte black nail art with gold foil is more than just a trend; it’s a timeless combination that offers effortless elegance. The deep, velvety finish of matte black provides a sophisticated backdrop, while the shimmering gold foil adds a touch of opulence and intrigue. This pairing creates a striking contrast that’s both modern and classic, making it incredibly versatile. Whether you prefer minimalist accents or bold, artistic patterns, this duo can be adapted to suit your personal style.
This nail art style is incredibly popular because:
It’s chic and sophisticated: The matte finish exudes an understated luxury that’s always in vogue.
It’s versatile: It works for everyday wear, special occasions, and everything in between.
It’s impactful: The contrast between matte black and shiny gold is eye-catching.
It’s relatively easy to achieve: With the right techniques and supplies, beginners can create beautiful designs.
Essential Tools and Materials for Your Matte Black & Gold Foil Manicure
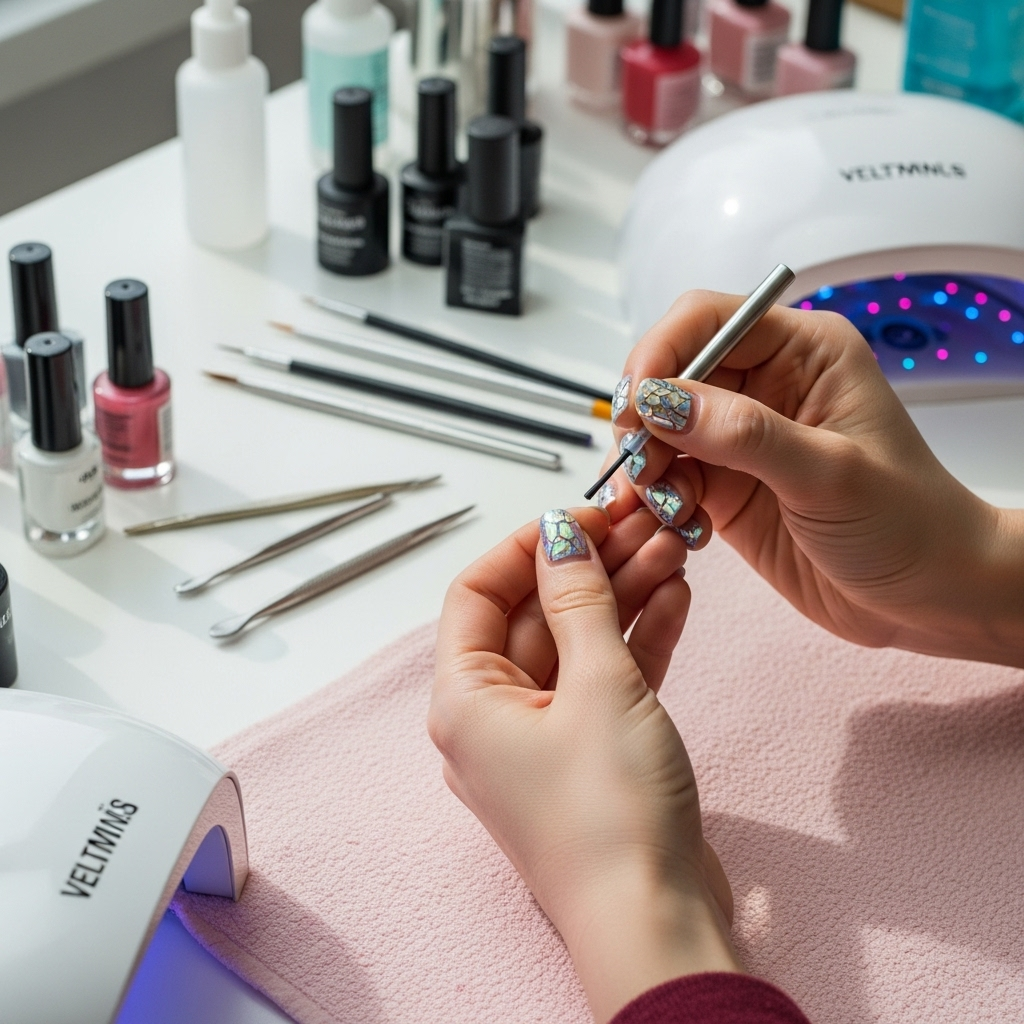
Before we dive into the fun part – creating designs – let’s gather everything you’ll need. Don’t be intimidated by a long list; most of these are standard nail supplies you might already have, or they are easily accessible.
Nail Preparation Essentials:
Nail File and Buffer: To shape your nails and smooth the surface.
Cuticle Pusher or Orange Stick: For gently pushing back cuticles.
Nail Polish Remover: To clean any residual oils from the nail plate.
Cotton Pads or Lint-Free Wipes: For applying remover.
The Stars of the Show:
Matte Black Nail Polish: A good quality, opaque matte black is key. You can also use a regular black polish and a matte top coat.
Gold Foil Flakes or Transfer Foil: These come in various shades of gold and are designed to adhere to polish. You can find them in small flakes for a diffused look, or sheets for larger accents.
Nail Glue or Foil Adhesive: This is crucial for sticking the gold foil onto the polish.
Application & Finishing Touches:
Base Coat: Protects your natural nails and helps polish adhere better.
Top Coat (Glossy and Matte): A glossy top coat is needed to adhere the foil, and a matte top coat will give you that desired velvety finish.
Small Brush or Applicator Tool: For placing foil precisely, a silicone tool or even tweezers can work.
Rubbing Alcohol (99% Isopropyl): This is a secret weapon for picking up and applying foil perfectly. You can purchase this at most drugstores.
Clean-Up Brush (Optional): A fine-tipped brush dipped in nail polish remover for cleaning up any mistakes around the cuticle.
Step-by-Step Guide: Creating Matte Black Nail Art with Gold Foil
Let’s get hands-on! Follow these simple steps to achieve a salon-quality matte black nail art with gold foil design.
Step 1: Prep Your Nails
Shape: File your nails to your desired shape. Consider a classic almond or a chic squoval.
Buff: Gently buff the surface of your nails to create a smooth canvas and remove any shine. This helps the polish adhere better.
Clean: Apply nail polish remover to a cotton pad and wipe each nail thoroughly to remove any dust or oils. Let your nails dry completely.
Step 2: Apply Base Coat and Black Polish
Base Coat: Apply one thin layer of your base coat and let it dry completely.
Black Polish: Apply two thin coats of your matte black nail polish (or regular black polish). Ensure each coat is fully dry before applying the next. For a truly opaque finish, a third coat might be needed for some polishes.
Step 3: The Magic of Gold Foil Application
This is where your main design will come to life! There are a few ways to apply the gold foil, each giving a slightly different effect. We’ll focus on the most popular and beginner-friendly methods.
Method 1: Using Foil Glue and Tweezers (for precise placement)
1. Apply Foil Glue: On the areas where you want the gold foil to stick, apply a thin layer of specialized nail glue or foil transfer adhesive. Let it dry until it becomes slightly tacky and translucent – this is crucial for the foil to adhere properly.
2. Place the Foil: Using tweezers, carefully pick up a piece of gold foil and gently press it onto the tacky glue.
3. Remove Excess: Once the foil is adhered, gently rub over it with your finger or a silicone tool to ensure it’s fully pressed down. Then, carefully peel away the excess foil backing. You should be left with a beautiful gold accent.
4. Repeat: Continue this process for all desired accent areas.
Method 2: Using a Glossy Top Coat and Rubbing Alcohol (for a diffused, textured look)
1. Apply Glossy Top Coat: Apply a thin layer of glossy top coat to the areas where you want the foil to adhere. This is the trick to making the foil stick temporarily. Don’t let it dry completely opaque; it needs to be a bit wet.
2. Press the Foil: Gently lay a piece of gold foil over the wet glossy top coat.
3. The Alcohol Trick: Lightly dab a piece of cotton pad soaked in 99% isopropyl alcohol over the foil. This helps to seal the foil to the glossy polish and makes the excess foil lift away cleanly.
4. Peel and Reveal: Gently peel away the foil backing. You should find bits of gold foil stuck to your nail where the glossy top coat was. This method creates a more scattered, marbled effect, which is very on-trend.
5. Seal (Optional but recommended): If you want to keep the texture and prevent snagging, you can apply a very thin layer of glossy top coat only over the gold foil areas. Let this dry.
Step 4: The Matte Finish
Apply Matte Top Coat: Once your gold foil is securely in place and completely dry, it’s time for the signature matte finish. Apply a generous layer of your matte top coat over your entire nail. Ensure full coverage to achieve that velvety look.
Let It Dry: Allow the matte top coat to dry completely. Avoid touching your nails until they are fully set to prevent smudging the matte finish.
Step 5: Clean Up (If Needed)
If you have any polish smudges around your cuticles or sidewalls, dip a fine-tipped brush into nail polish remover and gently trace around the edges of your nail to clean them up.
And voilà! You’ve created stunning matte black nail art with gold foil.
Stunning Design Ideas with Matte Black and Gold Foil
The beauty of matte black and gold foil lies in its versatility. You can go minimalist or bold, geometric or abstract. Here are some must-have designs to inspire your next manicure:
1. The Accent Nail Elegance
This is a fantastic starting point for beginners.
Design: Paint all nails with matte black polish. On just one accent nail (usually the ring finger), apply gold foil.
How to: Use Method 2 (glossy top coat + alcohol) for a diffused gold effect or Method 1 (foil glue) for a more targeted gold accent, like a half-moon at the cuticle or a stripe down the center.
Why it’s great: Subtle, chic, and incredibly easy to achieve. It adds just the right amount of sparkle.
2. Gold Foil French Tip
A sophisticated twist on the classic French manicure.
Design: Matte black base with a sharp gold foil tip.
How to: After applying your matte black base (Step 2), carefully apply foil glue or a fine line of glossy top coat along the free edge of your nail where you want the gold tip to be. Apply the gold foil, then remove the excess. Finish with the matte top coat.
Tip: For a cleaner line, you can use nail guides or stencils.
3. Geometric Gold Accents
Sharp lines and metallic shimmer create a modern, edgy look.
Design: Matte black base with geometric shapes or lines created with gold foil. Think triangles, half-moons, or clean stripes.
How to: Use Method 1 (foil glue) to apply precise geometric shapes. You can create abstract patterns by applying glue in lines or specific shapes and then pressing foil onto them.
Pro-Tip: Use a fine-tipped brush dipped in glue to draw thin, precise lines of gold.
4. Marble Swirls with Gold Highlights
Embrace the luxurious marble trend with a matte black and gold twist.
Design: A marbled effect using black and white (or grey) polish with veins of gold foil swirled throughout.
How to: This is a bit more advanced but achievable! After applying a base coat, create a marbled effect by swirling black and white polish on a stamper or a plastic bag, then pressing it onto your nail. While the design is still wet, gently press gold foil flakes into the wet polish in strategic spots. Once dry, apply your matte top coat.
Alternative: Create a solid matte black nail and then use Method 2 to strategically apply gold foil over areas where you’d want a “vein” of gold to appear, mimicking marble.
5. The Full Foil Fabulous
Go all out with full gold foil accent nails.
Design: One or two nails are completely covered in gold foil, set against matte black nails.
How to: Use Method 2, applying a generous amount of glossy top coat to the entire nail surface you want to cover. Press your gold foil sheet onto the wet top coat. Use the alcohol dabbing technique to ensure full transfer and clean removal of excess. Repeat with another piece of foil if needed to ensure full coverage. Finish with matte top coat on all nails.
Impact: This design makes a bold statement and is surprisingly easy to execute.
6. Speckled Gold Effect
A subtle yet intricate design that adds texture and shine.
Design: Matte black base with small, scattered pieces of gold foil all over.
How to: This is best achieved with Method 2. Simply apply glossy top coat to the desired nail(s) and then randomly press and dab gold foil flakes using the alcohol method across the entire nail. This creates a beautiful, starry or speckled effect.
Versatility: You can choose to do this on all nails or just an accent one.
Here’s a quick comparison of the methods for applying foil:
| Method | Best For | Technique | Difficulty | Result |
|---|---|---|---|---|
| Foil Glue & Tweezers | Precise shapes, lines, accents | Apply glue, let tackify, place foil | Beginner to Intermediate | Sharp, defined gold placement |
| Glossy Top Coat & Alcohol | Scattered flakes, marbled texture, full nail coverage | Apply glossy polish, press foil, dab with alcohol | Beginner | Textured, diffused, natural-looking gold |
Quick Tips for Flawless Matte Black & Gold Foil Nails
Achieving that perfect finish is all about technique and a few insider tips.
Use Good Quality Products: Investing in a good matte black polish and decent foil will make a huge difference.
Patience is Key: Let each layer dry properly, especially the black polish and the foil adhesive. Rushing will lead to smudges and peeling.
The Tacky Stage is Crucial: For both foil glue and glossy top coat methods, waiting for the right tacky stage is essential for proper adhesion. You want it sticky, but not wet.
Thin Layers are Best: Apply thin, even coats of all polishes and top coats to avoid bulkiness and ensure even drying.
Matte Top Coat Application: Apply your matte top coat in a smooth, even motion. Avoid going over it too many times once it starts to dry, as this can sometimes create streaks or unevenness.
Storage of Foil: Keep your gold foils in a dry place, ideally in their original packaging or a small sealed container, to prevent them from oxidizing or becoming brittle.
Experiment with Foil Types: Gold foil comes in many shades – from bright yellow-gold to antique antique gold, and even rose gold. Don’t be afraid to mix and match!
Maintaining Your Matte Black & Gold Foil Manicure
To keep your gorgeous nails looking their best for as long as possible, follow these simple maintenance tips:
Wear Gloves: Protect your nails when doing household chores like washing dishes or cleaning. Exposure to water and harsh chemicals can weaken the polish and cause it to lift.
Avoid Harsh Products: Steer clear of acetone-based nail polish removers if possible, as they can be drying and might affect the matte finish over time. Opt for non-acetone removers.
Moisturize Regularly: Keep your cuticles and hands hydrated by applying cuticle oil and hand cream daily. Healthy cuticles contribute to a chip-free polish edge.
Be Gentle: Avoid using your nails as tools, such as scraping or prying.
Quick Touch-Ups: If you notice a tiny chip or snag on an accent nail, you might be able to carefully reapply foil and top coat to that small area. However, often it’s best to address with a full repolish if significant damage occurs.
Frequently Asked Questions about Matte Black and Gold Foil Nails
Here are some common questions beginners have about this nail art style.
Q1: Can I use regular gold glitter polish instead of foil?
A: While gold glitter polish can add sparkle, it won’t achieve the same metallic, leaf-like effect as genuine gold foil. Foil provides a unique shine and texture that glitter polish can’t replicate.
Q2: How long does matte black nail art with gold foil usually last?
A: With proper application and care, a high-quality matte black nail art with gold foil manicure can last anywhere from 5 to 10 days. The longevity depends on your nail type, how active your hands are, and the quality of the products used.
Q3: Is it difficult to apply gold foil myself at home?
A: Not at all! As shown in the step-by-step guide, with a little practice, applying gold foil yourself is quite achievable, especially with the glossy top coat and alcohol method for a diffused effect.
Q4: Do I need a special matte black polish, or can I use a matte top coat?
A: You don’t necessarily need a special matte black polish. You can achieve the same look by applying two coats of your favorite regular black polish and then finishing with a good matte top coat. This often gives you more control over the shade of black.
Q5: What if my gold foil doesn’t stick properly?
A: This usually happens if the adhesive layer (foil glue or glossy top coat) wasn’t tacky enough, or if it was too wet. Ensure you wait for the perfect tacky stage before applying the foil. If using the alcohol method, make sure you’re using 99% isopropyl alcohol and dabbing gently.
Q6: Can I put a regular (shiny) top coat over the gold foil?
A: Yes, you can! If you’re using foil glue for precise placement and want to seal and protect it with a shiny finish, apply a glossy top coat. However, for the signature matte look, a matte top coat is essential. If you apply a glossy top coat first to adhere the foil, you’ll then cover everything with a matte top coat for the final finish.
Q7: Where can I buy good quality nail foil and adhesive?
A: You can find nail foil and dedicated foil adhesives at most beauty supply stores, drugstores with a good beauty section, and online retailers like Amazon, Etsy, or specialized nail supply websites. Look for reputable brands for the best results.
Conclusion
You’ve officially unlocked the secret to creating stunning matte black nail art with gold foil designs! From understanding the essential tools to mastering application techniques, you’re now equipped to create chic, sophisticated manicures that will make your nails the star of the show. Remember, nail art is all about self-expression and having fun. Don’t be afraid to experiment with different foil placements, shapes, and combinations.
Matte black and gold foil offer a timeless elegance that’s surprisingly easy to achieve. Whether you opt for a subtle accent nail or a bold geometric design, this stunning pairing is sure to elevate your style. So, gather your supplies, follow these steps, and get ready to wow yourself and everyone around you with your beautiful new nails. Happy polishing!


