Get gorgeous marble aura nails easily! This trend combines the classic elegance of marble with the dreamy, diffused colors of an aura effect. You can achieve this stunning look at home with simple steps and everyday tools.
Ever scroll through your feed and see those ethereal, swirled nails that look like captured clouds or precious gemstones? We’re talking about marble nails, but with a dreamy, colorful twist! These “marble aura” nails have taken over, and they might seem super intricate to recreate. But guess what? You absolutely can nail this look yourself, even if you’re just starting your nail art journey. Forget complicated techniques.
We’re going to break down how to get those chic, marbled effects with a soft, blended aura that looks totally high-end. Ready to transform your fingertips into wearable art? Let’s dive into the easy-to-follow steps for achieving beautiful marble aura nails that will have everyone asking where you got them done!
What Exactly Are Marble Aura Nails?
Marble aura nails are a fusion of two of the most popular nail art trends: classic marble and the “aura” effect. Traditional marble nails mimic the veining and patterns found in natural marble stone, usually with black and white or monochromatic shades. The aura effect involves a gradient or diffused color that seems to glow from the center of the nail, often created with an airbrush or sponging technique.
Marble aura nails blend these two concepts. Think of the elegant, swirling patterns of marble, but instead of sharp lines, imagine those swirls are softened and infused with the vibrant, diffused colors of an aura. This creates a multi-dimensional, almost holographic look that is both sophisticated and playful. The base is often a sheer or milky white, which allows the marbled colors and aura effect to truly pop.
Why Are Marble Aura Nails So Popular?
These nails are a hit for several reasons. Firstly, they offer a unique twist on a classic. Marble is timeless, and the aura effect adds a modern, trendy dimension. They’re incredibly versatile, suitable for everyday wear or special occasions, and can be customized to match any outfit or mood.
The beauty of marble aura nails lies in their organic, imperfect nature. Each nail is truly one-of-a-kind, making your manicure a personal work of art. Plus, the aesthetic often leans towards soft, dreamy color palettes, which are incredibly appealing and soothing. They give off a vibe of effortless elegance and a touch of mystic charm.
Your Essential Toolkit for Marble Aura Nails
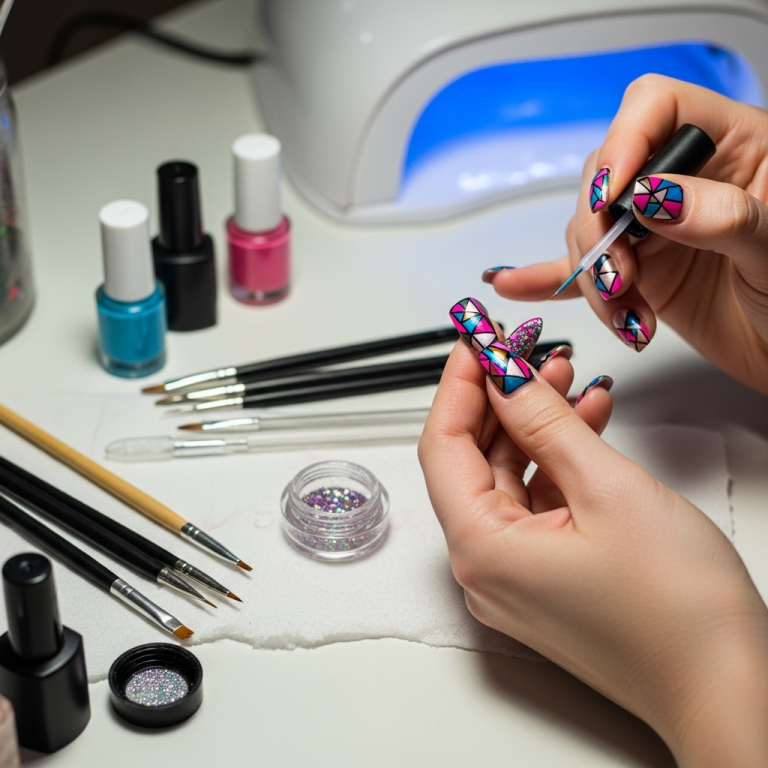
Don’t worry, you don’t need a professional salon setup to create this look! Here’s a list of what you’ll need. Most of these are standard nail art items you might already have or can easily find at your local drugstore or online.
Must-Have Tools and Supplies:
- Base Coat: To protect your natural nails and help polish adhere better.
- Top Coat: For a glossy finish and to seal your design.
- Sheer White or Milky Base Polish: This creates the perfect canvas for your marble effect.
- Assortment of Colored Polishes: Choose 2-4 colors that complement each other for the marble and aura effects. Think pastel pinks, blues, purples, or even some metallic shades.
- Thin Nail Art Brush or Toothpick: For creating the delicate marble veins.
- Makeup Sponge (Cosmetic Sponge or Latex-Free Sponges): A small piece is perfect for dabbing on the aura colors. You can find these at beauty stores.
- Rubbing Alcohol (Isopropyl Alcohol) or Nail Polish Remover: Essential for cleaning brushes and for certain marble techniques.
- Clean-up Brush: A small, flat brush (like a lip brush or a dedicated nail clean-up brush) for tidying up edges.
- Orange Stick or Cuticle Pusher: For cleaning up excess polish around the cuticles.
- Optional: UV/LED Lamp and Gel Polishes: If you prefer gel polish for longer wear, you’ll need these.
Step-by-Step Guide: Achieving Your Marble Aura Nails
Let’s get started! This tutorial focuses on a beginner-friendly method using regular nail polish. If you’re using gel polish, follow similar steps but cure each layer under your lamp as instructed.
Prep is Key
Start with clean, dry nails. Push back your cuticles gently using an orange stick or cuticle pusher. If you need to, lightly buff your nails to create a smooth surface. Apply a thin layer of your base coat. Let it dry completely.
The Milky Base
Apply 1-2 thin coats of your sheer white or milky base polish. This isn’t meant to be perfectly opaque; a slightly sheer finish adds to the ethereal look. Allow each coat to dry thoroughly. This is your canvas.
Creating the Aura Effect
This is where the magic starts! Take a small piece of your makeup sponge. Apply a tiny dot of each of your chosen aura colors (e.g., soft pink, peach, lilac) directly onto the sponge. Gently dab the sponge onto the center of your nail, pressing lightly. The idea is to deposit color gradually, creating a diffused, gradient effect. You can layer colors sparingly to build intensity. Don’t worry about perfect edges; this effect is all about softness.
Pro Tip: If you apply too much color or the sponging looks too harsh, gently dab over the area with a clean section of the sponge or a little bit of your milky base polish to blend it out.
Marbling the Effect
Now for the marble! Dip your thin nail art brush or a toothpick into one of your chosen marble colors (often a contrasting shade like white, black, or a metallic). Gently draw thin, wispy lines and swirls over the aura-effect base. You can also add tiny dots and connect them with your lines.
Before the polish dries, use your clean-up brush lightly dampened with rubbing alcohol (or nail polish remover) or a toothpick to softly blend and swirl the lines. The key here is to be delicate. You’re not trying to create sharp, defined veins, but rather soft, flowing patterns that integrate with the aura colors underneath.
Watch the Flow: Think about how veins appear in natural marble. They are often irregular, branching, and varied in thickness. Experiment with different line patterns. Don’t aim for symmetry; nature isn’t perfectly symmetrical!
Refining the Marble
If needed, you can add more fine lines with your brush or toothpick in a contrasting color to enhance the marble look. Again, use your damp brush or toothpick to gently blur and blend these new lines into the design without overworking it.
Sealing the Look
Once you’re happy with your marble aura design and it has dried completely, apply a thick, generous layer of your top coat. This is crucial for smoothing out any texture from the sponging and lines, making the design look cohesive and professional. Ensure you cap the free edge of your nail by running the brush along the tip. Let the top coat dry thoroughly.
Clean-Up
Use your clean-up brush dipped in a little nail polish remover to carefully clean up any polish that might have gotten onto your skin or cuticles. This will make your manicure look super neat and tidy.
Variations to Elevate Your Marble Aura Nails
Ready to get even more creative? Here are some fun ways to switch up the marble aura nail trend:
- Color Play: Instead of pastels, try jewel tones like emerald green, sapphire blue, and ruby red for a more dramatic effect. Or go for metallics like rose gold and silver for extra glam.
- Ombre Marble: Blend your aura colors in a more pronounced ombre, transitioning from one shade to another, and then add your marble veins.
- Glitter Infusion: Add a layer of sheer glitter polish over the dried marble design before your top coat for a sparkling finish.
- French Tip Aura: Apply the marble aura effect to the tips of your nails in a French manicure style.
- Accent Nail Focus: Choose one or two accent nails for the marble aura effect and keep the others a solid complementary color or a sheer nude for a balanced look.
Marble Aura Nails vs. Traditional Marble Nails
While related, marble aura nails offer a distinct aesthetic. Understanding the differences can help you achieve the exact look you desire.
| Feature | Traditional Marble Nails | Marble Aura Nails |
|---|---|---|
| Color Palette | Typically monochromatic or high-contrast (black/white, navy/white, grey/white, gold/white). | Can be monochromatic but often features softer, blended colors (pinks, purples, blues, peaches) with diffused gradients, often mimicking natural stone with a colorful twist. |
| Veining Technique | Sharp, defined lines and swirls are common to mimic stone. | Softer, more blended lines that integrate with an underlying aura/gradient effect. The lines are less about sharp definition and more about flow. |
| Base Color | Often a solid opaque base (white, black, or nude). | Usually a sheer or milky white, nude, or very pale pastel to allow aura colors and veins to blend beautifully. |
| Overall Effect | Classic, elegant, sophisticated, often bold. | Ethereal, dreamy, soft, multi-dimensional, contemporary. |
| Application Complexity | Can be simple with water marble techniques or more detailed with freehand painting. | Involves layering techniques (sponging for aura, painting/swirling for marble) which can be more intricate but are achievable with practice. |
Tips for Longevity and Maintenance
To keep your stunning marble aura nails looking fresh for as long as possible, follow these simple tips:
- Gel Polish Choice: If longevity is your top priority, consider using gel polishes and curing them under a UV/LED lamp. Gel manicures typically last 2-3 weeks without chipping.
- Reapply Top Coat: Every few days, you can add another thin layer of top coat to help maintain the shine and protect the design.
- Wear Gloves: When doing household chores, washing dishes, or gardening, wear rubber gloves. Harsh chemicals and prolonged water exposure can weaken polish and cause chipping.
- Avoid Harsh Chemicals: Even with regular polish, contact with acetone-based removers and strong cleaning agents can dull the finish.
- Moisturize: Keep your cuticles and hands moisturized with cuticle oil and hand cream. Healthy nails and skin make any manicure look better. For more on nail health, check out resources from the American Academy of Dermatology which offers great advice.
Frequently Asked Questions About Marble Aura Nails
Q1: Can I do marble aura nails with regular nail polish?
Absolutely! The method described in this guide uses regular nail polish and is perfectly achievable for beginners. You might need patience for drying times between layers.
Q2: How do I get the diffused “aura” effect if I don’t have a makeup sponge?
You can use a small piece of a regular household sponge (the soft, non-abrasive kind) or even a cotton ball. For a more controlled effect, you can try dabbing polish onto a palette and then gently pressing your chosen tool into the polish before dabbing it onto the nail. Some advanced artists even use a clear polish and a fluffy brush to softly blend colors, but sponging is the easiest for beginners.
Q3: My marble lines are too thick. How can I make them thinner?
Use a much finer nail art brush or a sharpened toothpick. Dip just the very tip into the polish and draw your lines very lightly. If they turn out too thick, use a clean-up brush dipped in nail polish remover to gently erase and refine the line while the polish is still wet.
Q4: How do I prevent the colors from looking muddy when I marble?
The trick is to work quickly and sparingly. Apply your aura colors and let them set slightly (they don’t need to be bone dry). Then, add your marble lines. Use minimal swirling and blending with your clean-up brush or toothpick. Don’t overwork the polish; too much mixing will turn the colors into a mess. Less is often more!
Q5: Can I achieve this look without a sheer white base?
You can try it on a clear or nude base, but a sheer white or milky polish provides the best canvas for the aura colors to appear vibrant and diffused, and for the marble veins to stand out without looking too harsh. It mimics the translucent quality of real marble.
Q6: How long does it take to do a set of marble aura nails?
For beginners, expect to take anywhere from 45 minutes to 1.5 hours per hand, depending on your speed and how intricate you make the designs. As you practice, you’ll likely get faster!
Conclusion
There you have it! Achieving stunning marble aura nails is totally within your reach. By combining the dreamy, diffused colors of the aura effect with the classic elegance of marble patterns, you create a manicure that’s both on-trend and uniquely yours. Remember, practice makes perfect, and even imperfect swirls can look incredibly chic.
Don’t be afraid to experiment with different color palettes and techniques. Whether you’reopting for soft pastels or bold jewel tones, these nails are sure to turn heads. So grab your polishes, your sponge, and your favorite thin brush, and get ready to create your own wearable masterpiece. Happy nailing!

