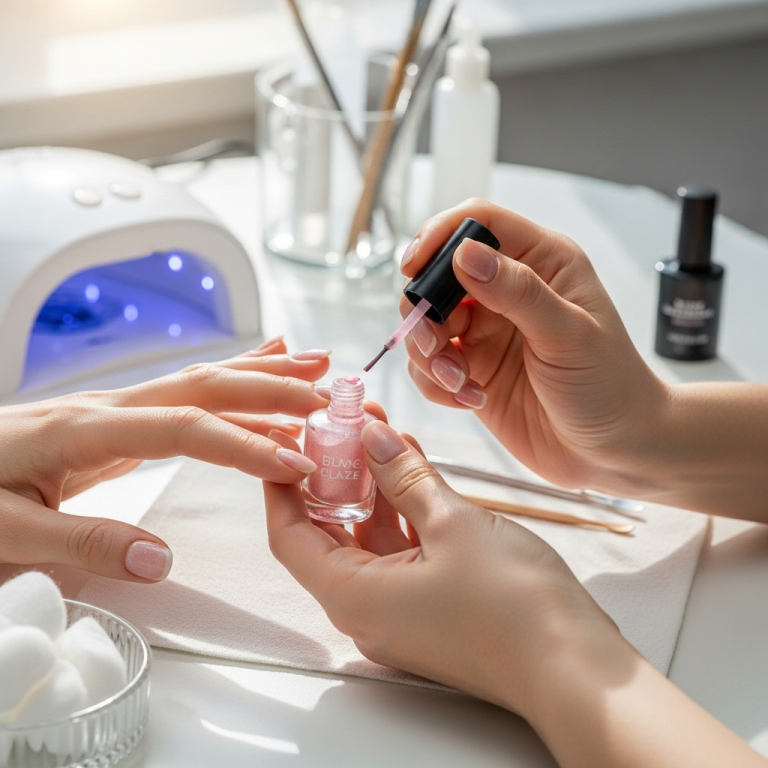
Looking for stunning and essential manicure nail designs? Learn easy DIY techniques for classic looks, trendy patterns, and simple accents. Discover beginner-friendly tips, essential tools, and how to achieve salon-worthy nails at home. Elevate your style with beautiful, achievable nail art that expresses your personality.
Hello there, nail lovers! Are you ready to transform your fingertips from simply polished to absolutely stunning? Sometimes, just a solid color feels a little… ordinary. You see those gorgeous nail designs online or in salons and think, “I could never do that!” Well, I’m here to tell you that you absolutely can! Creating beautiful manicure nail designs is easier than you might think, and it’s a fantastic way to express your personal style.
It can be frustrating when your nails are a blank canvas and you’re unsure where to start. Fret not! This guide is crafted just for you, whether you’re a complete beginner or looking to step up your nail art game. We’ll break down everything from picking the right tools to mastering simple yet impactful designs. Get ready to unleash your inner nail artist!
We’ll cover everything you need to know to jumpstart your nail design journey. Let’s dive into the world of fabulous manicures!
Frequently Asked Questions about Nail Designs
What are the easiest manicure nail designs for beginners?
The simplest designs often involve minimal steps and tools. Think solid colors with a single accent nail (like glitter or a different shade), simple dots using a dotting tool or pen tip, or a basic French tip using guides. Even a clean, well-done solid color is a beautiful design in itself!
What are the essential tools for basic nail art?
For beginners, a few key tools can make a big difference: a good quality nail file, a cuticle pusher, a base coat, a top coat, a few polishes in colors you love, and a fine-tipped nail art brush or a dotting tool. You can find great beginner kits online or at beauty supply stores.
How can I make my nail designs last longer?
Proper prep is key! Start with clean, dry nails. Use a base coat to protect your nails and help polish adhere. Apply thin coats of polish, allowing each to dry slightly before the next. Finish with a good quality top coat and reapply it every few days. Avoid exposing your nails to harsh chemicals or excessive water without gloves.
Can I achieve nail salon looks at home?
Absolutely! With practice and the right techniques, you can achieve beautiful salon-quality looks. Start with simpler designs and gradually experiment with more complex patterns. Patience and attention to detail are your best friends here.
What’s the difference between a gel manicure and a regular polish manicure?
Regular polish air dries and is flexible but might chip more easily and doesn’t last as long as gel. Gel polish is cured under a UV or LED lamp, creating a hard, durable finish that can last for weeks without chipping. Gel application and removal are also a bit more involved.
How do I clean up my nail polish mistakes?
A small brush (like an old lip brush) dipped in nail polish remover is your secret weapon! Gently go around the edges of your nail to clean up any stray polish. Cotton swabs can also work, but the brush often gives you more control.
Your Quick Guide to Stunning Manicure Nail Designs
Ready to make your nails the envy of everyone? Let’s explore some essential manicure nail designs that are perfect for beginners and beautiful on everyone. We’ll cover classic looks, easy patterns, and how to add that special touch that makes your nails pop. It’s all about having fun and letting your creativity shine!
1. The Timeless Elegance of Solid Colors and Accents
Sometimes, the most sophisticated look is the simplest. A perfectly applied solid color can be incredibly chic. But why stop there when a little accent nail can elevate it to a whole new level?
Solid Color Perfection
A flawless solid color manicure is the foundation of any great nail look. It’s clean, polished, and always in style. The key is meticulous application:
- Prep is Paramount: Start with clean, dry nails. Push back your cuticles and gently buff any ridges.
- Base Coat Rule: Always apply a clear base coat. This prevents staining (especially with darker polishes) and creates a smooth surface for your color.
- Thin, Even Coats: Apply your colored polish in 2-3 thin coats. Let each coat dry for a minute or two between applications. Thick coats lead to smudging and unevenness.
- The “Three-Stroke” Method: Start with a stroke down the center of the nail, then one on each side. This ensures even coverage without flooding your cuticles.
- Clean Up Crew: Use a small brush dipped in nail polish remover to clean up any polish that gets on your skin.
- Seal the Deal: A generous swipe of a good quality top coat will give your manicure a glossy finish and protect it from chipping.
The Accent Nail Magic
This is where basic gets beautiful! An accent nail is simply one nail (usually the ring finger) that has a different color, finish, or design. It adds visual interest without being overwhelming.
- Color Pop: Paint all nails one color, and your accent nail a contrasting or complementary shade. Think a classic red with a gold accent, or a deep navy with a silver accent.
- Glitter Glam: Paint all nails a solid color and make your accent nail a full glitter coat. It’s an instant party!
- Texture Play: Use a matte top coat on all nails and a glossy top coat on your accent nail, or vice versa.
- Subtle Shine: Apply a nude polish to all nails and a pearly or shimmery polish to your accent nail for a sophisticated glow.
Essential Tools for Solids and Accents
You don’t need much to master these looks:
- Nail file
- Cuticle pusher
- Base coat
- Colored polishes (2-3 shades for accent looks)
- A good quality top coat
- Optional: A fine-tipped cleanup brush
2. Easy-Peasy Patterns: Dots and Lines
Ready to add a touch of artistic flair? Dots and lines are your best friends for creating simple yet incredibly chic manicure nail designs. They look much more complicated than they actually are!
Dot Designs for Days
Polka dots are a classic for a reason! They’re playful, customizable, and surprisingly easy to create.
- The Tool: A dotting tool is ideal, but the round tip of a bobby pin, a ballpoint pen, or even a toothpick can work in a pinch.
- How-To: Dip your dotting tool into a small pool of polish. Gently touch the tip of the tool to your nail to create a dot. Repeat, re-dipping as needed.
- Placement Ideas:
- Classic Grid: Evenly spaced dots in rows.
- Random Scatter: Place dots at varying sizes and intervals for a more organic look.
- Gradient Dots: Start with large dots and transition to smaller dots, or vice versa.
- French Tips with Dots: Add a few small dots along the white tip of a French manicure.
- Tip: For the neatest dots, it’s often better to create slightly smaller, more consistent dots using a dedicated tool.
Effortless Lines and Stripes
Lines can add a modern, graphic touch to your nails. They’re fantastic for elongating the nail and creating a sleek look.
- The Tool: A fine-tipped nail art brush is your best bet. You can also find striping tape for super-straight lines.
- How-To (Freehand): Load your brush with a small amount of polish. Gently draw your lines across the nail. Practice on a piece of paper first!
- How-To (Striping Tape): Apply your base color and let it dry completely. Carefully place strips of nail art tape onto the nail, pressing down the edges to prevent polish bleeding. Paint over the tape. Once the polish is nearly dry (but not fully hardened), carefully peel off the tape to reveal clean lines.
- Line Ideas:
- Vertical Stripes: Draw one or more lines running from cuticle to tip.
- Horizontal Stripes: Lines across the nail. Try different widths!
- Diagonal Lines: Create a chic V-shape or parallel diagonal lines.
- Geometric Shapes: Combine lines to form triangles or squares.
Tools for Patterns
- Dotting tools (various sizes)
- Fine-tipped nail art brushes
- Nail art striping tape
- A reliable top coat
- Good quality polishes in complementary colors
3. Exploring Trendy Looks and Finishes
The nail world is always evolving! Keeping up with trends doesn’t mean you have to be a pro. Many modern looks are surprisingly easy to achieve with the right products and a little guidance.
The Allure of Matte
Matte nails have a sophisticated, velvety finish that’s a welcome change from high gloss. They can make any color look instantly more modern and chic.
- How to Get It: You have two main options:
- Matte Top Coat: This is the easiest way! Apply it just like a regular top coat over any dried polish.
- Matte Polish: Some polishes are formulated to dry with a matte finish.
- Design Ideas: Use a matte top coat over a glossy color (or vice versa!) for a subtle contrast. Combine matte and glossy finishes on different accent nails, or create designs with matte polish on a glossy base.
Metallic and Chrome Magic
These finishes are all about high impact. Metallic polishes offer a beautiful sheen, while chrome powder creates a mirror-like, futuristic effect.
- Metallic Polishes: Available in shades like gold, silver, rose gold, and even vibrant colors. They apply much like regular polish.
- Chrome Powder: This is where application gets a bit more specialized. You’ll typically need a no-wipe gel top coat as a base, then rub the chrome powder onto the cured gel. A final clear top coat (or gel top coat) is applied to seal it. There are even “water marble” style chromes that you can use with regular polish, but they require a specific technique. For a beginner-friendly way to try chrome, look for polishes that mimic the effect. Reputable brands like OPI often offer metallic-finish polishes.
- Design Ideas: Full metallic nails, metallic French tips, or subtle chrome accents.
Simple Stamping Designs
Nail stamping uses metal plates with etched designs and a special stamper to transfer patterns onto your nails. It’s a fantastic way to achieve intricate designs with ease.
- What You Need: Stamping plates, stamper, scraper, and a good, opaque stamping polish (regular polish can sometimes work, but stamping polish is usually pigment-rich and quick-drying).
- How it Works: Apply polish to the etched design on the plate, scrape off the excess quickly, then use the stamper to pick up the design. Immediately roll the stamper onto your nail. Seal with a top coat.
- Tips: Practice makes perfect! Keep your tools clean and work quickly. Avoid getting polish on the edges of the plate for cleaner transfers.
Tools for Trendy Finishes
- Matte top coat
- Metallic or chrome-finish polishes
- Nail stamping plates and stamper (optional, for advanced trend exploration)
- A good quality gel top coat (if experimenting with gel-based chrome)
Advanced Beginner Tips for Nail Art Success
You’ve got the basic designs down, and you’re ready to refine your technique. These tips will help you achieve those salon-worthy results and expand your creative horizons.
Nail Prep is Non-Negotiable
This cannot be stressed enough! The longevity and appearance of your manicure, especially intricate designs, depend heavily on proper preparation.
- Clean Slate: Always start with thoroughly cleaned nails. Remove all old polish.
- Shape Up: File your nails to your desired shape. Ensure all nails are even. For consistency in nail art, slightly longer nails can offer more canvas space.
- Cuticle Care: Gently push back cuticles. For dry cuticles, a good cuticle oil and moisturizer can work wonders. Avoid cutting your cuticles if you’re a beginner, as this can lead to infection risk.
- Buffing Gently: A light buff can smooth out ridges and create a slightly textured surface for polish to adhere to. Don’t over-buff, as this can weaken the nail. A fine-grit buffer is best.
Understanding Your Tools
Having the right tools makes all the difference. Here’s a quick rundown:
| Tool | Purpose | Beginner Friendly? |
|---|---|---|
| Dotting Tools | Creating uniform dots, swirls, and small details. | Yes! Easy to use. |
| Fine-Tipped Nail Art Brush | Drawing lines, creating textures, and detailed designs. | Yes, with practice. |
| Striping Tape | Creating perfectly straight lines and geometric patterns. | Yes! Very forgiving. |
| Stamping Plates & Stamper | Transferring intricate, pre-designed patterns. | Moderately (requires technique). |
| Gel Polish & Lamp | For a long-lasting, chip-resistant finish that requires curing. | Moderately (requires specific application/removal). |
| Regular Polish | Basic colors and finishes that air dry. | Yes! |
Polish Consistency Matters
The thickness of your polish impacts application. If your polish is too thick and goopy, it’s harder to control. If it’s too thin, it might be streaky. Most polishes are good as is, but avoid adding thinner too often, as it can change the formula. If a polish is old and has thickened significantly, it might be time to replace it.
The Power of Practice and Patience
Nobody creates a masterpiece on their first try! Don’t get discouraged if a design doesn’t turn out perfectly the first time. Treat it as a learning experience.
- Practice Surface: Use paper or even plastic wrap to practice designs before applying them to your nails.
- Start Simple: Master dots and lines before attempting complex floral patterns or portraits.
- Break it Down: Separate complex designs into smaller, manageable steps. For example, do all the base colors one day, and the design elements the next.
Seal It With a Top Coat
This is your final protective layer. A good top coat adds shine, prevents chipping, and can smooth out slightly uneven textures from your nail art. For designs involving glitter or texture, a slightly thicker top coat can help create a smooth surface.
DIY Nail Designs for Every Occasion
From everyday chic to special events, your nails can be the perfect accessory. Let’s look at some ideas that are easy to recreate at home.
Everyday Essentials
For work or casual outings, you want something stylish but understated.
- Subtle Gradient: Using a sponge, blend 2-3 complementary colors (like soft pinks and nudes) for a gentle sunrise effect.
- Minimalist Lines: A single, thin metallic line across the base or tip of a nude nail.
- Half Moon Manicure: Paint the bottom half of your nail in one color and the top half in another. You can even use tape to create a clean line.
- Tiny Dots: A few strategically placed tiny dots on one or two nails.
Weekend Vibes
Time to have a little more fun and express your personality!
- Bold Polka Dots: Use bright colors for your dots on a neutral background.
- Glitter Accent: All nails a solid color, with one nail fully covered in dazzling glitter.
- Two-Tone Tips: Instead of white French tips, try a vibrant color or a metallic shade.
- Marble Effect: A simplified water marble or a freehand painted marble pattern.
Special Occasions & Holidays
Amp up the glamour for parties, holidays, or just because!
- Glitter Ombre: Start with solid color at the cuticle and gradually blend glitter towards the tip.
- Festive Glitter Art: Use glitter polish to create shapes or patterns relevant to the occasion (e.g., stars for New Year’s, heart shapes for Valentine’s).
- Jewel Tones with Metallic Accents: Deep, rich colors like emerald, sapphire, or ruby paired with gold or silver details.
- Sophisticated Stamps: Use delicate floral or geometric stamping patterns for an elegant touch. Consider brands like Moyou London for a wide variety of plate designs.
Common Mistakes to Avoid
Even seasoned nail artists run into hiccups! Here are a few common pitfalls and how to sidestep them:
- Skipping the Base Coat: This is crucial! It protects your natural nail and ensures a smoother canvas for your polish.
- Applying Polish Too Thickly: Multiple thin coats are always better than one thick, gloppy coat. They dry faster and more evenly.
- Not Letting Polish Dry Enough: Rushing between coats or applying a top coat too soon is a recipe for smudges and dents.
- Flooding the Cuticles: Getting polish onto your skin makes for a messy look. Clean it up immediately with your cleanup brush.
- Using Old, Thick Polish: It drags, it streaks, and it just won’t apply smoothly.
- Forgetting the Top Coat: This is the seal of protection for your beautiful design!
Bringing It All Together: Confidence, Creativity, and Your Best Nails Yet!
See? Creating stunning manicure nail designs is well within your reach! We’ve journeyed from the simple elegance of solid colors and accent nails to the playful artistry of dots and lines, and even touched upon trendy metallic finishes. Remember, the most important tools you have are your creativity and a willingness to experiment.
Don’t be afraid to try different color combinations, play with textures, and explore new techniques. Each manicure is an opportunity to refresh your look and express your unique personality. Whether you’re perfecting your steady hand for a line design or discovering your favorite glitter shade, the process itself is a form of self-care and a creative outlet.
So go ahead, grab those polishes, lay down that base coat, and start creating. Embrace the journey, celebrate your successes (and learn from any smudges!), and enjoy the beautiful results. Your nails are a fantastic canvas for self-expression, and with these essential looks and tips, you’re ready to make them shine. Happy polishing!

