Quick Summary
Unlock the magic of manga nail designs with these essential, effortless tips and techniques! Perfect for beginners, you’ll learn how to create adorable anime-inspired looks that express your unique style, all with simple steps and everyday tools. Get ready to make your nails pop with color and charm!
Manga Nail Designs: Your Essential Guide to Effortless Anime-Inspired Looks
Ever look at your nails and wish they had a little more… spark? Maybe a touch of cute, a dash of bold, or a splash of your favorite anime character? You’re not alone! Many of us love manga and anime, and bringing that vibrant world to our fingertips can seem like a dream. The good news? It’s totally achievable, even if you’re new to nail art. We’re here to show you how to create stunning manga nail designs without any fuss or frustration. Get ready to express your inner artist and make your nails a canvas for your passions!
Why Manga Nail Designs Are All the Rage
Manga and anime have captured hearts worldwide with their unique art styles, captivating stories, and unforgettable characters. It’s no wonder that fans want to incorporate this passion into every part of their lives, and nails are the perfect portable canvas! Manga nail designs allow you to:
- Express Your Fandom: Show off your love for specific characters, series, or even classic manga tropes.
- Add a Pop of Personality: Inject fun, creativity, and a unique flair into your everyday look.
- Experiment with Color and Style: Dive into bold colors, graphic lines, and adorable imagery.
- Boost Your Confidence: Rocking a design that speaks to you is a fantastic confidence booster!
But let’s be honest, trying new nail art can feel intimidating. You might worry about having the right tools, the skill, or the time. That’s where this guide comes in! We’re focusing on essential and effortless manga nail designs, making it super simple for anyone to try.
The Absolute Essentials: Tools for Your Manga Nail Art Journey
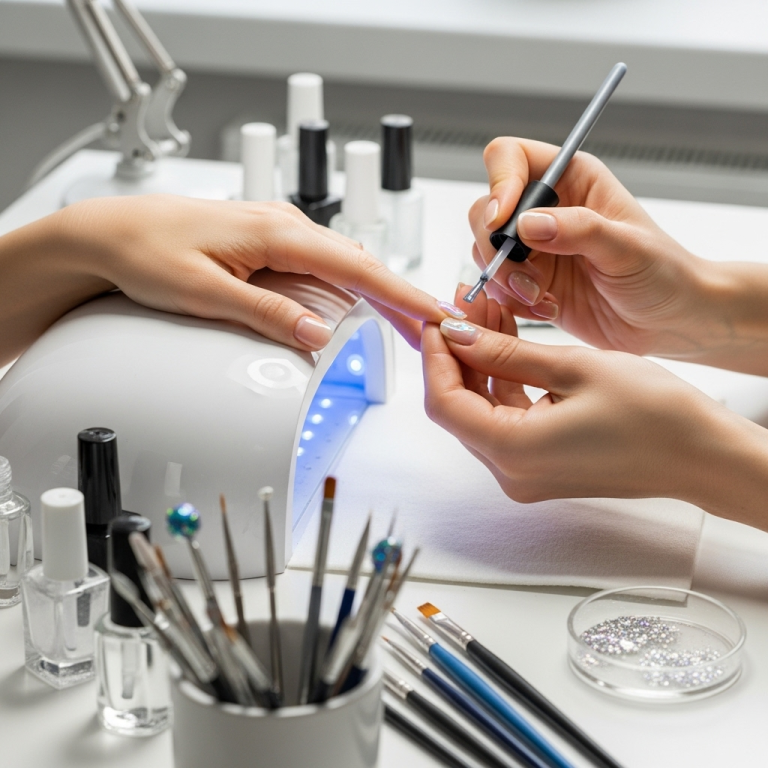
You don’t need a professional salon’s worth of equipment to create amazing manga nail designs. Here are the must-haves that will get you styling:
Nail Prep Powerhouses
- Nail File & Buffer: For shaping your nails and creating a smooth surface. A good buffer (usually with multiple sides) can make a huge difference in polish adhesion and finish.
- Cuticle Pusher/Orange Stick: Gently pushing back cuticles makes your nail bed look longer and cleaner, providing a better backdrop for your art.
- Base Coat: This is crucial! It protects your natural nail from staining and helps your polish and art last longer.
- Top Coat: Seals your design, adds shine, and prevents chipping. A quick-dry top coat is a lifesaver for busy bees!
Color & Creation Tools
- Nail Polish in Your Chosen Colors: Think vibrant hues, classic black and white, and maybe some shimmery shades.
- Thin Detail Brushes: These are your best friends for drawing fine lines, small details, and tiny shapes. You can find them at most beauty supply stores or online. Look for ones with very fine, pointed tips.
- Dotting Tools: Perfect for creating polka dots, small circles, and adding accents. They come in various tip sizes.
- Dotting Tool Alternative: Don’t have a dotting tool? A regular bobby pin tip or a toothpick can work in a pinch for small dots!
- Striping Tape (Optional): Great for creating clean, sharp lines and geometric patterns.
- Stencils or Stickers (Optional): If you’re just starting, these can be a fantastic way to get professional-looking results with minimal effort.
Clean-Up Crew
- Rubbing Alcohol or Nail Polish Remover: For cleaning brushes and correcting small mistakes.
- Small, Stiff Brush (like an old makeup brush): Dipped in remover, this is brilliant for cleaning up polish around your cuticles.
Remember, you can build your nail art toolkit over time. Start with the basics and add more specialized tools as you get more comfortable and adventurous!
Effortless Manga Nail Design Ideas for Beginners
Ready to dive into the fun part? Here are some super easy yet totally chic manga-inspired designs you can do at home:
1. Classic Black & White Manga Lines
This design is inspired by the iconic linework found in many manga panels. It’s minimalist but super effective!
How to Create:
- Prep: Start with a clean, filed nail. Apply your base coat and let it dry completely.
- Base Color: Apply one or two thin coats of a solid color. White, a pastel shade, or even a nude works beautifully. Let it dry thoroughly.
- Draw the Lines: Using a very thin detail brush and black nail polish (or white polish on a dark base), draw simple lines. Think abstract scribbles, thick outlines around your nail edge, or a few bold strokes. You can even try replicating a simple speech bubble shape!
- Add Shine: Once dry, seal your design with a good top coat.
Pro Tip: Don’t aim for perfection here! The raw, graphic nature of these lines is part of the charm. If you make a small wobble, it can easily be incorporated as part of the “sketchy” look.
2. Cute Chibi Character Accents
Chibi characters are known for their oversized heads and small bodies, making them incredibly adorable! You can capture their essence with simple accents.
How to Create:
- Prep & Base: Prepare your nails and apply a base coat. For this look, a pastel pink, baby blue, or soft yellow is perfect as a base color.
- Simple Face: On one or two accent nails, use a detail brush and black polish to draw a simple, round face. Add two tiny dots for eyes and a small “w” shape for a mouth.
- Add Ears: For an animal-like chibi, add two small, rounded shapes on top of the head for ears.
- Colorful Details (Optional): You can add a tiny colored bow or a small “blush” dot using a dotting tool.
- Seal It: Finish with a clear top coat.
Tip: Focus on just a simple face shape and eyes for the absolute easiest approach. The “chibi” feel comes through with this simplified representation.
3. Polka Dots & Bows: Shojo Sweetness
Shojo manga often features sweet, dreamy aesthetics, frequently incorporating polka dots and cute bows.
How to Create:
- Prep & Base: Start with your base coat. A classic pastel pink or baby blue is ideal for this look.
- Polka Dots: Once the base color is dry, use a dotting tool or the tip of a toothpick to create polka dots. Varying sizes can add visual interest. You can do white dots on a pastel background, or pastel dots on a white background.
- Add a Bow: On an accent nail, use a detail brush and white or pink polish to draw a simple bow shape. A small rectangle with two small triangles on top, then two small dangling lines, is an easy way to achieve this.
- Finishing Touch: Apply a glossy top coat to make everything shine.
Style Idea: Try alternating polka dot nails with a bow accent nail for a balanced but still very “manga” look.
4. “Onomatopoeia” Power!
Manga is famous for its dynamic sound effects written in stylized text (like KABOOM!, WHIZZ!, POW!). Recreate this energetic vibe!
How to Create:
- Prep & Base: Prepare your nails. A bold, contrasting base color works well – think a bright red, electric blue, or stark black.
- Choose Your Word: Pick a simple, impactful sound effect word from your favorite manga (e.g., “BANG,” “WOW,” “ZAP”).
- Write It Out: Using a thin detail brush and a contrasting color (like white, yellow, or black), carefully paint the lettering onto your accent nail. Aim for a bold, graphic font.
- Add Flair (Optional): You can add little starbursts or action lines around the word for extra drama.
- Top Coat Seal: Don’t forget your protective top coat!
Resource: For font inspiration, search for “manga sound effect examples” online. Visuals from dedicated resources like MangaPedia can guide your lettering style.
5. Simple Character Silhouettes
Represent your favorite characters with their iconic silhouettes. This is surprisingly simple and looks very chic.
How to Create:
- Prep & Base: Prep nails and apply a base coat. A dark color like navy, deep purple, or black makes silhouettes really pop.
- Find a Simple Silhouette: Look up the silhouette of your favorite character (e.g., Pikachu’s ears, Goku’s spiky hair silhouette). Keep it to a recognizable outline.
- Paint the Silhouette: Using a fine detail brush and a contrasting bright color (like yellow for Pikachu, orange for Goku, or white), carefully paint the outline onto an accent nail. You don’t need every detail; just the key identifying shapes.
- Optional: Add a Small Detail. For example, a tiny yellow dot for Pikachu’s cheek.
- Seal ‘Em Up: Apply a good top coat.
Tip: Think bold shapes! The less detail you try to cram in, the more effective and easier the silhouette will be.
Key Manga Nail Design Techniques Explained Simply
Mastering a few basic techniques will elevate your manga nail art game from good to spectacular. These are simple to learn and incredibly versatile!
The Art of the Clean Line
Sharp, clean lines are a hallmark of many manga styles. Here’s how to get them:
- Use a Detail Brush: As mentioned, a thin brush is essential. Make sure it’s clean and has a fine, yet firm, tip.
- Thin Coats: Apply polish to your brush in a thin layer. Too much polish can lead to blobs and uneven lines.
- Steady Your Hand: Rest your pinky finger or the side of your hand on the table for stability. Breathe slowly and deliberately.
- “Draw” the Line: Don’t just press down. Gently drag the brush across the nail, letting the bristles do the work.
- Clean Up Mistakes: Keep your small brush dipped in nail polish remover nearby. A quick swipe can fix minor errors before they dry.
Dotting Techniques for Adorable Accents
Dotting tools are fantastic for uniform dots, but they can do more!
- Perfect Polka Dots: Dip the ball tip of your tool into polish and gently press onto the nail. Lift straight up.
- Creating Shapes: Use the dotting tool to create small circles, ovals, or even stylized “eyes.”
- Adding Texture: Overlapping dots can create interesting textures or gradient effects.
- No Dotting Tool? Use a Toothpick or Bobby Pin: The tip of a toothpick or the end of a bobby pin can create small dots effectively.
Color Layering & Ombre Effects
Adding depth and dimension to your designs is easier than you think.
- Layering for Boldness: For lettering or detailed drawings, apply your base color, let it dry. Then, add your design on top. This makes the design pop.
- Simple Ombre: You can create a subtle color fade. Paint two colors side-by-side on a makeup sponge and dab it onto the nail to blend.
- Color Blocking: Use striping tape or a steady hand to create sharp divisions between two or more colors on one nail.
Maintaining Your Manga Masterpieces
You’ve put in the effort to create dazzling manga nail designs – let’s make them last!
Essential Care Tips:
- Always Use a Top Coat: This is your final shield against chipping and fading. Reapply every 2-3 days for extra durability.
- Be Gentle: Avoid using your nails as tools. Open cans, scrape things, or pick at labels with your fingertips, not your nail art.
- Moisturize: Keep your cuticles and nails hydrated with cuticle oil and hand cream. Healthy nails are stronger nails and less prone to breakage, which can ruin a design.
- Avoid Harsh Chemicals: When cleaning, wear gloves to protect your manicure from harsh detergents.
- Touch-Ups: For minor chips, a tiny bit of top coat can sometimes blend the edges and save your design for a little longer.
Manga Nail Design Trends to Watch
The world of manga nail art is always evolving! Here are a few trends that are making waves and are beginner-friendly:
Trending Manga Nail Design Styles
| Trend Style | Key Features | Beginner Friendliness | Effortless Tip |
|---|---|---|---|
| “Glow-Up” Nails | Nail art that incorporates holographic or iridescent finishes, often mimicking magical transformations or glowing effects. | High | Use holographic top coats or stickers over a solid base color. |
| Minimalist Character Icons | Simple, recognizable icons or symbols of popular characters (e.g., a tiny lightning bolt for Naruto, a heart for Sailor Moon). | Very High | Focus on one iconic shape with a steady detail brush. |
| “Panel” Designs | Recreating segments of manga panels using lines, speed effects, and small character faces or expressions. | Medium | Use striping tape for panel borders and simple dotting tools for expressions. |
| Pastel Dreamscapes | Soft, dreamy backgrounds with delicate manga motifs like stars, clouds, or simple anime-style eyes. | High | Use pastel polishes and a fine brush for subtle details. |
Beyond the Basics: Exploring Your Style
Once you’re comfortable with these beginner designs, don’t be afraid to get creative! Manga nail art is all about expressing yourself.
- Mix and Match: Combine elements from different designs. Maybe a chibi face on one nail and onomatopoeia on another?
- Color Combinations: Experiment with bold color pairings inspired by character outfits or series themes.
- Texture Play: Try layering matte top coats with glossy ones for unique effects.
- Inspiration Everywhere: Look at your favorite manga, anime, or even character merchandise for new ideas. Sometimes the simplest graphic element from a logo can inspire a whole nail design!
Resources like Pinterest are treasure troves for manga nail art inspiration. Searching for “#manganails” or “#animenails” will bring up thousands of ideas from creators all over the world. You can also find great tutorials on YouTube by searching for specific characters or design styles.
For those interested in the artistic foundations of manga, understanding character design principles can even inform your nail art. Resources from art education sites often break down how to draw expressive eyes or dynamic poses, which you can simplify for nail art. For example, understanding line weight in character art, a concept discussed by many art educators, can directly translate to how you use your detail brushes for impact.
Frequently Asked Questions About Manga Nail Designs
Q1: What’s the easiest manga nail design to try first?
A: The “Classic Black & White Manga Lines” design is incredibly beginner-friendly. It requires minimal detail and embraces a slightly imperfect, artistic look.
Q2: What kind of brush is best for drawing details on nails?
A: A thin detail brush with a fine, pointed tip is ideal. Look for brushes labeled “liner” or “detail” brushes in beauty stores. Natural hair brushes can sometimes be too soft, so synthetic bristles often offer better control for polish.
Q3: How do I stop nail polish from staining my nails?
A: Always use a good base coat before applying colored polish. A quality base coat creates a barrier between your natural nail and the pigmented polish, preventing stains

