Make gorgeous ombre nails at home easily! Grab a makeup sponge and follow these simple steps for a smooth, blended gradient look that mimics professional salon styles. Perfect for beginners, this guide breaks down the sponge technique for flawless DIY ombre nails.
Dreaming of those beautiful, blended ombre nails you see everywhere? They look so chic and professional, right? You might think they’re only achievable at the salon, but guess what? You can totally rock this trend at home! The secret weapon for achieving that seamless color fade without a struggle? A simple makeup sponge. No fancy tools or complicated techniques required. This guide is here to show you exactly how to use a sponge to get stunning ombre nails, even if you’ve never tried nail art before. Get ready to unleash your inner nail artist!
Mastering Ombre Nails: Your Essential Sponge Guide
Ombre nails, also known as gradient nails, are all about that smooth, beautiful transition between two or more colors. It’s a nail art trend that offers so much versatility, from subtle tonal shifts to bold, contrasting hues. For years, achieving this effect at home felt like a challenge. Many people struggled with brushes, trying to blend colors directly on the nail, often ending up with streaky messes. But with the right technique and a common household item—the humble makeup sponge—you can create professional-looking ombre nails with ease.
This guide, brought to you by Nailerguy, is designed to make the ombre nail process accessible and fun for everyone. We’ll cover everything you need to know, from choosing your colors to the final top coat, with a special focus on mastering the sponge application. Forget intimidating techniques; we’re keeping it simple, effective, and totally achievable for a DIY manicure that will turn heads.
Why Use a Sponge for Ombre Nails?
You might be wondering why a makeup sponge is the go-to tool for ombre nails. There are a few key reasons why this simple item is so effective for creating a smooth gradient:
- Texture: Makeup sponges have a porous texture. When you dab polish onto them, the sponge gently picks up and distributes the color. As you dab this onto your nail, it allows the colors to blend softly, creating that signature gradient effect.
- Even Application: Unlike trying to paint a blend, the dabbing motion of the sponge helps to layer the colors without disturbing the previous layer too much, resulting in a smoother transition.
- Accessibility: Most people already have a makeup sponge at home, or they are incredibly inexpensive and easy to find at any drugstore or beauty supply store.
- Beginner-Friendly: The dabbing technique is forgiving. It’s much easier to get a nice blend with a sponge than with a brush, making it perfect for those new to nail art.
What You’ll Need: Your Ombre Nail Toolkit
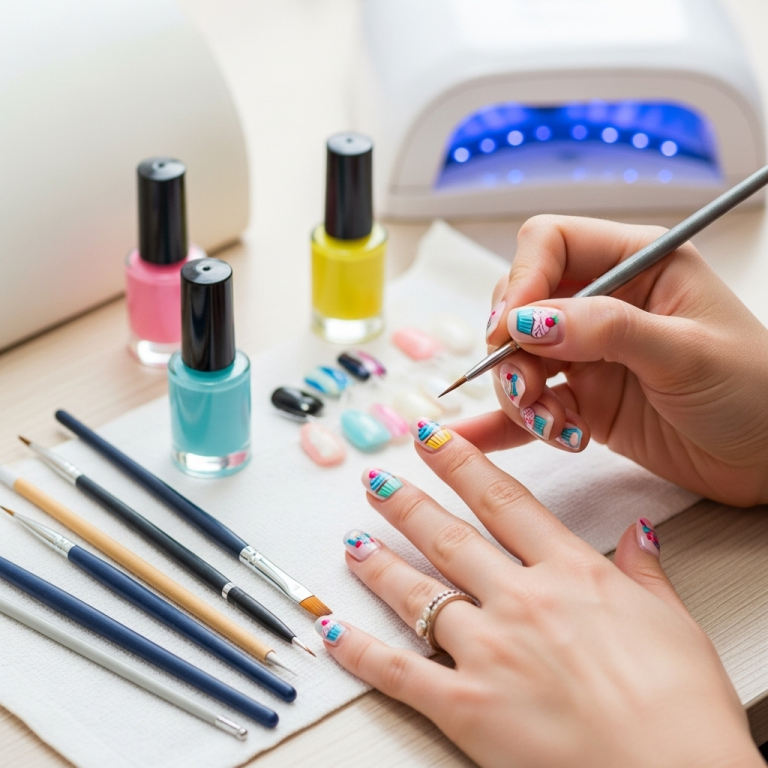
Before we dive into the steps, let’s gather your supplies. Having everything ready will make the process smooth and enjoyable. Think of this as setting up your personal nail art station!
Essential Tools:
- Nail Polish: Choose at least two colors that complement each other. Lighter shades tend to blend more easily for beginners.
- Top Coat: A good quality top coat is crucial for sealing in your design and adding shine.
- Base Coat: Protects your natural nails and helps polish adhere better.
- Makeup Sponge: A clean, dense makeup sponge works best. You can use a new one, or cut a larger one into smaller pieces. The density helps in picking up and depositing polish evenly.
- Nail Polish Remover: For cleaning up any stray polish.
- Cotton Swabs or Small Brush: For precise cleanup around the cuticles. A fine-tipped brush, like a detail brush or an old eyeliner brush, can be great for this.
- Paper Towel or Palette: To dab your polish onto before applying to the sponge.
- Optional: Clear Nail Polish (for mixing): Sometimes helpful to thin out polishes for better blending.
- Optional: Cuticle Guards or Liquid Latex: To protect your skin from polish.
Choosing Your Colors: Tips for Seamless Blending
The magic of ombre lies in the color transition. Here are some tips for picking shades that will blend beautifully:
- Similar Tones: Start with polishes that are in the same color family or have similar undertones. For example, a light pink fading into a darker fuchsia, or a pale blue into a rich navy.
- Light to Dark: A common and effective approach is to use a lighter shade at the base of your nail (near the cuticle) and a darker shade at the tip.
- Contrasting Colors: Once you’re comfortable, try bolder combinations! Think peach and coral, or teal and purple.
- Sheers and Glitters: Consider using a sheer polish as your base or adding a glitter polish over the blend for extra sparkle.
For a stunning example of color palettes that work well together, you can explore resources on color theory for makeup and fashion, which often translate beautifully to nail art.
Step-by-Step: How to Make Ombre Nails with a Sponge
Ready to get painting? This is where the fun begins! Follow these simple steps and you’ll have gorgeous ombre nails in no time.
Step 1: Prepare Your Nails
Just like any manicure, preparation is key for a lasting and beautiful result. Start with clean, dry nails.
- Clean: Remove any old polish. Wash your hands to get rid of oils and residue.
- Shape: File your nails into your desired shape.
- Cuticle Care: Gently push back your cuticles. You can use a cuticle pusher or an orange stick.
- Base Coat: Apply one layer of your base coat. Let it dry completely. This step protects your nails from staining and provides a smooth surface for the polish.
Step 2: Apply Your Base Color (Optional but Recommended)
While not strictly necessary for all ombre effects, applying a base color can enhance the final look and help the ombre transition appear smoother. This is usually the lighter of your two chosen colors.
- Apply one or two thin coats of your lightest polish to all nails.
- Let this layer dry thoroughly. This is important! If it’s still wet, the sponge will just make a mess.
Step 3: Prepare Your Sponge
This is where the magic happens. You’ll want to prepare your sponge so it’s ready to receive the polish.
- Cut your sponge: If you’re using a large cosmetic sponge, cut it into smaller, manageable pieces. A wedge shape works well, or you can create a flat surface by cutting off the rounded part. Aim for a size that feels comfortable to hold and dab onto your nail.
- Slightly Dampen (Optional): Some people find slightly dampening the sponge with water (and then squeezing out all excess moisture) helps create a softer blend. Others prefer a dry sponge for more opaque color. Experiment to see what you like! A dry sponge will give you more intense color payoff, while a slightly damp one can help with blending.
Step 4: Load the Sponge with Polish
This is the core technique. You’ll be applying your colors side-by-side on the sponge.
- Palette Prep: Pour a small amount of your first polish color (let’s say, the lighter one) onto a paper towel or a clean palette. Then, pour a small amount of your second polish color (the darker one) right next to it, touching the first color. You want the two colors to be next to each other, not mixed entirely.
- Pick Up Color: Gently dab your sponge into the polishes, aiming to pick up both colors along the line where they meet. You want a good amount of each color on your sponge.
- “Test” Dab: It’s a good idea to dab the sponge once or twice onto the paper towel first. This helps spread the polish evenly on the sponge and removes excess.
Step 5: Apply the Ombre to Your Nail
Now, transfer that beautiful color blend from the sponge to your nail.
- Dab Gently: Position the sponge over your nail and gently dab it onto the nail. Start at the cuticle area and dab your way down to the tip. Use a light to medium pressure.
- Layering is Key: You likely won’t get a perfect blend in one go. Reload your sponge with polish as needed and repeat the dabbing process. Apply multiple thin layers rather than one thick one.
- Focus the Blend: For your first pass, you might want to focus the lighter color at the cuticle and the darker color at the tip. As you reload and dab, you’ll naturally create the fade in between.
Step 6: Clean Up Edges
This is where you’ll define your nail and make it look super neat.
- Use a Cleanup Tool: Dip a cotton swab or a small, fine-tipped brush into nail polish remover.
- Precise Removal: Carefully go around the edges of your nail and cuticle to remove any stray polish. This step makes a huge difference in the professional appearance of your nails.
Step 7: Add More Layers (If Needed)
For a more vibrant or seamless ombre, you might want to repeat the sponging process.
- Let the first layer of ombre dry for a minute or two.
- Reload your sponge with polish (Step 4) and reapply the ombre effect to your nail (Step 5).
- Clean up the edges again (Step 6).
- The more layers you build, the more opaque and blended your ombre will become.
Step 8: Apply Your Top Coat
This is the finishing touch that seals everything in and adds that gorgeous gloss.
- Ensure your ombre layers are completely dry.
- Apply one or two generous coats of your favorite shiny top coat. Make sure to cap the free edge of your nail (sweep the brush across the tip of your nail) to prevent chipping.
- Let it dry completely.
Tips for Ombre Nail Success
Even with the sponge method, a few extra tips can elevate your DIY ombre game:
- Work Quickly but Carefully: Nail polish dries fast! Have your colors on your palette and your sponge ready before you start dabbing.
- Less is More: Apply thin layers of polish to the sponge and on your nails. It’s easier to build up opacity and blend with thin coats.
- Pressure Control: Experiment with how much pressure you apply to the sponge. Lighter pressure can create a softer blend, while firmer pressure deposits more color.
- Clean Your Sponge: If you plan to reuse your sponge, try to clean it as much as possible between colors or nails. However, many people find it easier to use a fresh piece for each manicure.
- Consider a Clear Polish Mix: If your polish is too thick and not blending well, try adding a tiny drop of clear polish to your colors on the palette.
- Protect Your Cuticles: For a super clean finish and less cleanup hassle, try applying liquid latex around your nail beds before you start. Once your ombre is done and dry, you can easily peel the liquid latex away, taking any stray polish with it. You can find liquid latex at many craft stores or online beauty suppliers.
Ombre Techniques Beyond Two Colors
Once you’ve mastered the two-color ombre, why not try more? The sponge method is adaptable for more complex gradients.
Three-Color Ombre:
- On your palette/paper towel, arrange three colors side-by-side, from lightest to darkest (or your desired order).
- Dab the sponge to pick up all three colors.
- Apply to the nail using the same dabbing motion. You will need to reload the sponge multiple times and focus the dabbing to achieve the blend between all three hues.
Glitter Ombre:
- Create your base color ombre as usual.
- On a clean section of your sponge, apply a glitter polish.
- Lightly dab the glitter polish onto the nail, focusing on the area where you want the most glitter payoff. This could be the tips, the cuticle, or the entire nail for a sparkling effect.
- Seal with a top coat to smooth out the glitter texture.
For inspiration on color combinations and glitter placements, check out nail art blogs and Pinterest. They often showcase stunning multi-color and glitter ombre designs.
Troubleshooting Common Ombre Nail Issues
Even with the best intentions, you might encounter a few snags. Don’t worry, these are easy to fix!
Issue: Streaky or Patchy Blend
Solution: This usually means you need more layers. Reload your sponge with polish and go over the nail again, focusing on the areas that need more color. Make sure you’re dabbing the sponge onto the nail, not swiping. You can also try dabbing the sponge on the palette to ensure an even coat of polish before hitting your nail.
Issue: Too Much Polish on the Sponge
Solution: Before dabbing on your nail, give the sponge a couple of “test” dabs on a paper towel. This removes excess polish, preventing blobs and allowing for a finer blend.
Issue: Colors Aren’t Blending Well
Solution: Ensure your polishes have a good consistency – not too thick. If they are very thick, try adding a tiny drop of clear polish to them on your palette. Also, make sure the sponge is picking up both colors effectively. Sometimes, slightly pressing the colors together on the palette before dabbing can help.
Issue: Polish Gets All Over My Skin
Solution: This is where your cleanup brush or cotton swabs with nail polish remover come in handy! For future attempts, strongly consider using liquid latex or cuticle guards to protect your skin beforehand. It makes cleanup a breeze and is especially helpful for detailed nail art.
A great resource for understanding nail polish formulations and how they affect application can be found on cosmetic science websites or through reputable beauty ingredient guides.
Ombre Nail Ideas for Every Mood
The beauty of ombre is its adaptability. Here are a few ideas to get your creative juices flowing:
Classic & Elegant Ombre
- Colors: Nudes, creams, pale pinks, soft grays, or whites.
- Look: A subtle, sophisticated fade that’s perfect for everyday wear or special occasions.
Bold & Vibrant Ombre
- Colors: Bright pinks, electric blues, fiery reds, sunny yellows, or rich purples.
- Look: A statement-making manicure that’s fun and eye-catching. Great for summer or when you want to add a pop of color.
Sunset Ombre
- Colors: Yellow, orange, pink, and maybe a touch of purple at the tips.
- Look: Mimics the beautiful hues of a sunset, creating a warm and dreamy effect.
Ocean Ombre
- Colors: Light blue, teal, deep blue, and perhaps a touch of white or glitter.
- Look: Evokes the shades of the ocean, from shallow waters to the deep sea.
Holographic or Chrome Ombre
- Colors: Use a solid base (like black or white) and then sponge on a chrome or holographic pigment for an iridescent, futuristic look.
- Look: Super trendy and dazzling, it catches the light beautifully.
Don’t limit yourself! The possibilities are endless. You can also experiment with different polish finishes, like matte top coats, to completely change the feel of your ombre design.
Pros and Cons of the Sponge Method
Like any DIY method, the sponge technique has its advantages and disadvantages.
| Pros | Cons |
|---|---|
| Easy to learn and master for beginners. | Can be messy if not careful; requires cleanup. |
| Achieves a smooth, seamless gradient effect. | Sponge can soak up a lot of polish. |
| Inexpensive and readily available tools (makeup sponge). | May take multiple layers to build desired opacity. |
| Versatile for various color combinations and effects. | Requires some practice for perfect color placement. |
| Allows for creative blending and custom looks. | Disposable sponges can create waste, though reusable ones are available. |


