Quick Summary: Magnetic nail designs are a fun, easy way to create stunning, multi-dimensional manicures at home. Using a special magnetic polish and a magnet, you can achieve eye-catching effects like cat-eye or galaxy looks with minimal effort. This guide breaks down exactly what you need and how to do it, even if you’re a total beginner!
Ever seen those mesmerizing nails that shimmer and shift with every movement? Chances are, you’ve spotted magnetic nail designs! They look super professional and high-tech, but guess what? You can totally do them yourself. If you’ve ever felt a little intimidated by nail art or thought trendy designs were out of reach, let’s chat. We’re diving into the wonderful world of magnetic nails – it’s simpler than you think! Get ready to transform your nails into captivating masterpieces. We’ll cover all the essentials, from tools to stunning design ideas, so you can start creating your own magnetic magic right away.
Unlock Mesmerizing Nails: Your Guide to Magnetic Nail Designs
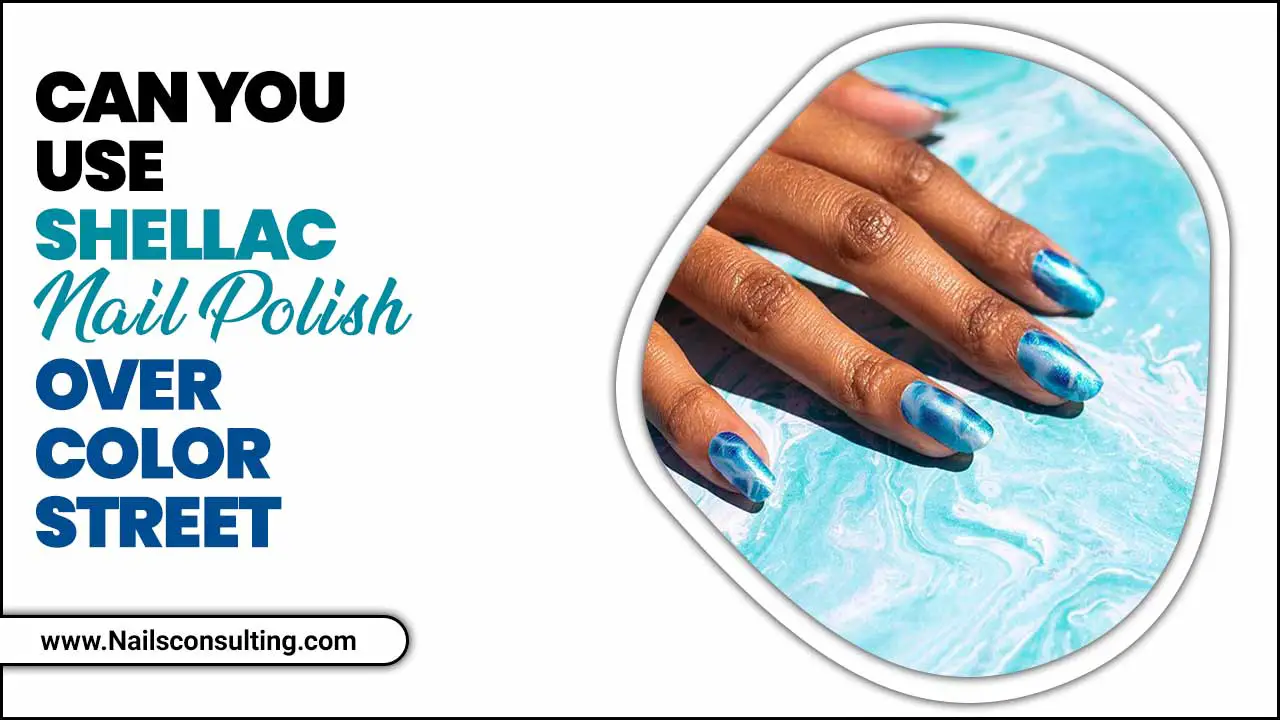
Magnetic nail designs, often called “cat-eye” or “galaxy” nails, are a popular trend that adds instant wow-factor to any manicure. They get their unique look from special polishes that contain fine metal particles. When a magnet is held near the wet polish, these particles move and arrange themselves, creating stunning patterns and depth. It’s like having a tiny magic show on your fingertips!
If you’re new to nail art, magnetic polishes are a fantastic starting point. They require very little artistic skill to achieve dramatic results, making them perfect for beginners. And for those of you who love to experiment, they offer a fresh way to play with color and shine.
Why Magnetic Nails Are a Must-Try
- Easy to Use: No complex techniques needed! The magnet does most of the work.
- Striking Visuals: Creates unique, dimensional effects that grab attention.
- Versatile: Works with a wide range of colors and magnet patterns.
- Long-Lasting: When applied correctly, magnetic gel polishes can last for weeks.
- Budget-Friendly: Achieve salon-quality looks without the salon price tag.
The Essential Toolkit for Magnetic Nail Designs
Before we dive into the “how-to,” let’s gather your gear. You don’t need a lot to get started, and most of these items are readily available online or at beauty supply stores.
What You’ll Need:
- Magnetic Nail Polish (Cat-Eye Polish): This is the star of the show! These polishes contain fine metallic powders.
- Magnet Tool: These come in various shapes – wands, sticks, or even plates. Choose one that suits the effect you want.
- Base Coat: Essential for protecting your natural nails and ensuring polish adhesion.
- Top Coat: Seals your design and adds a glossy finish.
- Color Coat (Optional, for layering): Some magnetic effects look even better over a black or dark base color.
- Nail Cleanser/Rubbing Alcohol: To prep your nails and remove any oily residue.
- Lint-Free Wipes: For a clean nail surface without leaving fuzzy bits behind.
- Cuticle Pusher/Orange Stick: To prepare your nail beds.
- Nail File and Buffer: To shape and smooth your nails.
- UV/LED Nail Lamp: Crucial for curing (drying) gel-based magnetic polishes. If you’re using regular polish, you can skip this, but gel offers much better durability.
Understanding Your Magnets
Not all magnets are created equal! The type of magnet you use will significantly influence the final design. Different shapes create different patterns. Here’s a quick look:
| Magnet Shape | Typical Effect | Description |
|---|---|---|
| Wand/Stick (Flat Side) | Classic Cat-Eye Line | The most common type. When held flat and still, it creates a sharp, defined line of shimmering particles. |
| Wand/Stick (Pointed Side) | Swirls or Starbursts | The tip can be used to create more intricate, swirling patterns or radial effects. |
| Round Magnet | Circular or Diffused Glow | Used to create a more diffused, glowing effect or smaller circular patterns. |
| Strip Magnets | Multiple Lines or Grids | Can be placed on the nail to create parallel lines or geometric patterns. |
| Multi-Magnet Tools | Complex Designs | Some tools come with multiple magnets or interchangeable heads to create more advanced looks. |
Experimenting with different magnets is part of the fun! Each one offers a unique way to manipulate the magnetic particles.
Step-by-Step: Creating Stunning Magnetic Nail Designs
Ready to create some nail magic? Follow these simple steps for a flawless magnetic manicure. We’ll focus on the popular gel polish method as it offers the best durability and shine, but the principles are similar for regular polish (just skip the curing steps!).
Step 1: Prep Your Nails
Proper nail prep is the foundation of any long-lasting manicure. This step ensures your polish adheres well and prevents chipping.
- Cleanse: Wash your hands thoroughly and dry them. Using a nail cleanser or rubbing alcohol on a lint-free wipe, swipe each nail to remove any oils or lotions.
- Shape: File your nails to your desired shape and length.
- Buff: Gently buff the surface of your nails to create a slightly rough texture for better adhesion. Be gentle – you don’t want to thin your nails.
- Cuticle Care: Gently push back your cuticles with a cuticle pusher or orange stick.
- Clean Again: Wipe down your nails again with your cleanser.
Step 2: Apply the Base Coat
Apply a thin, even layer of your base coat. This protects your natural nail from staining and creates a smooth surface for the color. Cure this layer under your UV/LED lamp according to the lamp’s instructions (usually 30-60 seconds).
Step 3: Apply the Color Coat
Here’s where the magic begins! Apply a thin, even coat of your dark base color if you’re using one (black is a popular choice for enhancing magnetic effects). Cure this layer. Then, apply a thin coat of your magnetic nail polish. Do NOT cure this layer yet!
Pro Tip: Apply magnetic polish to one nail at a time. This prevents the polish from drying and losing its magnetic properties before you can work your magic.
Step 4: Use the Magnet Tool
Now for the fun part! Hold your chosen magnet tool close to the wet magnetic polish on your uncured nail. Hold it for about 10-15 seconds. Experiment with the distance and angle to achieve different effects. For the classic cat-eye line, hold the wand parallel to the nail, about 1-2mm away. For swirls, use the tip or move the magnet in a pattern.
Watch as the metallic particles shift and create your desired pattern! Once you’re happy with the design, hold the magnet there for a few extra seconds to ‘set’ the pattern.
Step 5: Cure the Magnetic Layer
Immediately after creating your design with the magnet, place your nail under the UV/LED lamp to cure the magnetic polish layer. This locks the pattern in place. Follow the curing time recommended for your specific polish and lamp.
Step 6: Apply the Top Coat
Apply a thin, even layer of your top coat. This seals your design, adds incredible shine, and protects your manicure from chipping. Make sure to cap the free edge (the tip of your nail) to prevent lifting. Cure the top coat according to the lamp’s instructions.
Step 7: Clean Up
If you’re using a gel top coat that requires wiping, use a lint-free wipe dampened with nail cleanser or rubbing alcohol to remove the tacky inhibition layer. If you used a no-wipe top coat, you’re done!
Exploring Magnetic Nail Design Ideas
The possibilities with magnetic nail polishes are endless. Beyond the classic cat-eye, you can create a multitude of stunning effects. Here are some popular design ideas to inspire you:
1. The Classic Cat-Eye
This is the most well-known magnetic nail look. By holding a wand-style magnet parallel to the nail, you create a sharp, shimmering line that moves across the nail, resembling the pupil of a cat’s eye. It’s sophisticated and always eye-catching.
2. Galaxy Nails
Achieve a cosmic vibe by combining magnetic polish with small, subtle dots of white or silver polish (applied with a dotting tool) on top of your magnetic base before using the magnet. This creates a “starry night” effect. You can also use multi-color magnetic polishes for a nebulae look.
3. Swirled & Abstract Designs
Forget the straight line! Use the pointed tip of a magnet or move the magnet in circular, swirling motions while it’s close to the wet polish. This creates beautiful, organic abstract patterns that are unique to each nail.
4. Geometric Patterns
With more advanced magnet tools (like those with multiple prongs or grid patterns), you can create striking geometric designs. These require a steady hand and a bit of practice but the results are incredibly chic.
5. Multi-Colored Magic
Don’t be afraid to layer different colored magnetic polishes or use two different colored magnetic polishes on the same nail before applying the magnet. This can lead to surprising and beautiful color shifts and blended effects.
6. Shifting Metallics
Some magnetic polishes are designed to shift between two or even three colors depending on the angle of the magnet and light. These are perfect for a bold, dynamic look.
Tips for Achieving Flawless Magnetic Effects
Even with a simple process, a few insider tips can elevate your magnetic nail game:
- Work Quickly, Cure Instantly: Magnetic particles settle over time. Work on one nail at a time and cure it immediately after achieving your desired pattern.
- Magnet Placement is Key: Experiment with holding the magnet at different angles and distances. The closer the magnet, the stronger the pull, but be careful not to touch the polish.
- Thin Coats are Best: Thick coats of magnetic polish can make it difficult for the particles to move freely and may result in uneven designs or improper curing.
- Consider a Dark Base Color: Applying a black or deep, dark color as your first layer underneath the magnetic polish often amplifies the metallic effect and the color payoff. This works wonderfully for deeper jewel tones and richer shimmer.
- Invest in Quality Tools: A good quality magnetic polish and a strong magnet tool will make a significant difference in the vibrance and clarity of your designs.
- Clean Your Magnet: If your magnet tool gets polish on it, gently wipe it clean with a lint-free wipe and alcohol to ensure optimal performance for future use.
Comparing Magnetic Polish Types: Gel vs. Regular
When choosing your magnetic polish, you’ll encounter two main types: gel and regular (traditional) formulas. Each has its pros and cons.
| Feature | Magnetic Gel Polish | Regular Magnetic Polish |
|---|---|---|
| Application | Requires UV/LED lamp for curing | Air dries, no lamp needed |
| Durability | Excellent, lasts 2-3 weeks with proper application | Good, but typically less durable than gel (e.g., 5-7 days) |
| Shine & Finish | High-gloss, often mirror-like | Good shine, but may not be as intense as gel |
| Ease of Removal | Requires acetone soak-off or filing | Easier to remove with standard nail polish remover |
| Effect Vibrancy | Generally more intense and defined metallic effect | Can be vibrant, but sometimes a bit softer |
| Ideal For… | Long-lasting manicures, salon-quality shine, advanced designs | Quick manicures, those without a lamp, testing the magnetic trend |
For the most impressive and long-lasting magnetic nail designs, gel polish is usually the go-to choice. However, regular magnetic polishes are a great option if you prefer a simpler application process or don’t have a UV/LED lamp. For more information on nail product types, you can consult resources like the U.S. Food and Drug Administration’s (FDA) guidance on cosmetics, which includes insights into nail product safety and formulation.
Troubleshooting Common Magnetic Nail Issues
Even with the best intentions, you might run into a snag. Here are some common problems and how to fix them:
- Issue: The magnetic effect isn’t strong or clear.
- Solution: Ensure your magnetic polish is well-shaken or rolled (don’t shake vigorously, as this can create bubbles). Also, make sure your magnet is strong and held close enough to the uncured polish. Try a darker base color to enhance contrast.
- Issue: The pattern disappears before curing.
- Solution: You’re likely waiting too long between applying the polish and using the magnet, or between using the magnet and curing. Work on one nail at a time and cure immediately after using the magnet.
- Issue: The polish is curing unevenly or in clumps.
- Solution: You might be applying the magnetic polish too thickly. Apply thin, even coats. Ensure your UV/LED lamp is functioning correctly and providing adequate curing power.
- Issue: The design looks fuzzy or dull.
- Solution: This can happen if the magnet touches the polish surface. Keep a small gap (1-2mm) between the magnet and the wet polish. Also, ensure your top coat is applied smoothly and evenly.
- Issue: The manicure chips easily.
- Solution: Double-check your nail prep. If you’re using gel, ensure you’ve applied base coat, all color coats, and top coat thinly and cured each layer properly. Capping the free edge with each coat is also vital.
Frequently Asked Questions About Magnetic Nail Designs
What is magnetic nail polish?
Magnetic nail polish is a special type of polish that contains tiny metallic particles. When a magnet is held near the wet polish, these particles arrange themselves into patterns, creating unique, eye-catching designs (like the “cat-eye” effect).
Do I need a special magnet for magnetic nail polish?
Yes, you do! Standard household magnets are usually too weak. You need a specially designed nail art magnet, often called a “cat-eye” magnet stick or wand, which is strong enough to manipulate the metallic particles in the polish.
How long does the magnetic effect last?
The magnetic effect itself is ‘set’ once the polish is cured. The longevity of the manicure depends on whether you’re using regular polish or gel polish, and how well the nails were prepped and applied. Gel magnetic manicures can last for two to three weeks.
Can I use magnetic polish over any base color?
While you can use magnetic polish over any color, darker base colors (especially black) tend to make the magnetic effect much more pronounced and vibrant. Some magnetic polishes are designed to be used on their own and do not require a base color other than a base coat.
How do I create the “cat-eye” effect?
After applying a coat of magnetic polish (and before curing), hold a wand-style magnet parallel to your nail, about 1-2mm away, for 10-15 seconds. The metallic particles will form a distinct, shimmering line. Then, cure the nail under your UV/LED lamp.
Can I mix magnetic polishes from different brands?

