Luxury nail designs are achievable ways to elevate your look with sophisticated, elegant, and eye-catching manicures. Explore simple techniques, trendy styles, and essential tools to create stunning, high-end nail art at home. This guide empowers you to express your unique style with confidence.
Ever looked at perfectly polished nails and thought, “Wow, that looks so fancy!”? You’re not alone! We all love a manicure that feels a little extra special, a touch of pure glamour. But sometimes, those intricate designs can seem a million miles away, especially if you’re just starting out. The good news? Achieving luxurious nail looks doesn’t require a professional salon visit or a degree in art. It’s all about knowing a few key techniques, having the right (and simple!) tools, and tapping into your own creativity. Ready to transform your nails into tiny works of art? Let’s dive in and unlock the secrets to effortless luxury!
What Are Luxury Nail Designs?
So, what exactly makes a nail design “luxurious”? It’s not always about bling or complicated art. Luxury nail designs often signify elegance, sophistication, and a refined aesthetic. Think clean lines, rich colors, subtle textures, and a flawless finish. They evoke a sense of high quality and attention to detail, making your hands a statement of personal style and polish.
These designs can range from minimalist chic to richly detailed. The overall impression is one of understated opulence, where the beauty lies in the craftsmanship and the thoughtful selection of elements. It’s the kind of manicure that makes you feel put-together, confident, and ready to conquer anything.
Why Choose Luxury Nail Designs?
Beyond just looking good, embracing luxury nail designs can be a wonderful form of self-care and self-expression. Here’s why you might fall in love with them:
- Boosts Confidence: A beautiful, well-executed manicure can instantly make you feel more polished and confident. It’s like a little secret weapon you carry with you!
- Expresses Personal Style: Your nails are a canvas! Luxury designs offer a sophisticated way to show off your personality, mood, and aesthetic preferences.
- Elevates Any Outfit: From a casual day out to a formal event, the right nail design can tie your entire look together and add that perfect finishing touch.
- A Form of Creative Outlet: For many, nail art is a fun and relaxing way to be creative and de-stress. It’s a mini-escape into a world of color and pattern.
- Achievable DIY: With a few basic tools and techniques, many luxury nail designs are totally doable in the comfort of your own home, saving you time and money.
Essential Tools for Luxury Nails at Home
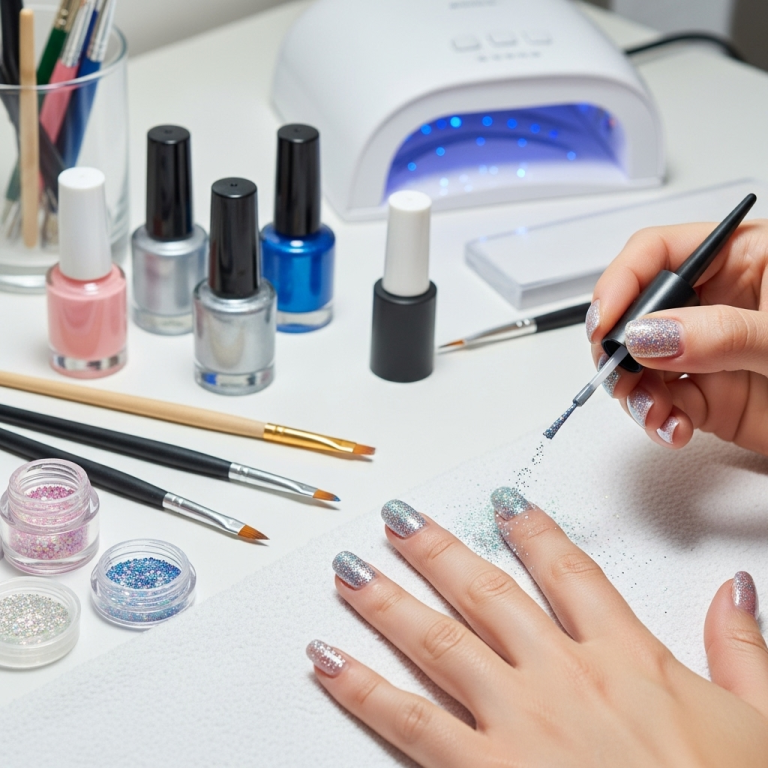
You don’t need a whole professional kit to create salon-worthy nails. Here are a few key tools that will make a big difference:
- Nail File (Glass or Fine-Grit Emyl): For shaping your nails smoothly and preventing snags. Glass files are great for gentle shaping.
- Cuticle Pusher/Orange Stick: To gently push back your cuticles for a clean nail bed.
- Base Coat: Crucial for protecting your natural nail from staining and helping polish adhere better.
- Top Coat: Seals your design, adds shine, and protects against chipping. A gel-like top coat can give that extra-glossy finish.
- Thin Nail Art Brushes (Detailer, Liner): These are your best friends for drawing lines, dots, and intricate details.
- Dotting Tools: These have small metal balls on the end, perfect for creating perfect dots and simple floral patterns.
- Striping Tape/Stencils: For creating crisp, clean geometric designs and French tips.
- Tweezers: For precise placement of small embellishments like rhinestones or glitter.
- Nail Polish Remover & Cotton Pads: For clean-up and corrections. Non-acetone removers are gentler on the nails.
- Good Quality Nail Polishes: Invest in a few classic shades (nudes, black, white, metallics) and some trendy colors.
Beginner-Friendly Luxury Nail Design Techniques
Ready to get creative? These techniques are perfect for beginners and offer a sophisticated look:
1. The Chic French Manicure (with a Twist!)
The French manicure is a timeless classic, but we can give it a luxurious update.
- Prep: Start with a clean, shaped nail. Apply a thin layer of your chosen nude or sheer pink polish as your base color. Let it dry completely.
- The Tip: Instead of white, try a metallic shade (gold, silver, rose gold) or a deep jewel tone (emerald, sapphire) for the tip. You can use a fine nail art brush to paint the tip, or for a cleaner line, use striping tape! Place the tape where you want the tip to begin, paint above it, and carefully peel the tape off when the polish is still slightly wet.
- Seal: Once dry, apply a generous layer of shiny top coat.
2. Polished Ombre Effect
This blended color look is incredibly chic and surprisingly easy.
- Base: Apply your base coat and a sheer nude or light pink polish. Let it almost dry.
- Sponge Technique: Dab two or three colors onto a makeup sponge (a regular cosmetic sponge works!). Start with your lightest color at the tip of your nail, then layer a slightly darker shade below it, and a darker color (or even glitter!) at the very edge of the nail tip.
- Apply: Gently dab the sponge onto your nail, rolling it slightly to blend the colors. Don’t press too hard! You might need to reapply polish to the sponge and dab again for a few layers to get a smooth transition.
- Clean Up: Use a small brush dipped in nail polish remover to clean up any excess color on your skin.
- Seal: Finish with a good top coat to meld the colors together and add shine.
3. Simple Geometric Lines
Clean lines look instantly modern and sophisticated.
- Base Colors: Paint your nails with your desired base colors. Think contrasting shades, like black and white, navy and gold, or a neutral base with a metallic accent.
- Apply Tape: Once the base color is completely dry, carefully place striping tape onto your nail to create geometric shapes. You can make a sharp diagonal line, a triangle, or even a simple stripe.
- Paint Over: Paint over the tape with your accent color.
- Remove Tape: VERY carefully peel off the striping tape while the accent color is still wet. This prevents the polish from lifting.
- Seal: Apply a clear top coat for a smooth, finished look.
4. Elegant Dotted Details
Dots are versatile and can create anything from a minimalist accent to a playful pattern.
- Base: Apply your base color polish and let it dry.
- Dotting Tool: Dip your dotting tool into your accent polish. Start by dabbing a few dots along the free edge of your nail for a modern take on a French tip, or create a small cluster of dots near the cuticle.
- Experiment: You can vary the size of the dots by using different sized dotting tools or the tip of a toothpick.
- Seal: Once dry, protect your design with a top coat.
5. Subtle Glitter Fade
A touch of sparkle can elevate any manicure to luxurious heights.
- Base Color: Apply your base color and let it dry.
- Glitter Polish: Take a glitter polish, preferably with smaller glitter particles for a more refined look.
- Apply Gradient: Apply the glitter polish mainly to the tip of your nail, fading downwards towards the cuticle. You can use the brush to gently feather the glitter. For a smoother blend, you can dab the glitter onto the nail tip with a makeup sponge.
- Layer if Needed: Apply a second light coat if you want more glitter opacity.
- Seal: Cap the glitter with a generous layer of top coat. It might take two coats of top coat to smooth out the texture of the glitter.
Deep Dive: Mastering a Luxury Look
Achieving that truly luxe feel involves more than just applying polish. It’s about the complete package – healthy nails, flawless application, and thoughtful design choices.
Nail Prep for a Luxe Foundation
This is arguably the most important step. Messy cuticles or uneven nail surfaces can ruin even the most beautiful design. A healthy nail is a beautiful nail!
- Cleanliness is Key: Always start with clean nails. Remove old polish thoroughly.
- Shape Matters: File your nails into your desired shape (square, squoval, almond, stiletto). A smooth shape is characteristic of a polished look. Consider glass files for a gentle, clean edge.
- Cuticle Care: Gently push back your cuticles with an orange stick or cuticle pusher. Avoid cutting them unless absolutely necessary, as this can lead to damage. Applying a cuticle oil beforehand can soften them, making them easier to manage.
- Buffing (Optional but Recommended): A very light buff with a fine-grit buffer can smooth out ridges and provide a good surface for polish to adhere to. Be gentle!
Application Techniques for a Flawless Finish
The way you apply your polish makes a huge difference.
- Base Coat is Non-Negotiable: It protects your nails and helps polish last longer.
- Thin, Even Coats: Avoid thick, gloopy layers of polish. Three thin coats are better than one thick one, as they dry faster and more evenly, reducing the chance of bubbles and streaks.
- The “Three-Stroke” Method: For each coat, place your brush in the center of the nail near the cuticle, sweep up to the tip, then down one side, then down the other. This ensures even coverage.
- Cap the Edge: After your final color coat, run your brush lightly along the free edge of your nail. This “caps” the polish and significantly helps prevent chipping.
- Top Coat Power: Apply a generous layer of top coat. Don’t forget to cap the edge again. A good top coat will seal your design, add incredible shine, and extend the life of your manicure.
Color Palettes for Sophistication
Choosing the right colors is fundamental to luxury nail designs.
- Neutrals & Nudes: Think soft beiges, creamy whites, subtle greys, and muted browns. They are versatile and always elegant.
- Deep Jewel Tones: Emerald green, sapphire blue, ruby red, amethyst purple. These rich, saturated colors exude opulence.
- Metallics: Gold, silver, rose gold, bronze. Used as accents or full nail colors, they add instant glamour.
- Classic Black & White: Timeless, bold, and always chic. Perfect for graphic designs.
- Pastels (with a twist): Muted or dusty pastels can also feel very luxurious, especially when paired with metallic accents or clean lines.
Embellishments: Less is More
While bold bling can be fun, true luxury often lies in subtle, strategic placement of embellishments.
- Tiny Gems: A single rhinestone at the base of a nail, a scattering of micro-pearls, or a thin line of tiny crystals along the cuticle can add just the right amount of sparkle.
- Crushed Shell/Abalone: These add a natural, iridescent shimmer that feels very high-end.
- Fine Glitter: Instead of chunky glitters, opt for fine holographic or metallic glitters for a sophisticated shimmer.
- 3D Charms (Use Sparingly): A very small, delicate charm can be stunning, but avoid anything too bulky or distracting.
Trendy Luxury Nail Design Ideas for Every Style
Let’s explore some popular looks that are currently trending and embody luxury:
1. The “Quiet Luxury” Manicure
This is all about understated elegance. Think clean, perfect nails in neutral shades. Often achieved with a sheer milky white, a soft nude, or a pale pink. The focus is on flawless application and the natural beauty of the nail shape and color.
2. Metallic Accents
Gold, silver, or rose gold lines, tips, or negative space designs over a nude or sheer base are incredibly chic. This trend embraces a modern, minimalist approach to glamour.
3. Chrome Nails
The “glazed donut” or full chrome finish in shades of silver, pink, or pearly white is a huge trend. It gives a high-shine, almost futuristic look that still feels incredibly luxurious.
4. Deep, Dark Polishes
Opaque blacks, deep navies, forest greens, and rich burgundies are sophisticated choices, especially for fall and winter. Paired with a glossy top coat, they look incredibly chic.
5. Minimalist Art
This involves simple, often abstract, designs. Think a single thin line, a small dot in an unexpected place, or a delicate abstract swirl. The key is restraint. For example, an almond-shaped nail with a single black dot near the cuticle looks incredibly modern and elegant.
Maintaining Your Luxury Nails
Keeping your fabulous nails looking their best is key. Regular care ensures your designs stay pristine.
- Moisturize, Moisturize, Moisturize! Apply cuticle oil daily and hand lotion frequently. Hydrated nails and cuticles look healthier and more polished.
- Avoid Harsh Chemicals: Wear gloves when doing household chores, especially washing dishes or using cleaning products. These can strip polish and damage nails.
- Touch-Ups: If you notice a tiny chip, you can sometimes fix it with a careful application of top coat or a matching polish.
- Reapplying Top Coat: Consider adding an extra layer of top coat every 2-3 days to refresh the shine and add protection.
- Gentle Removal: When it’s time for a change, use a good quality nail polish remover and soak your nails rather than scraping.
Table: Luxury Nail Design Inspiration
Here’s a quick reference guide to inspire your next manicure:
| Design Type | Key Elements | Best For | Beginner Rating |
|---|---|---|---|
| Classic French (Metallic Tip) | Sheer base, metallic line | Everyday elegance, special occasions | Easy |
| Ombre | Blended color gradient | Soft, sophisticated look | Medium |
| Geometric Lines | Clean, sharp lines with tape | Modern, edgy style | Medium |
| Single Dot Accent | Minimalist dot placement | Subtle detail, chic | Easy |
| Glitter Fade | Glitter concentrated at tip/base | Glamorous touch | Easy |
| “Quiet Luxury” | Perfectly applied neutrals/sheers | Understated elegance | Easy |
| Chrome Finish | High-shine metallic powder | Trendy, futuristic | Medium (requires special powder) |
Frequently Asked Questions About Luxury Nail Designs
Q1: How can I make my DIY luxury nails look professional?
A: Focus on flawless application with thin coats of polish, perfect cuticle cleanup, and a fantastic top coat. Using tools like striping tape for crisp lines and practicing your application strokes will make a big difference.
Q2: What are the easiest luxury nail designs for beginners?
A: Simple designs like a glitter fade, a single dot accent, or a classic French with a metallic tip are very achievable. Focusing on clean application of a solid, sophisticated color is also a great starting point.
Q3: Do I need special tools for luxury nail designs?
A: You don’t need many! A good base and top coat, a fine nail art brush or dotting tool, and perhaps striping tape will open up a world of elegant designs. Quality nail polishes are also key.
Q4: How long do luxury nail designs typically last?
A: With proper prep, application, and care (including a good top coat and avoiding harsh chemicals), most luxury polish designs can last 5-7 days before showing signs of wear.


