Want nails that stay flawless for weeks? Learn essential at-home hacks for long-lasting nail designs that prevent chips and fading. Discover simple techniques and product tips to keep your manicure looking salon-fresh, all by yourself!
Dreaming of perfect nails that last? We all love a beautiful manicure, but it can be frustrating when chips and wear start to show just days later. Getting those salon-quality designs to stick around longer shouldn’t require a trip to the nail salon. With a few clever tricks and the right approach, you can create stunning, long-lasting nail art right in your own home. Let’s dive into the secrets that will keep your nails looking fabulous for ages!
Why Do My Manicures Chip So Quickly?
It’s a common frustration! Several factors can contribute to a manicure’s short lifespan: improper prep, the type of polish used, environmental damage, and even how we use our hands.
Improper Nail Prep: Not cleaning or buffing nails correctly means polish has a harder time adhering, leading to lifting and chipping.
Polish Quality: Some polishes are formulated for faster drying but lack the flexibility and durability of others.
Top Coat Neglect: Skipping or using a subpar top coat is a major reason for chips and dullness.
Daily Wear and Tear: Constant exposure to water, harsh chemicals, and rough surfaces can break down polish.
Nail Condition: If your nails are naturally brittle or oily, polish may not adhere as well.
But don’t worry! We’ve got the solutions to help you achieve a manicure that truly endures.
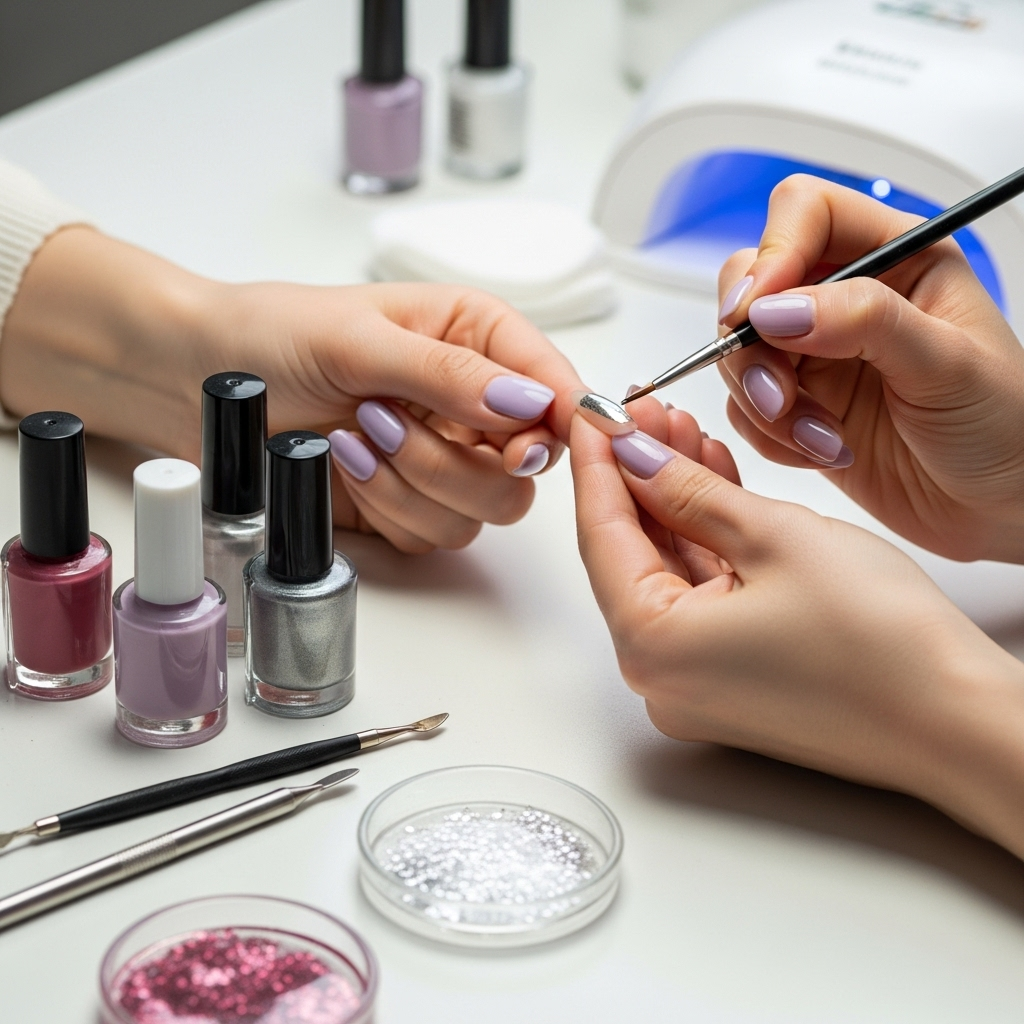
The Ultimate At-Home Hacks for Long-Lasting Nail Designs
Achieving a durable, beautiful nail design at home is totally doable! It’s all about a few key steps and understanding what makes polish stick. Think of it as building a strong foundation for your nail art.
1. Nail Prep is Non-Negotiable
This is arguably the most crucial step for any long-lasting manicure. Skipping thorough prep is like trying to build a house on sand – it won’t last.
Clean Your Nails Thoroughly: Remove all traces of old polish, oils, and lotions. Use a nail polish remover that doesn’t contain harsh acetones if your nails are prone to drying out. A good quality polish remover wiped over each nail ensures a clean canvas.
Push Back Cuticles: Gently push back your cuticles with an orange wood stick or a cuticle pusher. Avoid cutting them if possible, as cuticles protect your nail bed from bacteria. Keeping them tidy prevents polish from adhering to the skin, which can cause lifting.
Buff Your Nails Lightly: Use a fine-grit nail file (around 180-240 grit) to gently buff the surface of your nails. This creates a slightly rough texture, allowing the polish to grip better. Don’t over-buff, as this can thin your nails. Just a few light strokes across the surface are enough. For more information on nail care, the NHS offers some excellent general advice and tips.
Shape Your Nails: File your nails to your desired shape. Ensure all edges are smooth to prevent snags that could lead to chips.
2. The Power of a Good Base Coat
A good base coat is your manicure’s best friend. It acts as a protective barrier and a grippy surface for your color polish.
Choose the Right Base Coat: Select a base coat that suits your nail type. There are strengthening base coats, hydrating ones, and ridge-filling ones. A general-purpose, long-wear base coat is a great starting point for most people.
Apply Thin, Even Layers: Apply one thin layer of base coat. Ensure you cap the free edge of your nail by running the brush horizontally along the tip. This seals the polish and prevents chipping from the edge.
Let it Dry Completely: Resist the urge to rush! Allow the base coat to dry fully before moving on to color. This can take a minute or two, but impatience here can sabotage your entire manicure.
3. Mastering Polish Application
How you apply your color polish makes a huge difference in its longevity. Thin layers are key!
Thin Coats are Your Secret Weapon: Apply color polish in thin, even coats. Thick layers take longer to dry, are more prone to smudging, and are more likely to chip.
The Three-Stroke Method: A classic technique involves three strokes: one down the center, and one on each side. This ensures even coverage without excessive product.
Cap the Free Edge: Just like with the base coat, run your brush horizontally along the very tip of your nail after each color coat. This seals the color and provides an extra layer of protection.
Allow Drying Time Between Coats: This is crucial! Let each layer of color polish dry for at least 2-5 minutes before applying the next. Patience here guarantees a smooth, durable finish.
4. The Indispensable Top Coat
The top coat is your final defense against chips, dings, and dullness. It seals everything in and adds that coveted shine.
Choose a High-Quality Top Coat: Opt for a “long-wear,” “gel-like,” or “quick-dry” top coat. These are specifically formulated to provide durability and shine. Some even contain UV inhibitors to prevent color fading.
Apply Generously (but still smoothly): Apply a generous, but not overly thick, layer of top coat. This layer should smooth out any minor imperfections in the color coats.
ALWAYS Cap the Free Edge: Again, this is vital! Make sure your top coat covers the free edge of the nail. This “locks” in the color and prevents water and grime from seeping underneath.
Reapply Top Coat Regularly: For incredibly long-lasting manicures, consider reapplying a thin layer of top coat every 2-3 days. This refreshes the shine and adds another protective layer.
5. The Importance of Curing and Drying Times
Rushing the drying process is one of the biggest manicure mistakes. Patience is a virtue, especially when it comes to polish.
Air Drying vs. Quick Dry Products: While you can let traditional polish air dry, using quick-dry drops or sprays can help speed up the process significantly. These are often oil-based and help the polish layers solidify faster.
Avoid Touching Anything: After applying your final top coat, avoid touching anything for at least 15-30 minutes. Even a quick-dry polish needs a little time to fully harden. The longer you can let it set, the better.
The “Cold Water” Trick: After your polish has set for about an hour, you can try dipping your nails into a bowl of cold water for a minute or two. This can help the polish harden faster from the underside.
6. Protecting Your Manicure in Daily Life
Your hands do a lot of work! Protecting your gorgeous nails from everyday hazards is key to keeping them looking pristine.
Wear Gloves: This is a game-changer! Always wear rubber gloves when doing household chores, washing dishes, or working with cleaning products. These activities expose your nails to harsh chemicals and excessive moisture, which break down polish and can lead to lifting and chipping.
Be Mindful of Your Hands: Try to use your fingertips rather than your nails to press buttons, open boxes, or scrape things. Treating your nails gently will significantly extend their life.
Avoid Frequent Water Exposure: Prolonged soaking in water can soften the nail and the polish, making them more vulnerable to damage. Try to limit long baths or swims if you want your manicure to last.
7. Color Choice and Finish Matters
Some colors and finishes naturally last longer than others.
Darker or Deeper Shades: Often, deeper reds, blues, or purples tend to show chips less obviously than lighter or sheer shades.
Matte Finishes: While beautiful, matte finishes can sometimes wear down at the edges more quickly than glossy ones. A glossy top coat can still be applied over a matte polish for added durability if desired.
Nail Art Placement: Fine details or small decals applied directly onto the nail without a good “seal” can lift and peel. Layering these elements between polish coats and sealing them with a top coat is crucial.
At-Home Gel Polish vs. Regular Polish: A Comparison
If you’re looking for the absolute longest-lasting results at home, gel polish is often the way to go. However, it requires a bit more equipment.
| Feature | Regular Nail Polish | At-Home Gel Polish | Benefits for Longevity |
| :—————- | :———————————————— | :—————————————————- | :——————— |
| Application | Air dries; easy to apply and remove. | Requires UV/LED lamp to cure; can be trickier to apply. | Gel cures harder. |
| Durability | Prone to chipping and scratching; lasts 3-7 days. | Extremely durable; resistant to chips and scratches. | Gel lasts 2-3 weeks. |
| Removal | Simple with standard nail polish remover. | Requires special gel remover and soaking or foil method. | Regular polish is easier to remove. |
| Shine/Finish | Can be glossy; may dull over time. | High-gloss, even finish that lasts. | Gel maintains shine. |
| Damage Risk | Lower risk of overtreatment. | Potential for nail damage if removed improperly. | Regular polish is gentler. |
What You’ll Need for Long-Lasting Regular Polish
Nail Polish Remover: Acetone-free is gentler if you have dry nails.
Cotton Pads/Balls: For removing old polish.
Orange Wood Stick or Cuticle Pusher: For cuticle care.
Fine-Grit Nail File: To shape and lightly buff.
Buffer Block: For smoothing the nail surface.
High-Quality Base Coat: Essential for adhesion.
Your Favorite Nail Polish Colors: Choose good quality brands.
Fast-Drying Top Coat: A must for speed and durability.
Quick-Dry Drops or Spray (Optional): For speeding up drying.
Rubber Gloves: For household chores.
What You’ll Need for At-Home Gel Polish
UV/LED Nail Lamp: Essential for curing gel polish.
Gel Base Coat: Specifically designed to work with gel polish.
Gel Color Polish: Various shades available.
Gel Top Coat: Seals the gel manicure.
Isopropyl Alcohol (99%): For cleaning the tacky layer after curing.
Gel Nail Polish Remover: Stronger formula for removal.
Cotton Pads/Foil: For the removal process.
Cuticle Oil: To rehydrate after removal.
Troubleshooting Common Longevity Issues
Even with the best tips, you might encounter a few snags. Here’s how to fix them:
Bubbles in Polish: This is usually due to applying polish too thickly, not letting coats dry, or shaking polish bottles vigorously. Hack: Roll the bottle gently instead of shaking. Apply thinner coats and ensure each layer is dry.
Chipping at the Free Edge: This means the edge wasn’t properly sealed. Hack: Always cap the free edge with your base coat, color coats, and especially your top coat.
Polish Lifting: Often caused by oily nails or improper prep. Hack: Ensure nails are squeaky clean and dry. Lightly buffing the surface creates a better grip.
Dull Finish: Top coat may have worn away, or the polish simply lost its gloss. Hack: Reapply a thin layer of top coat every 2-3 days. Use a high-shine, long-wear top coat.
Tip Wear: The color looks slightly worn down at the tips. Hack: Re-cap the free edge diligently with every coat. A stronger top coat can also help. If tip wear becomes noticeable, a fresh layer of top coat might refresh it.
Frequently Asked Questions (FAQs)
—
Q1: How can I make my regular nail polish last longer than a week?
You can significantly extend the life of regular polish by focusing on thorough nail prep, applying thin coats of base coat, color, and especially top coat, and always capping the free edge of your nail. Protecting your nails from water and chemicals with gloves is also key.
Q2: Is it better to use a gel polish or regular polish for longevity?
Gel polish, when applied correctly and cured under a UV/LED lamp, is significantly more durable and long-lasting than regular polish, typically lasting 2-3 weeks. Regular polish usually lasts 3-7 days.
Q3: How many coats of polish should I apply for a long-lasting manicure?
Generally, two thin coats of color polish over a base coat, followed by one or two thin coats of top coat, is ideal. More than two color coats can make the polish thicker and prone to chipping.
Q4: What does “capping the free edge” mean and why is it important?
Capping the free edge means running your brush horizontally along the very tip of your nail after applying a coat of base, color, or top coat. This seals the edge, preventing polish from lifting or chipping from the tips.
Q5: Should I wash my hands before applying nail polish?
Yes, it’s important to wash your hands to remove any oils, lotions, or debris. However, ensure your nails are completely dry before applying polish. Some experts even recommend a quick swipe with isopropyl alcohol on a cotton pad right before applying the base coat to remove any lingering oils.
Q6: Can I use a regular top coat over gel polish or vice-versa?
No, you cannot mix regular polish and gel products. Gel polishes require a UV/LED lamp to cure and will not dry properly on their own. Regular polish will not provide the necessary seal or durability for a gel manicure, and a gel top coat will not cure over regular polish.
Q7: How important is the quality of the nail polish itself?
The quality of your nail polish matters a lot! Higher-quality polishes often have better formulas that offer superior color payoff, smoother application, and increased durability. Investing in reputable brands for your base coat, color, and especially your top coat can make a big difference in how long your manicure lasts.
—
Nail Art That Lasts: Design Ideas & Tips
It’s not just about color; how you incorporate designs can affect longevity too!
Simple & Subtle: Instead of intricate full-nail designs, opt for minimalist accents like a single stripe, a dot at the base, or a French tip. These are less prone to wear and tear than all-over complex patterns.
Sealing Glitter: If you love glitter, make sure it’s fully encapsulated. Apply glitter polish, let it dry, and then apply a thick, smoothing top coat to create a smooth surface. A second top coat can ensure it’s completely sealed.
Stamping & Decals: When using nail stamping plates or water decals, press them firmly and ensure there are no air bubbles. Always seal them completely with your top coat, paying special attention to the edges.
Press-On Nails: If you’re using press-on nails for an instant long-lasting look, ensure your natural nails are clean and dry, and use a strong nail glue or adhesive tabs specifically designed for press-ons. You can even apply a thin layer of top coat to the press-on itself for added shine. For more on press-on care, check out resources like iFixit’s general guides on adhesives.
Maintain Your Masterpiece
Even the most durable manicure needs a little TLC.
Cuticle Oil is Your Friend: Once your polish is fully cured (at least a few hours after application), apply cuticle oil daily. This keeps your nails and cuticles moisturized, preventing dryness that can lead to peeling and lifting around the cuticle line.
Gentle Filing: If you need to trim or file a snagged nail, use a fine-grit file and file in one direction only to prevent further damage or polish breakdown.
* Address Chips Immediately (If possible):** If you notice a tiny chip or snag, try applying a tiny bit of top coat to the spot. This can sometimes prevent it from spreading.
Conclusion: Your Long-Lasting Nails Await!
Creating stunning, long-lasting nail designs at home is absolutely within your reach! By mastering the art of nail prep, applying polish in thin, patient layers, and always sealing with a quality top coat, you’re setting yourself up for manicure success. Don’t forget the power of protecting your nails from daily wear and tear. With these essential hacks, your at-home manicures can look salon-fresh for days, if not weeks, giving you the confidence and style you deserve. Now go forth and create your most durable, beautiful nails yet!