Want your nail designs to last longer? Discover genius hacks like proper prep, quality polish, top coat tricks, and gentle aftercare. These simple tips will keep your manicures looking salon-fresh for weeks, saving you time and money while boosting your style confidence.
Long-Lasting Nail Design Hacks: Genius Tips
Ever spend precious time crafting the perfect nail design, only to have it chip after a couple of days? It’s a common frustration, but don’t worry! Achieving beautiful, long-lasting nail art is totally doable, even for beginners. You don’t need to be a nail pro to make your manicures last. We’ve gathered some genius tips and tricks that are easy to follow and make a big difference. Get ready to enjoy stunning nails that stay gorgeous longer – let’s dive into the secrets!
Why Do Manicures Chip So Quickly?
Several things can cause your beautiful nail designs to meet an early end. Think about everyday life: washing dishes, typing, opening packages, even just the natural wear and tear from using your hands. If the nail surface isn’t prepared correctly, or if the polish isn’t applied in the right way, it can lift or chip easily. Heat and moisture can also play a role in weakening the polish bond. But the good news is, with a few smart steps, you can significantly extend the life of your manicure and keep your designs looking flawless and chip-free.
The Foundation: Perfect Nail Prep is Key
This is where the magic truly begins! Skipping or rushing proper nail prep is the #1 reason manicures don’t last. Think of it like building a house – a strong, stable foundation is absolutely essential for everything to stay put.
1. Clean Slate: Remove All Traces of Old Polish
Before you even think about a new design, make sure every speck of old polish is gone. Even a tiny bit left behind can prevent the new polish from adhering properly, leading to premature lifting and bubbling.
- Use an acetone-based remover for stubborn glitters and dark colors.
- For a gentler option, opt for a non-acetone remover, though it might require a bit more scrubbing.
- Don’t forget to gently push back or trim your cuticles after removing old polish, but before filing.
2. Shape Up: File Your Nails Correctly
The way you file your nails can impact how long your polish lasts. Filing in one direction is crucial!
- Use a fine-grit nail file (around 240 grit is great for natural nails).
- File from the side of the nail towards the center in one smooth stroke.
- Avoid sawing back and forth, as this can weaken the nail edge and lead to snags and chips.
- Aim for a clean, smooth edge for the polish to grip onto.
3. Buff for Grip: Not for Shine!
A very light buffing of the nail plate is essential to remove natural oils and create a slightly rough surface for the polish to adhere to. However, be gentle!
- Use a fine-grit buffer (the fourth side on most multi-sided buffers).
- Lightly go over the entire nail surface just once or twice.
- The goal is to create a matte finish, not to thin or damage your nail. Over-buffing can actually make polish peel.
4. Wash (and Dry) Thoroughly: Oil is the Enemy
After filing and buffing, it’s vital to remove all dust and oils. Even the natural oils from your fingertips can interfere with polish adhesion.
- Wash your hands with a mild soap and water.
- Dry your hands and nails completely with a lint-free towel.
- An alternative is to swipe each nail with rubbing alcohol or a nail dehydrator. This removes oils and helps polish last much longer.
5. Prime Time: The Importance of a Base Coat
A good base coat is non-negotiable for long-lasting manicures and healthy nails. It’s the sticky layer that polish adheres to, and it also protects your natural nail from staining.
- Apply a thin, even layer of a quality base coat.
- Ensure you cap the free edge (paint the very tip of your nail) with every coat – base, color, and top coat. This seals the polish and prevents chips.
- Allow the base coat to dry for at least 1-2 minutes before applying color.
Nail Polish Application: The Art of Layering
How you apply your nail polish color and top coat is just as important as the prep work. Applying it correctly creates a smooth, durable finish.
1. Thin Coats are Best
Resist the urge to slather on thick layers of polish. Thick coats take longer to dry and are more prone to smudging, denting, and peeling.
- Apply two to three thin coats of your chosen color.
- Allow each coat to dry for at least 2-5 minutes before applying the next.
- A good test: gently touch the edge of a nail with your pinky finger. If it feels tacky but doesn’t transfer polish, it’s ready for the next coat.
2. Cap the Edge: Seal the Deal!
We mentioned this with the base coat, but it bears repeating for color and top coat. Capping the free edge is a game-changer for preventing chips.
- With each coat (color and top coat), run your brush along the very tip of your nail, creating a seal.
- This locks in the color and prevents moisture and air from getting underneath, which can cause lifting.
3. The Mighty Top Coat: Your Polish’s Best Friend
A good top coat is essential for shine, protection, and longevity. It acts as the final shield for your beautiful design.
- Choose a high-quality, quick-drying top coat. Gel-like top coats often provide extra durability.
- Apply a generous, but not gloopy, layer.
- Don’t forget to cap the free edge!
- Reapply a thin layer of top coat every 2-3 days to refresh your manicure and add extra protection. This is a secret weapon for extending the life of your polish.
Bonus Polish Application Hacks
Here are a few extra tricks to ensure your polish application is top-notch:
- Shake, Don’t Stir: Gently roll the polish bottle between your hands before use to mix the pigments. Shaking can introduce air bubbles.
- Wipe Your Brush Properly: Wipe one side of the brush clean on the neck of the bottle, then use the other side with polish on the nail. This gives you more control.
- Avoid Thick Cuticle Oil Before Polish: While cuticle oil is great for nail health, applying it right before polish can make the polish slide off. Cleanse your nails if you’ve used oil.
Designing for Durability: Creative Strategies
Sometimes, the design itself can be prone to wear and tear. Here’s how to build lasting beauty into your nail art.
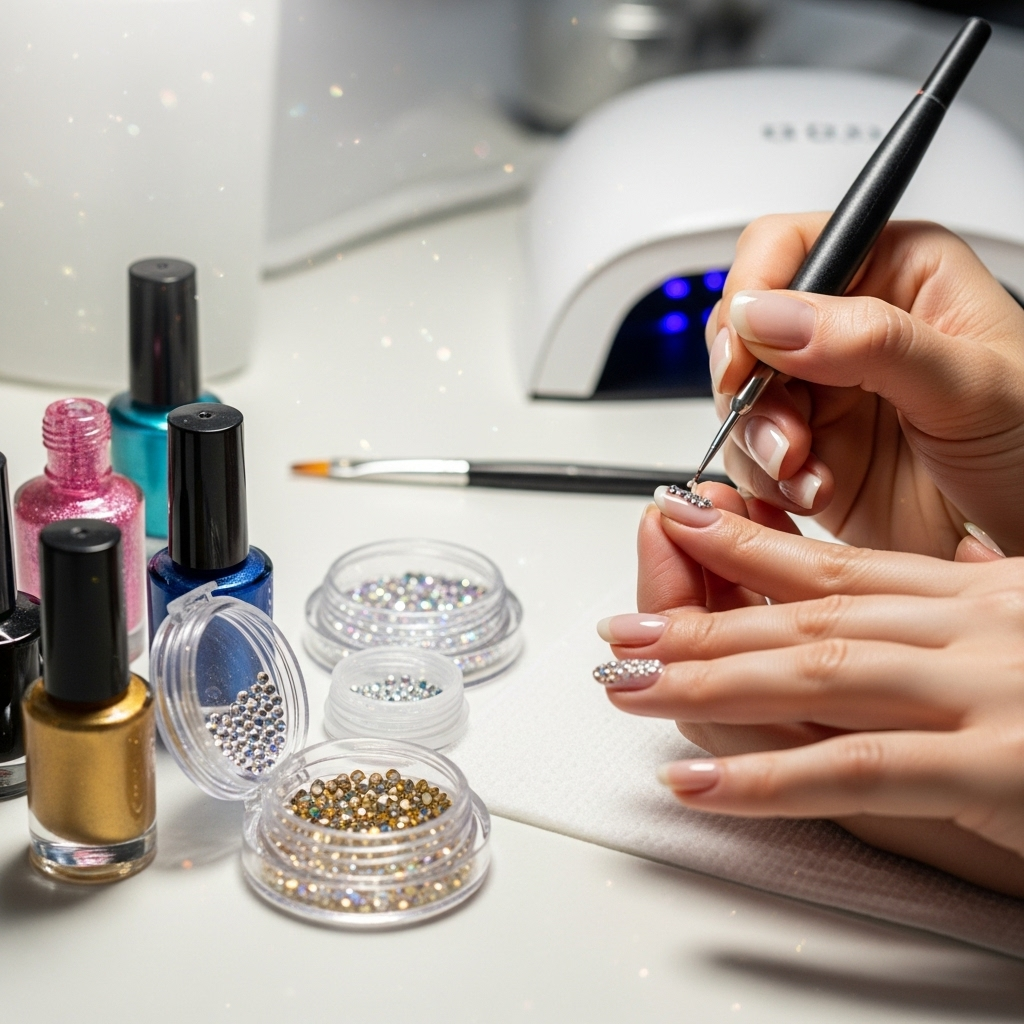
1. Strategic Placement of Embellishments
Gems, glitter, and other 3D elements can look amazing, but they can also catch on things and get ripped off. Placement matters!
- Use a strong nail glue or a thick top coat/gel to adhere embellishments. Try to embed them slightly into the polish or gel for a smoother finish.
- Avoid placing heavy embellishments near the free edge where they are more likely to snag.
- Consider encapsulating larger gems or 3D elements with a clear top coat or gel to smooth the surface and protect them.
2. Simple is Often Smarter
Extremely intricate designs with a lot of thin lines or delicate details can be more prone to chipping or smudging, especially if not applied perfectly. For maximum longevity, consider:
- Geometric shapes: Clean lines and blocks of color are often easier to seal.
- Minimalist accents: A single dot, a thin stripe, or a small sticker can add a chic touch without compromising durability.
- Ombre and gradient effects: These blend colors seamlessly and are often very forgiving.
3. The Power of Chrome and Foils Without the Fuss
Applying chrome powder or foil can be tricky. Here’s how to make it last:
- Ensure your base polish is completely dry but still slightly tacky.
- Apply foils or chrome powder with a silicone tool or your fingertip.
- Seal with a dedicated foil/chrome top coat or a good quality gel top coat. Always cap the edge!
4. Gel Polish: A Secret Weapon for Longevity
If you’re looking for serious staying power, gel polish is your best bet. It’s cured under a UV/LED lamp, making it incredibly durable and chip-resistant for 2-3 weeks.
- Professional application: For the best results and to ensure proper curing, consider getting it done at a salon.
- At-home kits: If you’re doing it yourself, invest in a good quality mini UV/LED lamp and starter kit. Follow the instructions carefully for each step – base, color, and top coat.
- Removal: Remember that gel polish requires a specific removal process (soaking in acetone) to avoid damaging your natural nails.
You can find detailed guides on how to use gel polish at home, such as those from Nailpro Magazine, which offer excellent insights into achieving salon-quality results.
Tools & Products That Make a Difference
Having the right tools and quality products can elevate your manicure from good to outstanding and, more importantly, long-lasting.
| Tool/Product | Why It Helps Durability | Beginner Tip |
|---|---|---|
| High-Quality Base Coat | Creates a strong bond, protects nails, prevents lifting. | Look for a smoothing or ridge-filling base coat if your nails aren’t perfectly even. |
| Good Quality Nail Polish | Better pigments and formulas adhere more smoothly and evenly. | Many brands offer “long-wear” formulas that are specifically designed for durability. |
| Quick-Dry Top Coat | Seals color, adds shine, and hardens the polish quickly. | Carry a mini version for touch-ups or to refresh your manicure every few days. |
| Glass Nail File | Files smoothly to prevent micro-tears, which can lead to chips. | Washable and gentler on the nail edge than traditional emery boards. |
| Cuticle Pusher/Orange Stick | Properly preparing the nail plate by gently pushing back cuticles ensures polish adheres to the nail, not the skin. | Use gently; push back cuticles after polish application to avoid lifting, but clean the nail plate before. |
| Lint-Free Wipes | Essential for removing dust and oils without leaving behind fibers that can interfere with polish adhesion. | Paper towels can leave fibers; microfiber cloths are also a good alternative. |
| Nail Dehydrator/Rubbing Alcohol | Removes all traces of oil and moisture from the nail plate for maximum polish adhesion. | Apply sparingly to the nail plate before your base coat. The CDC notes that isopropyl alcohol is effective at preventing bacterial growth, which indirectly supports a clean nail surface for polish. |
Daily Habits for Long-Lasting Nails
Your daily activities can make or break your manicure. Being mindful of how you use your hands is crucial.
1. Protect Your Hands!
This is arguably the most important habit for extending the life of any nail design, especially if you don’t have gel polish.
- Wear gloves for chores: Always wear rubber gloves when washing dishes, cleaning with harsh chemicals, or doing any task that involves prolonged contact with water or abrasive cleaners. Water can seep under the polish and weaken the bond, leading to lifting.
- Be mindful of daily tasks: Try not to use your nails as tools to open cans, scrape things, or pry items.
2. Hydrate, Hydrate, Hydrate!
Keeping your nails and cuticles moisturized is key to preventing problems.
- Use cuticle oil daily: Apply cuticle oil at least once a day, ideally before bed. This keeps your cuticles soft and prevents them from becoming dry and brittle, which can lead to hangnails that can snag and chip your polish.
- Moisturize your hands: Regularly applying hand lotion keeps the skin around your nails healthy and can prevent dryness that might affect polish adherence over time.
3. Avoid Harsh Chemicals
Beyond cleaning supplies, other common products can degrade nail polish.
- Sunscreen and insect repellent: Some ingredients in these products can break down nail polish. If you’ll be using them, try to apply them carefully or wear gloves.
- Hand sanitizers: While important for hygiene, frequent use of alcohol-based hand sanitizers can dry out your nails and cuticles, and may slightly degrade polish over time.
4. Gentle Removal of Everything
When it’s time to change your polish, do it gently.
- Avoid picking or peeling: This is the fastest way to damage your natural nail and remove layers of polish unevenly.
- Soak or use remover pads: For regular polish, allow a cotton pad soaked in remover to sit on the nail for a few seconds before wiping. For gel, follow proper removal techniques.
Troubleshooting Common Chip Issues
Even with the best tips, sometimes things happen! Here’s how to handle minor repairs:
Minor Chips and Scratches
Don’t panic if you get a small chip or scratch. You can often do a quick fix:
- Gently file down the rough edge of the chip with a fine-grit file.
- Apply a thin coat of your top coat over the affected area and the entire nail. Cap the edge again.
- For a more seamless repair, you might apply a very thin layer of your nail polish color to the chipped spot, let it dry, then apply top coat.
Lifting at the Edges
This often means the polish didn’t adhere well to the nail edge initially.
- Try to gently file away the lifted edge without damaging the natural nail.
- Carefully apply a thin coat of base coat to the bare area, let it dry, then apply color and top coat, ensuring you cap the edge.
- If the lifting is widespread, it might be time to remove the polish entirely and start fresh with proper prep.
Your FAQ Corner
Q1: How long should a regular nail polish manicure typically last?
A: With proper application and care, a well-applied regular nail polish manicure can last anywhere from 5 to 10 days before showing signs of significant wear or chipping. Gel polish, however, can last 2-3 weeks.
Q2: Do I really need a base coat?
A: Yes, absolutely! A base coat is crucial for helping polish adhere better, preventing stains on your natural nails, and creating a smooth canvas for your color. It’s a vital step for longevity.
Q3: How often should I reapply top coat?
A: For maximum durability, it’s a great hack to reapply a thin layer of top coat every 2-3 days. This refreshes the shine and adds an extra protective layer to prevent chips.
Q4: What’s the best way to dry regular nail polish quickly?
A: Quick-dry top coats are your best friend! You can also try dipping your nails into a bowl of ice-cold water for a minute or two after the polish feels mostly dry to the touch. Avoid using heat, as it can soften the polish.
Q5: Can I use nail glue to fix a chipped nail design?
A: You can use nail glue to temporarily re-adhere a popped-off nail gem or embellishment. For actual nail chips, filing and reapplying top coat is usually a better fix for polish. If the nail itself is broken, a nail repair kit might be needed.
Q6: Is gel polish bad for my nails?
A: When applied and removed correctly, gel polish is not inherently bad for your nails. Damage usually occurs from improper removal (peeling or filing too aggressively) or prolonged use without breaks, which can dry out the nail bed. Taking breaks and keeping nails moisturized is key.
Q7: What’s the difference between regular polish and gel polish?
A: Regular polish air-dries and is generally less durable, chipping more easily. Gel polish cures under a UV/LED lamp, creating a hard, flexible, and very long-lasting finish that is resistant to chips and smudges.
Conclusion: Your Path to Flawless, Lasting Nails
Achieving a manicure that stays beautiful for days, or even weeks, isn’t about luck – it’s about smart techniques and a little bit of care. From the essential steps of nail preparation that ensure polish has something to grip onto, to the careful application of thin coats and the crucial habit of capping the free edge, every step plays a role. Remember that a quality base coat and a reliable top coat are your nails’ best defense against chips and wear. Don’t underestimate the power of protecting your hands during daily chores; wearing gloves is a simple yet incredibly effective hack!
By incorporating these genius tips into your routine – whether you’re rocking classic polish or exploring the world of gel – you’ll be amazed at how much longer your nail designs will last. Embrace the process, enjoy the creativity, and wear your stunning, durable manicures with confidence. Happy polishing!