Want stunning lime green nails? This guide breaks down easy DIY lime green nail designs, essential tools, and tips to make your manicures pop. Get ready for a vibrant, fresh look that’s surprisingly simple to achieve, even for beginners!
Are you ready to inject some serious zest into your style? Lime green nails are a bold, fun choice that instantly brightens any look. But how do you get those vibrant, runway-ready designs without spending a fortune at the salon? It’s easier than you think! Many people find DIY nail art a bit intimidating, worrying about messy application or designs that just don’t turn out right. Don’t worry! We’ll walk you through everything you need to know to create show-stopping lime green nail art that expresses your unique personality.
From simple pops of color to intricate patterns, lime green offers a refreshing twist on traditional manicures. We’ll cover which polishes work best, the must-have tools for precision, and simple design ideas you can do at home. Get ready to transform your nails into a personal canvas of energetic style!
Why Lime Green Nails Are Having a Moment
Lime green is more than just a color; it’s a mood! This electric shade embodies vibrancy, freshness, and a playful spirit. It’s a color that stands out, making a statement without being over the top. Think of it as the nail equivalent of a burst of sunshine or a cool, refreshing drink on a hot day.
Fashion trends consistently bring vibrant colors back into the spotlight, and lime green is a prime example. It’s seen on runways, in celebrity styles, and now, it’s dominating the nail art scene. It pairs surprisingly well with a variety of other colors, from classic neutrals to bold contrasting hues, offering endless design possibilities.
For many, embracing bold colors like lime green on their nails is a fantastic way to step outside their comfort zone and express a more daring side. It’s a form of self-expression that’s both chic and fun. Plus, it’s perfect for any season, adding a pop of unexpected brightness to spring looks, a vibrant contrast to summer outfits, and a cheerful touch to darker fall and winter ensembles.
Essential Tools for Lime Green Nail Designs
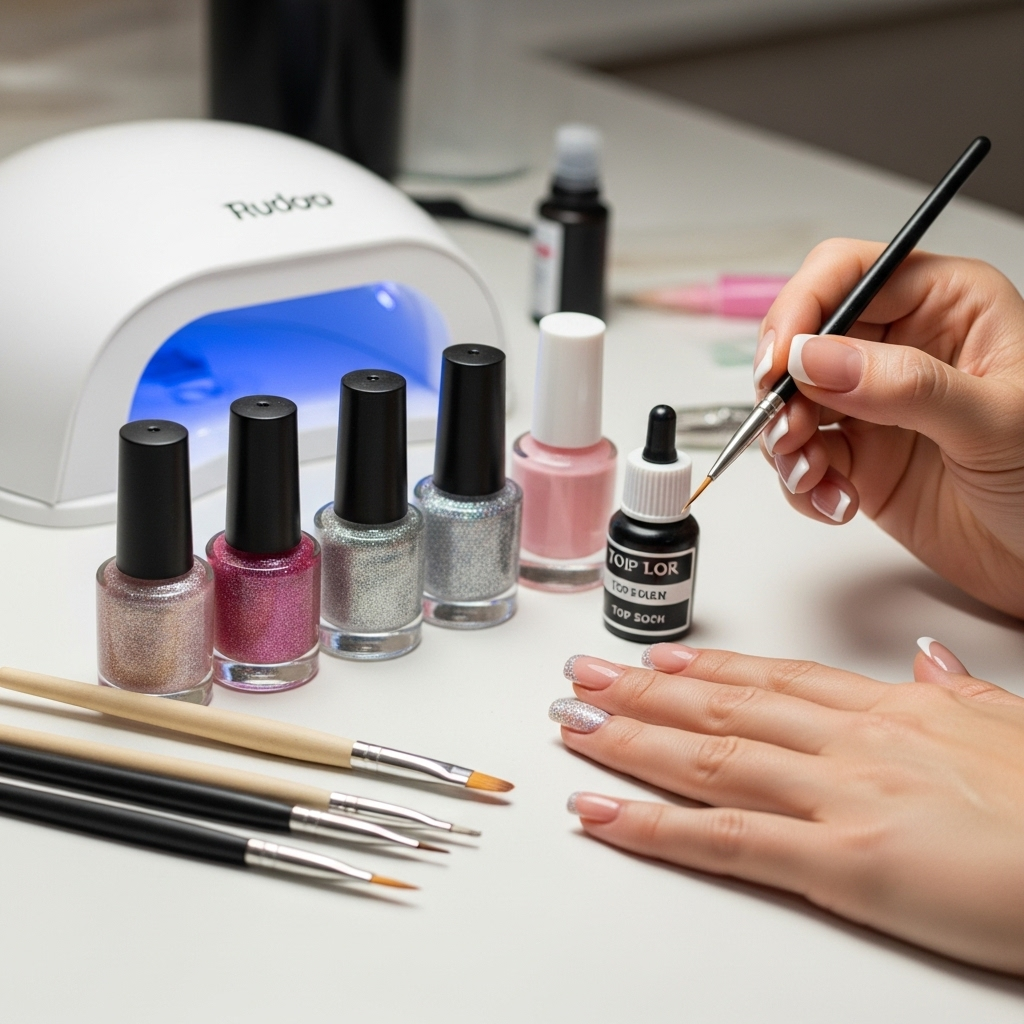
To achieve those stunning lime green nail designs, having the right tools makes all the difference. You don’t need a professional kit to start; a few key items will set you up for success. Investing in good quality tools can save you frustration and lead to much cleaner, more professional-looking results. Let’s look at what you’ll need:
Here’s a breakdown of essential supplies:
- Base Coat: This protects your natural nails from staining and helps your polish adhere better.
- Top Coat: Crucial for sealing your design, adding shine, and extending the life of your manicure.
- Lime Green Nail Polish: Choose a quality polish for vibrant color payoff.
- Accent Nail Polish Colors: White, black, gold, silver, or other complementary shades can enhance your designs.
- Thin Nail Art Brushes: A set with various fine tips is perfect for lines, dots, and details.
- Dotting Tools: These come with different-sized ball tips and are excellent for creating perfect dots and small patterns.
- Dotting Swirl Tool: Handy for swirling colors together or creating unique textures.
- Striping Tape: Creates sharp, clean lines for geometric designs.
- Stencils/Stickers: For quick and easy patterns like french tips, flowers, or abstract shapes.
- Nail Polish Remover: For cleaning up mistakes and refreshing your palette.
- Cotton Swabs or Small Brush: For precise cleanup around the cuticle area with remover.
- Nail File & Buffer: To shape your nails and ensure a smooth surface.
Having these tools will allow for greater precision and creativity. Don’t be afraid to experiment! Even simple designs can look incredibly chic with the right application.
Choosing the Perfect Lime Green Polish
The shade of lime green you choose can significantly impact the final look. There are subtle variations within the “lime green” family, each offering a different vibe. Consider the undertones and brightness:
- True Lime: A vibrant, almost neon green with a slight yellow undertone. This is the most energetic and eye-catching.
- Muted Lime: A slightly softer, less saturated version, perhaps with a touch more yellow or even a hint of white. This is more subtle but still trendy.
- Deeper Lime: If you want a less intense shade, look for lime greens with more depth, closer to an emerald but still retaining that unmistakable green-yellow glow.
When selecting your polish, look for:
- Opaqueness: A good opaque polish will give you full color coverage in one or two coats.
- Finish: You can find lime green polishes in cream, shimmer, metallic, and even glitter finishes, each offering a different texture and effect.
- Longevity: Gel polishes offer superior durability, but high-quality traditional polishes can also last well with a good top coat.
To ensure your lime green polish pops, always apply a white base coat first. This creates a brighter canvas and makes the green shade appear truer and more vibrant, especially if your natural nail color is darker. For gel polishes, a thorough cure under a UV/LED lamp is essential. For traditional polishes, ensure each layer is completely dry before applying the next.
Beginner-Friendly Lime Green Nail Designs
Getting started with lime green nail art doesn’t have to be complicated. Here are a few easy-to-achieve designs that look incredibly stylish:
1. The Classic Lime Pop
This is the simplest way to incorporate lime green. Paint all your nails in a vibrant lime green shade. For an extra touch, consider painting one accent nail in a contrasting color like white, black, or even a sparkling gold.
How-to:
- Apply a base coat to clean, dry nails.
- Apply one or two coats of your chosen lime green polish. Let dry completely between coats.
- On your accent nail (usually the ring finger), apply a contrasting color or even a glitter polish.
- Once dry, apply a generous layer of top coat to all nails.
2. Lime Green French Tips
A modern twist on the classic French manicure. Instead of white tips, use lime green!
How-to:
- Apply a sheer nude or milky white polish as your base on all nails. Let it dry.
- Carefully apply lime green polish to the tips of your nails. You can use a fine brush or guide stickers for a clean line.
- Alternatively, use striping tape: apply polish up to where you want the tip to start, stick tape, paint the tip with lime green, let it become tacky, then peel off tape.
- Let dry thoroughly, then apply a clear top coat.
3. Polka Dots Galore
Dots are fun, easy, and always stylish. Use lime green dots on a contrasting base, or use different colored dots on a lime green base.
How-to:
- Paint your nails with a base color (e.g., white, black, or lime green). Let it dry completely.
- Dip a dotting tool into a contrasting polish color (e.g., lime green dots on black nails).
- Press the dotting tool onto your nail to create dots. Vary the size by using different dotting tool tips.
- Continue creating dots in your desired pattern.
- Once all dots are dry, seal with a top coat.
4. Simple Lime Green Accents
Add a subtle touch of lime green to your existing manicure. This could be a single stripe, a small graphic shape, or a tiny dot near the cuticle.
How-to:
- Apply your base color (e.g., white, nude, or even a soft pastel). Let it dry.
- Using a very fine nail art brush dipped in lime green polish, carefully paint a thin line, a small dot, or a simple geometric shape on one or more nails.
- Make sure the line or shape is clean. Use nail polish remover on a fine brush to clean up any wobbles.
- Let the accent dry, then apply a top coat.
Intermediate Lime Green Nail Design Ideas
Ready to elevate your nail art game? These designs take a little more practice but offer stunning, high-impact results.
1. Marble Effect with Lime Green
This creates a sophisticated, organic look by swirling colors together.
How-to:
- Start with a white or neutral base coat on your nails. Let it dry.
- On a palette (or even a piece of foil), put a few drops of lime green polish and a few drops of white or black polish.
- Use a toothpick or a fine nail art brush to gently swirl the colors together, but don’t overmix.
- Quickly pick up some of the swirled color with your brush and dab or paint it onto your nail in a marble pattern.
- You can also place a drop of each color on the nail and then swirl them gently with a toothpick.
- Clean up the edges and seal with a top coat once dry.
2. Geometric Lines and Shapes
Clean lines and bold shapes are a modern favorite.
How-to:
- Paint your nails with a base color (e.g., black, white, or nude). Let it dry completely.
- Apply striping tape to create your desired geometric patterns. Ensure the tape is pressed down firmly to prevent polish bleeding.
- Paint over the taped areas with lime green polish. You might need two coats for full opacity.
- While the polish is still wet (or just tacky), carefully peel off the striping tape. This reveals the clean lines.
- Let the polish dry completely before applying a top coat.
3. Chrome Accents with Lime Green
Chrome powder can add a futuristic, ethereal shimmer. A popular trend is a lime green base with chrome details, or a chrome base with lime green accents.
How-to (for chrome details):
- Apply your lime green polish (gel polish works best for chrome) and cure under a lamp.
- Apply a No-Wipe Top Coat and cure.
- Using a silicone tool or applicator, rub chrome powder onto the tacky surface.
- Gently brush off excess powder.
- Using a fine brush and black or white polish, paint simple lines or dots over the chrome.
- Apply a final layer of No-Wipe Top Coat and cure.
4. Ombre Effect
A gradient from a complementary color to lime green, or a dark shade to a bright lime.
How-to:
- Apply a base color (e.g., white or a lighter green/yellow). Let it dry.
- Use a makeup sponge lightly dabbed with lime green polish.
- Gently dab the sponge onto the nail, starting from the tip or cuticle and working your way across to create a gradient.
- Repeat with more thin layers, focusing on building the color intensity where you want it.
- Clean up any smudges around the cuticle. Seal with a top coat.
Advanced Lime Green Nail Design Techniques
For those looking to push their creativity even further, these advanced techniques can create incredibly detailed and professional-looking designs.
1. Hand-Painted Fine Art
This involves using fine art brushes and precise control to paint detailed images, patterns, or abstract designs directly onto the nail.
How-to:
- Start with a well-prepped and polished nail (often a neutral or white base works best).
- Thin down your nail polishes with a tiny bit of nail polish thinner or rubbing alcohol to make them more fluid for painting.
- Using extremely fine detail brushes, load a small amount of polish and carefully paint your design. This could be floral motifs, intricate geometrics, or even character art.
- Work in thin layers, allowing each element to dry before adding the next to avoid smudging.
- High-quality brushes designed for acrylic painting or fine detail work are essential here.
- When complete, allow the art to cure fully before applying a protective top coat. Patience is key!
2. Decals and Transfers: Professional Polish with Ease
Water decals or stencils offer intricate designs without freehand painting. They are ideal for adding detailed patterns quickly.
How-to (Water Decals):
- Paint your nails with your desired base color and let dry completely.
- Cut out the decal design you want to use.
- Dip the decal in water for about 10-20 seconds until the design starts to loosen from the backing paper.
- Gently slide the design off the backing paper and onto your nail.
- Smooth out any bubbles or wrinkles with a damp fingertip or a silicone tool.
- Seal with a top coat.
3. Textured Nails
Adding texture can give your lime green design a unique touch, like sand effects or matte finishes.
How-to (Matte Finish):
- Apply your lime green polish and let it dry completely.
- Apply a matte top coat. This instantly transforms any shiny polish into a velvety, modern finish.
How-to (Sugar/3D Texture):
- Apply your lime green polish.
- While the polish is wet, sprinkle fine glitter or colored acrylic powder onto the nail.
- For more pronounced 3D effects, you can use gel paint and strategically place beads of gel or acrylic powder, curing afterwards.
Color Combinations with Lime Green
Lime green is surprisingly versatile and pairs well with many colors, opening up a world of design possibilities.
Here are some stunning color combinations:
| Color Combination | Vibe/Look | Design Ideas |
|---|---|---|
| Lime Green & White | Clean, fresh, modern, minimalist. | White base with lime green dots/lines; lime green french tips; abstract white and lime swirls. |
| Lime Green & Black | Bold, dramatic, edgy, chic. | Black base with lime green geometric patterns; lime green base with black floral accents; black French tips on lime green. |
| Lime Green & Gold/Silver | Luxurious, glamorous, festive. | Lime green base with gold/silver glitter accent nails; metallic stripes on lime green; gold/silver foil accents. |
| Lime Green & Hot Pink/Coral | Playful, summery, vibrant, tropical. | Color-block segments; alternating colored nails; ombre from pink to lime green. |
| Lime Green & Blues (Teal, Navy) | Sophisticated, earthy, contrasting. | Nautical stripes; abstract blues mixed with lime green; navy base with lime green details. |
| Lime Green & Neutrals (Beige, Grey) | Subtle, trendy, fashion-forward. | Lime green accent nail with neutral polish; thin lime green lines on a grey base; marble with lime green and beige. |
| Lime Green & Pastel Yellow/Orange | Sweet, retro, bright. | Checkerboard patterns; color-block designs; simple dot combinations. |
Experimenting with these pairings can help you create a cohesive and stylish look that perfectly suits your taste.
Maintaining Your Lime Green Nail Designs
Once you’ve created your beautiful lime green nail art, you’ll want it to last! Proper care ensures your manicure stays vibrant and chip-free for as long as possible. Here are some tips:
- Always Use a Top Coat: Reapply a layer of top coat every 2-3 days to refresh the shine and protect the design.
- Wear Gloves for Chores: Protect your nails from harsh chemicals and water by wearing gloves when washing dishes, cleaning, or gardening.
- Avoid Using Nails as Tools: Don’t use your