Quick Summary: Discover stunning LED gel nail design ideas perfect for beginners! Learn essential styles, simple techniques, and the tools you need to create beautiful, salon-worthy manicures at home. Get ready to express your unique style with long-lasting, gorgeous gel nails!
Curious about achieving that flawless, chip-free manicure you see everywhere? You’re in the right place! Many of us dream of beautiful nails that last, but getting started with gel can seem a little daunting. Don’t worry! We’re going to break down some of the most stunning LED gel nail design ideas in a way that’s super easy to follow.
You’ll learn which simple styles pack a major punch and discover the few tools you truly need to get started. Forget complicated steps; we’re focusing on fun, achievable looks that will make your nails the star of the show. Get ready to unleash your inner nail artist and create gorgeous gel designs right at your fingertips!
Why LED Gel Nails Are a Game-Changer
LED gel nails have taken the nail world by storm, and for good reason! Unlike traditional nail polish, they offer incredible durability and a high-gloss finish that can last for weeks. This means no more worrying about smudges or chips just hours after painting your nails.
The secret lies in the curing process. An LED lamp hardens the gel polish, creating a strong, flexible bond with your natural nail. This not only protects your nails but also allows for a smoother, more professional-looking finish at home. Whether you’re a complete beginner or looking to elevate your nail game, LED gel offers a fantastic canvas for creativity.
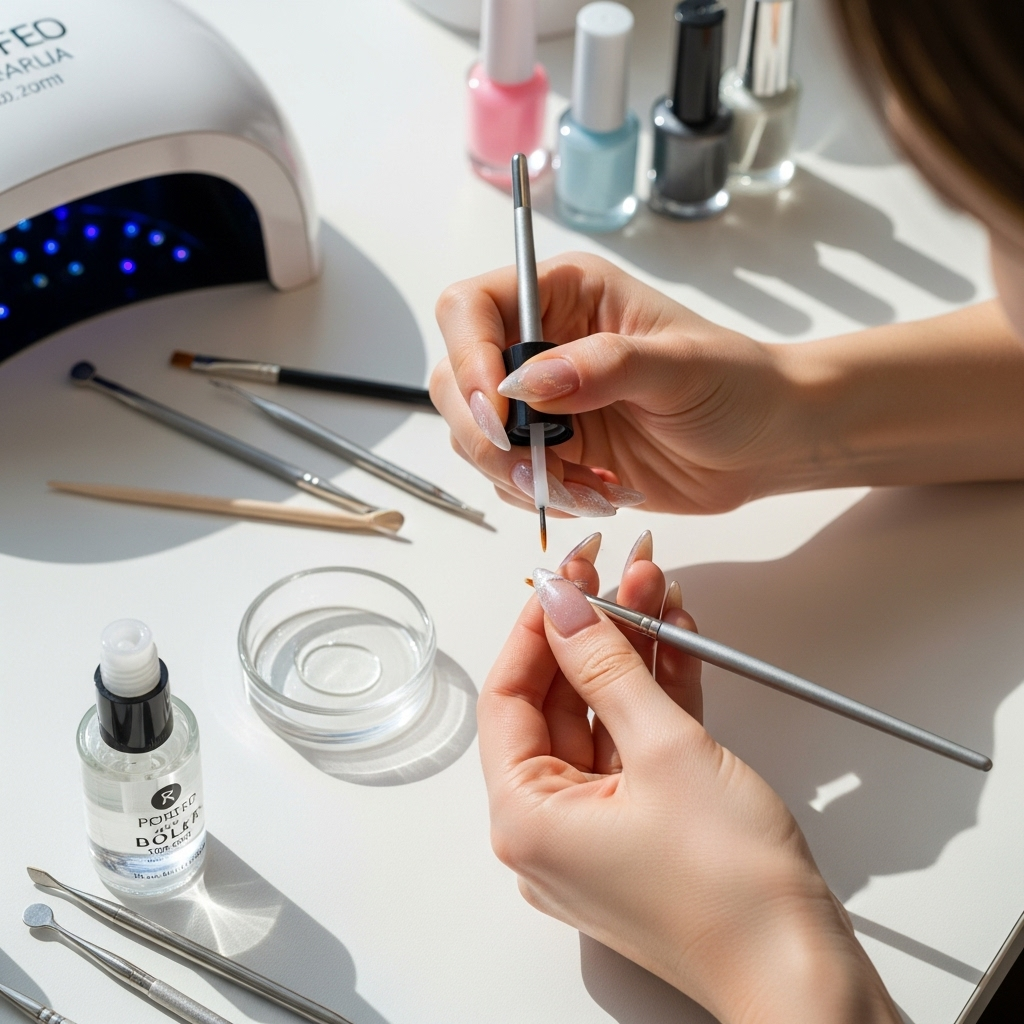
Essential Tools for Your LED Gel Nail Journey
To get started with LED gel nail designs, you don’t need a professional salon’s worth of equipment. A few key items will set you up for success. Think of these as your starter pack for creating beautiful gel manicures at home!
Must-Have LED Gel Nail Tools:
- LED Nail Lamp: This is non-negotiable! Look for a compact, user-friendly LED lamp designed for curing gel polish. Many come with timers, which is super helpful for beginners.
- Gel Base Coat: Prepares your nail for the color, helps it adhere, and protects your natural nail.
- Gel Color Polish: Choose your favorite shades! Start with a few versatile colors.
- Gel Top Coat: Seals your design, provides shine, and ensures longevity. It’s key to that super-smooth, durable finish.
- Nail File and Buffer: For shaping your nails and creating a smooth surface for polish application.
- Cuticle Pusher: Gently pushes back cuticles for a clean nail bed.
- Lint-Free Wipes: Essential for cleaning the nail surface and removing the sticky inhibition layer after curing.
- Alcohol or Gel Cleanser: Used with lint-free wipes to clean the nail and remove the tacky top layer.
- Cuticle Oil: To nourish and rehydrate your cuticles after the manicure.
Beginner-Friendly LED Gel Nail Design Ideas
Ready to dive into the fun part? Let’s explore some stunning LED gel nail designs that are perfect for beginners. These styles are impactful, relatively simple to execute, and offer plenty of room for personalization.
1. The Classic Single Shade
This is where everyone starts, and it’s a timeless classic for a reason! A perfectly applied solid color looks chic and sophisticated. The key here is thorough preparation and careful application.
Why it’s great for beginners:
- Minimal technique required.
- Focuses on a clean, smooth finish.
- Endless color possibilities.
How-to (Quick Version):
- Prep your nails: File, buff, and push back cuticles.
- Apply a thin layer of base coat and cure under the LED lamp.
- Apply one thin coat of your chosen color and cure.
- Apply a second thin coat of color and cure.
- Apply the top coat and cure.
- Wipe away the sticky layer with a cleanser and lint-free wipe.
- Apply cuticle oil.
2. The Accent Nail Wow
Want to add a little something extra without going all out? The accent nail is your best friend! Choose one nail on each hand (usually the ring finger) and give it a special design, while the others remain a solid color.
Design ideas for your accent nail:
- A different solid color.
- A subtle glitter polish.
- Simple dots or stripes.
- A touch of holographic or chrome powder.
Why it’s great for beginners:
- Lowers the pressure to create intricate art on all nails.
- Adds visual interest easily.
- Still feels very put-together.
How-to:
- Follow steps 1-5 for the solid color on all nails.
- For your accent nail(s), apply your chosen design after the second color coat and before the top coat, or use a contrasting color with the same solid color application process. For powders, apply after the top coat is cured and before wiping, or after the inhibition layer of the chosen color is wiped.
- This allows you to easily experiment with different finishes or colors on just one nail.
3. Simple French Manicure
The French manicure is elegant and understated. While it can be tricky to get perfect, a simplified version using striping tape or a thin brush can make it achievable for beginners.
Why it’s great for beginners:
- Classic and polished look.
- Relatively forgiving with a guide.
- Can be done with base, white/nude, and top coat.
How-to (with striping tape):
- Apply and cure your base coat.
- Apply and cure your nude or sheer pink base color.
- Apply a striping tape where you want the white tip to start. Press down firmly.
- Carefully paint your tip with a white gel polish.
- Cure the white tip.
- Gently peel off the striping tape.
- Apply top coat and cure.
- Wipe and apply cuticle oil.
4. Glitter Gradient (Ombre)
This design is beautiful, forgiving, and adds instant sparkle! A glitter gradient transitions from a solid color at the cuticle to full glitter at the tip, or vice-versa.
Why it’s great for beginners:
- Easy to blend.
- Glitter hides imperfections.
- Stunning visual effect.
How-to:
- Apply and cure your base coat.
- Apply and cure your solid gel color (this will be the base).
- Apply a layer of top coat. Do not cure.
- While the top coat is still wet, use a brush or sponge to dab glitter gel polish onto the desired area of the nail (e.g., the tip).
- Gently blend the glitter into the base color by dabbing or using a clean brush.
- Cure the nail under the LED lamp.
- Apply a final layer of top coat to seal the glitter and cure.
- Wipe and apply cuticle oil.
5. Polka Dots
Dots are a fun and easy way to add a playful touch to your gel manicure. They can be as sparse or dense as you like!
Why it’s great for beginners:
- Requires minimal artistic skill.
- Versatile in size and color.
- Looks charming and chic.
How-to:
- Apply and cure your base coat and solid color coats.
- Using a dotting tool (or the tip of a bobby pin, or even a toothpick), carefully pick up a small amount of gel polish.
- Gently place dots onto the cured gel color. You can make small dots, larger ones, or vary the size.
- Cure the nail.
- Apply a final top coat to seal everything in and cure.
- Wipe and apply cuticle oil.
6. Minimalist Lines
Thin, precise lines can look incredibly sophisticated and modern. They add a touch of art without being overwhelming.
Why it’s great for beginners:
- Clean and contemporary.
- Achievable with a fine-liner brush or striping tape.
- Can be as simple or intricate as you like.
How-to (with a fine-liner brush):
- Apply and cure your base and color coats.
- Using a very fine-tipped gel liner brush, dip into a contrasting gel polish color.
- Carefully draw thin lines horizontally, vertically, diagonally, or create simple geometric shapes.
- Cure the nail.
- Apply top coat and cure.
- Wipe and apply cuticle oil.
Getting the Perfect Gel Manicure: Key Steps Explained
Whether you choose a solid color or a more detailed design, the foundation of a great gel manicure lies in proper preparation and application. Here’s a breakdown of the essential steps:
Step-by-Step Gel Application:
- Prep is Key: Gently push back your cuticles using a cuticle pusher. File your nails to your desired shape using a nail file. Lightly buff the surface of your natural nail with a buffer to create a slightly rough texture for the gel to adhere to. Cleanse your nails with alcohol or a gel cleanser on a lint-free wipe to remove any dust or oils.
- Base Coat Application: Apply a thin, even layer of gel base coat. Ensure you cap the free edge (paint a little on the tip of your nail) to prevent lifting. Cure under your LED lamp according to the manufacturer’s instructions (usually 30-60 seconds).
- Color Application: Apply your first thin coat of gel color. Again, cap the free edge. Avoid getting polish on your cuticles. Cure under the LED lamp. Repeat this step for a second, or sometimes a third, coat of color until you achieve full opacity and desired depth.
- Top Coat Perfection: Apply a final layer of gel top coat. Cap the free edge. Many top coats are “no-wipe,” meaning they don’t leave a sticky residue after curing. If yours does leave a sticky layer (inhibition layer), you’ll need to cleanse it.
- Curing: Always follow the recommended curing time for your specific LED lamp and gel products. Under-curing can lead to a weak manicure that chips easily, while over-curing can make the gel brittle.
- Final Cleanse (if needed): If your top coat leaves a sticky residue, use a lint-free wipe saturated with alcohol or gel cleanser to gently remove it.
- Nourish: Finish by applying a drop of cuticle oil to each nail and gently massaging it in for hydration.
Understanding Gel vs. Traditional Polish & Other UV Gel Types
It’s helpful to know the differences between various nail products to make informed choices for your manicure.
LED Gel vs. Traditional Polish:
Traditional nail polish air-dries and can chip within a day or two. LED gel polish requires an LED lamp to cure, creating a hard, durable finish that lasts for weeks. It’s significantly more resistant to chipping and wear.
LED Gel vs. UV Gel:
Both LED and UV gel polishes harden under UV light. However, LED cured gels work with LED lamps, which are generally faster and more energy-efficient than traditional UV lamps. UV lamps cure a broader spectrum of UV light and may require slightly longer curing times. For home use, LED lamps are often preferred due to their speed and lifespan.
Soft Gel vs. Hard Gel:
This is an important distinction! ‘Soft gel’ is what most at-home gel polish kits use. It cures under a lamp and can be soaked off with acetone. ‘Hard gel’ is typically used for nail extensions and overlays; it also cures under a lamp but is much harder and cannot be soaked off – it must be filed away. We’re focusing on soft gel here for easy at-home manicures!
Troubleshooting Common Gel Nail Issues
Even with the best intentions, you might encounter a few hiccups as you learn. Here are solutions to common beginner problems:
Issue: Gel Polishing Streaky or Uneven
- Cause: Polish applied too thick, or not enough coats.
- Solution: Always apply thin, even coats. Ensure each layer is fully cured before applying the next. If coverage is still lacking, add a third thin coat.
Issue: Gel Chipping or Peeling
- Cause: Improper nail prep, not sealing the free edge, or under-curing.
- Solution: Ensure nails are clean and oil-free. Cap the free edge with base, color, and top coat. Make sure you’re curing for the correct amount of time.
Issue: Gel Not Curing Properly (Still Sticky)
- Cause: Lamp malfunction, insufficient curing time, or polish applied too thickly.
- Solution: Check your LED lamp’s wattage and ensure it’s functioning correctly. Follow recommended curing times precisely. Apply thinner layers of gel.
Issue: Gel Lifting at Cuticle or Sidewalls
Cause: Gel polish touching the skin or cuticle. Gel polish needs to be sealed on the nail plate only.
Solution: Be meticulous when applying. Use a fine brush or orange stick to clean excess polish away from the cuticle and sidewall before curing. This is crucial work!
Popular Gel Nail Color Trends for Inspiration
Beyond the designs, color choice plays a huge role! Here are some popular trends that work beautifully with LED gel:
Timeless Neutrals
Shades of beige, cream, soft grey, and muted nudes create an elegant and sophisticated look that goes with everything.
Bold Brights
Think vibrant corals, electric blues, sunny yellows, and hot pinks. These are perfect for making a statement.
Deep Jewel Tones
Emerald green, sapphire blue, deep ruby red, and amethyst purple are rich and luxurious, especially for fall and winter.
Pastel Dreams
Soft lavender, baby blue, mint green, and pale pinks are refreshing and delicate, ideal for spring and summer.
Metallic & Chrome
Silver, gold, rose gold, and iridescent chrome finishes are incredibly trendy and add a high-fashion touch.
Don’t be afraid to mix and match or use these colors as a base for your accent nails or simple designs!
Maintaining Your LED Gel Manicure
Once your beautiful LED gel design is on, you’ll want it to last! Proper care is key to maximizing its lifespan and keeping your nails looking pristine.
Tips for Long-Lasting Gel Manicures:
- Avoid Harsh Chemicals: Wear gloves when cleaning or doing chores that involve prolonged contact with water or harsh cleaning products. These can break down the gel over time.
- Moisturize Regularly: Apply cuticle oil daily to keep your nails and the surrounding skin hydrated. This prevents dryness, which can lead to chipping or lifting.
- Be Gentle: Try not to use your nails as tools to pry things open or scrape surfaces.
- Avoid Hot Water Soaks: Frequent, long soaks in very hot water can soften the gel and potentially weaken the bond.
- For Removal: When it’s time to remove, soak your nails in acetone. Never peel or force the gel off, as this can damage your natural nail. A professional removal or a well-guided DIY soak-off is recommended. You can learn more about safe nail care practices from the NHS.
Frequently Asked Questions About LED Gel Nail Designs
Q1: How long do LED gel nails typically last?
A: With proper application and care, LED gel nail designs can last anywhere from 2 to 3 weeks without chipping or losing their shine. This durability is one of their biggest advantages!
Q2: Can I remove LED gel polish myself at home?
A: Yes, you can! The most common method is soaking your nails in pure acetone. You’ll typically need to file off the top coat first, then soak cotton balls in acetone, place them on your nails, wrap them in foil, and let them sit for about 10-15 minutes before gently pushing off the softened gel.
Q3: Will LED gel damage my natural nails?
A: When