Japanese nail design popular trends offer a spectrum of chic, artistic, and personalized looks, from minimalist elegance to intricate storytelling. Discover the essential styles that define Japanese nail art, perfect for beginners wanting to explore creative, high-fashion manicures.
Ever scrolled through nail art and felt a little overwhelmed by the sheer creativity? Japanese nail designs are a whole universe of art, and sometimes it’s hard to know where to start. Many of us want nails that are stylish and unique, but the intricate details can seem daunting, right? Don’t worry! We’re going to break down the most popular Japanese nail design trends into easy-to-understand looks. You’ll learn simple ways to recreate these beautiful styles and find inspiration for your next manicure that perfectly expresses your personality. Get ready to discover the world of Japanese nail art, made simple for everyone!
The Allure of Japanese Nail Design: What Makes It Special?
Japanese nail design is more than just a manicure; it’s a form of wearable art. What sets it apart? It’s the incredible attention to detail, the unique blend of traditional Japanese aesthetics with modern trends, and the sheer diversity of styles. From delicate floral patterns to playful characters and sophisticated minimalist looks, Japanese nail art allows for incredible self-expression. It often focuses on creating a sense of luxury, whimsy, or profound beauty, all on a tiny canvas.
The popularity of these designs stems from their ability to tell a story, evoke a mood, or simply add a touch of undeniable charm to everyday life. They have a way of feeling both deeply personal and universally appealing.
Exploring Popular Japanese Nail Design Trends: Essential Looks for Every Style
Ready to dive into the most sought-after Japanese nail design trends? We’ve curated a list of “essential looks” that are perfect for beginners and seasoned nail art lovers alike. These trends are celebrated for their beauty, artistry, and adaptability.
1. The Delicate Elegance of Watercolour & Gradient Nails
Watercolour and gradient nails are a staple in Japanese nail art, known for their soft, blended transitions of color. This technique mimics the ethereal look of watercolour paintings or the subtle shifts in a sunset.
Why it’s loved: It’s incredibly versatile and can be adapted to any color palette or occasion. The blended effect is inherently calming and sophisticated.
Beginner-Friendly Tip: Use a makeup sponge or eyeshadow applicator to gently dab and blend two or three complementary polish colors onto the nail. Start with lighter colors at the base and blend darker shades towards the tip, or vice versa.
Color Palettes:
Pastels: Think soft pinks, blues, and lavenders.
Jewel Tones: Emerald green, sapphire blue, ruby red blended for a luxurious feel.
Earth Tones: Beige, terracotta, and muted greens for a natural look.
2. Whimsical Charm: Character & Anime-Inspired Nails
Japan’s rich culture of anime and cute characters (kawaii) naturally spills over into nail art. These designs are playful, fun, and a fantastic way to showcase your favorite characters or motifs.
What to expect: This can range from simple character faces (like Hello Kitty or Totoro) to more complex scenes or iconic symbols.
Getting Started: For beginners, focus on simpler characters or elements. You can use nail art brushes to freehand small designs, or consider using nail stickers and decals for a quick, easy application.
Popular Characters: Hello Kitty, My Melody, Rilakkuma, Pokemon characters, or even abstract representations of anime themes.
3. Nature’s Artistry: Floral & Botanical Motifs
Florals are timeless, but Japanese nail art elevates them with intricate details and a delicate touch. Think cherry blossoms, hydrangeas, or even minimalist leaf outlines.
The Appeal: These designs bring a sense of natural beauty and elegance to your nails. They can be as subtle or as bold as you like.
DIY Approach: Start with simple dotting tools to create flower petals and centers. For more advanced looks, a fine-tipped brush can help create delicate stems and leaves. Consider trying stamped floral patterns for an effortless yet detailed finish.
Seasonal Inspiration:
Spring: Cherry blossoms, tulips, wisteria.
Summer: Sunflowers, hibiscus, orchids.
Autumn: Maple leaves, chrysanthemums, acorns.
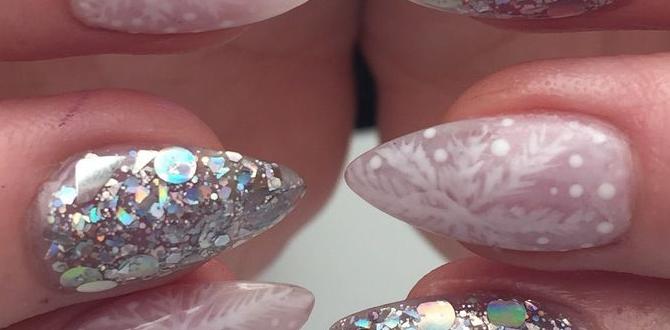
Winter: Snowflakes, pine sprigs, delicate frost patterns.
4. Geometric & Abstract Sophistication
For those who prefer a more modern and minimalist aesthetic, geometric and abstract patterns are a perfect choice. These designs play with lines, shapes, and contrasting colors for a chic, avant-garde look.
Key Elements: Clean lines, negative space, triangles, squares, abstract brush strokes, and minimalistic dots.
Easy Application: Use striping tape to create sharp geometric lines. Apply your base color, let it dry completely, carefully place the tape, apply a contrasting color over it, and then gently peel off the tape for a crisp design.
Color Combinations: Black and white, metallic accents (gold, silver), pastels with sharp black lines, or monochrome gradients.
Minimalist Chic: Subtle Yet Stunning Japanese Nail Designs
Minimalist Japanese nail designs are all about understated elegance. They focus on clean lines, subtle accents, and a sophisticated color palette. These are perfect for everyday wear or when you want your nails to look polished without being overly flashy.
5. The Power of Negative Space
Negative space, or “kuuki-re” (air space) in Japanese art, is a key design element. It means leaving parts of the nail art unpolished, creating a modern and elegant look.
How it’s done: Designs often feature a clear portion of the nail, with polished elements (like lines, dots, or small motifs) strategically placed.
Why it works: It makes the design feel lighter, more airy, and allows the natural nail to be part of the artwork.
Beginner Tips:
Use striping tape or stencils to mark off areas you want to leave unpolished.
Paint a clear top coat over the entire nail, then apply your design elements.
Alternatively, paint your accent colors first, then use a very fine brush to draw thin lines or dots in the clear areas.
6. Subtle Sparkle: Minimalist Glitter & Foil Accents
Adding a touch of shimmer can elevate a simple design. In Japanese nail art, this is often done with restraint and elegance.
What to look for: Think a single accent nail with fine glitter, a delicate strip of metallic foil along the cuticle or the edge of the nail, or tiny scattered rhinestones.
Easy Application:
Glitter: Apply a clear top coat to your accent nail and sprinkle a small amount of fine cosmetic glitter before the top coat dries. Seal with another layer of top coat.
Foil: Use a nail glue specifically for foil and press small pieces onto the tacky adhesive. A special foil transfer gel is another easy option.
Rhinestones: Use tweezers to place small gems onto a dot of nail glue or wet top coat, then secure with more top coat.
7. Delicate Dotting & Fine Lines
Simple dots and thin lines are incredibly effective for creating sophisticated patterns. They can be used to frame a nail, create abstract designs, or mimic small embellishments.
Tools for the job: A dotting tool or the tip of a fine-tipped brush is perfect for this. A striping brush for longer, cleaner lines.
Design Ideas:
A single row of tiny dots along the smile line of a French manicure.
Thin gold or silver lines creating a geometric pattern.
A constellation of tiny dots scattered across the nail.
Tools and Techniques for Creating Japanese Nail Designs
Achieving those stunning Japanese nail designs is easier than you might think with the right tools and a few simple techniques. You don’t need to be a professional to create art!
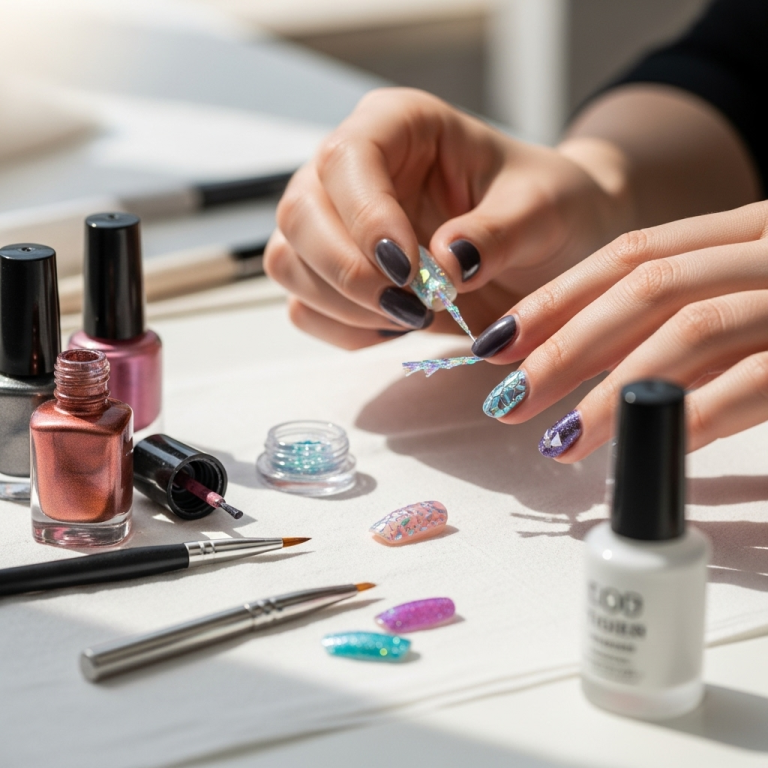
Essential Tools for Your Manicure Kit
Here are some must-have items that will help you recreate these popular trends:
Nail Polish: A collection of your favorite colors, including neutrals, pastels, and some metallic shades.
Base Coat & Top Coat: Crucial for protecting your nails and making your designs last. A good quality quick-dry top coat is a lifesaver!
Dotting Tools: These come in various sizes and are perfect for creating dots, small flowers, and other circular elements.
Fine-Tipped Nail Art Brushes: Essential for drawing delicate lines, intricate details, and small motifs. Angled brushes are also very useful.
Striping Tape: Thin, flexible tapes that help you create clean, crisp lines and geometric shapes.
Makeup Sponges or Eyeshadow Applicators: Great for creating gradient and watercolour effects.
Tweezers: For precisely placing small embellishments like rhinestones or glitter.
Nail Glue/Foil Gel: If you plan on using nail foils or larger embellishments.
Nail Polish Remover & Cotton Pads: For cleaning up mistakes and prep.
Technique Breakdowns: Simple Steps to Stunning Looks
Let’s demystify some of the techniques used in Japanese nail art.
1. Creating Gradient Nails (The Sponge Method)
This method gives you a beautiful, seamless blend of colors.
Step 1: Prep Your Nails: Apply base coat, let it dry, then apply your lightest polish color as a base. Let it dry completely.
Step 2: Apply Colors to Sponge: Take your makeup sponge or applicator and apply lines of your chosen polish colors next to each other. Don’t overdo it; 2-3 colors are usually enough.
Step 3: Stamp Onto Nail: Gently press the sponge onto your nail, rolling slightly from side to side to transfer the color. You might need to reapply polish to the sponge and repeat this a couple of times to build up intensity.
Step 4: Clean Up & Seal: Immediately clean up any excess polish around your cuticle and finger with a brush dipped in nail polish remover. Once dry, apply a thick layer of top coat to smooth out the texture and seal the gradient.
For more on nail polish application tips, check out this guide from the Allure experts.
2. Mastering Negative Space Designs
This technique requires a bit of patience but yields sophisticated results.
Step 1: Base Color: Apply your base polish color and let it dry fully.
Step 2: Apply Striping Tape: Carefully place strips of nail tape onto your nail to section off the areas you want to remain clear. Press down the edges firmly to prevent polish from seeping underneath.
Step 3: Paint Over: Apply your accent color(s) over the taped sections. You can paint the entire section, or just parts of it.
Step 4: Remove Tape: While the accent color is still wet, carefully peel off the striping tape using tweezers or a pointed tool. This is crucial for getting clean lines.
Step 5: Seal: Once dry, apply a generous layer of top coat over the entire nail, including the taped-off areas, to create a smooth, uniform surface.
3. Adding Simple Floral Elements with Dotting Tools
This is a fun and easy way to add nature-inspired art.
Step 1: Base & Bloom Base: Apply your base coat and a solid color for your main polish. Let it dry.
Step 2: Create Petals: Dip your dotting tool into a contrasting polish color. Place dots in a circular pattern on your nail, gently pressing and slightly pulling to create petal shapes. For a five-petal flower, make a central dot slightly larger and four surrounding smaller dots.
Step 3: Add the Center: Use a smaller dotting tool or a different color to place a tiny dot in the very center of your flower.
Step 4: Stem and Leaves (Optional): Use a fine-tipped brush with green polish to draw a thin stem and a couple of simple leaf shapes.
Step 5: Seal: Apply your top coat carefully, ensuring all elements are sealed.
Japanese Nail Art Inspiration: Beyond the Basics
The beauty of Japanese nail design trends is their constant evolution and the endless inspiration they offer. Here are a few more ideas to spark your creativity:
5. The Art of ‘Kintsugi’ Inspired Nails
Kintsugi is the ancient Japanese art of repairing broken pottery with lacquer dusted or mixed with powdered gold. It treats breakage and repair as part of the history of an object, rather than something to disguise.
Nail Interpretation: This translates beautifully into nail art using gold or metallic lines to “repair” cracks or breakages in a nail design, often on a solid color or even a French tip.
Keywords: Gold accent, broken elegance, repair art, metallic crackle.
6. Delicate 3D Embellishments
Beyond flat art, Japanese nailists are masters of subtle 3D elements. This could be tiny sculpted flowers, pearls, or intricate lace-like details applied with UV gel.
Considerations for Beginners: While full 3D sculpting can be advanced, you can achieve a similar effect by carefully placing small pre-made charms, gems, or caviar beads with strong nail glue or gel.
7. The Sophistication of French Ombre
A modern twist on the classic French manicure, the French ombre blends the white tip into a sheer nude or pink base, creating a seamless, elegant transition.
Technique: Often achieved with airbrushing or advanced sponging techniques, but can be mimicked with careful blending of sheer polishes.
8. Storytelling Nails: Themed Manicures
Japanese nail art often tells a story or represents a theme. This could be seasonal (like autumn leaves), a specific mood (calm sea waves), or even a personal interest.
Inspiration Sources: Nature, travel, mythology, fashion, literature, and everyday life.
Maintaining Your Japanese Nail Designs
Once you’ve created or had your beautiful Japanese nail design done, keeping it looking its best is key!
Hydration is Key: Keep your cuticles and hands moisturized. Dry skin can make even the most perfect nails look less polished. Use cuticle oil daily.
Protect Your Nails: Wear gloves when doing household chores, especially washing dishes or cleaning. Harsh chemicals and prolonged water exposure can weaken nails and lift polish.
Avoid Using Nails as Tools: Resist the urge to pick, scrape, or pry with your nails. This can chip your design and damage your natural nail.
Gentle Removal: When it’s time to change your polish, use a nail polish remover that is less harsh (like acetone-free) and soak cotton pads to gently remove polish. Avoid aggressive scrubbing.
Regular Top Coat Application: Applying an additional layer of top coat every few days can help refresh your manicure, add shine, and reinforce the design, especially on high-traffic nails.
Frequently Asked Questions About Japanese Nail Designs
Q1: Are Japanese nail designs difficult to do at home?
A1: Many Japanese nail designs are indeed intricate, but there are plenty of beginner-friendly trends! Focusing on techniques like gradients, simple florals with dotting tools, or negative space with striping tape makes them achievable for beginners right at home. Start simple and build your skills!
Q2: What are the most popular colors used in Japanese nail designs?
A2: Popular colors often include soft pastels, muted earth tones, classic nudes, and elegant whites. Metallics like gold and silver are frequently used as accents. However, vibrant colors are also used, especially for character or themed designs, often blended in unique ways like gradients.
Q3: Do I need special tools for Japanese nail art?
A3: You certainly don’t need a professional kit to start! Basic tools like dotting tools, fine-tipped brushes, and striping tape can be purchased affordably online or at beauty stores. Even household items like makeup sponges can create beautiful gradient effects.
Q4: How long do Japanese nail designs typically last?
A4: With proper application, good quality polish, and diligent care, most Japanese nail designs can last 1–2 weeks. Using a good base and top coat is essential, as is minimizing exposure to harsh chemicals and water.
Q5: Can I combine different Japanese nail design trends?
A5: Absolutely! The best part of nail art is personalization. You can mix minimalist accents with floral elements, or a soft gradient with a single character on an accent nail. Experiment to find combinations that reflect your personal style.
Q6: What is the significance of negative space in Japanese nail art?
A6: Negative space, or leaving parts of the nail unpolished, is a design choice that adds modernity, subtlety, and sophistication. It creates visual interest by balancing opaque elements with open areas, making the overall design feel lighter and more artistic.
Q7: Where can I find more inspiration for Japanese nail designs?
A7: Pinterest and Instagram are fantastic visual resources! Search for terms like “Japanese nail art,” “Japandi nails,” “kawaii nails,” or specific trends like “watercolour nails” or “negative space nails.” You can also look at Japanese fashion magazines and blogs for the latest trends.
Conclusion: Your Journey into Japanese Nail Art Begins Now!
Exploring the popular trends in Japanese nail design opens up


