Get ready for stunning horoscope nail art! This beginner-friendly guide makes creating celestial designs easy and fun, turning your nails into tiny cosmic masterpieces perfect for unleashing your inner star.**
Ever scrolled through dazzling nail art and felt inspired, but a little intimidated? You’re not alone! Dreamy celestial designs, like horoscope nail art, can seem complex. But what if I told you it’s totally achievable, even for beginners? Get ready to transform your nails into a starry spectacle that’s uniquely you. This tutorial breaks down everything you need, making it super simple to create your own horoscope-inspired manicure. Let’s dive in and let your nails shine!
Why Horoscope Nail Art is a Cosmic Hit
Horoscope nail art is more than just a pretty design; it’s a way to connect with your zodiac sign, express your personality, and wear your cosmic identity right on your fingertips. It’s unique, personal, and a total conversation starter!
- Personal Expression: Show off your zodiac sign with pride!
- Unique Style: Stand out with a manicure that’s one-of-a-kind.
- Conversation Starter: Your nails will have everyone asking about them.
- Trendy & Timeless: Celestial themes are always in style.
- Fun DIY Project: Enjoy a creative and relaxing self-care session.
Essential Tools for Your Zodiac Manicure
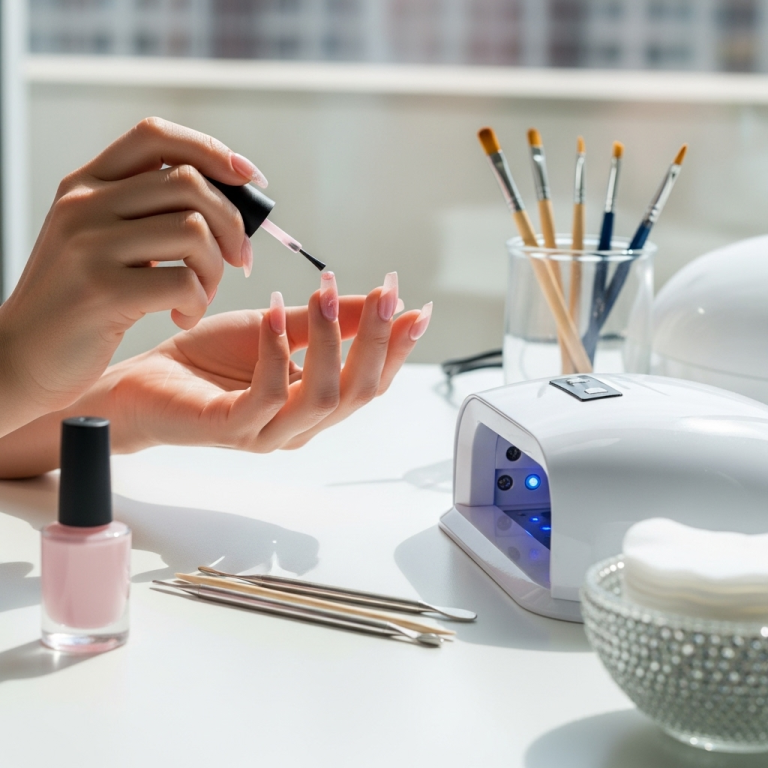
Don’t worry if you’re new to nail art! Here are the basic tools that will make your horoscope nail art tutorial a breeze. Think of these as your cosmic creation kit!
- Nail Polish:
- Base Coat: Protects your nails and helps polish adhere better.
- Top Coat: Seals your design and adds shine.
- Base Colors: Black, navy, deep purple, or any dark color for a night sky effect.
- Accent Colors: White, silver, gold, or colors related to your zodiac sign’s element (fire, earth, air, water).
- Detail Brushes: A fine-tip brush for drawing constellations and symbols. You can often find beginner sets at beauty stores or online. For very detailed work, a nail art brush set is a great investment.
- Dotting Tool: Perfect for creating stars or small dots. They usually have a ball on the end and come in various sizes.
- Nail Polish Remover & Cotton Swabs: For cleaning up any mistakes (we all make them!).
- Optional:
- Glitter Polish: For extra sparkle!
- Stencils: If you want perfectly shaped symbols (though freehand is fun too!).
- Rhinestones or Gems: For added 3D celestial sparkle.
Understanding Zodiac Symbols and Elements
Before we get painting, let’s get a little cosmic insight! Each zodiac sign has its own unique symbol and is associated with one of four elements: Fire, Earth, Air, or Water. Knowing these can help you choose colors and designs that truly represent your sign.
| Zodiac Sign | Symbol | Element | Typical Colors |
|---|---|---|---|
| Aries | ♒ (Ram) | Fire | Red, Orange, Gold |
| Taurus | ♓ (Bull) | Earth | Green, Pink, Cream |
| Gemini | ♔ (Twins) | Air | Yellow, Light Blue, Silver |
| Cancer | ♕ (Crab) | Water | White, Silver, Pale Blue |
| Leo | ♖ (Lion) | Fire | Gold, Orange, Yellow |
| Virgo | ♗ (Maiden) | Earth | Navy Blue, Brown, Forest Green |
| Libra | ♘ (Scales) | Air | Rose Pink, Turquoise, Peach |
| Scorpio | ♙ (Scorpion) | Water | Deep Red, Black, Burgundy |
| Sagittarius | ♚ (Archer) | Fire | Purple, Royal Blue, Teal |
| Capricorn | ♛ (Goat) | Earth | Black, Dark Green, Brown |
| Aquarius | ♜ (Water Bearer) | Air | Electric Blue, Turquoise, Teal |
| Pisces | ♝ (Fish) | Water | Sea Green, Lavender, Silver |
Step-by-Step Horoscope Nail Art Tutorial (Beginner Friendly!)
Ready to become a celestial artist? This horoscope nail art tutorial is designed for everyone. We’ll focus on creating a beautiful night sky effect and adding your sign’s symbol.
Step 1: Prep Your Nails
Good nails start with good prep! This is key for any manicure, especially when you want intricate designs to last.
- Cleanse: Start with clean, dry nails. Remove any old polish.
- Shape: File your nails into your desired shape.
- Cuticle Care: Gently push back your cuticles. You can use a cuticle pusher or an orangewood stick. Keeping cuticles neat makes room for art and ensures a polished look. For more on cuticle care, check out resources from reputable sources like the American Academy of Dermatology.
- Base Coat: Apply a thin layer of base coat. Let it dry completely. This protects your nail bed from staining and makes your polish adhere better.
Step 2: Create Your Night Sky Base
This is where the magic begins! We want a deep, mysterious sky effect.
- Apply Dark Base Color: Paint your nails with your chosen dark color – black, deep navy, or dark purple are perfect for a night sky. Apply two thin coats for even coverage. Make sure each coat is completely dry before adding the next.
- Pro Tip for Depth: For a more textured, galaxy-like look, you can gently dab a slightly lighter shade (like a deep blue over black) with a makeup sponge onto your nails while the base coat is still slightly damp. This adds depth. Let it dry fully.
Step 3: Add Your Stars and Constellations
Now let’s bring in the sparkle!
- Dotting Tool Stars: Dip the ball of your dotting tool into white, silver, or gold polish. Gently dot small stars all over your nails. Vary the size slightly for a more natural look. You can also use the tip of a toothpick if you don’t have a dotting tool.
- Constellation Lines (Optional): If you feel adventurous, use your fine-tip nail art brush and white or silver polish to draw faint lines connecting some of your dots to create constellations. Don’t worry if they aren’t perfect; the sky is vast and a little messiness adds to the charm!
- Glitter Accents (Optional): Add a touch of glitter polish over some areas to make your night sky pop.
Step 4: Draw Your Zodiac Symbol
This is the personal touch! Find a simple image of your zodiac symbol online.
- Practice First: If you’re nervous about freehanding, practice on a piece of paper or a nail tip file first.
- Use Your Detail Brush: Dip your fine-tip brush into white, gold, or silver polish.
- Draw Your Symbol: Carefully paint your zodiac symbol onto one or two accent nails (or all of them if you’re feeling brave!). Take your time. A common placement is the thumbnail or ring finger.
- Symbol Examples:
- Aries: / (Ram horns)
- Taurus: A circle with two small arcs at the top (Bull’s head)
- Pisces: || (Two fish joined by a line)
- Virgo: M (often with a loop at the end)
Step 5: Add Additional Celestial Elements (Optional)
Want to take it to the next level?
- Moons: Use the side of your dotting tool dipped in polish to create crescent moons.
- Planets: Paint small circles with accent colors.
- Rhinestones: Place small rhinestones with a dot of polish where you want them to look like bright stars or planets.
Step 6: Seal Your Masterpiece
Don’t forget this crucial step to make your art last!
- Apply Top Coat: Once all the polish and art are completely dry (this is important!), apply a generous layer of clear top coat over all your nails. This will smooth out any texture, protect your design, and give a beautiful glossy finish.
- Cap the Edges: Gently brush the top coat along the free edge (tip) of your nails. This helps prevent chipping.
- Let it Dry: Be patient! Let your top coat dry thoroughly before doing anything strenuous.
Congratulations! You’ve just created your own horoscope nail art. You’re officially rocking your cosmic style!
Horoscope Nail Art Inspiration & Variations
The beauty of horoscope nail art is its endless possibilities! Here are a few ideas to spark your creativity:
- Single Symbol Accent: Paint all nails with the night sky base and add your zodiac symbol on just one accent nail (like your ring finger). This is minimalist and chic.
- Full Constellation Map: Cover all nails with stars and lines, perhaps with a subtle symbol on one.
- Element Colors: Instead of just dark base colors, incorporate colors associated with your element. A fire sign might use reds and oranges within their night sky.
- Zodiac Color Palette: Paint each nail a different color from your sign’s associated lucky colors.
- Subtle Sparkle: Use sheer glitter polishes over a nude or sheer pink base, then add tiny dots for stars and your symbol. This is perfect for a more understated look.
- Gradient Sky: Create a beautiful sunset or dawn gradient as your base, then add stars and symbols. Think pinks, purples, and oranges!
A great resource for understanding color theory in art, which can be applied here, is found on university art department pages, like those discussing basic color theory.
Tips for Long-Lasting Horoscope Nails
Want your cosmic creations to shine for as long as possible? Follow these pro tips:
- Seal, Seal, Seal: Always use a good quality top coat and apply it correctly, capping the edges. Reapply a thin layer of top coat every 2-3 days to refresh the shine and seal your design.
- Be Gentle: Avoid using your nails as tools. Don’t scrape, pick, or pry with them, especially when they’re freshly manicured.
- Moisturize: Keep your nails and cuticles hydrated! Dry, brittle nails are more prone to breakage and chipping. Use a good cuticle oil or hand cream regularly. For more comprehensive nail care advice, consult resources like the Nail Care HQ.
- Gloves Are Your Friends: Wear gloves when doing household chores, washing dishes, or using cleaning products. These can strip the polish and damage your manicure.
Frequently Asked Questions about Horoscope Nail Art
Q1: I’m a total beginner. Is horoscope nail art really achievable for me?
Absolutely! This tutorial is designed for beginners. We’ve broken it down into simple steps. With a little practice (and patience!), anyone can create beautiful horoscope nail art.
Q2: What if I can’t draw my zodiac symbol perfectly?
Don’t stress about perfection! Nail art is about creativity. If you’re struggling with freehand drawing, try using a stencil, looking for temporary nail stickers with symbols, or simply making your symbol abstract. The goal is to have fun and express yourself, not to achieve professional studio results on your first try!
Q3: Can I use regular nail polish, or do I need special tools?
You can definitely use regular nail polish! The essential tools are a base coat, top coat, your colors, and then just a fine-tip brush (often found in basic art brush sets) and a dotting tool. Many people even use toothpicks for dots and fine lines. Speciality items are optional enhancers, not necessities.
Q4: How long does horoscope nail art usually last?
With proper application, including a good base and top coat, and regular touch-ups of the top coat, you can expect your horoscope nail art to last anywhere from 5-10 days. Keeping your nails moisturized and avoiding harsh chemicals will also help extend its life.
Q5: I have weak nails. Can I still do this?
Yes! A good base coat is very important for weak nails, as it provides a protective barrier. If your nails are very weak, consider doing this design on nail tips that you can glue onto your natural nails, or be extra careful with moisturizing and wearing gloves during tasks.
Q6: What are the best colors for different zodiac elements?
General color associations can help! Fire signs (Aries, Leo, Sagittarius) often look great with reds, oranges, yellows, and gold. Earth signs (Taurus, Virgo, Capricorn) suit greens, browns, deep navies, and creams. Air signs (Gemini, Libra, Aquarius) might prefer yellows, blues, silvers, and pastels. Water signs (Cancer, Scorpio, Pisces) often gravitate towards blues, greens, silvers, and purples.
Q7: Can I combine stars and my zodiac symbol with other designs?
Of course! Horoscope nail art is incredibly versatile. Feel free to mix and match with other elements like small moons, planets, glitter, or even abstract swirls. The key is to create a cohesive look that you love and that represents you.
Conclusion: Your Personal Cosmic Canvas Awaits!
And there you have it! Your very own horoscope nail art tutorial, designed to be fun, accessible, and totally achievable. You’ve learned the essential tools, the simple steps to create that starry night sky, and how to add your unique zodiac touch. Remember, your nails are a fantastic canvas for self-expression. Whether you go for a bold constellation map or a subtle symbol on an accent nail, embracing this trend is all about celebrating your cosmic identity and having a blast with your manicure.
Don’t be afraid to experiment with colors, add your own personal flair, or even try designs for your favorite constellations! The most important part is to enjoy the process and love the results. So grab your polishes, your brushes, and let your creativity shine. Your next amazing manicure is just a few steps away! Happy painting and may your nails be ever celestial!


