Holographic chrome nails give you a dazzling, iridescent shimmer that’s perfect for summer. This guide breaks down how to achieve this trendy look at home, making your nails pop with vibrant, light-reflecting color. Get ready for a stunning, futuristic mani that captures the essence of summer fun!
Hey nail lovers! Are you ready to inject some serious sparkle into your summer look? We’re diving headfirst into the magical world of holographic chrome nails. Imagine nails that shift through a rainbow of colors with every move, catching the light like a disco ball – totally mesmerizing, right? This is the trend to rock when the sun is high and the vibes are good.
Maybe you’ve seen these shimmery wonders on social media and thought, “No way can I do that at home!” Or perhaps you’ve tried a few nail trends and found them a bit too complicated. I get it! But trust me, achieving holographic chrome nails is totally within reach, even if you’re just starting out. It’s all about the right tools and a little bit of patience.
This guide is designed to break down everything you need to know, step-by-step. We’ll cover the essential supplies, a super simple application process, and tips to make your holographic chrome nails last through all your summer adventures. Get ready to unleash your inner nail artist and create a mani that’s as unique and vibrant as you are! Let’s get sparkling!
What Are Holographic Chrome Nails?
Holographic chrome nails are a nail art finish that combines two popular effects: holographic shine and chrome smoothness. The result is a high-shine, mirror-like surface that also displays a spectrum of iridescent colors, shifting and changing depending on the light and angle. Unlike a standard metallic chrome, the holographic element adds a rainbow effect, making them uniquely dazzling and eye-catching. They’re like tiny, wearable prisms on your fingertips, perfect for adding a playful, futuristic, and super summery vibe to any outfit.
Why Holographic Chrome is THE Summer Trend
Summer is all about embracing bright colors, fun vibes, and things that catch the light – and holographic chrome nails deliver all of that and more! Here’s why they’re the ultimate summer accessory:
Radiant Shine: They give off an incredible, almost otherworldly glow that looks amazing in the summer sun.
Color-Shifting Magic: The holographic effect means your nails will subtly change color as you move, offering a dynamic and mesmerizing look.
Versatile Sparkle: Despite being bold, they can actually pair with a wide range of summer outfits and colors, adding a pop of vibrant interest.
Fun & Playful: It’s a trend that doesn’t take itself too seriously. They’re pure fun and guaranteed to boost your mood and confidence.
Instagram-Ready: Let’s be honest, these nails are incredibly photogenic and will make your summer snaps pop!
Must-Have Supplies for Your Holographic Chrome Mani
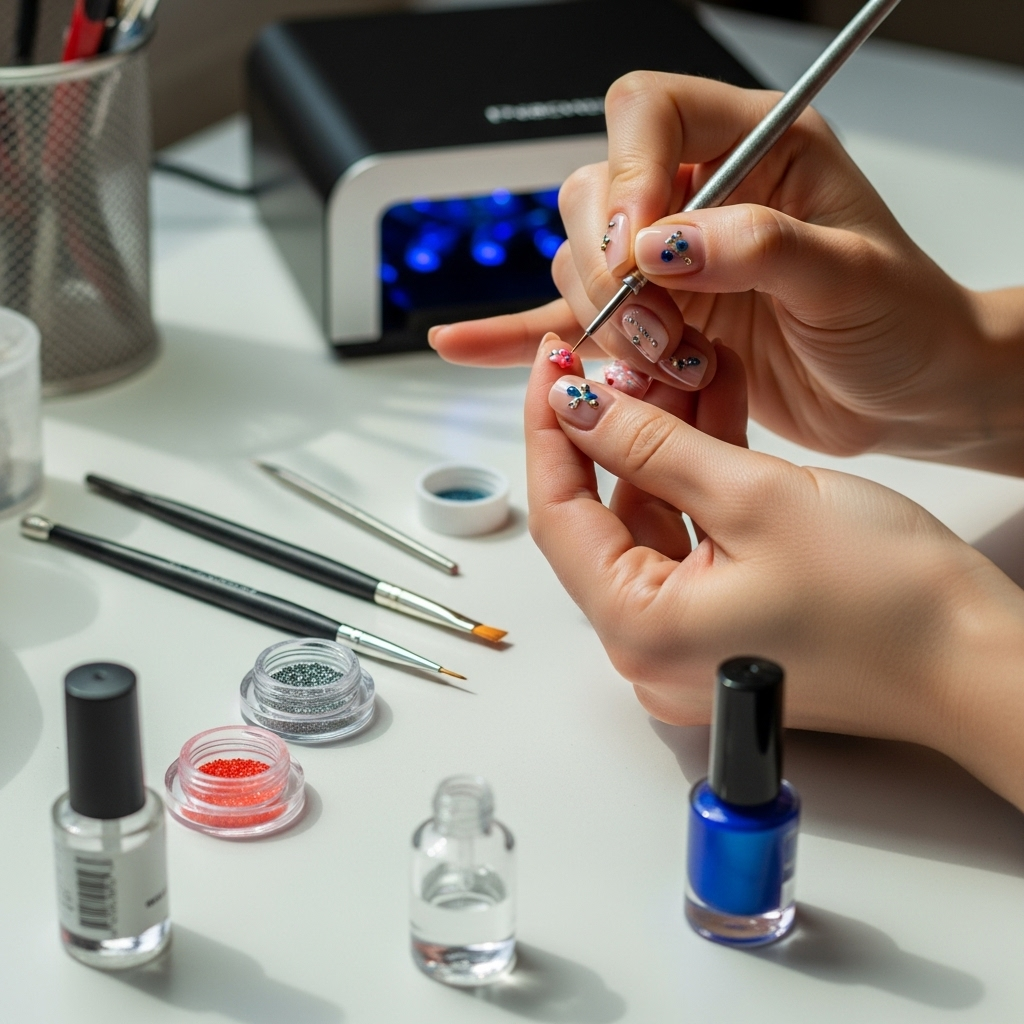
Getting that flawless holographic chrome finish is easier than you think with the right supplies. Here’s a breakdown of what you’ll need. Don’t worry, these are all readily available!
First things first, you’ll need a good base. For the best results and longevity with chrome powders, a gel polish system is highly recommended. This includes:
- UV/LED Nail Lamp: Essential for curing gel polish and making your chrome shine.
- Gel Base Coat: Creates a smooth surface and helps the polish adhere.
- Gel Color Polish (Usually Black or White): This forms the underlying color that your chrome powder will adhere to. Black is popular for a deeper, more intense chrome, while white offers a brighter, pastel-like shift.
- Gel Top Coat (No-Wipe is Best): Seals everything in and provides that super glossy finish. Make sure it’s a “no-wipe” formula, as the sticky inhibition layer of regular gel top coats can interfere with chrome application.
Now for the stars of the show:
- Holographic Chrome Powder: This is the magic ingredient! It comes in various iridescent shades. For the classic look, silver or multi-colored holographic powders are popular.
- Silicone Applicator Tool or Sponge Eyeshadow Brush: These are crucial for picking up and buffing the powder onto your nail for that smooth, seamless chrome effect.
Don’t forget the prep and finishing touches:
- Nail File and Buffer: To shape and smooth your natural nails or enhancements.
- Cuticle Pusher/Remover: For clean, polished edges.
- Alcohol Wipes or Lint-Free Wipes with Isopropyl Alcohol: To clean the nail plate before polish and to clean up any excess powder.
- Optional: Nail Glue or Gel Adhesive: For applying larger holographic flakes or gems for added dimension.
Step-by-Step Guide: How to Achieve Holographic Chrome Nails
Ready to get your holographic shimmer on? Follow these steps for a professional-looking finish right at home. Patience and a steady hand are your best friends here!
Step 1: Prep Your Nails
Proper prep is key for any manicure, especially one that requires a smooth, flawless finish like chrome.
- Clean Nails: Start with clean, dry nails. Remove any old polish.
- Shape: File your nails into your desired shape.
- Cuticle Care: Gently push back your cuticles using a cuticle pusher. If needed, you can use a cuticle remover, but be very gentle. Clean cuticles create a larger canvas for your design and make the polish look more professional.
- Buff: Lightly buff the surface of your nails with a buffer block. This creates a slightly rough surface for the gel polish to adhere to, but don’t overdo it! You’re just removing the natural shine.
- Cleanse: Wipe each nail with an alcohol wipe to remove any dust and oils. Ensure they are completely dry.
Step 2: Apply Your Base Gel Color
This layer will influence the final look of your chrome.
- Base Coat: Apply a thin, even layer of gel base coat. Cure under your UV/LED lamp according to the manufacturer’s instructions (usually 30-60 seconds).
- Color Application: Apply one or two thin coats of your chosen gel color polish (black for intense, white for bright). Ensure each coat is applied evenly and cure each layer thoroughly under the lamp. Thin coats are better than one thick, goopy coat!
Step 3: Apply the Holographic Chrome Powder
This is where the magic happens!
- Apply No-Wipe Top Coat: Apply a thin, even layer of your no-wipe gel top coat. Do NOT cure this layer yet. You want it slightly tacky.
- Apply Powder: Dip your silicone applicator or sponge brush into the holographic chrome powder. Gently tap off any excess.
- Buff It In: Lightly begin to buff the powder onto the uncured no-wipe top coat on your nail. Work in small circles, applying gentle pressure. You’ll see the chrome effect start to appear. Continue buffing until the entire nail surface has a smooth, even, metallic sheen.
- Clean Up Edges: Use a small brush or your finger to gently clean any excess powder from around the cuticle and sides of the nail.
- Cure: Once you’re happy with the coverage and smoothness, cure the nail under your UV/LED lamp as directed. This seals the powder.
- Repeat: Repeat steps 3-7 for all nails.
Step 4: Seal it with a Top Coat
The final layer of protection and shine.
- Second Top Coat: Apply another thin, even layer of your no-wipe gel top coat over the cured chrome powder. This is crucial for sealing in the chrome and preventing it from rubbing off.
- Final Cure: Cure this final layer under your UV/LED lamp according to the manufacturer’s instructions.
- Optional Cleanup: Once cured, you can use a lint-free wipe with a tiny bit of isopropyl alcohol to gently wipe over the nails, just to ensure absolutely no residue remains, though with a good no-wipe top coat, this isn’t usually necessary.
Step 5: Admire Your Work!
Give your nails a moment to cool down after the final cure, and then bask in the glory of your stunning holographic chrome manicure!
Tips for Longevity and Extra Sparkle
Want your holographic chrome nails to last as long as possible and shine their brightest? Here are a few pro tips:
Thin Coats are Your Friend: Whether it’s base, color, or top coat, thin, even layers cure better and last longer. Avoid thick, chunky applications.
Seal the Deal: Don’t skip the final top coat! It’s essential for locking in the chrome powder and preventing premature chipping or fading.
Avoid Harsh Chemicals: Try to wear gloves when doing chores, especially those involving harsh cleaning products, to protect your manicure.
Be Gentle: While chrome powder is sealed, it’s still a delicate finish. Avoid filing directly on the chrome surface after it’s applied.
Consider Nail Glue for Flakes/Gems: For added dimension this summer, apply a bit of nail glue or gel adhesive to a few areas after the first top coat (before curing the second top coat) and press in some holographic flakes or small gems for extra pops of sparkle. Carefully encapsulate these with your final top coat. Resources on proper adhesive application for nail art can be found through reputable beauty education sites such as Beauty Training Resources.
Carry a Mini Top Coat: For on-the-go touch-ups, a regular (non-gel) clear top coat can help refresh the shine if needed, though it won’t rebuild the chrome effect.
Holographic Chrome Powder: Types and Effects
The world of holographic chrome powders is vast and exciting! While they all aim for that iridescent shine, different types can offer slightly different looks. Understanding these can help you pick the perfect powder for your desired summer vibe.
| Powder Type | Description | Best For | Pros | Cons |
|---|---|---|---|---|
| Classic Silver Holographic | The original and most popular. Creates a bright, prismatic rainbow effect over a dark base. | Intense, vibrant rainbow effect. | Highly reflective, dramatic rainbow. Easy to find. | Can appear too bright for some. |
| Colored Holographic (e.g., Pink, Blue, Purple) | These base colors provide a slight tint to the rainbow shift. A pink holographic powder might lean more pink in its rainbow. | Subtle color undertones with rainbow shifts. | Adds a hint of specific color while still shimmery. | Rainbow effect might be slightly less pronounced than pure silver. |
| Duochrome Holographic | Combines the shifting colors of duochrome with the prismatic rainbow effect of holographic. Shifts between two main colors with an added rainbow flare. | Complex, multi-dimensional color changes. | Very unique and dynamic. Offers a layered effect. | Can be more expensive. May require specific base colors to shine. |
| Fine vs. Coarse Glitter/Powder | Refers to the particle size. Fine powders buff to a smoother, more mirror-like finish. Coarser particles can give more of a “glitter chrome” or textured metallic effect. | Smooth mirror finish vs. textured shimmer. | Fine: Sleek, modern look. Coarse: More playful, glittery effect. | Fine: Requires very smooth application. Coarse: May not achieve a true “mirror” effect. |
When choosing your powder, consider the underlying gel color you plan to use. Black polish generally creates the most intense and true holographic effect, making the rainbow colors pop. White or very light colors will create a softer, pastel-like iridescent finish.
Common Concerns and How to Fix Them
Even with the best instructions, sometimes things don’t go exactly as planned. Don’t fret! Here are some common issues with holographic chrome nails and how to troubleshoot them:
Powder Isn’t Buffing Smoothly/Appearing Patchy:
Cause: Not enough tackiness on the no-wipe top coat before applying powder, or not buffing enough pressure.
Fix: Ensure your no-wipe top coat is applied thinly and hasn’t been cured at all. Buff the powder more firmly and ensure you’re covering the entire surface. If it’s still patchy, you might need to apply another thin layer of no-wipe top coat (uncooked), buff powder again, and then cure.
Chrome is Rubbing Off or Chipping:
Cause: Insufficient sealing with the final top coat, or harsh chemical exposure.
Fix: Make sure you applied at least one, preferably two, thin, even layers of no-wipe gel top coat and cured them thoroughly. Wear gloves for household chores. If it starts chipping, you may need to gently file the edge and reapply a no-wipe top coat to that specific nail and cure it.
Powder Looks Dull or Not Shiny:
Cause: Incorrect product application, or the powder itself might be of lower quality.
Fix: Double-check that you’re using a no-wipe gel top coat as your base for the powder application and that you’re buffing it in well. Ensure the powder is applied to a completely dry, uncured layer of top coat. Sometimes, a second buffing session with powder can increase shine.
Powder Gets Stuck in Cuticles:
Cause: Applying too much powder too quickly, or not cleaning up the edges properly.
Fix: Use a small, dry brush or your finger to gently sweep away excess powder from the cuticle area before curing. It’s easier to prevent than to fix after curing. If some gets stuck, you might need to carefully file it away once cured.
The Rainbow Effect Isn’t Strong:
Cause: The underlying gel color might be too light, or the lighting isn’t optimal.
Fix: Try applying the holographic powder over a black gel polish for a more intense rainbow effect. Move your nails in different lights; the holographic effect is most noticeable when light hits it directly at an angle.
By understanding these common issues, you can tackle any little hiccups and achieve that perfect holographic shine!
Frequently Asked Questions (FAQs)
Q1: Can I use regular nail polish for holographic chrome nails?
A1: No, holographic chrome powders are designed to adhere to the sticky inhibition layer of gel polish or a special chrome gel base. Regular air-dry polishes don’t have this property, so the powder won’t stick or achieve the chrome effect.
Q2: What’s the difference between holographic chrome powder and regular chrome powder?
A2: Regular chrome powder creates a smooth, metallic mirror finish (like silver or rose gold). Holographic chrome powder adds a prismatic, rainbow-like shimmer to that mirror finish, making it shift colors with the light.
Q3: Do I really need a UV/LED lamp?
A3: Yes, absolutely. Gel polishes, top coats, and base coats require curing under a UV or LED lamp to harden and set properly. This is essential for the chrome powder to adhere and for the manicure to last.
Q4: My chrome looks streaky or patchy. What did I do wrong?
A4: This usually happens if the no-wipe top coat wasn’t tacky enough (cured too long or used a regular top coat), or if you didn’t buff the powder in with enough pressure or coverage. Ensure you’re using a true no-wipe gel top coat and buffing until the entire nail surface is uniformly covered.
Q5: How long do holographic chrome nails typically last?
A5: When applied correctly with gel products, holographic chrome nails can last 2-3 weeks, similar to a standard gel manicure. Longevity depends on proper prep, application, and aftercare.
Q6: Can I apply holographic chrome powder over any color gel polish?
A6: You can! However, the color of the underlying gel polish greatly affects the final holographic effect. Black provides the most intense, rainbow-popping effect. White or lighter colors will create a softer, pastel-like iridescence.
Q7: Is it difficult to remove holographic chrome nails?
A7: Removal is similar to removing other gel manicures. You’ll typically need to soak them off using acetone and foil wraps, or gently file the top layers off first before soaking. Avoid aggressively peeling or prying them off, as this can damage your natural nails. Visit Nail Care HQ for detailed gel removal techniques.
Conclusion
There you have it – your complete guide to creating stunning holographic chrome nails for that essential summer vibe! We’ve walked through everything from understanding what makes these nails so special to gathering your supplies, mastering the application step-by-step, and even troubleshooting common issues.
Remember, the key to a fabulous holographic chrome mani lies in good nail prep, using the right gel products (especially that no-wipe top coat!), and a little bit of buff


