Feeling a bit intimidated by fancy nail art? This guide breaks down essential high-end nail art designs into simple, achievable steps. Learn minimalist chic, elegant French tips, and subtle marble effects using basic tools you likely already have. Unleash your inner artist and create salon-worthy looks at home with confidence!
Dreaming of those stunning, sophisticated nails you see on magazine covers and social media? It’s easy to think high-end nail art is only for pros with secret techniques and fancy equipment. But what if I told you that achieving elegant, eye-catching designs at home is totally within reach? Many of the most chic and impressive looks are surprisingly simple to create once you know a few key approaches. Forget feeling overwhelmed; we’re going to explore some essential high-end nail art designs that even beginners can master.
Ready to elevate your mani game? We’ll cover everything from understanding the core principles of elegant design to creating specific looks with step-by-step instructions. Get ready to impress yourself and everyone around you with your beautiful, custom nail art!
What Makes Nail Art “High-End”?
So, what exactly is the secret ingredient that makes a nail design feel “high-end”? It’s not always about glitter explosions or intricate portraits (though those can be stunning!). Often, it’s about:
- Subtlety and Sophistication: Think clean lines, classic color palettes, and understated details.
- Precision and Cleanliness: Well-filed nails, perfectly applied polish, and crisp edges make a huge difference.
- Quality Materials: Using good quality polish and tools can really elevate the finish.
- Thoughtful Design: A design that feels intentional, balanced, and complements your personal style.
- Texture and Dimension: Sometimes, a subtle shift in finish (like matte vs. glossy) or a hint of texture adds that luxe feel.
It’s about creating a polished, put-together look that feels intentional and special. Think of it as the difference between a quick sketch and a well-rendered painting – both are art, but one often conveys a sense of refined skill and detail.
Essential Tools for High-End Nail Art
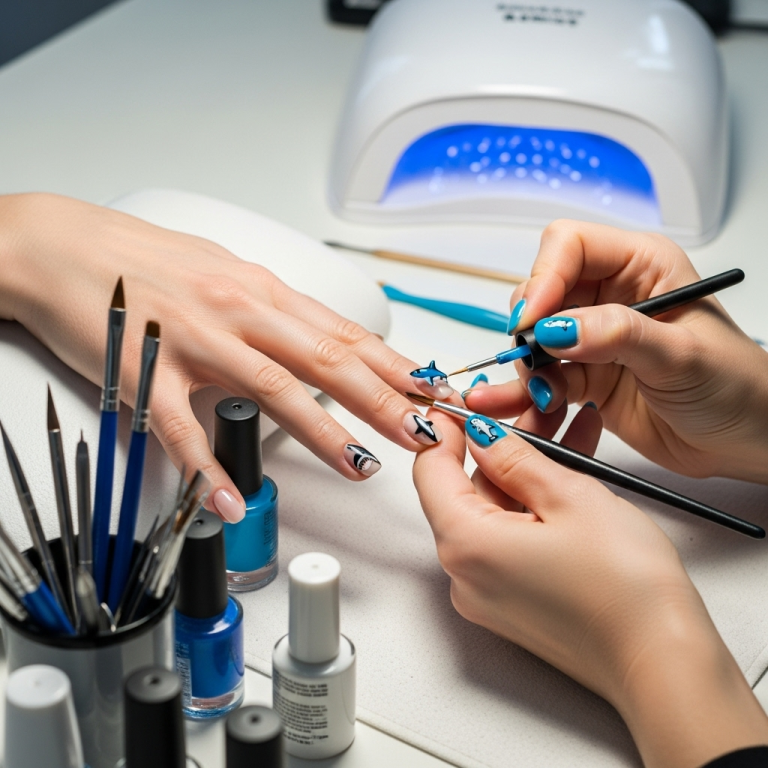
You don’t need a professional salon’s worth of equipment to create beautiful nail art. Here are a few key tools that will help you achieve those high-end looks. Many of these are likely already in your nail polish stash!
- Fine-Tip Nail Art Brushes: These are your best friends for drawing thin lines, dots, and delicate details. Look for a set with various tip sizes.
- Dotting Tools: These have little balls on the end, perfect for creating perfect dots of various sizes and even small flowers.
- Striping Tape or Stencils: These sticky tools help you create crisp, straight lines or geometric shapes effortlessly.
- A Good Top Coat: A high-shine or quick-dry top coat seals your design, adds gloss, and protects your art.
- Clean-Up Brush: An old, small makeup brush or a specialized clean-up brush dipped in nail polish remover is essential for tidying up edges.
- Base Coat: Always start with a good base coat to protect your natural nails and help polish adhere better.
Investing in a few quality brushes and tools can make a world of difference in achieving that professional finish. Don’t worry if you don’t have them all right away; start with what you have and build your collection as you practice!
Beginner-Friendly High-End Nail Art Designs
Let’s dive into some specific designs that are surprisingly easy to learn and look incredibly chic. These are perfect for practicing your skills and building confidence.
1. The Modern French Manicure
The classic French manicure gets a sophisticated update. Instead of just white tips, we’re playing with color and placement.
What You’ll Need:
- Base Coat
- Your chosen polish colors (e.g., nude base, colored tip polish)
- Fine-tip nail art brush OR striping tape
- Top Coat
Steps:
- Prep Your Nails: Start with clean, filed nails. Apply your base coat and let it dry completely.
- Apply Base Color: Paint your nails with a sheer nude, pink, or a soft neutral color. Apply two thin coats for even coverage and let them dry.
- Create the Tip (Method 1: Brush):
- Dip your fine-tip brush into your chosen tip color.
- Gently paint a thin line across the free edge of your nail. For a modern twist, try a color other than white – think metallics, deep jewel tones, or even pastels.
- You can also experiment with the placement – a thin line just above the natural smile line, or even a double line.
- Carefully clean up any smudges with your clean-up brush dipped in remover.
- Create the Tip (Method 2: Striping Tape):
- Once your base color is completely dry, carefully apply a strip of striping tape across the nail where you want the division line to be (usually just above the natural smile line).
- Paint over the tip of your nail with your chosen tip color.
- Immediately after painting, carefully peel off the striping tape. This creates incredibly crisp lines.
- Apply Top Coat: Once the tip color is dry, apply a generous layer of your favorite top coat to seal the design and add shine.
2. Minimalist Line Art
Simple lines can be incredibly chic and modern. This design focuses on clean, abstract elements.
What You’ll Need:
- Base Coat
- Your chosen polish color (e.g., a sophisticated neutral or a deep shade)
- Black or white nail art polish (or a metallic for a different effect)
- Fine-tip nail art brush
- Top Coat
Steps:
- Prep and Base Coat: Start with clean, filed nails. Apply your base coat and let it dry.
- Apply Main Color: Paint your nails with your primary polish color. Apply two thin coats and ensure they are completely dry. A matte top coat applied at this stage can also create a beautiful contrast later.
- Draw Your Lines:
- Dip your fine-tip brush into the contrasting nail art polish.
- Experiment with simple lines: a single diagonal line across a nail, a few parallel vertical lines, a small abstract squiggle, or a simple geometric shape like a triangle or square.
- Focus on keeping the lines thin and precise. It’s okay if they aren’t perfectly straight – that can add to the artistic feel!
- Start with one accent nail if you’re nervous, or try one or two lines on each nail.
- Clean Up and Top Coat: Carefully clean up any stray marks with your clean-up brush. Wait for the line art to dry fully before applying a shimmering or glossy top coat.
3. Subtle Marble Effect
Marble nails look super luxurious, and you can achieve a beautiful effect with just a couple of colors and a bit of gentle blending.
What You’ll Need:
- Base Coat
- A light base color (e.g., white, cream, pale grey)
- One or two contrasting colors for the marbling (e.g., black, gold, deep navy)
- Toothpick or fine-tip brush
- Top Coat
Steps:
- Prep and Base Color: Apply base coat. Paint your nails with your light base color, applying two thin coats. Let them dry mostly but still slightly tacky.
- Create Veins:
- With your contrasting color (e.g., black), dot or draw thin, irregular lines onto the slightly tacky base color. Don’t cover the whole nail.
- If using gold or metallic, you might want to dilute it slightly with top coat to make it easier to work with.
- Blend the Veins:
- Immediately, take a clean toothpick or the tip of your fine-tip brush.
- Gently drag it through the lines you just drew, “smudging” them to create a natural, watery marble effect. You’re just gently pulling the color to create wisps.
- Don’t over-blend! Less is more here. You want to see distinct veins.
- Add a second thin line of a different color if desired, and blend again lightly.
- Seal and Shine: Once you’re happy with the marble pattern and it’s just dry to the touch (don’t wait too long!), carefully apply a generous top coat. The top coat will smooth out the texture and make the design pop.
For more information on nail care basics that will make any design look better, check out Mayo Clinic’s guide to healthy nails.
4. Negative Space Designs
Negative space is a design technique where parts of your natural nail are left uncovered, creating a chic, modern, and minimalist look. It’s perfect for those who love a subtle yet stylish mani.
What You’ll Need:
- Base Coat
- Your chosen polish colors for patterns/shapes
- Striping tape or stencils (optional, but helpful for clean lines)
- Fine-tip brush (optional)
- Top Coat
Steps:
- Prep and Base Coat: Apply your base coat to clean, prepped nails. Let it dry.
- Apply First Color (Optional): If you’re using a sheer colored polish as your “negative space” base, apply a very thin coat now and let it dry. Otherwise, you’re working directly on your natural nail or base coat.
- Create Your Design with Color:
- Using Striping Tape: Apply pieces of striping tape in geometric patterns (e.g., forming triangles, squares, or just lines). Paint over the tape with one of your chosen colors. Once the polish is set but not fully dry, carefully peel off the tape, revealing the negative space underneath.
- Freehand with Brush: Use a fine-tip brush to paint shapes or lines onto the nail, leaving portions of the nail bare. This could be a simple half-moon at the cuticle, a V-shape at the tip, or abstract shapes near the sides.
- Stencil Method: Place a geometric stencil and paint over it, then remove.
- Add Detail (Optional): You can add tiny dots or a fine line with a contrasting color in the painted areas.
- Seal the Deal: Once all polish is dry, apply a clear, glossy top coat over the entire nail to seal the design and add shine.
5. Sophisticated Ombre
While ombre can sometimes feel complex, a subtle, tonal ombre is surprisingly easy and looks incredibly elegant.
What You’ll Need:
- Base Coat
- Two or three complementary polish colors (e.g., light pink to medium pink, nude to light brown, light blue to deeper blue)
- Cosmetic sponge or a stiff brush
- Top Coat
Steps:
- Prep and Base Coat: Apply base coat and let it dry.
- Apply Base Color: Paint your nails with the lightest color from your gradient. Let it dry completely.
- Load Your Sponge:
- On a disposable surface (like foil or a plastic lid), paint stripes of your chosen colors right next to each other. For instance, a stripe of light pink touching a stripe of medium pink.
- Gently dab a cosmetic sponge into the colors. You want to pick up both colors on the sponge.
- Sponge the Gradient:
- Lightly dab the sponge onto your nail, starting from the cuticle and blending upwards towards the tip.
- Re-load your sponge with color as needed and continue dabbing. The key is light, tapping motions to blend the colors seamlessly.
- You’re aiming for a smooth transition rather than harsh lines.
- Clean Up and Top Coat: Immediately clean up any polish that got on your skin using your clean-up brush and remover. Once the color is dry, apply a good top coat to smooth out the sponged texture and add shine.
Understanding Nail Shapes and Lengths
The shape and length of your nails significantly impact how a design looks. High-end designs often benefit from well-maintained nails.
Common Nail Shapes:
- Square: Straight sides with sharp, 90-degree corners.
- Squoval: A softer version of square, with rounded corners.
- Round: Curved edges that follow the fingertip. Great for preventing snags.
- Oval: Elongated and rounded, creating an elegant look.
- Almond: Similar to oval but tapers to a soft point. Very flattering.
- Stiletto: Tapers to a sharp point.
- Coffin/Ballerina: Tapers to a blunt, squared-off tip.
Length Considerations:
- Short Nails: Look great with minimalist designs, single accent lines, or subtle color blocking.
- Medium Length Nails: Offer more canvas for intricate details or gradients.
- Long Nails: Can handle bolder designs, but simple elegance often shines brightest.
For high-end looks, slightly longer nails (oval, almond, or squoval) often provide a beautiful canvas. However, even short nails can look incredibly chic with the right minimalist design. The most important thing is that your nails are healthy and neatly filed.
Caring for Your High-End Manicure
You’ve put in the effort to create beautiful nail art – let’s make it last!
- Top Coat is Key: Reapply a thin layer of top coat every 2-3 days to maintain shine and prevent chipping.
- Wear Gloves: Protect your hands and your manicure when doing chores, washing dishes, or gardening. Household chemicals are the enemy of polish!
- Avoid Using Nails as Tools: Don’t use your nails to open cans, scrape labels, or pry things open.
- Hydrate: Keep your cuticles and nails moisturized with cuticle oil. Healthy nails are less prone to breaking.
- Be Gentle: Avoid harsh scrubbing or excessive soaking.
With a little care, your stunning nail art can last for days, looking fresh and fabulous!
Troubleshooting Common Nail Art Issues
Don’t get discouraged if your first few attempts aren’t perfect. Every nail artist experiences hiccups! Here’s how to fix some common problems:
| Problem | Solution |
|---|---|
| Polish is too thick and stringy. | Add a drop or two of nail polish thinner (never remover, as that breaks down the polish). Let it sit for a minute and stir gently. |
| Lines are bleeding or fuzzy. | Ensure your base color is fully dry before adding details. Make sure your brush isn’t overloaded with polish. Clean up excess polish on the brush before painting lines. |
| Bubbles in polish. | Don’t shake your polish bottle vigorously; roll it between your palms. Apply thin coats rather than thick ones. Make sure your previous coat is almost dry before applying the next. |
| Top coat smudges the design. | Wait until your nail art is completely dry before applying top coat. If it’s still a bit soft, use a “tomp” or “cap” motion instead of a sweeping brush stroke. Gently dab the top coat onto the design first, then sweep it over the whole nail. |
| Design looks messy around the edges. | Keep your clean-up brush handy! Dip it in nail polish remover and carefully trace around the cuticle and side walls to create crisp edges. This is a game-changer. |
Remember, practice makes progress! Even a slightly imperfect design can look charming when done with enthusiasm.
For more insights into nail health and maintenance, you can explore resources from the <a href="https://www.aad.org/public/diseases/skin-growth/


