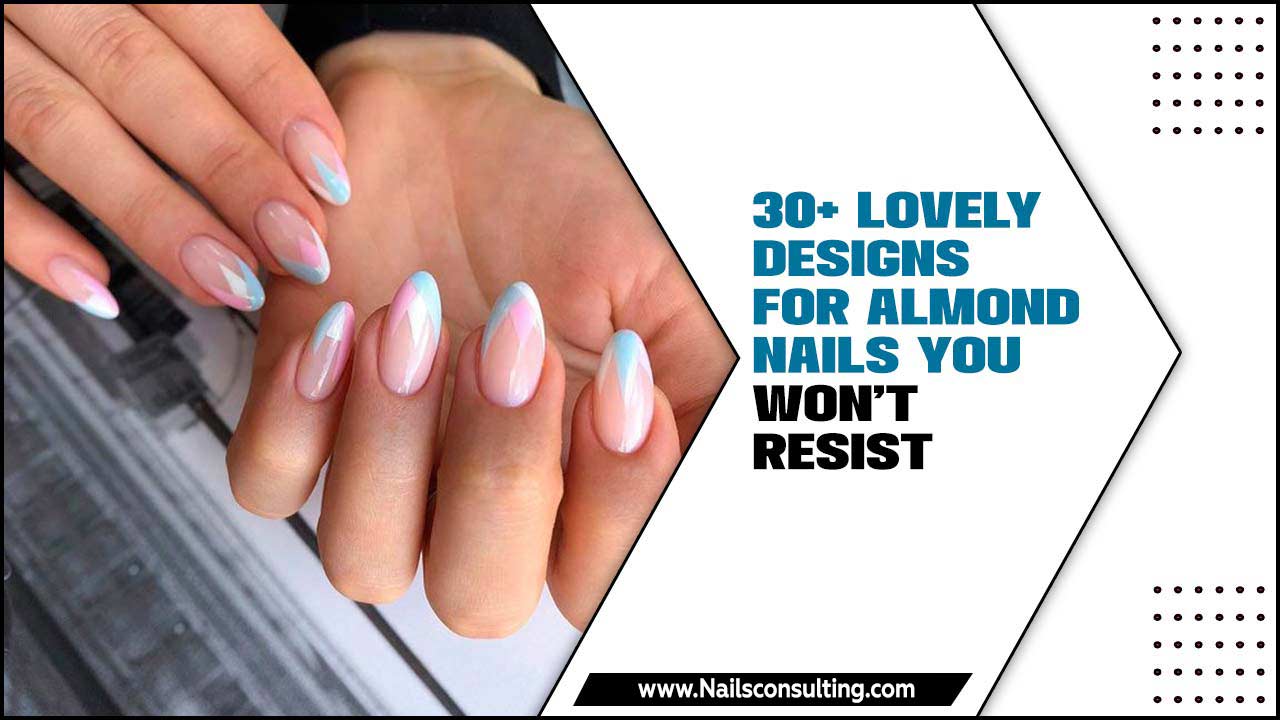
Green nail design ideas for spring are all about fresh, vibrant looks! From subtle mint to deep emerald, green offers a natural pop of color perfect for the season. Explore easy DIY styles like ombre, simple dots, or floral accents that beginners can master for a chic spring manicure.
Spring is finally here, and you know what that means? Time to refresh your look, starting with your nails! If you’re anything like me, you crave that feeling of new beginnings, and nothing says “new beginnings” quite like a gorgeous green manicure. But sometimes finding the perfect green nail design can feel a bit… overwhelming. Where do you even start? Don’t worry, I’ve got you covered! We’re diving into the most delightful green nail design ideas that are perfect for spring. Get ready to embrace the season with nails that are as fresh and vibrant as a blooming garden. Let’s make your nails shine!
Why Green Nails are Perfect for Spring
As the world outside awakens with budding leaves and fresh blossoms, green nail designs naturally fit the spring vibe. It’s a color that’s inherently linked to nature, growth, and renewal. Think about it: the first tender shoots of grass, the vibrant leaves on trees, the sweet peas in bloom – they all showcase a beautiful spectrum of green.
Green is also surprisingly versatile. It can be calming and serene, like a soft mint shade, or bold and energetic, like a bright lime. This makes it a fantastic choice for a wide range of personal styles. Plus, unlike some bolder spring colors, green still feels grounded and elegant, making it easy to wear for any occasion.
For beginners, green is a forgiving color to work with. Many shades are beautiful even with a simple, clean application. And when you’re ready to experiment, there are tons of easy design ideas that will make your nails stand out without requiring years of practice. It’s the perfect way to channel that springtime optimism and let your creativity blossom!
Essential Green Nail Design Ideas for Spring
Ready to get creative? Here are some of the most popular and easy-to-achieve green nail design ideas that are trending this spring. We’ll cover everything from minimalist chic to more playful looks!
1. The Classic Green French Tip
The French manicure is a timeless classic, and a green twist is a brilliant way to make it spring-ready. This design is super chic and surprisingly easy to do yourself!
How to achieve it:
- Start with a sheer nude or milky white base coat. Apply two thin coats for an even finish. Let it dry completely.
- For the green tips, you have a few options:
- Freehand: Carefully paint a green line across the tip of each nail. Take your time and try to keep the line as steady as possible.
- Using a thin brush: Dip a fine-tipped nail art brush into your green polish and draw a clean line.
- Stencil/Guide: Use French tip guide stickers to get a perfectly straight line. Place the sticker just below where you want your green tip to start, paint over the tip, remove the sticker once the polish is slightly tacky but not wet.
- Consider using a pastel green for a softer look or a brighter emerald for a bolder statement.
- Once the green tips are dry, apply a clear top coat to seal the design and add shine.
2. Minty Fresh Ombre
Ombre is a beautiful way to blend colors, and a minty green ombre evokes fresh spring skies and new leaves. It looks intricate but is quite achievable!
How to achieve it:
- Apply a pale green or white base coat to all your nails. Let it dry completely.
- For the ombre effect, you’ll want two shades of green, or one green and white/light cream. The easiest way for beginners is to use a makeup sponge (a clean, dry cosmetic sponge works best).
- Apply stripes of your chosen green polishes directly onto the sponge: one color at the tip, the other at the base, or one color for the main nail and another for the tip.
- Gently dab the sponge onto your nail, pressing down firmly to blend the colors. You might need to reapply polish to the sponge a few times for a smooth transition.
- Repeat this process on all nails. It might take a few tries to get the hang of it, so don’t get discouraged!
- Once you have your desired ombre effect, let it dry for a minute. Then, carefully clean up any polish that got on your skin using a small brush dipped in nail polish remover.
- Finish with a nourishing cuticle oil and a clear top coat.
3. Simple Sage Green Swirls
Sage green is a sophisticated and earthy shade that’s incredibly popular right now. Adding simple swirls elevates it from a solid color to a chic design.
How to achieve it:
- Paint your nails with a lovely sage green polish. Apply two coats for opacity and let them dry thoroughly.
- Using a contrasting color (like white, cream, or a subtle gold), or even a slightly darker or lighter shade of green, grab a fine-tipped nail art brush or a dotting tool.
- Dip your tool into the accent polish.
- On each nail, create a few simple, flowing swirls. Think of gentle curves and loops. You don’t need to be perfect; the organic nature of swirls is what makes them look good!
- Alternatively, you can use a toothpick for this if you don’t have a nail art brush. Just be gentle!
- Apply a clear top coat to seal your beautiful, minimalist design.
4. Delicate Green Floral Accents
Spring is synonymous with flowers, and what better way to celebrate than with delicate green floral accents on a neutral base?
How to achieve it:
- Start with a neutral base. Think milky white, pale beige, or a sheer nude polish. Apply one or two coats and let it dry completely.
- Using a fine nail art brush and a soft green polish (like a pastel green or even a hint of mint), paint small, simple floral shapes. Think tiny petals or dots arranged in a flower pattern.
- You can also use tiny green rhinestones or glitter for a touch of sparkle.
- For a more detailed look, add a tiny dot of white or a contrasting color in the center of your green “flowers” to create a highlight or center.
- Once your floral art is dry, finish with a clear top coat.
5. Emerald Green with Gold Accents
For a touch of luxury and depth, emerald green is a stunning choice. Adding gold accents makes it feel extra special for spring events.
How to achieve it:
- Apply two coats of a rich emerald green polish. Ensure it’s fully dried.
- To add the gold accent, you can:
- Gold foil transfer: Apply a special foil adhesive to sections of your nail (e.g., along the cuticle line, a geometric shape, or random streaks). Once the adhesive is tacky, press gold foil onto it. Gently peel off the excess foil.
- Metallic gold polish: Use a fine nail art brush dipped in metallic gold polish to draw thin lines, geometric shapes, or even a delicate accent on one or two nails.
- Gold glitter: Apply a thin layer of gold glitter polish strategically over the emerald green.
- A great spot for gold accents is the cuticle area or a single stripe down the middle of the nail.
- Seal everything with a durable clear top coat.
6. The “Tipsy” Green Gradient
This modern take on the French tip involves a gradient rather than a sharp line, giving a softer, more artistic feel in various shades of green.
How to achieve it:
- Start with a clear or very light nude base.
- Using a thin brush and a lighter shade of green (like mint or light lime), paint a small section of the nail tip.
- With a slightly darker shade of green, paint the next section, overlapping slightly with the lighter shade to create a subtle blend.
- Continue this with a medium green and a darker green towards the very tip. The key is to blend the edges softly.
- Alternatively, you can use a makeup sponge (as described in the ombre section) with different shades of green to create a gradient effect on the tips.
- A top coat will smooth out the transition.
Tools and Tips for Your Green Manicure
Getting that perfect green nail design doesn’t require a professional salon visit! Here are some essential tools and helpful tips to make your DIY manicure shine.
Essential Tools for DIY Green Nails
Having the right tools can make a huge difference in achieving salon-worthy results at home:
- Nail File & Buffer: For shaping and smoothing your nails.
- Base Coat: Protects your natural nail and helps polish adhere better. A good ridge filler can be a lifesaver for uneven nail surfaces.
- Top Coat: Seals your design, adds shine, and prevents chipping. Look for quick-dry or gel-like finishes.
- Nail Polish Remover & Cotton Pads: For clean-ups and removing polish.
- Fine-Tipped Nail Art Brushes: Essential for creating details, lines, and swirls. You can find these in most beauty stores or online.
- Dotting Tools: Great for creating dots, small flowers, or spreading polish for gradients. They come in various tip sizes.
- Makeup Sponge: A clean, dry cosmetic sponge is perfect for ombre and gradient effects.
- Nail Polish Guard or Liquid Latex: To protect your skin from polish mess around the cuticle area.
- Cuticle Oil: To moisturize your nails and skin after polishing.
Pro Tips for Beginners
Don’t worry if your first few attempts aren’t perfect. Practice makes progress! Here are some tips:
- Thin Coats are Key: Always apply thin, even coats of polish. Thicker coats are more prone to smudging and take longer to dry.
- Allow Drying Time: Patience is your best friend. Make sure each layer is mostly dry before applying the next.
- Clean Up Mistakes: Keep an old, fine-tipped brush or a toothpick handy that you can dip in nail polish remover to clean up any polish that gets on your skin. Do this while the polish is still wet for easier removal.
- Start Simple: Begin with designs that don’t require extreme precision, like solid colors, simple dots, or easy gradients.
- Secure Your Polish with Top Coat: A good top coat is crucial for making your design last.
- Experiment with Greens: Don’t be afraid to try different shades – from pale mint to vibrant lime, olive, or deep forest green.
Popular Shades of Green for Spring
The world of green polish is vast and beautiful! For spring, we’re seeing a few key shades really shine. Choosing the right shade will truly elevate your chosen design.
| Shade Name | Vibe | Best For | Design Ideas |
|---|---|---|---|
| Mint Green | Fresh, light, airy, pastel. | Subtle elegance, everyday wear, soft spring looks. | French tips, simple dots, light ombre. |
| Sage Green | Earthy, muted, sophisticated, calming. | Chic, minimalist looks, natural beauty. | Swirls, solid color, abstract lines. |
| Lime Green | Bright, energetic, fun, bold. | Making a statement, playful designs. | Accent nails, geometric patterns, color-blocking. |
| Emerald Green | Rich, luxurious, deep, elegant. | Special occasions, sophisticated manicures. | Accents with gold or silver, deep French tips. |
| Olive Green | Muted, natural, a bit more subdued. | Grounded, earthy tones, unique style. | Matte finish, minimalist geometric shapes. |
When selecting your green polish, consider your skin tone. Lighter, cooler greens often complement cooler skin tones, while warmer, deeper greens can look stunning on warmer skin tones. However, the best shade is always the one that makes you feel happiest!
Adding Sparkle and Dimension
Want to take your green nail designs to the next level? Adding a touch of sparkle or a different texture can instantly transform your manicure.
Glitter Accents
A sprinkle of glitter can add instant festivity to any green nail design. You can use glitter polish in shades of gold, silver, holographic, or even a complementary blue or pink. Apply it as an accent nail, a glittery tip, or a gradient fading from the cuticle to the tip.
Matte Finish
Tired of the high-gloss look? A matte top coat applied over your green polish can give your manicure a sophisticated, velvety finish. This works particularly well with deeper greens like emerald or olive, giving them a modern, understated appeal.
Stickers and Decals
For the ultimate beginner-friendly detail, consider nail art stickers or decals. You can find tiny green leaves, floral patterns, or even abstract designs that you simply peel and stick onto your polished nail. Seal with a top coat for longevity.
3D Elements
If you’re feeling a bit more adventurous, small 3D embellishments like tiny rhinestones, pearls, or even small charms can add a beautiful dimension. Apply these with a strong top coat or nail glue. For spring, think about clusters of tiny clear or iridescent gems that mimic dewdrops.
Maintaining Your Green Spring Manicure
Once you’ve created your beautiful green nail art, you’ll want it to last! Here’s how to keep your manicure looking fresh:
Seal with a Quality Top Coat: This is the most important step for longevity. A good top coat not only adds shine but also protects your design from chipping and fading. Reapply every 2-3 days if you notice it dulling.
Wear Gloves: When doing chores like washing dishes or cleaning, wear rubber gloves. Water and harsh cleaning chemicals can weaken nail polish and cause it to lift.
Avoid Using Nails as Tools: Resist the urge to use your nails to open cans, scrape labels, or anything similar. Your nails are for looking pretty, not for prying!
Moisturize Regularly: Keep your hands and nails hydrated. Apply cuticle oil daily, especially around the edges of your polish, to prevent dryness and chipping.
Touch-Ups: For minor chips, you can sometimes carefully file away the chipped edge and reapply a thin layer of top coat or even the base color to the affected area.
FAQ: Your Green Nail Design Questions Answered
Here are some common questions beginners have about green nail designs:
Q1: I’m a total beginner. Which green nail design is the easiest to try first?
A1: For absolute beginners, starting with a solid coat of a beautiful green polish is the easiest way to go! If you want a design, try painting simple dots in a slightly darker or lighter green on top of your solid coat, or experiment with a mint green French tip using guide stickers.
Q2: How do I prevent my nail polish from chipping so quickly?
A2: The key is proper prep and a good top coat. Make sure your nails are clean and free of oils before applying polish. Always use a base coat, apply thin coats of color, and finish with a high-quality top coat. Reapply your top coat every few days!
Q3: Can I use regular nail polish for ombre or gradient designs, or do I need special products?
A3: You absolutely can use regular nail polish! For ombre and gradients, a makeup sponge is your best friend. You apply the polishes directly to the sponge and then dab them onto your nail to blend. It’s surprisingly easy once you get the hang of it.
Q4: My nail art brush smudges when I try to create details. What am I doing wrong?
A4: This usually happens if the base color isn’t dry enough, or if you’re using too much polish on your brush. Try applying your polish in very thin coats and waiting a bit longer between layers. Also, dip your brush in polish sparingly – you can always add more!
Q5


