Graduation nail art offers a fun, celebratory way to mark your academic achievement. From elegant minimalist designs to dazzling glitter effects, find genius and essential looks perfect for your big day, tailored for beginners to easily recreate and express your unique style.
Graduation is a huge milestone, a moment to shine and celebrate years of hard work! You’ve picked out the perfect outfit, styled your hair, and now you’re thinking about the finishing touch: your nails. But where do you start with graduation nail art? It can feel a little overwhelming with so many trendy ideas out there. Don’t worry, we’ve got your back! This guide is designed to make choosing and creating stunning graduation nails super simple, even if you’re completely new to nail art.
Why Your Graduation Nails Matter
Think about all those photos you’ll be taking – holding your diploma, shaking hands, celebrating with friends and family. Your hands will be in so many memories! Graduation nails are more than just pretty polish; they’re a personal statement. They’re a way to express your excitement, your personality, and the journey you’ve just completed. Choosing the right design can boost your confidence and make you feel truly ready to step into your next adventure feeling polished and put-together.
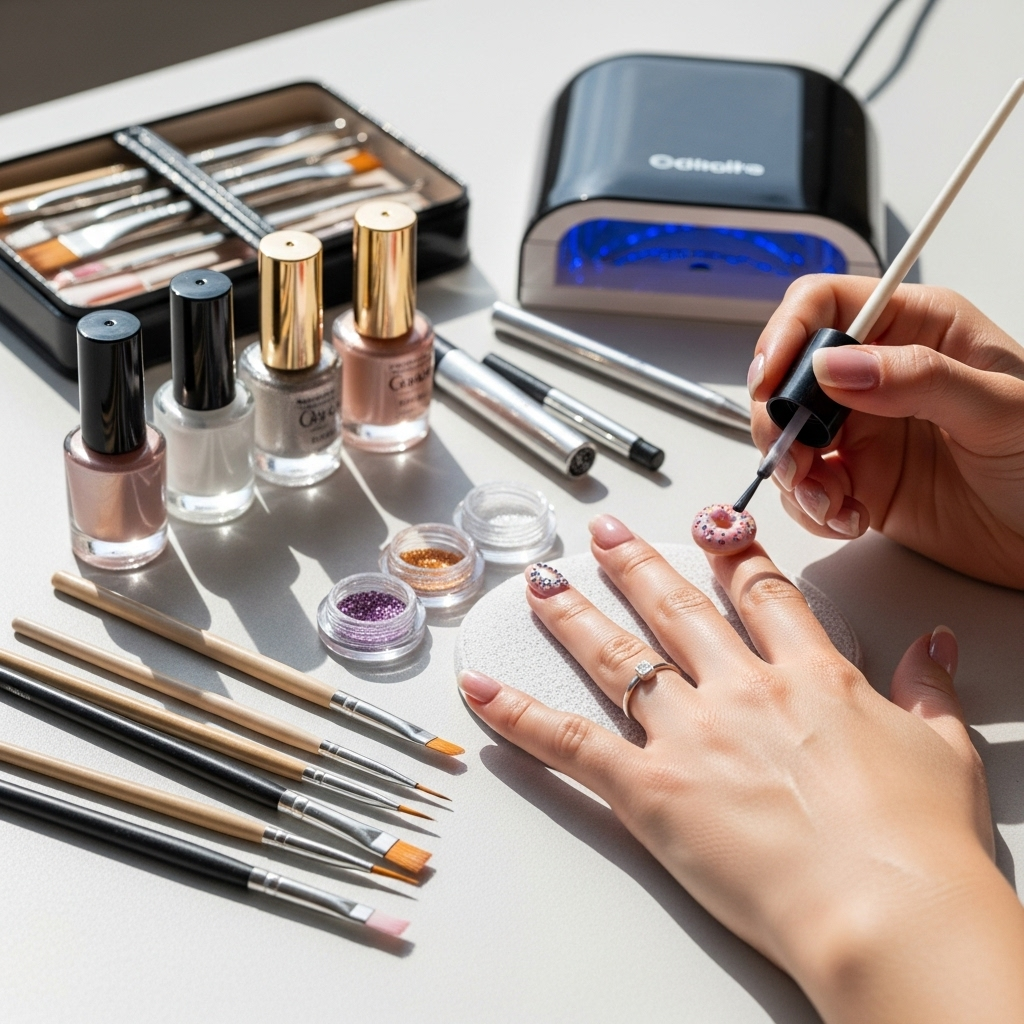
Understanding the Basics: What You’ll Need
Before we dive into the fun designs, let’s make sure you have the essential tools. Having these on hand will make creating your graduation nail art a breeze!
Essential Nail Art Tools for Beginners
- Nail Polish Remover: For correcting mistakes and starting with a clean slate.
- Cotton Pads/Balls: To apply remover.
- Base Coat: This protects your natural nails from staining and helps polish adhere better. It’s a must-have for any manicure!
- Top Coat: To seal your design, add shine, and prevent chips. A good top coat is your best friend for a long-lasting finish.
- Nail Files: To shape your nails. A fine-grit file is great for smoothing. For more on nail shaping, check out Nails Magazine’s tips.
- Cuticle Pusher: To gently push back your cuticles for a neat look.
- Nail Art Brushes: A few fine-tipped brushes are super helpful for detail work, lines, and dots.
- Dotting Tools: These have a small ball on the end and are perfect for making consistent dots.
- Tweezers: Useful for placing small embellishments like glitter or tiny studs.
- Your Chosen Nail Polishes: Select colors that match your gown, school colors, or personal style!
Genius Graduation Nail Art Ideas for Every Style
Now for the exciting part! We’ve curated some fantastic graduation nail art ideas that are perfect for beginners. They’re stylish, celebratory, and surprisingly easy to achieve.
1. The Classic & Chic: Minimalist Elegance
If you prefer a sophisticated and understated look, minimalist nail art is your go-to. It’s timeless and complements any graduation outfit.
“Chalkboard” Accent Nail
This design is inspired by the classic blackboard used in classrooms. It’s a subtle nod to your academic journey.
- Colors: Matte black or dark grey for the base, white or light grey for the design.
- Look: Paint all nails a solid color (e.g., matte black). On one accent nail (usually the ring finger), use a fine nail art brush and white polish to draw a small, simple symbol like a star, a graduation cap outline, or even your graduation year (e.g., “24”).
- How-to:
- Apply base coat.
- Paint all nails with your chosen solid color. Let dry completely.
- On your accent nail, carefully paint your chosen symbol with white polish using a thin brush.
- Let it dry thoroughly.
- Apply a matte top coat for that chalky finish, or a glossy top coat for contrast.
Subtle Sparkle French Tips
A twist on the traditional French manicure, this adds just a hint of celebratory shimmer.
- Colors: Nude or pale pink base, silver or gold glitter polish for the tips.
- Look: A clean, sheer base with a delicate glitter line at the tip of each nail.
- How-to:
- Apply base coat.
- Paint nails with your sheer nude or pink polish.
- Once dry, carefully apply a thin line of glitter polish along the free edge of each nail. You can use the brush from the glitter polish or a fine-tip brush for more control.
- Alternatively, use tape to create a clean line for your glitter tip.
- Apply a top coat to seal the glitter.
2. School Spirit Sparkle
Show your pride with colors that represent your alma mater! This is a fun way to personalize your look.
Two-Tone Ombre Nails
Ombre is a gradient effect, flowing from one color to another. It looks intricate but is surprisingly easy with a makeup sponge!
- Colors: Your school colors! For example, blue and gold.
- Look: Nails that seamlessly blend from one school color to another.
- How-to:
- Apply base coat and let dry.
- Paint your nails with the lighter of your two school colors. Let it dry completely.
- On a makeup sponge (a regular kitchen sponge cut into a small piece works!), apply stripes of your two school colors side-by-side.
- Gently dab the sponge onto your nail, pressing down and rolling slightly to blend the colors.
- Repeat the striping and dabbing if needed to build the color intensity.
- Clean up any polish on your skin with nail polish remover and a brush.
- Once dry, apply a generous layer of top coat to smooth out the texture from the sponge.
Color Block Accents
Bold and eye-catching, this uses geometric blocks of your school colors.
- Colors: Your school colors (e.g., red and white).
- Look: Nails split into distinct sections of different colors.
- How-to:
- Apply base coat.
- Paint your nails with your primary school color. Let dry completely.
- Once dry, use striping tape (or regular small strips of tape) to create a geometric line or shape. For example, a diagonal line across the nail.
- Paint the section behind the tape with your secondary school color.
- Carefully remove the tape while the polish is still slightly wet to get a clean line.
- Repeat on other nails with different color block arrangements if desired (e.g., half-and-half, triangles).
- Finish with a top coat.
3. Glamorous Graduation Glow
Ready to add some sparkle and shine? These looks are all about celebrating your success with a touch of glamour.
All-Over Glitter Bomb
When in doubt, go for glitter! This is pure celebration on your fingertips.
- Colors: A stunning glitter polish in silver, gold, rose gold, or even iridescent finishes.
- Look: Nails coated in a dense, shimmering glitter.
- How-to:
- Apply base coat.
- Apply one or two coats of your chosen glitter polish. Glitter polish can sometimes be tricky, so a dense glitter might require a bit of dabbing with the brush to get even coverage.
- For extra sparkle, apply a second coat of glitter polish.
- Ensure each layer is completely dry before applying the next or the top coat.
- Apply a thick top coat to smooth out the glitter texture and add insane shine. This also helps it last longer!
Confetti Celebration Nails
This design mimics the festive confetti you might see at a graduation party.
- Colors: A sheer or light-colored base (like white, clear, or pale pink) with multi-colored or metallic confetti glitter.
- Look: A fun scattering of “confetti” pieces across the nail.
- How-to:
- Apply base coat.
- Paint your nails with your chosen sheer or light base color. Let dry.
- While the last coat is still slightly wet, or by dabbing a clear top coat onto the nail, carefully place confetti glitter pieces using a brush or tweezers. Don’t overload it; a scattered effect looks more natural.
- You can also use a dedicated confetti glitter polish where the pieces are already mixed in.
- Once you have the desired placement, apply a thick top coat to encase the confetti and create a smooth surface.
4. The “Future is Bright” Designs
These designs carry a symbolic meaning, looking forward to what’s next.
Stardust/Constellation Nails
A dreamy, celestial look to symbolize your bright future ahead.
- Colors: Deep blues, purples, black, or even white. Silver or gold for stars and dots.
- Look: A dark, moody base with tiny scattered dots and lines resembling stars and constellations.
- How-to:
- Apply base coat.
- Paint your nails an dark color like navy blue or black. Let dry completely.
- Using a dotting tool or the tip of a fine brush, carefully place tiny dots of silver or gold polish randomly across the nail.
- Connect some of the dots with thin lines using a very fine nail art brush to create constellation patterns. Don’t worry about perfection; a slightly abstract look is part of the charm!
- Let the dots and lines dry thoroughly.
- Apply a top coat, going easy at first to avoid smudging the delicate details, then build up to a smooth finish.
“Shine Bright” Text Accent
A simple, inspiring message on one nail.
- Colors: Any color scheme you love.
- Look: A solid base color with “Shine” or “Bright” written on an accent nail.
- How-to:
- Apply base coat.
- Paint your nails your desired base color. Let dry.
- On your accent nail, use a very fine nail art brush and a contrasting color to gently write your word (e.g., “Shine” or “Joy”). You might want to practice writing the word on a piece of paper first!
- Alternatively, use nail stencils or custom nail stickers if freehand writing isn’t your strong suit.
- Let the writing dry completely.
- Apply top coat to seal and protect.
DIY Tips for Flawless Graduation Nails
Even with the easiest designs, a few pro tips can make a big difference:
- Prep is Key: Always start with clean, dry nails. Push back your cuticles gently and consider a quick buffing for a smooth surface. For nail care tips, the American Academy of Dermatology has some great advice. Learn more about healthy nail care from the AAD.
- Work in Thin Layers: It’s much better to apply two or three thin coats of polish than one thick, gloopy one. Thin coats dry faster and look smoother.
- Patience is a Virtue: Let each layer of polish dry completely before adding the next. This is the most crucial step to avoid smudges and dents!
- Clean Up as You Go: Keep a small brush dipped in nail polish remover handy to clean up any stray polish on your skin or cuticles. This makes a huge difference in the final look.
- Don’t Forget the Top Coat! This seals everything in, adds shine, and makes your manicure last. An extra thick layer of top coat over glitter or textured designs is a game-changer.
Choosing Your Graduation Nail Style: A Quick Guide
Picking the perfect graduation nail art can be fun and easy with a little guidance. Consider these factors:
| Consideration | Beginner-Friendly Tip | Example Graduation Nail Look |
|---|---|---|
| Your Personal Style | Do you prefer classics, subtle elegance, or bold statements? | Minimalist: Subtle Sparkle French Tips. Bold: Color Block Accents. |
| Time Commitment | How much time do you have before graduation? Complex designs take longer. | Quickest: Solid color or glitter bomb. Moderate: Ombre or simple accent nails. |
| Effort Level | Are you comfortable with fine details, or do you prefer easier application? | Easy: Glitter, solid colors. Moderate: Ombre, simple dotting. |
| Outfit/Gown Color | Do you want your nails to match your attire or be a pop of contrast? | Matching: School colors. Contrast: Metallics or nudes with colorful gowns. |
| Symbolism | Do you want your nails to represent your school or your future? | School: School spirit colors. Future: Stardust or “Shine Bright” designs. |
Frequently Asked Questions About Graduation Nail Art
Q1: What polish colors are popular for graduation?
Common and popular choices include metallics like gold, silver, and rose gold for celebration, classic nudes and pinks for elegance, and school colors to show spirit. White and black are also versatile bases for adding details.
Q2: How can I make my DIY graduation nails last longer?
Start with clean, dry nails and a good base coat. Apply polish in thin layers and let each coat dry completely. Always finish with a high-quality top coat and reapply it every couple of days if needed.
Q3: I’m a total beginner. What’s the easiest graduation nail art to try?
Solid colors are the easiest! For a bit more flair, try an all-over glitter polish or a simple French tip using a glitter polish. These require minimal precision and look instantly festive.
Q4: Can I use press-on nails for graduation?
Absolutely! Press-on nails are a fantastic, quick, and easy option for beginners or if you’re short on time. Many come in beautiful designs, including glitter and themed looks, ready to go.
Q5: How do I prevent smudging when applying glitter or fine details?
The key is patience! Ensure each layer is completely dry. For glitter, a thick top coat is essential to create a smooth surface. For fine lines or dots, a steady hand and good lighting are helpful. If you make a mistake, clean it up immediately with a brush dipped in nail polish remover before it dries.
Q6: What if my school colors are hard to find in nail polish?
Don’t fret! You can often create custom shades by mixing polishes. Alternatively, focus on a more neutral, celebratory color like gold, silver, or rose gold, and use your school colors for just one or two accent nails if you can find them. Nail stickers and decals are also great for specific colors.
Conclusion: Polish Up Your Graduation Day!
Graduation nail art is a wonderful way to celebrate your achievements and express your personal style as you mark this significant moment. Whether you opt for a classic, understated look, go all out with school spirit colors, or embrace dazzling glitter, there’s a perfect design waiting for you. Remember, the most important thing is to choose something that makes you feel confident and happy. With these easy-to-follow ideas and beginner-friendly tips, you’re well on your way to creating graduation nails that are as bright and brilliant as your future. So grab your polishes, get creative, and get ready to celebrate in style!