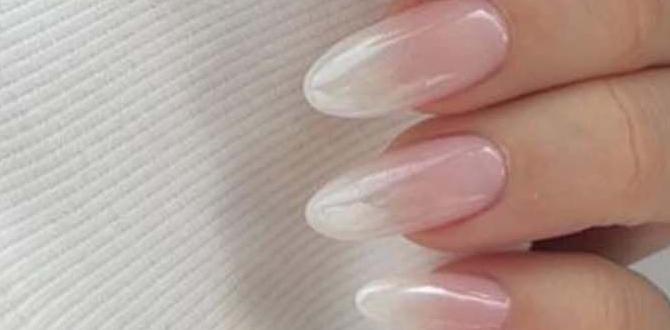
Gold and silver nail design styles offer stunning, versatile looks for any occasion. From subtle accents to full metallic glamour, these luminous metals elevate manicures. Learn easy techniques and discover the chicest trends to create eye-catching nails that shine.
Are you ready to add some sparkle to your fingertips? Gold and silver nails are a total game-changer! They add instant elegance and a touch of luxury, making any outfit feel more special. Don’t worry if you’re new to nail art; these looks are surprisingly easy to achieve. We’ll walk you through simple ways to get dazzling gold and silver manicures right at home. Get ready to shine brighter than ever!
This guide will cover everything you need to know, from choosing the right polish to mastering simple techniques for eye-catching designs. We’ll explore the best looks and show you how to make them your own. Let’s dive into the dazzling world of gold and silver nails!
Why Gold and Silver Nails Are Always a Trend
Gold and silver nails aren’t just a fleeting fad; they’re timeless classics for a reason! These metallic hues bring a touch of glamour and sophistication that never goes out of style. Whether you love a subtle shimmer or a bold, reflective finish, gold and silver can adapt to any aesthetic. They work beautifully for everyday wear, special events, or even a glamorous night out. Plus, they’re incredibly versatile, pairing well with almost any nail polish color or clothing style. Think of them as the little black dress of nail art – always chic, always appropriate!
The enduring popularity of gold and silver nails stems from their ability to instantly elevate a manicure. They feel luxurious without being over-the-top. For a beginner, starting with metallic shades is a fantastic way to experiment with nail art because they often provide excellent coverage and a stunning finish even with a single coat. They also tend to be forgiving; minor imperfections can be easily disguised by the reflective nature of the polish.
Getting Started: Essential Tools and Supplies
Before we jump into the fun designs, let’s gather your nail art toolkit! Having the right supplies makes the process so much smoother and the results much more professional. Don’t feel overwhelmed; you probably have some of these on hand already!
Your Metallic Manicure Must-Haves:
- Base Coat: This is your nail’s best friend! It protects your natural nails from staining and helps your polish last longer.
- Top Coat: Seals your design, adds shine, and prevents chipping.
- Gold Nail Polish: Choose a shade that suits your style – from pale champagne to deep antique gold.
- Silver Nail Polish: Look for bright, reflective silver or a softer, brushed metal finish.
- Optional: Metallic Foils or Chrome Powders: For an extra-intense metallic effect.
- Detail Brushes or Dotting Tools: For creating intricate designs.
- Nail Polish Remover: For cleaning up mistakes.
- Cotton Pads or Balls: For applying remover.
- Nail Files and Buffers: For shaping and smoothing your nails.
Having a good selection of gold and silver polishes, from matte finishes to high-shine metallics, gives you the most creative freedom. For chrome effects, specialized chrome powders are key. These are finely milled pigments that create a mirror-like finish when applied over a specific type of topcoat. You can find many affordable options online or at beauty supply stores. Exploring the variety of metallic finishes available, like holographic or glitter-infused polishes, can also add unique textures to your designs.
Beginner-Friendly Gold and Silver Nail Design Styles
Ready to get creative? These designs are perfect for beginners and can be adapted to your personal style. They’re all about adding that touch of metallic magic without requiring expert skills.
1. The Classic Metallic Mani
This is the simplest and most straightforward way to rock gold and silver. It’s all about that beautiful, solid color finish.
- Prep Your Nails: Start with clean, shaped nails. Apply a base coat and let it dry completely.
- Apply Your Metallic Polish: Apply one or two thin, even coats of your chosen gold or silver polish. Let each coat dry thoroughly between applications.
- Seal the Deal: Once your color is dry, apply a generous layer of top coat for shine and longevity.
Pro-Tip: For a super smooth, streak-free finish, always apply polish in thin layers rather than one thick glob. This helps the polish dry evenly and prevents bubbling.
2. Elegant Metallic French Tips
A twist on the classic French manicure, this adds a sophisticated metallic edge.
- Nail Prep: Apply base coat and let it dry. Paint your nails a neutral or sheer color (like nude, pale pink, or clear). Let it dry completely.
- Apply Metallic Tips:
- Method 1 (Freehand): Carefully paint a thin line of gold or silver polish along the free edge of your nail using the polish brush.
- Method 2 (Using a Guide): Place French tip guide stickers (available at most drugstores) along the line where you want your tip to start. Paint over the tip area with your metallic polish. Carefully peel off the guides while the polish is still slightly wet.
- Clean Up: Use a small brush dipped in nail polish remover to clean up any smudges or uneven lines.
- Seal: Apply a clear top coat over the entire nail.
Why it Works: This design is chic and understated. The metallic tip provides a pop of glamour without being overwhelming, making it perfect for work or formal events.
3. Subtle Metallic Accents
Not ready for a full metallic nail? Add a hint of shine with small accents!
- Base Color: Paint your nails your desired solid color (e.g., black, navy, deep red, or a pastel shade). Let it dry completely.
- Add the Accent:
- Accent Line: Use a fine-tipped detail brush dipped in gold or silver polish to draw a thin line across the base of your nail, along the cuticle, or diagonally across the nail.
- Polka Dots: Use a dotting tool to place small gold or silver dots on your nails. You can dot them all over, in a pattern, or just on one or two accent nails.
- Half-Moon: Apply a small circle or half-moon sticker near your cuticle, then paint the rest of the nail. Remove the sticker and fill in the space with metallic polish, or vice-versa.
- Seal: Apply a top coat.
Designer’s Tip: For a modern look, try a single gold or silver line horizontally across the middle of a dark-colored nail. It’s minimalist but impactful!
4. Ombre Metallic Fade
This gradient effect is surprisingly easy and looks incredibly sophisticated.
- Base: Apply a base coat and then a solid color (e.g., a deep blue or black) on all nails and let dry.
- Create the Fade:
- Method 1 (Sponge): Apply your chosen metallic polish onto a makeup sponge. Gently dab it onto the tips of your nails, blending downwards. You might need a few light applications to build up the intensity.
- Method 2 (Brush): Use a clean, dry brush (like a striping brush) to gently feather the metallic polish from the tips downwards over your base color.
- Clean Up: Clean up any excess polish around your cuticles with a brush and remover.
- Seal: Apply a thick layer of top coat to smooth out the sponge texture and even out the gradient.
Try This: A silver to black ombre or a pale gold to white fade can look incredibly chic. The key is to blend gently for a seamless transition.
Advanced Techniques for Dazzling Shine
Ready to take your gold and silver nails to the next level? These techniques offer a more intense metallic effect and look incredibly professional. Don’t be intimidated; with a little practice, you’ll master them!
1. The Full Chrome Effect
This creates a mirror-like finish that’s incredibly eye-catching. It requires a special chrome powder and a specific top coat.
- Prep and Polish: Apply base coat, then paint your nails with a solid, dark color (black works best for intense chrome). Apply two coats and let the second coat dry for a few minutes until it’s slightly tacky, but not fully cured if using gel. If using regular polish, ensure it’s completely dry.
- Apply No-Wipe Top Coat: Apply a layer of “no-wipe” gel top coat. For regular polish, use a dedicated chrome powder base coat or a quick-dry top coat if recommended by the powder manufacturer. Cure gel under a UV/LED lamp according to product instructions. Let regular polish top coat dry for a minute or two until it’s tacky.
- Apply Chrome Powder: Using a silicone tool, eyeshadow applicator, or your fingertip (gloves recommended for gel), pick up a small amount of the chrome powder. Rub it firmly and evenly over the tacky surface of the nail until it achieves a mirror-like shine. Work in small sections if needed.
- Buff Away Excess: Gently brush away any loose powder from the nail and surrounding skin.
- Seal It In: Apply another layer of no-wipe gel top coat over the entire chrome surface. Cure under the lamp. For regular polish, use a fast-drying, non-smudge top coat.
Where to Find It: Chrome powders are readily available online and at specialty nail supply stores. They come in various colors, but silver and gold are classics!
2. Metallic Foil Accents
Nail foils are thin sheets of metallic material that transfer a vibrant, almost holographic shine onto your nails. They’re great for creating abstract or geometric designs.
- Prep: Apply base coat and your desired nail polish color (or just base coat if you want the foil on the natural nail). Let it dry completely.
- Apply Foil Glue: Use a specialized foil glue or a thin layer of regular top coat. Let it become tacky (usually 1-2 minutes).
- Transfer the Foil: Place the metallic foil, colored side up, onto the tacky surface. Press down firmly with your finger or a silicone tool.
- Peel Away: Quickly and carefully peel off the foil. The metallic design should transfer to your nail.
- Seal: Apply a top coat. Be aware that some top coats can dull the foil’s shine, so a gel top coat often works best for longevity and shine.
Design Ideas: You can use foils to cover the entire nail, create geometric shapes, cover just the tips, or make random cracked patterns for a distressed look.
3. Gold Leaf or Flakes
For a luxurious, artistic touch, gold leaf or flakes are perfect. They create an elegant, imperfectly beautiful effect.
- Base Polish: Apply your base coat and a solid nail polish color (nude, white, or black often look stunning with gold leaf). Let it dry completely.
- Apply Adhesive: Use a specialized nail glue for gold leaf or a thin layer of sticky top coat. Let it reach the right tackiness – this varies by product.
- Place the Leaf/Flakes: Gently pick up pieces of gold leaf or flakes with tweezers or a dry brush. Carefully apply them onto the tacky areas of your nail. You can place them strategically, overlap them, or create a scattered effect.
- Press and Seal: Gently press the flakes down with your finger or a tool to ensure adhesion. Brush away any excess loose flakes. Apply a thin layer of top coat to seal everything in. For a smoother finish with gold leaf, you might need a thicker top coat or a gel top coat.
Tips for Application: Gold leaf is very delicate. Work in a draft-free area. Don’t apply too much glue at once, as it can dry before you get the leaf on. Less is often more!
Caring for Your Metallic Manicure
You’ve got beautiful gold and silver nails – let’s keep them looking that way! Proper care will extend the life of your manicure and keep your nails healthy.
Maintenance Tips:
- Wear Gloves: Whenever you’re doing chores involving water or harsh chemicals (like washing dishes or cleaning), wear rubber gloves. This protects your nails and polish from damage.
- Avoid Harsh Chemicals: Even when not wearing gloves, try to minimize contact with strong cleaning supplies, acetone-based removers (unless you’re taking off your polish), and even certain perfumes.
- Moisturize: Keep your cuticles and nails hydrated with cuticle oil or hand cream. Dryness can lead to chipping and peeling. Apply cuticle oil daily. For instance, a good quality almond oil can be very effective for cuticle care. You can learn more about the benefits of cuticle oils on sites like the American Academy of Dermatology Association which offers insights into nail health.
- Touch Up: If you notice a small chip or wear, try to touch it up with a matching polish or a clear top coat as soon as possible to prevent it from worsening.
- Be Gentle: Avoid using your nails as tools. Don’t pick at polish or try to scrape things with them.
Regular moisturizing is crucial. Massaging cuticle oil into your nail beds and around your cuticles can improve the flexibility of your nails, making them less prone to breaking or chipping. Ensuring that your base and top coats are high quality can also make a significant difference in how long your manicure lasts. A good top coat acts as a protective shield for your beautiful metallic finish.
Comparing Gold vs. Silver: Which is Right for You?
Both gold and silver offer stunning metallic looks, but they have different vibes. Choosing between them often comes down to personal preference and the overall look you’re going for.
| Feature | Gold Nails | Silver Nails |
|---|---|---|
| Overall Vibe | Warm, luxurious, opulent, classic, rich. | Cool, modern, sleek, sophisticated, bright. |
| Best Paired With | Warm tones (reds, oranges, yellows, browns), creams, deep blues, emerald green. Works well with darker skin tones and warm undertones. | Cool tones (blues, purples, pinks, greys), black, white, pastels. Accentuates fair skin tones and cool undertones. |
| Versatility | Can range from subtle champagne to bold yellow gold. Great for both casual and formal occasions. | Ranges from bright, reflective chrome to softer brushed nickel. Excellent for making a statement or adding a futuristic touch. |
| Common Styling | Full metallic, accents, French tips, ombre, marbled with black. | Full chrome, glitter, geometric lines, pairing with matte black, abstract designs. |
When to Choose Gold: Opt for gold when you want to evoke warmth and classic glamour. Think of it for holiday parties, weddings, or when you’re wearing warmer clothing colors. A deep antique gold can be incredibly sophisticated, while a brighter yellow gold adds a bolder statement.
When to Choose Silver: Silver is your go-to for a modern, cool-toned aesthetic. It’s fantastic for achieving a sleek, futuristic look or for complementing cooler outfits and tones. A bright, mirror-like silver chrome is a showstopper for events, while a brushed silver can be surprisingly elegant for everyday wear.
Many people find that they have a preference based on their skin’s undertones. Generally, people with warm undertones (yellow, peachy) look best in gold, while those with cool undertones (pink, blue) shine in silver. However, these are just guidelines, and the most important thing is to wear what makes you feel amazing!
DIY Gold & Silver Nail Art Inspiration
Still looking for ideas? Here are some popular and creative ways to incorporate gold and silver into your nail designs:
- Marble Effect: Swirl gold or silver polish with black, white, or deep jewel tones for a luxurious marble look.
- Geometric Patterns: Use striping tape and metallic polishes to create sharp lines, triangles, or chevrons.
- Constellation/Starry Night: Use a fine brush or dotting tool to create small gold or silver dots and specks over a dark base – like a tiny galaxy on your nails!

