Get stunning gold nail designs easily at home with this step-by-step guide! Perfect for beginners, we cover essential tools, simple application techniques, and creative ideas to make your nails shine. Discover how to achieve a professional, glamorous look with just a few basic steps and achieve beautiful gold accents or full gold nails.
Thinking about adding a touch of glam to your fingertips? Gold nail designs are a fantastic way to elevate any look, from everyday chic to dazzling evening elegance. But if you’re new to nail art, the idea of creating intricate gold patterns might seem a bit daunting. Don’t worry! This guide is here to make it super simple. We’ll break down exactly what you need and how to get that beautiful golden shine on your nails, step by stylish step. Get ready to shine!
Why Gold Nail Designs Are Always a Good Idea
Gold is more than just a color; it’s a statement! It instantly adds a touch of luxury, sophistication, and a hint of warmth to your manicure. Whether you prefer a subtle shimmer, bold metallic tips, or intricate gold accents, there’s a gold nail design for everyone. It’s incredibly versatile and pairs beautifully with almost any outfit and occasion. Plus, achieving a chic gold look at home is surprisingly achievable, even if you’ve never done nail art before.
Essential Tools for Your Gold Nail Journey
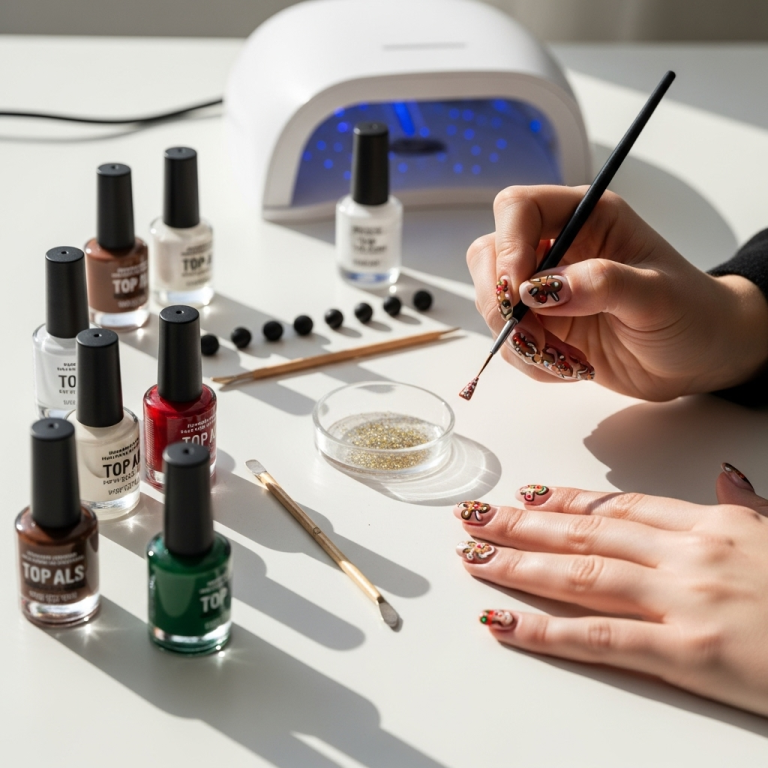
Before we dive into the fun part, let’s gather our supplies. Having the right tools makes all the difference in creating a flawless gold nail design. Don’t worry if you don’t have everything right away; start with the basics and build your collection!
Must-Have Items:
- Base Coat: Protects your natural nails and helps polish adhere better.
- Top Coat: Seals your design and adds a glossy finish for lasting shine.
- Your Chosen Gold Polish: This could be a metallic gold nail polish, gold glitter polish, or even gold flakes.
- Nail Polish Remover: For cleaning up mistakes and prepping nails.
- Cotton Balls or Pads: For polish removal.
- Cuticle Pusher/Orange Stick: To gently care for your cuticles.
- Nail File: To shape your nails.
Optional (But Super Helpful!) Tools:
- Thin Nail Art Brush or Detailer Brush: Perfect for drawing fine lines or applying intricate designs.
- Dotting Tools: For creating perfect dots and small circular patterns.
- Striping Tape or Nail Stencils: For creating sharp, clean lines and geometric patterns.
- Foil Transfer Glue & Gold Foil Sheets: A popular way to get a super-shimmery, mirror-like gold finish.
- UV/LED Lamp: If you’re planning to use gel polish for longer-lasting results.
Step-by-Step Guide: Simple Gold Accents
Let’s start with a super easy way to add a touch of gold: simple accents! This is perfect for beginners and looks incredibly chic. We’ll focus on creating a lovely gold stripe or a few dots.
Step 1: Prep Your Nails
Start with clean, dry nails. File them to your desired shape and gently push back your cuticles using a cuticle pusher. Apply a thin layer of your base coat and let it dry completely. This is crucial for a smooth finish and to protect your nails.
Step 2: Apply Your Base Color (Optional)
If you want your gold accents to pop, apply one or two thin coats of your favorite nail polish color. A nude, white, black, or even a deep jewel tone looks fantastic with gold. Let this layer dry thoroughly. Rushing this step can lead to smudging!
Step 3: Add Your Gold Accent
Now for the fun part!
- For a Gold Stripe: Dip a thin nail art brush into your gold polish. Wipe off any excess on a paper towel. Gently draw a thin line across the tip of your nail, or diagonally from one corner to the other. You can also add a line at the base of your nail.
- For Gold Dots: Use a dotting tool (or the tip of a toothpick!). Dip the ball of the tool into your gold polish. Place dots along the cuticle line, on the tip, or scattered across your nail.
Don’t worry if it’s not perfect! A little imperfection can add charm. If you make a mistake, clean it up carefully with a small brush dipped in nail polish remover.
Step 4: Seal the Deal
Once your gold accents are completely dry, apply a generous layer of top coat. This will smooth out any textures, prevent chipping, and give your design a beautiful, glossy finish. Make sure to cap the free edge of your nail (swipe the brush along the very tip) for extra durability.
Step-by-Step Guide: Full Gold Glitter Nails
Want to go all out with a dazzling gold glitter manicure? This is surprisingly easy and makes a huge statement! It’s all about layering the glitter for maximum impact.
Step 1: Nail Preparation
Just like before, start with clean, filed nails. Apply your base coat and let it dry. You can either leave your nails bare for a semi-sheer glitter look, or apply a thin coat of a complementary color (like nude or white) underneath.
Step 2: Apply the First Layer of Gold Glitter Polish
Shake your gold glitter polish well to distribute the glitter evenly. Apply one thin coat to your nails. Don’t worry about perfect coverage yet; this is just the base layer.
Step 3: Build Up the Glitter
Let the first coat dry for a minute or two. Now, apply a second coat. Focus on getting good glitter distribution. For a more opaque glitter finish, you might need a third coat. Remember to apply thin coats to avoid a thick, lumpy texture.
Step 4: Clean Up Edges
If any glitter got onto your skin or cuticles, use a small brush dipped in nail polish remover to carefully clean up the edges. This step makes a big difference in the final polished look.
Step 5: Seal and Shine
Once the glitter polish is completely dry, apply a thick layer of top coat. Glitter polishes can sometimes feel a bit gritty. A generous top coat will smooth everything out and add that beautiful, high-shine finish. You might need two layers of top coat to get a really smooth surface.
Step-by-Step Guide: Chic Gold Foil Nails
For a stunning, almost mirror-like metallic finish, gold foil is the way to go! It looks incredibly professional but is simple to achieve with the right steps.
Step 1: Prepare Your Nails
Clean, file, and apply your base coat. Let it dry completely. You can then apply your desired nail polish color as a base. A dark color like black or navy often makes the gold foil pop the most, but any color can work!
Step 2: Apply Foil Transfer Glue
Apply a thin, even layer of specialized foil transfer glue over the nail where you want the foil to adhere. This glue is usually clear or slightly white and becomes tacky when it’s ready for the foil. Let it dry until it’s no longer wet to the touch – this usually takes about 60 seconds to a few minutes, depending on the brand. It should feel sticky, not wet.
Step 3: Press on the Gold Foil
Cut a piece of gold foil slightly larger than your nail. Place the colored side of the foil (the side you want to transfer onto your nail) facing up. Press the foil firmly onto the tacky glue. Use your fingertip or an orange stick to gently rub over the entire surface of the foil for about 10-20 seconds. This helps transfer the metallic layer.
Step 4: Peel Away the Foil
Slowly and smoothly peel away the backing paper of the foil. The gold metallic design should now be adhered to your nail. If there are any gaps or areas where the foil didn’t transfer perfectly, you can try reapplying a bit of glue and pressing the foil again onto those specific spots.
Step 5: Seal the Foil
Once you’re happy with the foil application, wait a minute for it to settle before applying a top coat. To protect the foil and give it a smooth, glossy finish, apply one or two layers of a good quality top coat. Be gentle when applying the top coat so you don’t smudge the foil.
Creating More Advanced Gold Nail Designs
Once you’ve mastered the basics, you can get more creative! Here are a few ideas to try:
- Gold French Tips: Instead of white, use a metallic gold polish to paint the tips of your nails.
- Gold Geometric Patterns: Use striping tape or stencils to create sharp lines, triangles, or squares with gold polish.
- Gold Confetti on Tips: Apply a clear polish or a sheer nude polish, then dab gold glitter polish just on the tips for a subtle confetti effect.
- Gold Ombre: Start with a metallic gold polish at the tip and fade it down towards the cuticle using a makeup sponge or a gradient brush.
- Jewelry-Inspired Designs: Use fine brushes and gold polish to mimic the look of intricate gold chains or filigree patterns.
Maintaining Your Gold Nail Designs
To keep your gorgeous gold nails looking their best:
- Wear Gloves for Chores: Protect your nails from harsh chemicals and water by wearing rubber gloves when washing dishes or cleaning.
- Reapply Top Coat: If your manicure starts to lose its shine, a quick reapplication of top coat can revive it.
- Moisturize: Keep your hands and cuticles hydrated with a good hand cream and cuticle oil. Healthy nails and skin make any design look better.
- Be Gentle: While gold foil is beautiful, it can be prone to scuffing. Try to avoid scratching or peeling at the design.
Understanding Nail Polish Ingredients
For those interested in what goes into their favorite polishes, understanding basic nail polish ingredients can be helpful. Most conventional nail polishes consist of nitrocellulose (which forms the film on the nail), plasticizers (to make the film flexible), solvents (like ethyl acetate or butyl acetate, to dissolve other ingredients and allow application), color pigments, and resins. For a healthier option, many brands now offer “3-free,” “5-free,” “7-free,” or even “10-free” polishes, meaning they exclude certain potentially harmful chemicals like formaldehyde, toluene, and DBP (dibutyl phthalate). You can learn more about common nail polish ingredients and their safety profiles from resources like the U.S. Food & Drug Administration (FDA).
Troubleshooting Common Issues
Even with the best intentions, you might encounter a few bumps in the road. Here’s how to fix them:
| Problem | Solution |
|---|---|
| Polish is streaky or uneven. | Ensure each coat is thin and fully dry before applying the next. Use a good quality polish and apply it with smooth, even strokes. A thicker top coat can help even out slight inconsistencies. |
| Glitter is clumpy or not evenly distributed. | Shake your glitter polish well before use. Apply thin coats and use a generous top coat to smooth the surface. For full coverage, sometimes applying glitter with a makeup sponge can help build it up more densely. |
| Gold foil peeled off or didn’t transfer well. | Make sure the foil glue is sufficiently tacky (not too wet, not too dry). Press the foil down firmly and rub evenly. Ensure your base polish or nail is completely dry before applying glue. Reapply glue to bare spots and try again. |
| Mistakes and smudges. | Keep a small brush dipped in nail polish remover handy. Carefully trace around the mistake to clean up edges or remove smudges without disturbing the rest of the design. Clean the brush often. |
| Nails chipping too quickly. | Always use a base coat and a good top coat, paying special attention to capping the free edge of your nail. Avoid exposing your nails to excess water or harsh chemicals without gloves. |
FAQ: Your Gold Nail Design Questions Answered
Q1: Can I achieve gold foil nails without special foil glue?
A: While specialized foil transfer glue is recommended for the best and most lasting results, some DIY bloggers experiment with regular nail polish as an adhesive. However, the longevity and finish are typically not as good, and the glue is designed to create the perfect tacky surface for foil transfer, so it’s worth investing in.
Q2: How do I make glitter nail polish look smooth?
A: The key to smooth glitter is layering and top coat! Apply thin coats of glitter polish, allowing them to dry slightly in between. After you have the desired glitter coverage, apply a thick, glossy top coat. You might need two layers of top coat to fully encapsulate the glitter and create a smooth surface. Different types of top coats (gel-like formulas or specific smoothing top coats) can also help.
Q3: What colors look best with gold nail designs?
A: Gold is incredibly versatile! It looks stunning with classic neutrals like black, white, beige, and grey. Deep jewel tones such as emerald green, sapphire blue, and ruby red also create a luxurious contrast. Metallics like rose gold or silver can create a chic layered metallic look. Even softer pastels can be beautifully highlighted by gold accents!
Q4: How long does a gold nail design usually last?
A: Longevity depends on several factors: the quality of your polishes, how well you prepped your nails, and your daily activities. A well-applied conventional polish design with a good base and top coat can last 5-7 days before chipping. If you’re using gel polish and a UV/LED lamp, your gold design can last 2-3 weeks! For foil designs, the top coat is crucial for protection.
Q5: Can I combine different gold finishes in one manicure?
A: Absolutely! Mixing different gold finishes is a fantastic way to add dimension and interest to your nails. For example, you could have a base of metallic gold polish and then add fine gold glitter accents, or use gold foil on one nail and a glitter polish on another. Just ensure each layer is dry before applying the next.
Q6: Is it difficult to remove glitter nail polish?
A: Glitter polish can be a bit trickier to remove than regular polish, but there’s a popular trick: the foil method! Soak a cotton ball with nail polish remover, place it on your nail, and then wrap your fingertip tightly with aluminum foil. Let it sit for 5-10 minutes. The remover will soften the glitter polish, allowing it to wipe off much more easily.
Conclusion
See? Creating beautiful gold nail designs at home is totally within your reach! Whether you’re opting for a subtle shimmer, a bold metallic finish, or intricate foil details, these step-by-step guides have equipped you with the knowledge and confidence to transform your nails. Remember, nail art is all about self-expression and having fun. Don’t be afraid to experiment with different techniques, colors, and patterns. With a little practice and these essential tips, you’ll be rocking dazzling gold manicures that are sure to turn heads. So, gather your supplies, unleash your creativity, and let your nails shine!

