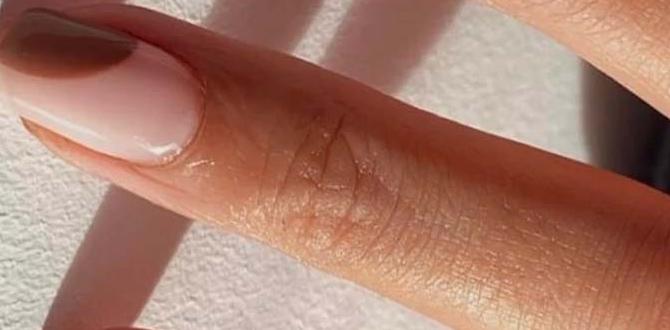
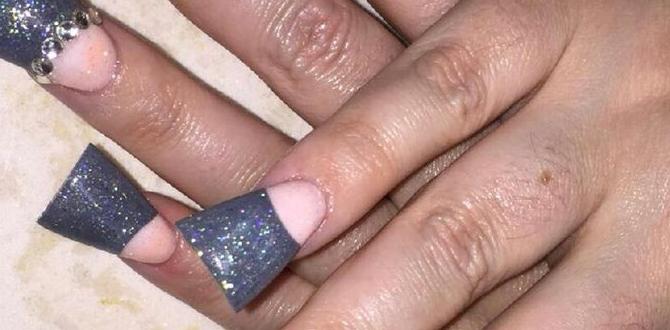
Glitter tip nails are a dazzling, easy way to add sparkle to your look! Perfect for beginners, these designs elevate any manicure with a touch of glamour. We’ll show you simple techniques to achieve the best glitter tips, from subtle shimmers to bold statements, ensuring your nails shine effortlessly.
Nail trends come and go, but a little bit of sparkle? That’s eternal! If you’re dreaming of adding some pizzazz to your fingertips but think intricate nail art is too tricky, I’ve got fantastic news for you. Glitter tip nails are your new best friend. They give you that glamorous pop without requiring hours of practice or a steady hand that can rival a surgeon’s. Whether you want a subtle hint of shimmer or a full-on disco ball effect on your nails, this trend is incredibly versatile and surprisingly simple to master. Get ready to transform your nails into dazzling works of art that are totally achievable, even if you’re just starting out. We’re diving into the easiest, most stylish ways to rock glitter tips!
Why Glitter Tip Nails Are Perfect for Everyone
Glitter tip nails have taken the beauty world by storm, and for good reason! They offer a brilliant way to express yourself and add a touch of magic to your everyday style. But beyond just looking fabulous, there are even more reasons why this trend is a winner for nail lovers of all levels.
Simplicity: The biggest draw! Creating a sharp, clean line of glitter is much simpler than, say, hand-painting tiny flowers.
Versatility: From subtle, fine glitter for a professional setting to chunky, holographic glitter for a party, there’s a glitter tip style for every occasion and personality.
Durability: Glitter, especially when sealed properly with a good top coat, can be quite long-lasting. It’s less prone to chipping compared to intricate full nail designs.
Cost-Effective: You don’t need a professional salon visit to achieve stunning glitter tips. With a few basic supplies, you can create salon-worthy looks at home.
Customization: The possibilities are endless! You can choose from countless colors, finishes, and application methods to create a look that’s uniquely you.
This trend proves that you don’t need to be a nail art expert to achieve eye-catching results. It’s all about making beauty accessible and fun!
Essential Tools for Your Glitter Tip Manicure
Before we dive into the fun designs, let’s gather our tools. Having the right supplies makes all the difference in achieving a smooth, polished look. Don’t worry, you probably have most of these already, or they’re easy to find at any drugstore or beauty supply store.
Here’s a quick rundown of what you’ll need:
Your Base Polish: This could be a sheer nude, a solid color, or even a clear polish, depending on the look you’re going for.
Glitter Polish: The star of the show! You can use a glitter polish with a clear or colored base, or loose glitter with a clear top coat or gel.
Fine-Tip Brush or Applicator: For precise application, especially if using loose glitter or wanting a very clean line. A striping brush, a small fan brush, or even a clean makeup brush can work.
Top Coat: Crucial for sealing in the glitter and giving your nails a glossy, long-lasting finish. A quick-dry top coat is a lifesaver!
Nail Polish Remover and Cotton Pads: For any oopsies or for cleaning up the edges.
Optional:
Stripping Tape or Stencils: For creating super-sharp, clean lines.
Sturdy Card or Palette: To swirl loose glitter with top coat.
Cuticle Guard or Latex Tape: To protect your skin around the nail for a cleaner finish. This is especially helpful for beginners.
Having these on hand will make your glitter tip application a breeze.
Effortless Glitter Tip Nail Designs for Beginners
Now for the fun part! Let’s explore some super simple, yet incredibly stylish ways to rock glitter tip nails. These designs are perfect for anyone looking to add a touch of sparkle without a steep learning curve.
1. The Classic Glitter French Tip
This is the quintessential glitter tip look! It’s elegant, chic, and works for any occasion.
How to Do It:
1. Start with your base color (a nude, sheer pink, or even clear polish) and apply one or two thin coats. Let it dry completely.
2. Method A (Freehand): Dip a fine-tip brush into your glitter polish. Carefully draw a line across the tip of your nail, following your natural smile line. Go slowly and build up the glitter.
3. Method B (Tape Stencil): Apply a nail art stencil or stripping tape across your nail where you want the glitter tip to begin. Paint the glitter polish over the tip. Immediately peel off the tape while the polish is still wet for a crisp line.
4. Method C (Dabbing): Apply a clear top coat or a sticky base coat to the tip of your nail. Then, use a brush or your fingertip to gently dab loose glitter onto the tip.
5. Once the glitter is dry or the tape is removed, apply a generous layer of top coat over the entire nail, paying attention to sealing the glitter edge. This prevents glitter from catching on things and gives a smooth finish.
2. The Ombre Glitter Fade
This design creates a beautiful gradient effect where the glitter subtly blends into your base color. It looks sophisticated and is surprisingly easy to achieve.
How to Do It:
1. Apply your base color (a sheer nude, light pink, or even a pale blue works beautifully) and let it dry.
2. Take a makeup sponge or a textured applicator (like a silicone nail tool). Apply a thin layer of glitter polish or a clear top coat mixed with loose glitter onto the sponge.
3. Gently dab the sponge onto the tip of your nail, working downwards. Start with more pressure at the very tip and lighten up as you move towards the cuticle. This creates the faded effect.
4. Repeat the dabbing process with less pressure to build up the intensity of the glitter fade towards the tip.
5. Clean up any stray glitter around your cuticles with nail polish remover.
6. Finish with one or two coats of clear top coat to smooth out the texture and add shine.
3. The Subtle Glitter Accent
Sometimes, less is more! This design adds just a hint of shimmer to make your nails pop.
How to Do It:
1. Apply your favorite solid color polish or a sleek nude shade. Let it dry completely.
2. Take your glitter polish – a fine, iridescent glitter often works best here.
3. Apply just one thin coat of glitter polish directly over the tip of the nail. You can do this freehand with the brush.
4. Alternatively, use a thin striping tape laid horizontally across the tip of your nail. Apply the glitter polish over the tape and peel it off immediately.
5. Seal with a clear top coat. This look is understated and perfect for everyday wear or a minimalist vibe.
4. The Glitter Cuticle Line
This is a modern, edgy take on the glitter tip. Instead of the free edge, the sparkle sits at your cuticle line.
How to Do It:
1. Apply your base color polish and let it dry completely.
2. Method A (Freehand): Using a thin brush dipped in glitter polish, carefully paint a thin, crescent-shaped line of glitter just above your cuticle. You want to mimic the shape of your cuticle.
3. Method B (Stencil): Apply a curved nail stencil or a piece of tape cut into a curve just above your cuticle line. Apply glitter polish over the exposed nail area, then carefully remove the stencil.
4. Clean up any mistakes with a fine brush dipped in nail polish remover.
5. Apply a clear top coat over the entire nail. This design is bold, unexpected, and very chic!
5. The Chunky Glitter Overline Dip
For a bolder statement, try using chunky glitter. This technique gives a playful, glamorous finish.
How to Do It:
1. Apply your base color polish (a solid color like black, deep red, or even a bright pop like teal looks amazing with chunky glitter). Let it dry.
2. Paint the tip of your nail with a clear top coat or a sticky gel.
3. Dip your nail into a pot of chunky glitter, or use a brush to carefully pat the glitter onto the wet area. Ensure good coverage over the tip.
4. Gently shake off excess glitter.
5. Let it dry completely. Chunky glitter can be bumpy, so you might need two generous coats of top coat to smooth it out and create a protective, glossy finish. Be patient with the top coat application; it’s essential for durability and a smooth feel.
Pro Tips for Flawless Glitter Application
Achieving polished glitter tip nails isn’t just about the design; it’s also about technique! Here are some insider tips to make your glitter application as smooth and professional as possible.
Prep Work is Key: Ensure your nails are clean, dry, and free of any old polish or oils. A good base coat can help your polish adhere better.
Thin Layers Are Better: Whether it’s your base color or your glitter polish, applying multiple thin layers is almost always better than one thick, gloopy one. This prevents streaking and ensures even coverage.
Don’t Rush the Drying Time: Patience is a virtue in nail art! Let each layer dry thoroughly before applying the next. This prevents smudging and lifting.
Embrace the Top Coat: A quality top coat is non-negotiable, especially with glitter. It seals the glitter, adds shine, and protects your manicure from chipping. For chunky glitters, more than one layer of top coat might be needed to create a smooth surface. Consider a gel top coat for extra durability if you’re comfortable using one.
Clean Up as You Go: Keep nail polish remover and a fine-tipped brush (or an orange stick with a cotton tip) handy. Cleaning up any stray glitter or polish around your cuticles while the polish is still wet makes the final result look much neater.
Loose Glitter vs. Glitter Polish:
Glitter Polish: Easier to control for beginner French tips or accent lines. The glitter particles are already suspended in a polish base.
Loose Glitter: Offers more control over the density and type of glitter. It’s great for ombre effects and achieving a truly custom look. Remember to mix it with a clear polish or top coat, or apply it over a wet sticky base.
For an Extra Smooth Finish with Loose Glitter: After applying loose glitter over a wet top coat, some find it helpful to gently buff the surface with a fine-grit buffer before applying the final top coat. This can help smooth down any raised glitter particles.
Comparing Glitter Application Methods
When it comes to applying glitter tip nails, you have a few fantastic options, each with its own advantages. Understanding these methods can help you choose the best one for the design you want to achieve and your current skill level.
| Method | Description | Pros | Cons | Best For |
| :————————- | :—————————————————————————————————— | :—————————————————————————- | :———————————————————————— | :———————————————————————————————————- |
| Glitter Polish | Using a nail polish that already contains glitter particles. | Easy to use, consistent glitter payoff, readily available. | Limited control over density and placement, some glitters can be sparse. | Simple tips, accent lines, beginners trying the French tip look. |
| Loose Glitter + Top Coat | Applying loose craft glitter over a wet layer of clear polish or top coat. | High control over glitter amount and placement, vast color/size selection. | Can be messy, requires precise application for clean lines. | Ombre effects, bold glitter tips, custom mixes, achieving specific densities. |
| Loose Glitter + Gel | Using loose craft glitter over a sticky layer of gel polish or gel base/top coat. | Extremely durable, long-lasting shine, great for chunky glitters. | Requires UV/LED lamp, potential for thick application if not careful. | Long-wear glitter tips, chunky glitter designs, adding texture to gel manicures. |
| Duo-Chrome/Holographic Base | Using a glitter polish with a sheer, color-shifting base coat, or a glitter polish layered over a special base. | Creates depth and subtle shimmer, blends beautifully. | Can be harder to find specific shades, more subtle than pure glitter. | Modern French tips, accent nails, adding a sophisticated shimmer. |
| Glitter Cuticle Powder | A cosmetic-grade glitter powder applied with a brush over a tacky surface. | Fine, smooth finish, can be brushed on for a gradient. | Can require specific applicators, may not be as intense as craft glitter. | Subtle shimmer along the cuticle, soft glitter fades, professional-looking finishes. |
Maintaining Your Glitter Tip Nails
Once you’ve perfected your dazzling glitter tip manicure, you’ll want it to last! Here’s how to keep those tips looking fabulous for as long as possible.
Be Gentle: While glitter adds strength, it’s still a nail polish manicure. Try to avoid using your nails as tools – think opening cans or scraping.
Moisturize: Keep your hands and cuticles hydrated by applying cuticle oil daily or using a good hand lotion. This helps prevent dryness and keeps your nails looking healthy and your manicure intact. Dry cuticles can lead to lifting or chipping.
Gloves are Your Friend: When doing household chores, especially those involving water, chemicals, or scrubbing, wear rubber gloves. This is the single best way to protect your manicure from damage.
Avoid Harsh Chemicals: Exposure to cleaning products, acetone (other than for removal), and even certain hairsprays can dull the shine or weaken the polish.
Touch Ups: If you notice a tiny chip or a lost piece of glitter on an edge, don’t despair! You can often carefully touch it up with a bit of top coat and reapply a tiny bit of glitter if needed.
Proper Removal: When it’s time for a change, soak your nails in acetone-based nail polish remover. For stubborn glitter, use foil wraps (soaking cotton pads in acetone, placing them on the nail, and wrapping with foil) for about 10-15 minutes. Gently scrape off any remaining glitter with an orange stick or cuticle pusher. Avoid peeling or forcing the polish off, as this can damage your natural nails. For gel-based glitter tips, you may need a more intensive removal process.
Frequently Asked Questions About Glitter Tip Nails
Q1: Can I use regular craft glitter on my nails?
Absolutely! As long as it’s cosmetic-grade or made of plastic (not metal, which can rust or cause reactions), craft glitter is fantastic for nail art. Just be sure to apply it over a wet polish or top coat, and seal it well with multiple layers of top coat to ensure it stays put and feels smooth.
Q2: How do I get a clean line with glitter polish?
For the cleanest lines, use a thin striping tape or a nail stencil. Apply the tape where you want the glitter to stop, paint the glitter over the tip, and then immediately peel the tape off while the polish is still wet. This prevents the polish from drying and creating a bumpy edge.
Q3: My glitter tip looks bumpy. What can I do?
Bumps are common, especially with chunkier glitters! The key is multiple layers of top coat. Apply one coat, let it dry completely, then apply another, and so on. You might need two or even three generous coats of top coat to smooth out the surface and create that glossy finish. A fine-grit nail buffer can also help gently smooth the surface before the final top coat.
Q4: How can I remove glitter polish without damaging my nails?
The best way is to soak! Saturate a cotton ball with acetone-based nail polish remover, place it on your nail, and wrap it tightly with foil. Let it sit for about 10-15 minutes until the glitter and polish soften. Then, gently slide the softened polish off with an orange stick or a cuticle pusher. Avoid picking or peeling, as this can damage your nail bed.
Q5: Are glitter tip nails suitable for short nails?
Yes, absolutely! Glitter tips can look stunning on short nails. A fine glitter French tip or a subtle glitter fade can elongate the look of short nails, making them appear more slender and elegant. You can adjust the width of the glitter tip to best suit the shape and length of your nails.
Q6: Can I mix different types of glitter together?
Definitely! Mixing fine glitter with chunky glitter or combining different colors can create a unique, multi-dimensional effect. Just ensure you mix them well over a palette or in a small container with a clear base or top coat before applying them to your nails.
Q7: How long do glitter tip nails typically last?
With proper application and care, glitter tip nails can last anywhere from 5-7 days, sometimes longer. Using a good quality base and top coat, avoiding harsh activities, and moisturizing your hands and cuticles regularly will help extend the life of your manicure. If using gel polish, they can last up to 2-3 weeks.
Conclusion: Shine Bright with Glitter Tips!
There you have it – your comprehensive guide to creating stunning, effortless glitter tip nails! From the classic French tip to chic ombre fades and trendy cuticle accents, there’s a sparkle for every style and skill level. We’ve explored the essential tools, shared simple step-by-step designs, and sprinkled in pro tips to ensure your manicure is as flawless as can

