Glass nail designs offer a mesmerizing, iridescent finish that catches the light beautifully. Perfect for beginners and pros alike, these stunning looks create a holographic, shattered-glass effect on your nails, adding instant glamour and unique style to any manicure. Learn how to achieve this eye-catching trend effortlessly!
Ever scrolled through nail inspiration and stopped dead at a set of nails that looked like tiny, shattered rainbows? Those are likely glass nail designs, and they’re absolutely captivating! The allure of that light-refracting, ethereal shimmer can seem a bit complex to achieve, leaving many thinking it’s a technique reserved only for nail pros. But guess what? You can totally achieve this dazzling look right at home, and it’s easier than you think. Forget complicated steps; we’re breaking down the magic of glass nails so you can rock this trend with confidence and flair. Get ready to add some sparkle to your fingertips!
What Are Glass Nail Designs?
Glass nail designs, often called “shattered glass nails,” mimic the look of broken pieces of iridescent or holographic cellophane. Instead of painting a solid color, you’re creating a mosaic of light-reflecting fragments over a base color or a sheer polish. This technique gives your nails a unique, multi-dimensional shine that changes with every movement and angle.
The magic behind this effect comes from small pieces of special film or foil that are applied to the nail using a special adhesive. These tiny fragments catch the light, creating a dazzling, almost prism-like effect that’s utterly mesmerizing. It’s a fantastic way to elevate a simple manicure into something truly special and eye-catching.
Why Are Glass Nail Designs So Popular?
The popularity of glass nail designs stems from their unique ability to transform nails into miniature works of art. They’re:
- Visually Stunning: The iridescent, holographic effect is unlike any other nail trend. It catches the light in a way that’s constantly changing and always beautiful.
- Versatile: Glass elements can be used subtly as accents or as the main feature of a manicure. They work with a wide range of base colors, from bold neons to classic nudes.
- Trendy & Unique: While not entirely new, the trend cycles back with fresh interpretations, keeping it relevant and exciting. It’s a surefire way to stand out.
- Expressive: They offer a fantastic canvas for personal style, allowing for endless creativity. You can tailor the colors and placement of the “glass” to match your mood or outfit.
Essential Tools for Creating Glass Nail Designs
Don’t let the name fool you – creating these stunning designs doesn’t require actual glass! You’ll need a few specialized (but easy-to-find!) tools and materials. Here’s your starter kit:
- Base Coat: To protect your natural nails and help polish adhere.
- Your Chosen Base Polish: This could be a solid color, a sheer nude, a vibrant hue, or even a French tip.
- Glass Nail Effect Transfer Foil or Film: This is the key ingredient! It comes in pre-cut shapes or rolls of iridescent, holographic, or colored film that you’ll cut into smaller pieces. You can find these online or at most beauty supply stores. Brands like Kiss USA offer various styles.
- Clear Nail Glue or Foil Transfer Gel: A specialized gel polish designed specifically for adhering transfer foils works best for a smooth, long-lasting finish. Regular clear nail glue can also work in a pinch.
- Tweezers: Fine-tipped tweezers are essential for picking up and placing the tiny pieces of foil.
- Scissors or Nail Art Clippers: To cut the transfer foil into small, manageable pieces. Small, sharp scissors or specialized nail art clippers work well.
- Top Coat: A good quality, non-wipe top coat is crucial to seal everything in and give that glossy finish. A gel top coat, if you use gel polish, will provide extra durability.
- Cuticle Pusher/Orange Stick: To help smooth down the foil pieces and ensure they lie flat.
- UV/LED Lamp (if using gel products): If you opt for gel polish and foil transfer gel, you’ll need a lamp to cure them.
Understanding Glass Nail Effect Films/Foils
The “glass” part of these designs isn’t actual glass, but rather thin, highly reflective, iridescent transfer films or foils. They come in a variety of styles, each offering a different look:
- Holographic: These refract light into rainbow colors, much like a prism.
- Iridescent: These shift colors depending on the angle of light, often with pearly or opalescent undertones.
- Shattered Glass: These are typically clear or tinted films with holographic or iridescent coatings that are pre-cut into irregular, shard-like shapes. They give the most literal “shattered glass” appearance.
- Glow-in-the-Dark: For an extra magical touch, some foils have a glow-in-the-dark component.
- Colored Foils: While many lean towards natural iridescence, you can also find foils in specific colors like pink, blue, or purple with that signature reflective finish.
The key is that these films are designed to be applied in small, broken pieces, creating a mosaic effect rather than a smooth, solid surface. The way they are cut and applied is what gives them their distinctive charm.
Step-by-Step Guide: Creating Your Own Glass Nail Designs
Ready to get creative? Follow these simple steps to achieve stunning glass nail designs. We’ll cover both regular nail polish and gel polish methods.
Method 1: Using Regular Nail Polish and Nail Glue
This method is great if you don’t use gel polish or have a UV/LED lamp. It’s accessible and still delivers beautiful results.
Step 1: Prep Your Nails
Start with clean, dry nails. Push back your cuticles, gently buff your nails to create a smooth surface, and wipe them clean with an alcohol wipe or nail polish remover to remove any oils. Apply a base coat and let it dry completely.
Step 2: Apply Your Base Color
Paint your nails with your desired base polish. You can use a solid color, a sheer polish for a more natural look, or even a white polish for a brighter holographic effect. Allow the polish to dry until it’s slightly tacky – not fully dry, but not wet. This is crucial for the glue to adhere properly.
Step 3: Cut and Prepare Your Foil
Take your glass nail effect foil and use small scissors or nail art clippers to cut it into tiny, irregular pieces. Aim for shapes of various sizes, like shards of glass. You’ll want a good amount of these small pieces ready to go.
Step 4: Apply Nail Glue
Using a fine-tipped applicator or a brush, carefully apply a thin, even layer of clear nail glue over the tacky base polish. You can cover the entire nail or just specific areas where you want the glass effect to appear.
Step 5: Place the Foil Pieces
This is where patience and precision come in! Working quickly before the glue dries completely, use your fine-tipped tweezers to pick up the small foil pieces and place them onto the glued areas. Arrange them in a scattered or mosaic pattern. Press them down gently with your cuticle pusher or orange stick to ensure they adhere smoothly.
Step 6: Seal with Top Coat
Once all the foil pieces are in place and the glue has dried, apply a generous layer of clear top coat. This seals the foil, protects it, and creates a smooth, glossy finish. For a super smooth look, you might need 2-3 layers of top coat, allowing each to dry in between. Make sure to cap the free edge of your nails to prevent chipping.
Method 2: Using Gel Polish and Foil Transfer Gel
This method offers a durable, high-gloss finish and is often preferred for its longevity and ease of precise application.
Step 1: Prep Your Nails and Apply Base Gel
Start with clean, dry nails. Push back cuticles, lightly buff the nail surface, and cleanse with an alcohol wipe. Apply a gel base coat and cure under your UV/LED lamp according to the manufacturer’s instructions.
Step 2: Apply Your Base Color Gel
Apply your chosen base gel polish color. You can do one coat or two for opacity, curing each layer as directed. For a more whimsical look, you can leave the base color slightly unset or ‘sticky’ after the second coat cure if your gel brand allows, but for foil transfer gel, a fully cured layer is usually best unless otherwise specified. Refer to your specific foil transfer gel instructions.
Step 3: Apply Foil Transfer Gel
Apply a thin, even layer of specialized nail foil transfer gel over the desired area of your nail. This gel is formulated to remain tacky even after curing, which is what allows the foil to adhere. Cure this layer under your UV/LED lamp. Check your product’s instructions – some require a full cure, while others are best left slightly uncured or in a very tacky state immediately after curing.
Step 4: Cut and Prepare Your Foil
Similar to the regular polish method, cut your glass nail effect foil into small, irregular pieces using sharp scissors or trimmers. Having them ready to go is key.
Step 5: Press the Foil onto the Tacky Gel
Working with one nail at a time (as the transfer gel can cure further and lose tackiness), gently press the foil pieces onto the tacky transfer gel layer using your tweezers. Arrange them to create your desired shattered glass effect. Smooth them down with an orange stick or cuticle pusher to ensure good adhesion.
Step 6: Remove Excess Foil and Apply Top Gel
Once the foil is pressed down, carefully peel away any excess foil material that didn’t adhere to the gel. Apply a layer of gel top coat (preferably a non-wipe formula for maximum shine) over the entire nail, ensuring it covers the foil pieces and seals the edges. Cure the top coat under your UV/LED lamp.
Step 7: Final Buff and Shine (Optional)
If you notice any rough edges from the foil, you can gently buff them with a fine-grit buffer. Then, apply another layer of top coat if desired for extra protection and shine, and cure again.
Tips for Perfecting Your Glass Nail Designs
Even with a step-by-step guide, a few pro tips can help you achieve salon-worthy results:
- Start Small: If you’re new to this, begin by applying the foil to accent nails before trying a full set.
- Work in Sections: Don’t try to apply all the foil pieces at once. Work on small areas of the nail at a time to ensure the glue or gel stays tacky.
- Layering is Key: For a deeper “glass” effect, you can carefully layer small pieces of foil on top of each other, ensuring each layer is smoothed down.
- Smoothness Matters: The smoother you press the foil pieces, the more seamless and polished your final look will be. Use the back of your tweezers or an orange stick to gently smooth out any bubbles or lifted edges.
- Don’t Overdo It: Too much foil can look cluttered. Find a balance that enhances your base color without overpowering it.
- Consider Your Base: A sheer or holographic base can enhance the effect, while a solid color provides a vibrant contrast. Experiment!
- Seal, Seal, Seal: A good top coat is crucial for longevity and that beautiful shine. Don’t skimp on this step! Ensure you cap the free edge of your nails to prevent peeling.
Common Issues and How to Fix Them
Even the most experienced nail artists run into minor hiccups. Here’s how to troubleshoot common glass nail design problems:
Issue: Foil won’t transfer or adhere properly.
Solution: This usually means your base (glue or gel) wasn’t tacky enough, or it dried out. For nail glue, ensure your base polish was slightly tacky when you applied the glue. For gel, make sure the transfer gel was cured correctly according to instructions and applied to a fully cured base layer. Try again, ensuring the sticky layer is activated or present.
Issue: The foil pieces are lifting or bumpy.
Solution: Gently press down the edges with an orange stick or the back of your tweezers. If there are significant bumps, you might need to carefully trim away lifting pieces with tiny scissors before applying an extra layer of top coat. For gel, ensure you’re using enough top coat and that it’s fully cured.
Issue: The edges of the foil are sharp or uneven.
Solution: This is part of the “shattered” look! However, if it feels too rough, a good top coat should smooth it out. You can also gently file the free edge of your nail after applying the top coat to create a smoother finish, then apply another top coat.
Issue: The effect looks dull or not shiny enough.
Solution: Your top coat might not be providing enough shine, or the foil itself might be a more subtle type. Ensure you are using a high-gloss top coat, and consider applying two generous layers. For gel, a non-wipe top coat is essential for maximum shine.
Glass Nail Designs: Base Color Ideas
The base color you choose dramatically impacts the final look of your glass nail design. Here are some ideas to get your creativity flowing:
Subtle & Ethereal
- Sheer White or Milky Pink: Creates a delicate, pearlescent effect.
- Pale Nude: For a sophisticated, understated shimmer.
- Clear Polish: Lets your natural nail show through with a hint of sparkle.
Bold & Vibrant
- Black or Deep Navy: The “glass” pieces pop dramatically, creating a striking contrast like stained glass.
- Hot Pink or Electric Blue: Complements neon-styled foils for a futuristic look.
- White or Pastel Colors: For a softer, spring-like holographic effect.
- Glitter Base: Layering glass elements over a glitter polish can create an explosion of sparkle.
Themed Looks
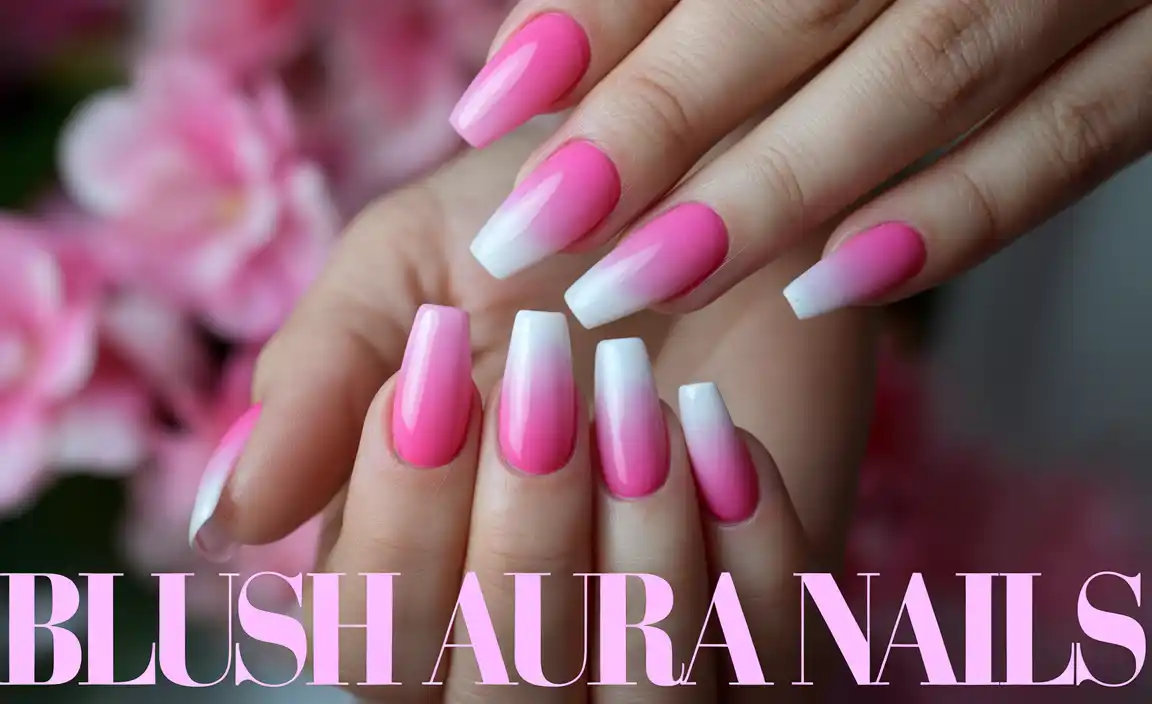
- Ombre Base: Blend two colors into a gradient before applying foil for a seamless, artistic effect.
- French Tip: Apply glass elements only to the tips for a dazzling twist on a classic.
- Aurora Borealis Style: Use a dark, deep blue or purple base with iridescent foils to mimic the Northern Lights.
Maintaining Your Glass Nail Designs
Glass nail designs, especially when done with gel, are quite durable. However, a little care goes a long way:
- Wear Gloves: When doing household chores, especially washing dishes or cleaning, wear rubber gloves to protect your nails from harsh chemicals and prolonged exposure to water, which can weaken the polish and foil.
- Avoid Using Nails as Tools: Don’t use your nails to pry open cans, scrape labels, or perform other tasks that could chip or lift the design.
- Moisturize: Keep your hands and cuticles hydrated with cuticle oil and hand lotion. Healthy cuticles contribute to overall nail health and the appearance of your manicure.
- Regular Top Coats: For regular polish manicures, you can extend their life by applying an extra layer of top coat every few days.
For gel manicures, the durability is inherent in the product. However, if you notice any lifting or chipping at the edges, it’s best to address it sooner rather than later to prevent further damage. This might involve a small repair with top coat or visiting your nail technician.
The Science Behind the Shine: How Foils Work
The captivating shimmer of glass nail designs comes from the way these special films interact with light. They utilize principles of thin-film interference and iridescence. Here’s a simplified look:
- Thin-Film Interference: The foil is incredibly thin, often just a few nanometers thick. When light hits the surface, it reflects off both the top and bottom surfaces of the thin film. These two reflected light waves interfere with each other. Depending on the thickness of the film and the wavelength of light, certain colors will be reinforced, while others cancel out, creating the vibrant, shifting colors you see. This is similar to how oil slicks or soap bubbles display rainbow colors.
- Holographic Effect: Holographic foils often have a diffraction grating structure embedded within them. This structure is made of precisely spaced lines or grooves that split light into its component colors, much like a prism, creating the distinct rainbow streaks. According to the National Institute of Standards and Technology (NIST), diffraction gratings are key to separating light wavelengths.

