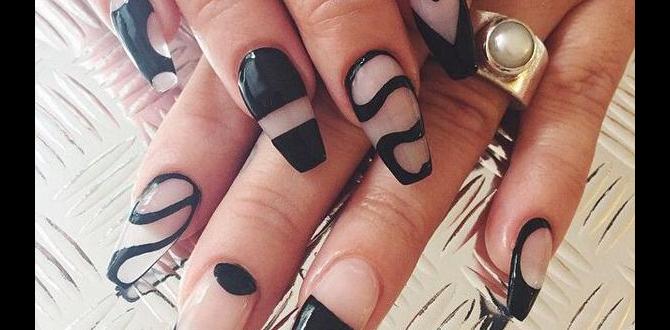
Glass Nail Designs: Absolutely Stunning & Achievable at Home! Learn 5 essential looks, what you need, and easy tips to get that shimmering, broken-glass effect. Perfect for beginners wanting a trendy, eye-catching manicure.
Dreaming of nails that sparkle and shine like shattered glass? You’re in the right place! Many of us see those Instagram-worthy glass nails and think, “Wow, that must be super hard to do.” The good news? It’s totally achievable, even if you’re just starting out with nail art. We’re going to break down exactly how to create these gorgeous designs. Get ready to transform your nails into dazzling masterpieces!
This guide is designed just for you, whether you’re a nail art newbie or just looking for your next fabulous manicure idea. We’ll cover everything from the basic tools to creating five stunning glass nail looks that will turn heads. Let’s dive into the magical world of glass nails and unlock your inner nail artist!
What Exactly Are Glass Nail Designs?
Glass nail designs, also known as shattered glass nails, are a type of nail art that imitates the look of broken glass fragments. This effect is achieved by using iridescent cellophane or foil pieces applied over a contrasting base color. When the light hits these tiny pieces, they reflect and refract, creating a mesmerising, multi-dimensional shimmer. It’s like wearing tiny stained-glass windows on your fingertips!
The beauty of this trend lies in its versatility. You can go for subtle hints of shimmer or full-on dazzling effects. The ‘glass’ pieces themselves come in various shapes and sizes, allowing for endless creative possibilities. It’s a popular choice for special occasions, festive events, or simply when you want your nails to feel extra special and unique.
Why Are Glass Nail Designs So Popular?
Glass nails have taken the nail world by storm, and it’s easy to see why! They offer a unique and sophisticated shimmer that stands out from traditional glitter. Here’s what makes them a celeb and influencer favorite:
- Unique Aesthetic: They provide a holographic, iridescent effect that is unlike any other nail trend.
- Eye-Catching Sparkle: The way the light catches the “glass” shards creates a glamorous, attention-grabbing look.
- Versatility: From subtle accents to full-nail coverage, they can be adapted to almost any style and occasion.
- Beginner-Friendly: Surprisingly, the core technique is quite simple and forgiving, making it great for DIY manicures.
- Customizable: You can play with base colors, shard shapes, and placement to make the design your own.
Essential Tools & Supplies for Glass Nails
Before we get to the fun part, let’s gather your essentials! Don’t worry, most of these are pretty standard nail supplies, and the special ‘glass’ component is easy to find. Having the right tools makes the process smoother and the results more professional-looking.
Here’s what you’ll need:
- Base Coat: This protects your natural nails and helps your polish adhere better.
- Nail Polish: Choose a color that will make your glass shards pop! Darker colors like black, navy, or deep purple create a striking contrast, while lighter colors can give a softer, ethereal glow.
- Top Coat: This is crucial for sealing in your design and adding a glossy finish.
- “Glass” Shards: These are typically iridescent cellophane or special nail art foils. You can buy them pre-cut into small squares or irregular shapes, or you can cut your own from larger sheets. They are readily available online or at beauty supply stores.
- Tweezers: Fine-tipped tweezers are essential for picking up and precisely placing the tiny glass shards.
- Scissors (Optional): If you’re cutting your own shards from a larger sheet, you’ll need small, sharp scissors.
- Cuticle Pusher/Orange Stick: To help gently push back cuticles for a clean nail canvas.
- Nail File and Buffer: To shape your nails and create a smooth surface.
- Rubbing Alcohol or Nail Polish Remover: For cleaning the nail surface before applying polish.
- Top Coat Applicator (Optional but Recommended): Sometimes a thicker top coat can help embed the shards more smoothly. Look for gel top coats if you’re using gel polish, or a good quality regular top coat.
Where to Find Your “Glass” Shards
The magic ingredient for glass nails is the cellophane or foil. You can usually find these at:
- Online Retailers: Websites like Amazon, Etsy, and specialized nail art supply stores offer a wide variety of colors, shapes, and sizes. Search for “shattered glass nail foil,” “iridescent cellophane,” or “nail art flakes.”
- Beauty Supply Stores: Some larger beauty stores might carry these items, especially those catering to professional nail technicians.
- DIY Option: You can sometimes find iridescent gift-wrapping cellophane or theatrical gels that can be cut into small pieces. Ensure they are thin enough to adhere and seal well. For more information on nail art materials and safety, the U.S. Food & Drug Administration (FDA) provides guidance on cosmetic ingredients and safety, which is always good to be aware of when applying products to your body.
How to Create the Basic Shattered Glass Effect
This is the foundation for all your glass nail designs! Once you master this technique, you can play with different colors and layouts. It’s simpler than you might think!
Step 1: Prep Your Nails
Start with clean, dry nails. Push back your cuticles gently. Shape your nails with a file and buff the surface lightly to remove any shine. Cleanse your nails with rubbing alcohol or nail polish remover to get rid of oils.
Step 2: Apply Your Base Color
Apply one or two thin, even coats of your chosen nail polish. A dark color works wonderfully as a background because the shards will really stand out. Let each coat dry completely. This is important – if the base color is still wet, the shards might sink into it instead of sitting on top.
Step 3: Apply a Sticky Layer (Crucial Step!)
This is where the magic happens. Apply a thin layer of your top coat (or a special transfer gel if you have it) over the dried base color. You don’t want it too thick, or the shards will be submerged and lose their glass-like clarity. You want just enough tackiness for the shards to adhere.
Step 4: Place the “Glass” Shards
Using your fine-tipped tweezers, carefully pick up small pieces of the iridescent cellophane or foil. Place them onto the tacky top coat layer on your nail. Arrange them in a scattered or geometric pattern, whatever you like! Don’t worry about perfection; the “shattered” look is meant to be a bit random. Overlap them slightly if you want a more intense effect.

Step 5: Seal the Deal with Top Coat
Once you’re happy with the placement of your shards, apply a generous layer of top coat over the entire nail. This is key to smoothing everything out and making sure the shards are sealed in and won’t snag or peel off. Be sure to cap the free edge (the tip of your nail) to further protect the design. You might need two generous coats of top coat to fully encapsulate the shards and achieve a smooth finish. Let it dry completely.
Step 6: Final Touches
Clean up any polish smudge around your cuticles with a small brush dipped in remover. Admire your work!
5 Essential & Stunning Glass Nail Designs
Now that you’ve got the basic technique down, let’s explore some popular and stunning ways to incorporate glass nail designs into your manicure!
1. The Classic Shattered Black Glass
This is perhaps the most iconic glass nail look, and for good reason. The deep black base makes the iridescent shards pop with incredible contrast, giving a sophisticated yet edgy vibe. It’s perfect for a night out or when you want your nails to make a statement.
How to achieve it:
- Prep nails and apply 1-2 coats of opaque black nail polish. Let dry completely.
- Apply a thin layer of top coat.
- Using tweezers, place small, irregular iridescent shards over the tacky top coat. Aim for a scattered pattern with some areas denser than others.
- Seal carefully with 1-2 generous coats of top coat, ensuring all shards are fully covered and the surface is smooth.

2. Ethereal Aurora Borealis Glass
Inspired by the magical Northern Lights, this design uses a mix of pastel or iridescent base colors and similarly colored shards to create a dreamy, otherworldly effect. Think soft blues, pinks, greens, and purples blended or layered.
How to achieve it:
- Prep nails. You can use a sheer white, a light pastel color, or even a duochrome polish as your base. Alternatively, you can create a subtle gradient with two or three pastel shades. Let it dry.
- Apply a thin layer of top coat.
- Place fine, iridescent shards that have hints of pastel or holographic colors. Consider shapes that are smaller and more delicate for this look.
- Seal with multiple thin coats of top coat to build up a smooth, glossy finish without submerging the delicate shard colors.
Tip: For an extra aurora effect, you can lightly dust some iridescent or holographic pigment over your wet top coat before it fully cures, then add another top coat layer.
3. Geometric Glass Accent
Not ready for full-nail glass? Try using the shattered glass effect on just one or two accent nails, or even as a geometric accent on a solid color nail. This offers a chic way to incorporate the trend without overwhelming your manicure.
How to achieve it:
- Paint all your nails in your chosen base color (e.g., nude, grey, white, or even a bold primary color). Let dry.
- On your accent nail(s), apply a thin layer of top coat where you want the glass effect to appear.
- Carefully place shards in a specific shape – perhaps a stripe, a triangle in the corner, or outlining a French tip.
- Seal with top coat over the entire nail, paying attention to smoothing the edges of your geometric design.

4. Pearly White & Iridescent Shimmer
This elegant design combines a classic pearly white or creamy base with subtle iridescent shards. It’s sophisticated, clean, and adds just the right amount of sparkle for everyday wear or a wedding manicure.
How to achieve it:
- Prep nails. Apply 1-2 coats of a creamy white, ivory, or very light nude polish. A pearly finish polish works beautifully here. Let dry.
- Apply a thin layer of top coat.
- Select small, finely cut iridescent shards that have a subtle shimmer rather than an intense holographic effect. Place them more sparingly than in the black glass design, focusing on areas like the center or tips of the nails.
- Seal with top coat. For this look, you want to ensure the top coat is ultra-smooth and glossy to maintain the clean, refined aesthetic.
5. Color-Blocked Glass
Combine the artistry of color blocking with the sparkle of shattered glass! This design involves creating distinct sections of color on your nail, with glass elements applied to one or more of those sections.
How to achieve it:
- Plan your color block design. You might do a half-and-half look, a diagonal split, or stacked stripes.
- Paint the first color block and let it dry completely.
- Carefully apply tape (nail art tape works best) to create a clean line for your next color block.
- Paint the second (or third) color block. Remove the tape while the polish is still slightly wet to avoid lifting.
- Once all color blocks are dry, apply top coat to the section(s) where you want the glass effect.
- Place your shards in the tacky top coat on the designated section(s).
- Seal the entire nail with top coat, ensuring a smooth transition between colored sections and the glass elements.

Tips for the Perfect Glass Nail Finish
Achieving that flawless, smooth, and dazzling glass nail look takes a little practice and a few key tricks:
- Work in Good Light: You’ll need to see what you’re doing, especially when placing those tiny shards!
- Thin Coats Are Key: Avoid thick layers of polish or top coat, as they can make the shards look “muddy” or sunk in.
- Tackiness is Your Friend: The top coat layer needs to be sticky enough to grip the shards but not so wet that they float around uncontrollably. If your top coat dries too fast, work on one nail at a time.
- Encapsulate Thoroughly: Don’t skimp on the final top coat layers. You need enough to fully cover and smooth over the shards, creating a durable surface. Capping the free edge also adds longevity.
- Smooth Out Bumps: If you feel any texture after the first top coat, apply another generous, smooth layer to level it out.
- Clean Tweezers: Make sure your tweezers are clean and free of old polish or debris for precise shard placement.
- Practice Makes Perfect: Your first attempt might not be magazine-worthy, and that’s okay! The more you practice, the better you’ll get at placing the shards and achieving that smooth finish.
Troubleshooting Common Glass Nail Issues
Even with the best intentions, sometimes things don’t go exactly as planned. Here are a few common hiccups and how to fix them:
Issue: Shards aren’t sticking.
Solution: Your top coat layer might be too dry or not tacky enough. Try applying it a little thicker, or work on one nail at a time so it stays sticky. Ensure you’re using a good quality top coat that maintains some tackiness.
Issue: The glass effect looks dull or buried.
Solution: This usually means the top coat layer was too thick initially, or not enough top coat was used to seal the shards. For the final sealing coats, use generous, smooth layers. You might need to go back and add another one or two thin, even top coats to build up the smooth surface.
Issue: Shards are peeling or catching.
Solution: The shards weren’t fully encapsulated. You need to add more top coat, ensuring you cover the edges of the shards and cap the free edge of your nail. If a shard is already lifting, you can try carefully applying a tiny bit of top coat underneath it with a fine brush and pressing it back down, then re-sealing.
Issue: The shard pieces are too big.
Solution: If you’re cutting your own, use smaller scissors and cut into much smaller pieces. If you bought pre-cut shards, try to select finer ones or break larger ones into smaller fragments before applying.
Glass Nails vs. Other Nail Trends
Glass nail designs offer a unique sparkle that sets them apart. Unlike traditional glitter, which is often dense and uniform, glass shards create a scattered, iridescent effect that catches the light in a more dynamic way. Holographic polishes offer a similar rainbow shift, but glass nails have a distinct “shattered” texture and depth. Chrome powders provide a smooth, metallic sheen, which is very different from the prismatic reflections of glass nails. If you’re looking for something truly unique that offers a sophisticated, multi-dimensional shimmer, glass nail designs are a fantastic choice.
Frequently Asked Questions (FAQ)
Q1: Can I do glass nail designs with regular nail polish, or do I need gel?
A: You can definitely do glass nail designs with regular nail polish! The key is the “sticky layer” of top coat to adhere the shards. While gel polish might offer a more durable and high-gloss finish, regular polish works perfectly

