Unlock stunning geometric nail designs with easy-to-follow steps! This guide makes chic, modern manicures achievable for everyone, even beginners. Learn essential techniques and simple tools to create your own professional-looking geometric art at home.
Ever look at those perfectly sharp lines and amazing shapes on nail art and think, “Wow, I could never do that”? You’re not alone! Many of us see intricate geometric nail designs and feel a bit intimidated. But guess what? Creating these stunning looks is more accessible than you might think. With a few simple tricks and the right tools, you can transform your nails into a modern masterpiece. This guide is designed to break down geometric nail art into easy-to-manage steps, ensuring even the newest nail art enthusiast can create beautiful, sharp designs. Get ready to unleash your inner artist and discover how fun and rewarding geometric nail design can be!
Why Geometric Nail Designs Are a Must-Try
Geometric nail designs are incredibly popular for a reason. They offer a perfect blend of modern style and timeless appeal. Whether you love clean, minimalist looks or bold, eye-catching patterns, geometric art has a place in your nail wardrobe. These designs are incredibly versatile, fitting every occasion from a casual day out to a formal event. Plus, they’re fantastic for boosting your confidence and allowing you to express your unique style. Let’s dive into why these designs are so essential and how you can start creating them!
The Allure of Angles and Lines
What makes geometric patterns so captivating? It’s the precision, the balance, and the visual interest they bring. Think of triangles, squares, chevrons, and stripes – these basic shapes, when arranged thoughtfully, create complex and sophisticated art. Unlike freehand floral designs or intricate portraits, geometric patterns rely on clean lines and uniform shapes. This makes them remarkably beginner-friendly while still offering endless possibilities for creativity. They can be as simple as a single stripe down your nail or as complex as a mosaic of interlocking shapes.
Versatility for Every Style
Geometric nail art isn’t a one-size-fits-all trend. You can tailor it to your personal aesthetic. Prefer understated elegance? Opt for a single metallic line on a nude background. Feeling bold? Go for a multi-colored design with sharp angles and contrasting shades. They work beautifully with almost any outfit and can elevate a simple look to something truly special. From business casual to evening glam, geometric designs can adapt and impress.
Essential Tools for Geometric Nail Art
Getting started with geometric nail designs doesn’t require a massive investment in tools. A few key items will set you up for success. The most important thing is a steady hand and a bit of patience, but the right tools make all the difference. Here’s what you’ll need:
The Must-Have Nail Art Arsenal
- Base Coat and Top Coat: The foundation of any good manicure. A good base coat protects your natural nails, and a durable top coat seals your design, adding shine and preventing chips.
- Nail Polish Colors: Choose your favorite shades! Contrasting colors often make geometric designs pop, but monochromatic schemes can be incredibly chic too.
- Striping Tape or Stencils: These are your secret weapons for achieving perfectly straight lines and crisp edges. Striping tape is thin, flexible tape that you can apply to your nail to create barriers for polish. Stencils offer pre-cut shapes. You can find these at most beauty supply stores or online. For excellent nail care practices, it’s beneficial to understand how your nails react to different polish ingredients. For more on nail health, consult resources like those provided by the American Academy of Dermatology.
- Dotting Tools: These come with various-sized ball tips and are perfect for creating small dots, which can be incorporated into geometric patterns or used as accents.
- Fine-Tipped Brushes (Nail Art Brushes): Essential for drawing thin lines, connecting dots, or cleaning up edges. Look for brushes with very fine, precise bristles.
- Tweezers: Useful for picking up and precisely placing striping tape or small embellishments.
- Clean-up Brush or Cotton Swabs: For tidying up any polish that gets outside the lines. A small brush dipped in nail polish remover is excellent for this.
- Nail Polish Remover: For correcting mistakes and cleaning up stray polish.
- Orange Stick or Cuticle Pusher: For cleaning up the cuticle area and ensuring a neat finish.
When to Use What: Tool Breakdown
Let’s get a little more specific on how these tools help with geometric designs:
| Tool | Primary Use in Geometric Nail Art | Beginner Tip |
|---|---|---|
| Striping Tape | Creating perfectly straight lines and sharp angles. | Apply tape to dry polish. Press edges firmly to prevent polish bleed. Remove tape while polish is still slightly wet for the cleanest lines. |
| Fine-Tipped Brush | Freehanding thin lines, connecting shapes, detailing. | Start with a steady hand and thin coats of polish. Practice drawing lines on paper first. Use sparingly with polish for control. |
| Dotting Tools | Creating uniform dots for patterns or as accents. | Dip the ball end into polish and gently press onto the nail. For consistent sizes, use the same tool or portion of the ball for each dot. Swirl the tool in polish for a fresh application. |
| Tweezers | Precise placement of tape, glitter, or charms. | Handle small items delicately. Steady your hand by resting your wrist. |
| Clean-up Brush | Erasing polish errors around the cuticle and sides. | Dip a fine brush in remover, wipe off excess on a paper towel, then carefully paint away stray polish. |
Beginner-Friendly Geometric Nail Design Ideas
Ready to get creative? Let’s start with some simple yet stunning geometric nail designs that are perfect for beginners.
1. The Classic Chevron
The chevron is a V-shaped pattern that’s both stylish and easy to achieve. It adds a dynamic look to any manicure.
- Prep: Start with clean, shaped nails. Apply your base coat and let it dry completely.
- Base Color: Apply your first (base) nail polish color. Let it dry thoroughly – this is crucial for clean lines. A good drying time can be aided by using thinner coats of polish.
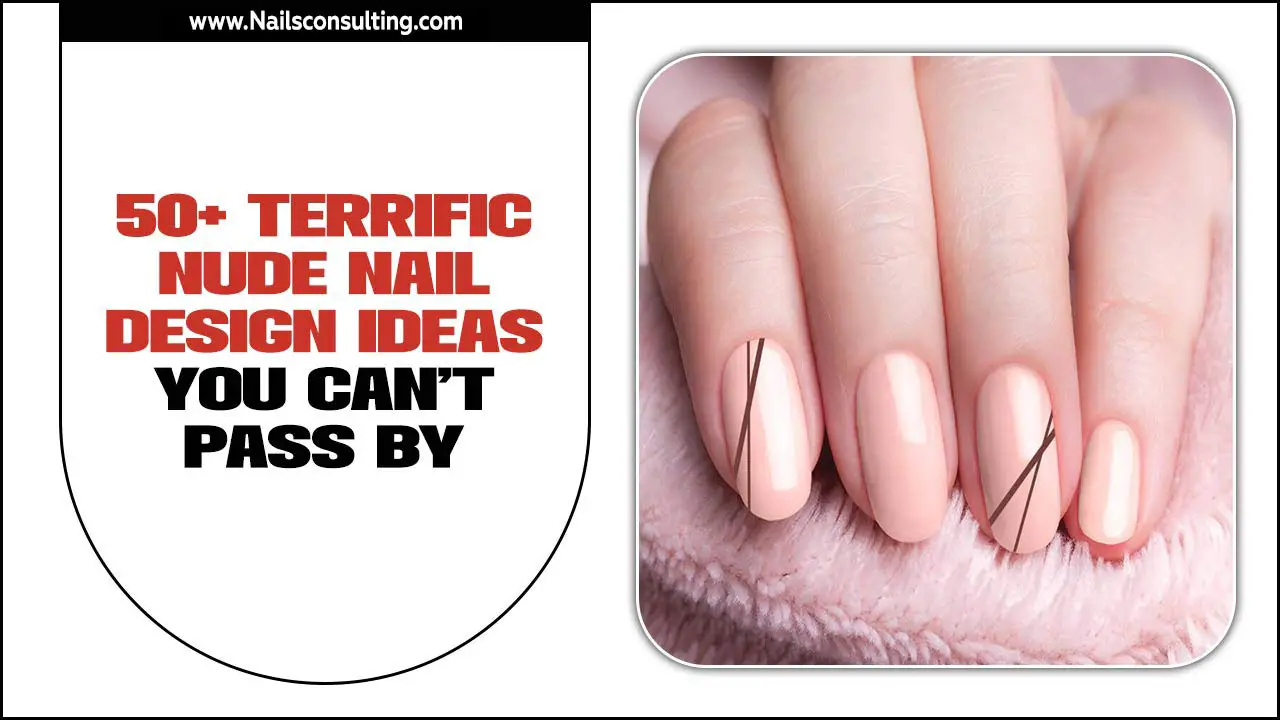
- Striping Tape Application: Carefully apply a piece of striping tape diagonally across your nail. Press down firmly on the edges to ensure no polish can seep underneath. You can create a single chevron or two opposing chevrons.
- Second Color: Paint the section of the nail above the tape with your second nail polish color.
- The Reveal: While the second color is still slightly wet (not fully dry, but not sticky wet), carefully peel off the striping tape using tweezers or your fingers. Be gentle!
- Finish: Once dry, apply a generous layer of top coat to seal the design and add shine.
Tip: For a cleaner line, wait until the second color is just set – not completely dry. This helps prevent the color from smudging when you remove the tape.
2. Simple Stripes
Lines are the building blocks of geometric design. Straight, clean stripes add a touch of sophistication.
- Prep & Base: Apply base coat and your first color, letting it dry completely.
- Tape Time: Apply strips of striping tape horizontally or vertically across your nail. You can place them close together for a dense stripe look or farther apart for a minimalist feel. Ensure the tape is firmly adhered.
- Accent Color: Paint over the taped sections with a contrasting color. You can paint all the taped sections or select just one or two.
- Remove Tape: While the accent color is still slightly wet, carefully peel off the striping tape.
- Final Touch: Apply top coat once everything is dry.
Variation: Try mixing directions! Use vertical stripes on one nail and horizontal on another for a dynamic look. For even more precise lines, consider using a nail art pen which offers a very controlled application.
3. Polka Dot Geometry
Dots can be geometric too! Arranging them in uniform patterns or clusters creates a playful geometric effect.
- Base: Apply your base coat and main polish color, allowing it to dry fully.
- Dotting: Dip your dotting tool into a contrasting polish color. Gently press the tip onto your nail to create a dot.
- Pattern Play: Create a pattern with your dots. You could make a neat grid, a diagonal line of dots, or fill a specific shape area. Varying the size of your dotting tools can add extra dimension.
- Clean-up: Use a fine brush dipped in remover to clean up any stray dots around the edges.
- Seal: Finish with a good quality top coat.
Tip: For perfectly spaced dots, use a ruler or practice a few times on paper to get a feel for the spacing. Clean your dotting tool often between applications to keep your dots crisp.
4. Half-Moon Minimalist
This chic design uses a simple curve at the base of the nail and a contrasting color or metallic accent.
- Base: Apply base coat and your main polish color. Let it dry completely.
- French Tip Curve: Using striping tape or even a small circular sticker (like those used for hole punches), create a curve at the base of your nail, just above the cuticle.
- Accent Area: Paint the small area above the tape/sticker with a contrasting color or a metallic polish (gold, silver, rose gold look fantastic for this!).
- Reveal: Carefully remove the tape/sticker while the accent color is slightly dewy.
- Seal: Apply top coat once dry.
Pro Tip: Cut a strip of striping tape into a curve shape yourself using scissors for more control over the placement and size of your half-moon.
Taking Your Geometric Designs to the Next Level
Once you’ve mastered the basics, you can start experimenting with more complex geometric patterns and techniques.
Mixing Shapes and Colors
Don’t be afraid to combine elements! Use tape to create a sharp diagonal line, then use a dotting tool to add dots along that line. Play with contrasting finishes – a matte top coat over a metallic geometric pattern can look incredibly sophisticated.
Asymmetrical Designs
Not all geometric designs need to be symmetrical. Try a sharp, angular design on one side of the nail and leave the other side clean, or have varying patterns across different nails in your manicure. This adds a modern, artistic flair.
Negative Space Geometric Art
This is a super trendy technique where you intentionally leave parts of your natural nail visible. Use tape to block out shapes and then fill in the rest with color. The contrast between the polish and the bare nail is striking and sophisticated.
For instance, after applying base and top coat, you might apply tape to create a triangle shape on your nail. Then, paint the rest of the nail with a bold color. Once dry, remove the tape to reveal a perfectly shaped clear triangle against the colored background. This technique is also a great way to extend the life of your manicure, as chips are less noticeable on the unpolished areas.
The Power of Polish Brands and Formulas
When creating sharp geometric designs, the formula of your nail polish matters. Thicker or streaky formulas can make clean lines difficult. Look for polishes that are self-leveling and apply smoothly. Brands that offer a wide range of opaque and highly pigmented colors are excellent choices. For instance, brands known for their one-coat coverage can significantly speed up the process and reduce the risk of smudging tape.
Consider using metallic or glitter polishes for accent lines or shapes. These often have a thicker consistency that can help create a more defined edge. However, they can also be trickier to work with, so practice is key!
Maintenance and Longevity Tips
Once you’ve created your stunning geometric masterpiece, you’ll want it to last! Here’s how to keep your geometric nails looking fresh:
- Top Coat is Key: Always finish with a high-quality top coat. Reapply it every few days to refresh the shine and protect your design.
- Be Gentle: Avoid using your nails as tools. Try not to scrape or pick at things, as this can lift the polish and ruin your sharp lines.
- Moisturize: Keep your cuticles and hands moisturized. Dry skin can make your manicure look less polished overall.
- Gloves: Wear gloves when doing household chores, especially those involving water or harsh cleaning chemicals.
Frequently Asked Questions About Geometric Nail Designs
Q1: What polish finish is best for geometric nail designs?
A: For geometric designs, a glossy finish usually looks the best as it makes the lines appear crisper and the colors more vibrant. However, matte finishes can also create a very chic, modern look, especially when used in contrast with a glossy accent.
Q2: How do I prevent polish from bleeding under striping tape?
A: Ensure your base layer of polish is completely dry before applying the tape. Press down firmly and seal all the edges of the tape. For an extra safeguard, you can paint a thin layer of your base color or even liquid latex around the edge of your nail before applying the design color, and then peel that off with the tape. Removing the tape while the top color is still slightly wet also helps prevent “lifting” or smudging.
Q3: Can I use stickers or decals for geometric designs?
A: Absolutely! Nail stickers and decals are a fantastic shortcut for geometric patterns, especially for beginners. You can find them in a huge variety of shapes and styles. Just ensure they adhere well to your nail and seal them with a top coat to make them last.
Q4: My lines aren’t straight. What am I doing wrong?
A: This is a common challenge! Ensure you’re using a very fine-tipped brush or precisely applied striping tape. Practice drawing lines on paper first. When using a brush, try holding your other hand steady and resting your painting hand’s wrist for stability. Thin coats of polish are also much easier to control than thick ones.
Q5: How can I make my geometric designs last longer?
A: A good quality top coat is your best friend. Apply it generously over your entire design once it’s completely dry. Reapply a thin layer of top coat every 2-3 days to maintain shine and protect the artwork. Also, always wear gloves when exposed to water or chemicals.
Q6: Are there specific types of nail polish that work best for geometric art?
A: Opaque, pigmented polishes that apply smoothly are ideal. Avoid formulas that are too thick, streaky, or goopy, as they can make clean lines very difficult. Gel polishes are also fantastic for geometric art due to their smooth application and durability, but they require a UV/LED lamp to cure.
Conclusion
Geometric nail designs are more than just a trend; they’re a fantastic way to express your personal style with creativity and confidence. From sharp, clean lines to intricate patterns, the possibilities are truly endless. We’ve explored the essential tools you need, from striping tape to fine-tipped brushes, and broken down easy-to-follow step-by-step guides for classic designs like chevrons and stripes. Remember, practice is key, and every attempt brings you closer to mastering these stunning looks. Don’t be afraid to experiment with different color palettes, shapes, and finishes like matte versus glossy. By following these tips and tricks, you can achieve salon-worthy geometric nail art right in your own home, proving that beautiful, intricate designs are totally achievable for everyone. So grab your polishes, get creative, and enjoy the process of transforming your nails into works of art!

