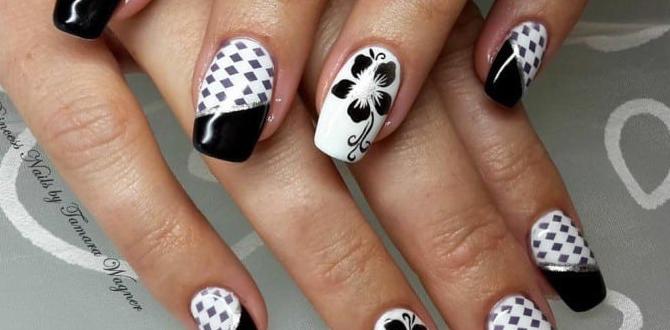
Geometric nail designs are a fantastic way to add a modern, stylish touch to your manicure! Easy to learn and customize, these designs use simple shapes like lines, triangles, and squares to create eye-catching patterns. With just a few basic tools and a little practice, you can achieve stunning, salon-worthy looks at home, boosting your confidence and creativity.
Hello, nail lovers! Lisa Drew here from Nailerguy. Are you ready to take your nail game from simple to spectacular? If you’ve ever admired those super chic, art-inspired manicures and thought, “There’s no way I can do that,” I’ve got great news! Geometric nail designs are your perfect entry point into the world of nail art. They’re surprisingly easy to create and offer endless possibilities for personalization.
We’ll dive into everything you need to know to get started, from the basic tools to simple techniques that will have you painting perfect lines and shapes in no time. Forget complicated art; we’re making geometric gorgeous for everyone!
Why Geometric Nail Designs Are Essential for Beginners
Geometric nail designs have become a staple in the nail art world, and for good reason! They offer a fantastic balance of visual impact and achievable execution, making them ideal for anyone dipping their toes into DIY manicures.
Geometric patterns rely on fundamental shapes: lines, dots, triangles, squares, and circles. This simplicity is precisely what makes them so beginner-friendly. Unlike freehand floral or portrait art, geometric designs are structured. You’re not aiming for organic curves but for clean, precise lines and shapes. This structure provides a roadmap, making it easier to achieve a polished look even with limited artistic experience.
Beyond ease of creation, geometric designs offer incredible versatility. They can be minimalist and chic with just a few strategic lines, or bold and vibrant with contrasting colors and intricate patterns. This adaptability means geometric nails can suit any occasion, outfit, or personal style, from everyday wear to a special event. They’re also incredibly forgiving; a slightly wobbly line can often be incorporated into the design or easily covered with another element.
The sheer popularity of geometric nail designs also means there’s a wealth of inspiration and tutorials available. You can find endless ideas online, from simple accent nails to full-hand designs. This readily available inspiration fuels creativity and provides clear examples to follow as you learn. Mastering geometric shapes is also a stepping stone to more complex nail art, equipping you with foundational skills and confidence.
Finally, geometric nail art can be incredibly budget-friendly. With a few basic tools and polish, you can achieve a professional-looking manicure without the salon price tag. Investing in a few key items will unlock a world of design possibilities right at your fingertips.
Getting Started: Essential Tools for Geometric Nail Art
Before we start painting, let’s gather our supplies! You don’t need a professional kit to create stunning geometric nails. A few key items will set you up for success.
Think of these tools as your friendly assistants in creating those crisp lines and neat shapes. Having the right tools makes the process smoother, more enjoyable, and significantly easier to achieve those desired results.
The Must-Haves:
- Nail Polish/Gels: Of course! You’ll need your base colors and accent colors. Opt for polishes with good opacity for fewer coats.
- Base Coat: Protects your natural nails and helps polish adhere better.
- Top Coat: Seals your design, adds shine, and increases longevity.
- Nail Art Brushes: A fine-tipped brush is essential for drawing lines. A slightly thicker one can be helpful for filling in shapes. Look for synthetic bristles. A good quality liner brush is a game-changer for thin, precise lines.
- Dotting Tools: These have round tips of various sizes and are perfect for creating dots, which can be incorporated into geometric patterns or used as outlines.
- Striping Tape/Stencils: These are your secret weapon for achieving super straight lines and perfect geometric sections without freehand drawing. You can find metallic striping tape or pre-cut vinyl stencils.
- Tweezers: Especially useful for applying striping tape or small stencils precisely.
- Nail Polish Remover and Cotton Swabs/Pads: For cleaning up mistakes and tidying edges. A fine-tipped brush dipped in remover can also be used for precise cleanup.
- Clean-up Brush: A small, flat-bristled brush (often synthetic) is invaluable for cleaning up polish around the cuticle and sidewalls for a salon-perfect finish.
Getting Creative with Tools:
Don’t feel limited to just these! Many everyday items can be repurposed:
- Toothpicks: Can be used for small dots or fine lines in a pinch.
- Plastic Wrap/Foil: Excellent for practicing designs or creating textured effects.
- Even a Credit Card/Ruler: Can act as a straight edge stencil in a DIY situation.
What About UV/LED Lamps for Gel?
If you’re using gel polish, a UV/LED lamp is essential for curing the polish between coats and for your top coat. This ensures the gel hardens properly, giving you that super durable, high-shine finish. Regular nail polish air dries, but gels need light to cure.
Your First Geometric Nail Design: A Step-by-Step Guide
Let’s get hands-on! We’ll walk through a simple yet effective geometric design that’s perfect for beginners. This design uses lines and simple shapes, often referred to as a “negative space” or “minimalist geometric” style.
Design Idea: Minimalist Lines & Shapes
This design involves creating clean lines and perhaps a small triangle or square on a “naked” nail or a sheer base color.
Step 1: Prep Your Nails
A good manicure starts with a clean canvas. This step is crucial for polish longevity and a professional finish.
- Clean: Remove any old polish thoroughly. Wash your hands with soap and water and dry them completely.
- Shape: File your nails to your desired shape and length. Aim for consistency.
- Cuticle Care: Gently push back your cuticles. You can use a cuticle pusher or an orangewood stick. Avoid cutting them unless absolutely necessary, as this can lead to infection.
- Buff (Optional): Lightly buff the surface of your nails to create a smooth, even texture. This also helps polish adhere better.
- Base Coat: Apply one thin layer of your chosen base coat. Let it dry completely. This protects your nails and prevents staining.
Step 2: Apply Your Base Color (or Go Negative Space)
For this minimalist design, you have two main options for your nail’s base:
- Negative Space: This is where parts of your natural nail show through. You can apply a clear top coat or a very sheer nude/pink polish. This option is super forgiving and chic.
- Solid Base Color: Apply 1-2 thin, even coats of your favorite polish. Let each coat dry completely before applying the next. A smooth, opaque surface is ideal.
If using gel polish, cure each layer under your UV/LED lamp according to the manufacturer’s instructions.
Step 3: Adding the Geometric Elements
Now for the fun part! We’ll use striping tape for sharp, straight lines, which is a fantastic beginner technique.
- Plan Your Design: Decide where you want your lines and shapes. A simple design could be a diagonal line from one corner to the opposite side, a triangle in the corner, or parallel lines near the tip or base.
- Apply Striping Tape:
- Carefully cut a short piece of striping tape using sharp scissors or your nail art brush.
- Using tweezers, place one end of the tape on your nail where you want your line to start.
- Gently press the tape down, smoothing it firmly onto the nail surface. Ensure there are no air bubbles and that the edges are sealed down to prevent polish from seeping underneath. If you get a small bubble, try to press it flat.
- Press firmly along the entire length of the tape to ensure a clean separation line.
- Apply Your Accent Color:
- Paint over the tape with your accent color polish. Make sure to cover the tape completely and extend the polish slightly over the edges of the tape onto the nail.
- If using regular polish, apply thin coats and let them dry to a touchable state (not fully hardened).
- If using gel polish, apply thin coats and cure under your lamp.
Step 4: The Reveal – Carefully Remove the Tape
This is the moment of truth! Patience is key here.
- Timing is Everything:
- For Regular Polish: Wait until the polish is tacky but not fully dry. If it’s too wet, it will smudge. If it’s too dry, the polish might lift with the tape.
- For Gel Polish: Remove the tape before curing the final layer of accent color. This allows the gel to be easily removed without the risk of lifting or unevenness.
- Gentle Removal: Using your tweezers, find an edge of the striping tape and gently and slowly peel it off the nail. Pull at an angle that’s away from the colored polish you just applied.
- Admire Your Line! You should now have a perfectly crisp line.
Step 5: Clean Up and Top Coat
The final polish!
- Clean Up Mistakes: Dip a fine-tipped brush (or a cotton swab/pad) in nail polish remover. Carefully clean up any polish that got on your skin or cuticles. A clean-up brush allows for precision around the nail edge.
- Apply Top Coat: Once any touch-ups are dry, apply a generous, even layer of your favorite top coat over the entire nail. This seals the design, adds shine, and protects your artwork. Be sure to cap the free edge (paint a little on the tip of the nail) to prevent chips.
- Cure (for Gel): If using gel polish, cure your top coat under the UV/LED lamp.
And voilà! You’ve created a beautiful geometric nail design. Repeat on your other nails, varying the patterns or keeping them consistent, as you like!
Variations and Advanced Techniques
Once you’ve mastered the basics, you can start experimenting with different geometric shapes and techniques. Geometric nail designs are incredibly versatile, allowing for endless creativity.
Playing with Shapes and Placement:
- Triangles: Create a triangle at the tip of your nail, a half-triangle at the base, or use multiple triangles to form a larger pattern.
- Squares and Rectangles: Outline a section of your nail, create a grid, or place a single square near the cuticle.
- Chevrons: A classic V-shape, often created with striping tape or a V-shaped stencil.
- Asymmetrical Designs: Don’t feel obligated to make everything symmetrical. A single bold line or a cluster of shapes on one side of the nail can be very striking.
- Color Blocking: Use tape to divide your nail into sections and fill each section with a different color. This is a bold, graphic look.
Beyond Striping Tape:
While striping tape is fantastic, other tools can help you achieve amazing geometric effects:
- Dotting Tools for Grids: Use different sized dotting tools to create rows and columns of dots that form a grid pattern. You can then connect these dots with a fine liner brush.
- Stencils: Pre-cut vinyl stencils are available in various geometric shapes. Apply the stencil to your nail, paint over it, and peel it off for a crisp, clean design.
- Freehand with a Fine Liner Brush: As your confidence grows, try drawing lines and shapes freehand with a good quality nail art brush. Practice thin, steady strokes.
- Stamping Plates: Many stamping plates come with geometric patterns. Apply stamping polish to the plate, scrape off the excess, and use a stamper to transfer the design to your nail.
Incorporating Negative Space and Finishes:
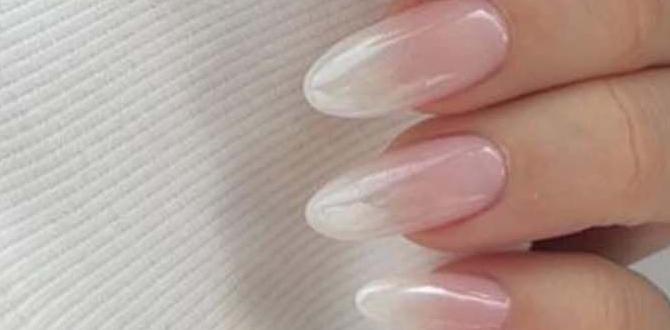
Negative space designs, where parts of the natural nail or a sheer polish show through, are incredibly popular and chic. Combine this with geometric elements for a sophisticated look.
- Half-Moon Geometric: Paint a half-moon shape at the base of your nail and add geometric lines or shapes above it.
- Ombre Geometric: Create a colored geometric shape over a softly blended ombre base.
- Matte Finish: Swap your shiny top coat for a matte top coat for a modern, velvety look. Geometric shapes pop beautifully with a matte finish.
- Glitter Accents: Add a touch of glitter polish to specific geometric shapes or lines for a bit of sparkle.
Tips for Clean Lines and Precision:
- Thin Coats: Always apply thin coats of polish. This prevents bulkiness, especially around tape, and dries faster.
- Steady Hand: When working freehand or with tape, try to rest your wrists or elbows on a stable surface to minimize hand tremors.
- Clean Up Brush is Your Friend: Keep a small brush dipped in nail polish remover handy for immediate touch-ups and sharpening edges.
- Practice on Nail Art Mats: Before applying to your nails, practice drawing lines and shapes on a silicone nail art mat or even plastic wrap to get a feel for the brush and polish.
- Let Layers Dry (Mostly): For regular polish, ensure layers are nearly dry before applying tape or the next color. For gel, cure each layer properly.
Geometric Nail Designs: Tool Comparison Table
Choosing the right tools can make a big difference in achieving your desired geometric nail art. Here’s a quick comparison of some common tools and their best uses:
| Tool | Primary Use in Geometric Art | Pros | Cons | Best For |
|---|---|---|---|---|
| Nail Art Brushes (Fine Liner) | Drawing thin lines, connecting dots, freehand shapes | Precision, control, versatility | Requires practice for steady hand, can be tricky with thick polish | Creating intricate patterns, fine details, freehand designs |
| Dotting Tools | Creating dots, outlines, small circles | Easy to use, consistent dot size | Limited to circles/dots unless used very creatively | Dot patterns, subtle designs, filling in small areas |
| Striping Tape | Creating straight lines, defining geometric sections | Guaranteed straight lines, sharp edges, easy to use | Can be tricky to apply perfectly (bubbles, lift), limited to straight lines | Creating clean lines, grids, borders, sharp geometric shapes |
| Nail Stencils (Vinyl) | Creating precise shapes (triangles, squares, etc.) | Perfectly uniform shapes, easy application | Limited to the shapes available on the stencil, can sometimes lift polish | Reproducing specific geometric shapes consistently |
| Toothpicks | Creating small dots, very fine lines (in a pinch) | Readily available, cheap | Limited precision, prone to breaking, polish can dry quickly on the tip | Temporary solution for dots or very small details |
Maintenance and Longevity for Your Manicure
Your geometric nail art is finally complete – now, let’s keep it looking fabulous! Proper care can extend the life of your stunning design.
Daily Care Tips:
Think of your nails like you

