Geometric nail design inspiration is all about clean lines, simple shapes, and eye-catching patterns. These stunning essentials are surprisingly easy to achieve, even for beginners, and offer endless creative possibilities to elevate your look. Let’s dive into the world of geometric beauty!
Are you ready to add some sharp style to your fingertips? Geometric nail designs are incredibly popular because they’re super versatile and look so polished. But sometimes, seeing those perfectly straight lines and crisp angles can feel a little intimidating if you’re new to nail art. Don’t worry! This guide is here to show you just how achievable and fun geometric nail art can be. We’ll break down everything you need to know, from basic shapes to creating stunning looks that will have everyone asking for your secrets. Get ready to transform your nails into works of art!
Discovering Geometric Nail Design: A Beginner’s Guide
Geometric nail designs are characterized by the use of basic geometric shapes like lines, squares, triangles, circles, and polygons. Think of it as drawing with polish! These designs are fantastic because they can be as simple or as intricate as you like. Whether you’re aiming for a minimalist vibe with a single thin stripe or a bold statement with a complex mosaic of shapes, geometric art offers a sophisticated and modern aesthetic.
Why Geometric Nails are Perfect for Beginners
You might think intricate patterns require a steady hand and years of practice, but that’s not always the case with geometric designs. Many of these looks rely on simple techniques and tools that are easy to master. Plus, the nature of geometric shapes means that even slight imperfections can often blend in or add to the artistic charm. It’s a fantastic way to build your confidence in nail art!
Here’s why geometric nail designs are a great starting point:
- Simplicity is Key: Many designs use just a few basic shapes and colors.
- Tool Flexibility: You don’t need fancy equipment to start. Simple striping tape or even a thin brush can do wonders.
- Forgiving Nature: Clean lines can be achieved with practice, but even slightly wobbly lines can look chic in a more abstract geometric piece.
- Endless Customization: Mix and match colors, shapes, and placements to create looks that are uniquely yours.
- Modern & Chic: Geometric designs always look sophisticated and on-trend.
Essential Tools for Geometric Nail Art
Before we jump into the fun designs, let’s get you equipped with the right tools. You might already have some of these at home!
Must-Have Tools
- Base Coat: Protects your natural nails and helps polish adhere better.
- Top Coat: Seals your design, adds shine, and extends wear.
- Nail Polish in Various Colors: Choose colors that complement each other or create a bold contrast.
- Thin Nail Art Brush (Striper Brush): Perfect for drawing fine lines and details. Look for one with a long, thin tip.
- Dotting Tools: Great for creating small dots that can form patterns or fill areas.
- Striping Tape (or Washi Tape): Invaluable for creating sharp, straight lines and geometric sections.
- Tweezers: Handy for placing small embellishments or manipulating tape.
- Nail Polish Remover & Cotton Swabs: For cleaning up mistakes. A fine-tipped brush dipped in remover is excellent for precision cleanup.
- Nail File & Buffer: To shape your nails and smooth the surface for a uniform canvas.
Optional but Helpful Tools
- Nail Stencils: Pre-cut designs that help create specific geometric shapes.
- Cuticle Pusher: To gently push back and clean up the nail bed area.
- LED/UV Lamp for Gel Polish: If you prefer gel polish for longer wear and faster drying.
Choosing the right tools can make a big difference! High-quality brushes can help you achieve those crisp lines more easily. For instance, a fine-tipped striper brush like those offered by brands known for nail art supplies can be a game-changer compared to a standard polish brush for intricate work.
Geometric Nail Design Inspiration: Stunning Essentials to Try
Now for the exciting part! Here are some foundational geometric nail design ideas that are perfect for beginners and can be adapted to your style. We’ll start with the simplest and build up!
1. The Minimalist Stripe
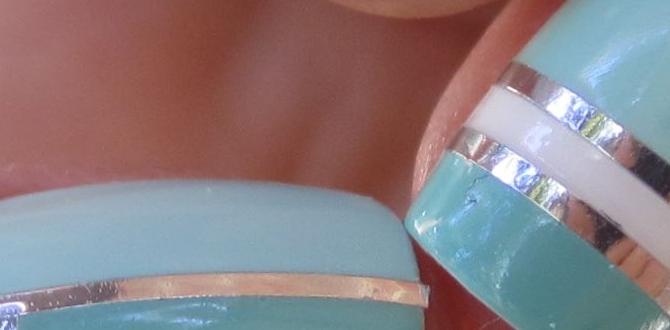
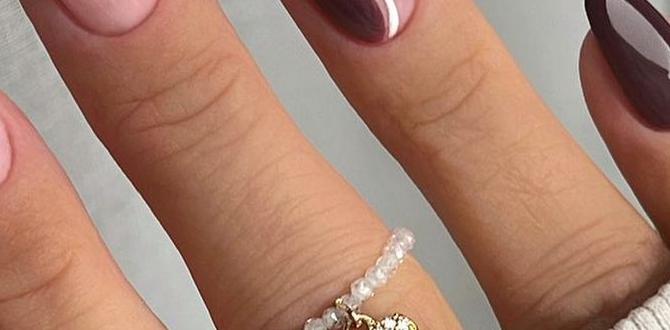
This is the ultimate entry-level geometric design. It’s chic, modern, and incredibly easy. You can create a single stripe, multiple parallel stripes, or crossing lines.
How to Create It:
- Apply your base coat and let it dry completely.
- Paint your nails with a solid color. Let it dry thoroughly.
- Use a thin nail art brush dipped in a contrasting polish color to carefully draw a straight line(s) either vertically, horizontally, or diagonally across your nail.
- For super sharp lines, use striping tape: apply the tape where you want the line to be, paint over it, let it dry partially, and carefully peel off the tape.
- Seal with a top coat once everything is dry.
2. Color Blocking with Angles
This design involves dividing your nail into sections of different colors, often using diagonal or triangular shapes. It’s bold and playful.
How to Create It:
- Start with a base coat and your first color. Let it dry.
- Apply striping tape to create a diagonal line across your nail.
- Paint the larger section with your second color.
- Once the second color is dry, carefully peel off the tape.
- For a three-color design, apply tape again to create a new section, paint it, let it dry, and remove the tape.
- Finish with a top coat.
3. The Polka Dot Grid (or Variation)
While not strictly geometric shapes, dots are fundamental building blocks. Arranging them in a grid creates a geometric pattern. You can also combine dots with lines.
How to Create It:
- Apply base coat and your main polish color. Let it dry.
- Using a dotting tool dipped in a contrasting color, create a series of evenly spaced dots across your nail. You can make them all the same size or vary them. If you’re feeling adventurous, use a ruler or tape to guide your dot placement for a perfect grid.
- Alternatively, create a few strategic dots and connect them with fine lines using a striper brush.
- Apply a top coat.
4. Triangle Power
Triangles are a strong geometric shape that can be used in many ways – as outlines, filled shapes, or even as accent nail art.
How to Create It (Simple Triangle Accent):
- Paint your accent nail with a base color.
- Once dry, use a fine brush and a contrasting color to paint an upside-down triangle at the base of your nail (near the cuticle).
- You can fill it in or leave it as an outline.
- Let it dry and apply a top coat.
How to Create It (Striped Geometric Design):
- Paint your nail with a base color. Let it dry.
- Use striping tape to create two diagonal lines that meet at a point (forming a large triangle shape on your nail). You might want to leave the tip empty or fill it with a different color.
- Carefully paint the exposed section(s).
- Once dry, remove the tape.
- Finish with a top coat.
5. The Half-Moon Chic
Inspired by vintage styles, the half-moon manicure involves painting a semi-circle at the base of the nail. You can do this by leaving the base unpolished or by using a contrasting color.
How to Create It:
- Apply your base coat and first color. Let it dry.
- Use a circular stencil or guide (like the opening of a small bottle cap) or freehand draw a semi-circle along your cuticle line with a fine brush.
- Fill in the semi-circle with a contrasting color.
- Alternatively, use striping tape to create the boundary of the half-moon.
- Let it dry and apply a top coat.
6. The Block and Line Combo
Combine solid colored blocks with delicate lines for a dynamic look. This can be as simple as one block and one line, or a more intricate arrangement.
How to Create It:
- Paint your nail a solid color. Let it dry.
- Use striping tape to section off a part of your nail (e.g., a corner or a horizontal band).
- Paint the taped-off section with a second color. Once dry, remove the tape.
- Then, use a fine brush to draw thin lines connecting your colored blocks, or add single lines to accent the design.
- Seal with a top coat.
7. Negative Space Geometric Art
Negative space designs are very trendy and surprisingly forgiving. This means leaving parts of your nail bare (natural or with just a clear coat) and adding geometric elements to the exposed areas.
How to Create It:
- Apply a clear base coat or a very sheer nude polish. Let it dry.
- Use striping tape to create your desired geometric pattern directly on the nail.
- Paint over the taped sections with your chosen colors, leaving the taped-off areas bare.
- Once the polish is dry, carefully remove the tape.
- Apply a clear top coat over the entire nail to seal everything and add shine.
Achieving Perfect Lines: Tips for Precision
Crisp, clean lines are the hallmark of great geometric nail art. Here are some pro tips to help you achieve them:
- Work on Dry Polish: Always ensure your base color is completely dry before adding lines or tape. This prevents smudging.
- Thin Coats are Best: Apply polish in thin, even coats. Thick polish can lead to smudging and uneven lines when tape is applied and removed.
- Steady Your Hand: Rest your wrists on a flat surface for stability. You can also rest your pinky finger on your desk or the table while you paint.
- Don’t Load Your Brush Too Much: For brushes, load just a small amount of polish. Wipe off any excess on the rim of the bottle or a palette.
- Use Quality Tape: Nail art striping tape is designed to adhere well and peel off cleanly without lifting polish (when applied correctly). Washi tape can sometimes work, but it’s thicker and can be trickier.
- Patience with Tape Removal: Peel tape off slowly and at a slight angle. If you’re worried about lifting polish, wait for the polish to be mostly dry but not fully hardened.
- Clean Up Mistakes Immediately: Keep a small brush (like a liner brush or even an old, clean makeup brush) dipped in nail polish remover handy. Gently swipe away any wobbly lines or accidental marks while the polish is still wet.
For more advanced techniques, consider exploring fine art brushes from reputable beauty supply stores. Even a slightly better brush can make a noticeable difference in your ability to control the flow of polish.
Geometric Nail Design Color Palettes
The color choices can truly make or break a geometric design. Here are some popular and effective color palette ideas:
Classic & Sophisticated
- Black, White, and Gold/Silver
- Nude, White, and Rose Gold
- Navy Blue and Creamy White
Bold & Playful
- Primary Colors (Red, Blue, Yellow) with Black or White
- Bright Pink, Teal, and Yellow
- Deep Burgundy, Emerald Green, and Mustard Yellow
Modern & Muted
- Pastel Pink, Mint Green, and Lavender
- Grey Tones (light to dark) with a hint of metallic
- Earth Tones: Terracotta, beige, olive green
Pro Tip: Start with 2-3 colors for your first few designs. This keeps it manageable and ensures a cohesive look. Most geometric designs look fantastic with a neutral base and a pop of a contrasting color.
Table: Common Geometric Shapes and Their Nail Art Potential
Let’s look at how fundamental shapes can be translated into stunning nail art.
| Geometric Shape | Nail Art Application Examples | Beginner Friendliness |
|---|---|---|
| Lines (Straight, Dashed, Wavy) | Single stripe accent, parallel stripes, grid patterns, connecting dots. | Very High – Easy to draw with brush or tape. |
| Squares/Rectangles | Color-blocked sections, creating borders, abstract pixel-like designs. | High – Achievable with tape or careful freehand painting. |
| Triangles | Accent nail tip, chevron patterns, geometric outlines, segmented designs. | High – Tape is excellent for creating sharp triangle edges. |
| Circles/Dots | Polka dots (patterned or random), creating small accent circles. | High – Easy with dotting tools or the tip of a pen/skewer. |
| Polygons (e.g., Hexagons) | More complex mosaic patterns, outlined shapes filled with different colors. | Medium to High – Can be tricky freehand; stencils or precise taping can help. |
Creative Placement and Variations
Don’t limit yourself to just one nail! Geometric designs can be applied across all nails in a uniform way, or you can create a unique pattern on each nail for a more artistic statement.
- Accent Nail Focus: Choose one nail (usually the ring finger) to feature a more intricate geometric design while keeping the others simple (e.g., solid color or a single stripe).
- Full Nail Coverage: Cover all your nails with the same geometric pattern for a strong, cohesive look.
- Asymmetrical Designs: Play with asymmetry! Have a diagonal line start from one corner on one nail and from the opposite corner on another.
- Combining Geometric Elements: Mix straight lines with dots, or combine triangles with squares on the same nail or across different nails in a set.
- 3D Geometric Accents: For the adventurous, small rhinestones or studs can be strategically placed to create 3D geometric shapes.
Consider looking at resources like the National Institutes of Health (NIH) for general beauty and skin health information which indirectly supports nail health. While they don’t offer nail art tutorials, understanding nail plate health through reputable sources is always a good foundation for any nail art endeavor.
FAQs About Geometric Nail Designs
Q1: What is the easiest geometric nail design for beginners?
The easiest design is the minimalist stripe. Using striping tape to create one or two straight lines horizontally, vertically, or diagonally is very forgiving and looks super chic!
Q2: Do I need special tools for geometric nail art?
Not necessarily! While tools like thin nail art brushes and striping tape make it easier and more precise, you can start with basic polish, a toothpick or skewer for dots, and even regular Scotch tape (though nail art tape is better) for lines.
Q3: How do I get really straight lines without using tape?
The key is practice and a steady hand. Rest your wrists, use a thin brush, and load it with just a small amount of polish. Paint in one smooth motion if possible. Don’t be afraid to use a small brush dipped in nail polish remover for precise clean-up of any wobbles.
Q4: Can I combine different geometric shapes in one design?
Absolutely! Mixing shapes like lines, triangles, and dots can create a dynamic and unique look. Start simple by combining just two shapes, like a few dots connected by lines.
Q5: How long do geometric nail designs usually last?
This depends on the polish used and your top coat. With a good quality base coat, a well-applied solid color, and a strong, shiny top coat, most geometric designs can easily last 5-7 days, especially if you avoid harsh chemicals and excessive washing. Using gel polish will significantly extend wear time.
Q6: What kind of nail polish is best for geometric designs?
Standard nail polish works perfectly fine, especially for beginners. If you want designs that last longer and have a super smooth finish (which is great for geometric patterns), gel polish cured under a UV/LED lamp is an excellent option. However


