Create stunning geode slice nail art with crystals for that essential sparkle! This beginner-friendly guide breaks down the process, showing you how to achieve a glamorous, naturally beautiful look right at home. Get ready for nails that shimmer and shine with breathtaking geode-inspired designs.
Have you ever seen those mesmerizing nail designs that look like slices of real geode crystals, sparkling with embedded gems? They look so intricate and fancy, right? Maybe you’ve thought, “There’s no way I can do that myself!” Well, surprise! With a few simple steps and the right materials, you can totally rock this trend. Geode slice nails add a touch of natural luxury and a whole lot of sparkle to your fingertips. This tutorial is designed to make it super easy, even if you’re new to nail art. Get ready to make your nails shine like never before!
What’s Special About Geode Slice Nail Art?
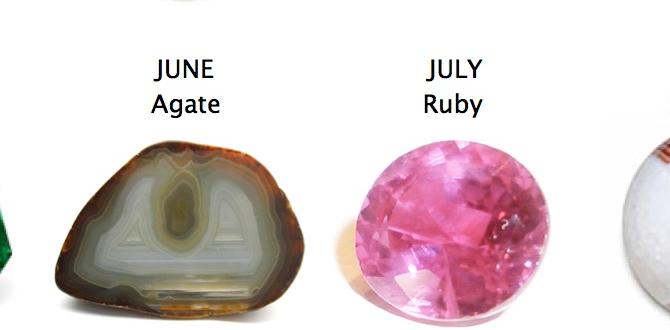
Geode slice nail art is all about capturing the raw beauty of natural geodes. These stunning rocks, when cracked open, reveal dazzling crystal formations in a rainbow of colors. Nail artists replicate this effect by creating layered, translucent designs on the nails that mimic the swirling patterns and crystalline structures found inside geodes. The “slice” part comes from making the design look like a cross-section of a geode. Then, we add crystals to amplify that natural sparkle and make those geode patterns pop! It’s a design that’s both elegant and a little bit wild, reflecting the unique beauty of nature.
Why You’ll Love Geode Slice Nails
Unique & Stylish: No two geode nails are ever the same, ensuring a totally custom look.
Dazzling Sparkle: The combination of gel colors and strategically placed crystals create incredible shine.
Versatile: This design works with a wide range of color palettes, from soft pastels to bold jewel tones.
Achievable: With this guide, you’ll find it’s simpler than it looks to create this stunning effect.
Essential Tools and Materials
Before we dive into the magic, let’s gather our supplies. Don’t worry, most of these are standard nail art items you might already have, or they’re easy to find!
- Base Coat: To protect your natural nails and help polish adhere.
- Top Coat: For a shiny, protective finish.
- Gel Polish Colors: You’ll need a few translucent shades. Think milky white, light grey, soft pink, or even pale blues to mimic crystal layers.
- Opaque Gel Polish: A darker, opaque color for the outer edges of your geode slice (e.g., deep purple, black, or dark grey).
- Gold or Silver Foil Flakes: For that authentic geode shimmer.
- Nail Art Brush: A thin, precise brush for creating lines and details.
- Dotting Tool: For placing small dots of color and crystals.
- Crystals/Rhinestones: Choose various sizes for dimension. Clear or AB (Aurora Borealis) crystals work beautifully.
- Nail Glue or Builder Gel: To secure your crystals.
- UV/LED Nail Lamp: Essential for curing gel polish.
- Isopropyl Alcohol (90% or higher): For cleaning the nail and removing the sticky layer.
- Lint-free Wipes: To avoid leaving fuzzy bits on your nails.
- Tweezers: For picking up and placing small crystals and foil flakes precisely.
Step-by-Step Geode Slice Nail Art Tutorial
Ready to create some magic? Follow these steps, and you’ll have stunning geode nails in no time!
Preparation is Key!
1. Cleanse your nails: Start with clean, dry nails. Remove any old polish.
2. Shape and buff: File your nails to your desired shape and gently buff the surface to create a smooth canvas for the polish.
3. Apply base coat: Apply a thin layer of base coat and cure it under your UV/LED lamp according to the product instructions. This is crucial for gel polish longevity.
Creating the Geode Layers
4. First translucent layer: Apply your lightest translucent gel polish (like milky white) all over the nail. Cure it. This forms the base of your geode.
5. Second translucent layer: Apply another translucent color (e.g., light grey or pale pink) over about two-thirds of the nail, leaving a small section of the first color showing near the cuticle. Don’t aim for perfect coverage; we want a swirled, layered look. Cure.
6. Third translucent layer (optional): If you want more depth, add a third translucent shade (like a soft blue or lavender) in smaller sections, overlapping your previous colors slightly. Cure. Remember, the idea is to build soft, blended layers.
7. Adding the outer edge: Using your opaque gel polish and a fine nail art brush, paint a curved line around the outer edge of the nail, mimicking the natural rock formation of a geode slice. You can make this line slightly uneven for a more realistic look. Cure.
Defining the Geode Veins
8. Cracking the code: With a very thin brush and a slightly darker shade of your translucent gel (or even your opaque edge color), draw thin, irregular lines that branch out from the outer edge, moving towards the center. Think of natural crystal veins. You can also use a bit of black or dark grey gel for sharper veins. Cure.
9. Adding shimmer: While the last gel layer is still wet (or after curing and applying a thin layer of top coat that you’ll then wipe the sticky layer off from), artfully place small gold or silver foil flakes onto the wet gel. This adds that authentic geode sparkle and texture. Cure very well If you applied them on a cured layer.
The Sparkle Factor: Crystals!
10. Crystal placement: Now for the fun part! Using your dotting tool or tweezers, pick up your chosen crystals. You can place them strategically along the veins you created, in the center where the layers meet, or around the outer edge to mimic crystal clusters. Think about creating a focal point.
11. Securing the bling: Apply a small dot of nail glue or builder gel where you want each crystal to sit. Gently press the crystal into the adhesive. If using builder gel, cure the nail immediately. For nail glue, allow it to dry completely.
The Finishing Touch
12. Sealing the design: Apply a generous layer of top coat over the entire nail, carefully going around the edges of the crystals to secure them. Make sure to cap the free edge of your nail to prevent lifting. Cure under the lamp.
13. Final clean-up: Wipe off the sticky inhibition layer with isopropyl alcohol and a lint-free wipe.
And voilà! You’ve created beautiful geode slice nail art with essential sparkle.
Color Palette Inspiration for Geode Nails
The beauty of geode nail art is its adaptability. You can create a geode effect in almost any color scheme! Here are a few ideas to get your creative juices flowing:
| Geode Style | Translucent Colors | Opaque Edge Color | Accent Color/Foil | Crystal Suggestion |
|---|---|---|---|---|
| Classic Amethyst | Soft Purple, Lavender, Pale Lilac | Deep Violet or Black | Silver Foil Flakes | Clear or Amethyst-colored Crystals |
| Rose Quartz | Milky White, Pale Pink, Soft Peach | Dusty Rose or Nude Pink | Rose Gold Foil | Rose Quartz or Clear Crystals |
| Agate Blue | Sky Blue, Teal, Milky White | Navy Blue or Dark Teal | Silver Foil | Clear or Light Blue Crystals |
| Emerald Jungle | Deep Forest Green, Emerald, Lime Green | Black or Dark Green | Gold Foil | Emerald or Clear Crystals |
| Crystal Clear | Clear Gel, White, Pale Grey | Any Opaque Color (e.g., Magenta, Teal) | Silver or Gold Foil | Clear or AB Crystals |
Pros and Cons of Geode Slice Nail Art
Every nail art trend has its upsides and challenges. Here’s a quick look at what to expect with geode slice designs:
Pros:
- Visually Stunning: The intricate patterns and sparkle are eye-catching and sophisticated.
- Unique Personalization: The design process allows for infinite customization in color and pattern.
- Trendy Appeal: Geode and crystal designs are very popular in the nail art world.
- Builds Nail Art Skills: Practicing layered gels and detail work improves your overall nail artistry.
- Adds Glamour: Instantly elevates any manicure for special occasions or everyday fabulousness.
Cons:
- Time-Consuming: Layering gels and placing crystals can take longer than a regular polish application.
- Requires Specific Tools: You’ll need gel products, a lamp, and fine brushes, which might be an initial investment.
- Potential for Bulkiness: If too many crystals or thick layers of gel are used, nails can feel bulky. Careful application is key.
- Practice Needed: Achieving clean, realistic veins might take a few tries.
Tips for Long-Lasting Geode Nails
To make sure your beautiful geode slice nails stay sparkling for as long as possible, keep these tips in mind:
- Proper Nail Prep: Ensure your natural nails are clean, dry, and free of oils before starting. Roughing up the nail surface slightly with a fine-grit buffer helps gel adhesion.
- Thin Gel Layers: Apply gel polishes in thin, even coats. Thick layers can lead to improper curing and lifting.
- Cure Completely: Always cure each gel layer under your UV/LED lamp for the instructed time. Incomplete curing is a common cause of gel polish failure. For detailed information on UV/LED lamp technology and curing times, you can refer to resources like those from nail industry associations or reputable beauty supply manufacturers, often found on their specialized websites explaining the science behind UV curing.
- Seal the Edges: Don’t forget to “cap” the free edge of your nail with your base coat, color layers, and especially your top coat. Running your brush along the tip prevents chipping and peeling.
- Crystal Security: Use a strong nail glue or builder gel for crystals. Ensure they are fully encased once the top coat is applied.
- Avoid Harsh Chemicals: Wear gloves when doing chores like washing dishes or cleaning with harsh chemicals, as these can break down the gel and cause it to lift, especially around the edges.
- Gentle Maintenance: If your nails feel like they’re catching on something, resist the urge to pick or peel. This can damage the gel and your natural nail.
Frequently Asked Questions About Geode Slice Nail Art
Here are some common questions beginners have about creating geode slice nail art:
Q1: Can I do geode slice nail art with regular nail polish?
While you can try to mimic the look with regular polish by layering colors and using fine brushes, it won’t have the same depth, shine, or longevity as gel polish. Geode art relies heavily on the translucent properties and self-leveling capabilities of gel, which are difficult to achieve with standard polish. Crystals also adhere much better and more permanently to gel.
Q2: What if I don’t have many translucent gel colors?
No worries! You can create translucency by mixing a small amount of your opaque gel polish with a clear builder gel or a clear top coat. This also allows you to customize your shades. Start with a 9:1 ratio of clear to colored gel and adjust as needed for your desired opacity.
Q3: How do I make the geode veins look realistic?
Practice is key! Use a very fine detail brush and paint thin, irregular lines. Don’t aim for perfect symmetry. Look at pictures of real geodes for inspiration. You can also try using a slightly darker shade of your translucent color, or even a touch of black or dark grey gel blended carefully, for sharper contrast.
Q4: My crystals keep falling off. What am I doing wrong?
This usually comes down to improper application. Make sure you’re using sufficient nail glue or builder gel to secure the crystal. After applying the crystal, it’s crucial to then apply your top coat carefully, making sure to go around the base and sides of the crystal to lock it in place. Cap the edge of the nail with top coat too.
Q5: How can I achieve the swirled geode effect?
The swirled effect comes from layering your translucent colors strategically. Apply one translucent color, cure, then apply the next color in sections, slightly overlapping the first. Don’t over-blend. The goal is distinct but softly merging layers. You can use a dotting tool to gently swirl the edges where two colors meet before curing, but be careful not to muddy the colors.
Q6: Is it safe to use builder gel for crystals?
Yes, builder gel is an excellent choice for securing larger or heavier crystals. It provides a strong, durable base and can help encase the crystal for extra security and a smoother finish. Just be sure to cure it thoroughly under your lamp, just as you would with gel polish.
Conclusion
There you have it! Geode slice nail art with crystals is an achievable and incredibly rewarding design that brings a touch of natural wonder and dazzling sparkle to your fingertips. By following these steps, gathering your essential tools, and embracing a little creativity, you can transform your nails into miniature works of art. Don’t be afraid to experiment with different color combinations and crystal placements until you find your perfect geode-inspired look. So grab your polishes, your lamp, and get ready to let your nails shine with that essential, beautiful sparkle. Happy nailing!


