Gender Reveal Nail Designs: Essential & Stunning – Reveal Your Little One’s Gender with Gorgeous Manicures! Discover easy tips and creative ideas for breathtaking gender reveal nails that celebrate your special moment.
Getting ready for a baby is such an exciting time! One of the most fun traditions is the gender reveal party. And what better way to add a pop of personality and style to your celebration than with some adorable gender reveal nail designs? Whether you love subtle hints or bold statements, there’s a perfect manicure waiting for you. Tying the knot before you get to the pink or blue? We’ve got you covered with simple ideas that anyone can do, even if you’re just starting your nail art journey. Let’s dive into creating some memorable nails for your big reveal!
Why Gender Reveal Nails Are a Must-Have
Gender reveal parties are all about anticipation and joy. Your nails are like a tiny canvas to express that excitement! They’re a unique way to participate in the fun and create lasting memories, especially in photos. Plus, they’re a super easy way to feel festive as you await the big moment. Imagine cutting the cake or popping the confetti – your hands will be front and center!
Think about it: the focus will be on your pregnancy journey, and your nails are a beautiful, subtle way to contribute to the narrative of the day. They allow you to express your personal style while embracing this beautiful milestone. Many moms-to-be feel a special connection with their nails, transforming them into a personal expression of their pregnancy journey. It’s a small detail that can make a big impact on your photos and your overall celebration experience.
Choosing Your Color Palette: The Foundation of Your Design
Before we get to the dazzling designs, let’s talk colors! The classic choices for gender reveals are pink and blue, but you can get creative! Think about:
- Classic Pink & Blue: Timeless for a reason! Perfect for a traditional reveal.
- Pastel Hues: Soft pinks, baby blues, mint greens, or lavender can be beautiful and subtle.
- Gold & Silver: These metallic shades add a touch of elegance and can be used as accents or full colors.
- White or Nude Base: A neutral base can make brighter accent colors pop.
- Rainbow Accents: If you’re feeling playful, incorporate small rainbow elements.
Consider the overall theme of your party too. Are you going for something whimsical, elegant, or modern? Your color choices will set the tone for your entire nail design.
Essential Tools for Your DIY Gender Reveal Manicure
You don’t need a professional salon to create stunning gender reveal nails! With a few basic tools, you can achieve salon-worthy results at home. Here’s what you might need:
- Nail File & Buffer: To shape and smooth your nails.
- Base Coat: Protects your natural nails and helps polish adhere better.
- Top Coat: Seals your design and adds shine for longevity.
- Nail Polish Colors: Your chosen palette for the reveal.
- Dotting Tools or Toothpicks: For creating dots and small details.
- Thin Nail Art Brush: For lines, swirls, and intricate patterns.
- Stencils or Nail Stickers (Optional): For easy-to-achieve shapes and designs.
- Cuticle Oil: To keep your cuticles hydrated and healthy.
Having the right tools makes all the difference. A good quality base and top coat are game-changers for making your manicure last. And don’t underestimate the power of a simple toothpick for creating perfect little dots!
Beginner-Friendly Gender Reveal Nail Designs to Try
Ready to get creative? These designs are perfect for beginners and truly stunning!
1. The Subtle Speckle
This is an effortless yet effective design. You’ll show off your surprise color without being too obvious!
How-To Steps:
- Start with a clean, shaped nail. Apply your base coat and let it dry completely.
- Apply two thin coats of a neutral color like nude, white, or a very light grey. Let each coat dry thoroughly.
- Dip a clean, dry toothbrush or a stiff brush into your chosen reveal color (pink or blue).
- Hold the brush a bit away from your nail and flick the bristles with your thumb to create a speckled effect. Aim for a light scattering of color.
- Let the speckles dry.
- Apply a clear top coat to seal everything in and add shine.
Pro Tip: If you don’t have a toothbrush, you can achieve a similar effect by lightly dabbing a sponge (like a makeup sponge) onto the polish and then dabbing it onto your nail. You can also wrap a bit of saran wrap around your finger, dab it in polish, and gently press it onto the nail for a textured, speckled look.
2. The Delicate Dip
A simple gradient or ombre effect can be incredibly chic and hint at the surprise without giving it away.
How-To Steps:
- Apply your base coat and let it dry.
- Paint your nails with a neutral or a very light, soft color, and let it dry.
- Take a makeup sponge or a textured applicator. Apply a small amount of your reveal color (pink or blue) onto the sponge.
- Gently dab the sponge onto the tips of your nails, blending downwards slightly to create a gradient effect. You can build up the color intensity gradually.
- Repeat on all nails, ensuring each layer is slightly dry before adding more.
- Once you’re happy with the gradient, let it dry completely.
- Apply a shimmering top coat or a regular clear top coat.
Why it works: The subtle transition of color is visually pleasing and intriguing. It’s not an outright reveal but a beautiful, artistic suggestion of what’s to come. This technique works exceptionally well with soft pastel shades for a dreamy feel.
3. The Polka Dot Peek-a-Boo
Playful and sweet, polka dots are always a fun choice. This design strategically places a hint of the reveal color.
How-To Steps:
- Apply base coat, let dry.
- Paint nails with a neutral or light base color (e.g., white, ivory, light grey). Let dry completely.
- Using a dotting tool, toothpick, or the tip of a fine nail art brush, carefully place a few dots of your chosen reveal color (one on each nail, or a small cluster).
- Alternatively, for a more integrated look, use the reveal color as your base and add tiny white or nude dots on top.
- Let the dots dry thoroughly.
- Apply a clear or sparkling top coat.
Designer’s Note: For an ultimate “guess if you can” approach, use the neutral color as your base and place just ONE tiny dot of pink or blue on the ring finger of each hand. It’s a tiny secret shared with your nails!
4. The Accent Nail Surprise
This is one of the easiest yet most impactful designs. You put the main color reveal on just one nail!
How-To Steps:
- Apply base coat and let dry.
- Paint all nails on one hand (or both!) with a neutral or a pre-reveal color (like white, silver, or a light pastel). Let them dry.
- On one accent nail (typically the ring finger), paint it entirely with your reveal color (pink or blue). Apply two coats for opacity.
- Let the accent nail dry completely.
- Apply a top coat over all nails to protect the design and add shine.
Style Tip: You can take this a step further by adding a simple design to the accent nail, like a tiny heart or a small stripe in the neutral color, for an extra touch of flair.
Intermediate Gender Reveal Nail Designs for More Flair
Feeling a little braver with your nail brush? These designs add a bit more artistry.
5. The Ombre Reveal Fade
A full gradient across all nails provides a beautiful, sophisticated reveal.
How-To Steps:
- Apply base coat and let dry.
- Paint all nails with a light, neutral shade (e.g., baby pink, powder blue, white). Let dry.
- On a cosmetic sponge, create a stripe of your desired reveal color (pink or blue). Next to it, create a stripe of your base color.
- Gently dab the sponge onto the tips of your nails, blending the colors together to create a smooth ombre effect.
- Repeat dabbing to build up the color saturation and blend. You may need to reapply polish to the sponge multiple times.
- Once dry, apply a dazzling top coat, possibly with glitter, to enhance the effect.
Tip for Smoothness: A slightly damp make-up sponge can create a softer transition. Experiment with dabbing lightly for a subtler fade, or pressing a bit harder for more color intensity.
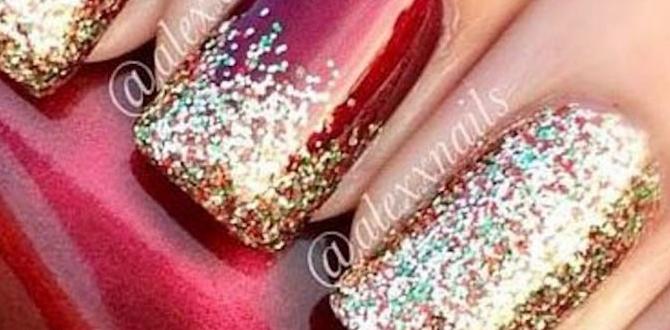
6. The Glitter & Glam Reveal
Who doesn’t love a little sparkle? Glitter is perfect for celebrations!
How-To Steps:
- Apply base coat and let dry.
- Paint all nails with your chosen reveal color (pink or blue), or use a neutral base like white or nude if you want the glitter to be the star.
- While the polish is still wet (or use a glitter top coat method), apply glitter. You can do this by:
- Dipping your brush into glitter polish and applying it over your base color.
- Using a separate glitter polish and applying it strategically (tips, gradient, or full coverage).
- For a more intense glitter look, use a glitter pigment powder mixed with a clear top coat or applied over a tacky layer of color.
- Let everything dry. Glitter can take a little longer.
- Apply a thick, smooth top coat to encapsulate the glitter and prevent it from feeling rough.
Glitter Placement Ideas:
- Full Glitter Nail: Cover your entire nail with glittering pink or blue.
- Glitter French Tip: Apply a regular French tip and then add a line of glitter polish on top of the white tip.
- Glitter Gradient: Apply glitter gradually from the tip of your nail downwards.
7. The Statement Stripe
A bold stripe can be very modern and stylish, subtly hinting at the gender.
How-To Steps:
- Apply base coat and let dry.
- Paint all nails with a contrasting color. For example, if you choose pink and blue for your stripe, use white or nude as the base.
- Once the base is dry, use a striping tape or a very fine nail art brush to create a clean stripe in your reveal color (pink or blue) across the nail. You can place it horizontally, vertically, or even diagonally.
- If using striping tape, apply it carefully over the dried base coat, paint the stripe color over it, and then carefully peel off the tape while the paint is still wet.
- Let the stripe dry completely.
- Apply a clear top coat.
Tip for Precision: Ensure your base color is completely dry before adding the stripe. For a super crisp line with a brush, load a small amount of polish onto the tip and draw steadily. A thin layer is better than a thick one that might smudge.
Advanced Gender Reveal Nail Art Techniques (For the Ambitious!)
If you’re feeling confident and creative, why not try something a little more intricate?
8. The Hidden Message
This is a fun reveal! The color is hidden until you do something special.
How-To Steps:
- Start with a base coat on clean, dry nails.
- Apply a layer of your chosen reveal color (pink or blue). Let it dry.
- Now, apply a layer or two of white or nude polish over the reveal color. This will completely hide the underlying pink or blue.
- Once the top layer is dry, you can either:
- Scratch Reveal: Use a fine tool (like a toothpick or a special nail art stylus) to lightly scratch away a small section of the white/nude polish to reveal the pink/blue underneath.
- Water Reveal: For a truly unique effect, you can use a specific type of polish or technique where applying water (or another liquid) causes the outer layer to become sheer or bubble away, revealing the color beneath. This often involves specialized products.
- Seal with a top coat.
Caveat: The “water reveal” is less common with regular nail polish and often requires specialized thermochromic (color-changing) polishes or specific techniques that might be tricky for beginners without practice. The scratch-off method is more achievable with standard supplies. Research thermochromic nail polish if you’re interested in that effect!
9. The Tiny Confetti or Sprinkle
This is a playful and very “party” vibe. Imagine tiny pieces of confetti on your nails!
How-To Steps:
- Apply base coat and let dry.
- Paint your nails with a neutral color like white or nude. Let dry.
- Using tweezers or a damp brush, carefully place tiny pieces of colored confetti or very small glitter shapes onto your nails. You can choose pink or blue confetti, or a mix of both for an intriguing look.
- Arrangement Ideas:
- Random Sprinkle: Scatter confetti randomly across the nail.
- Concentrated Sprinkle: Group confetti at the nail tip or cuticle area.
- Single Confetti: Place just one or two pieces strategically on one accent nail.
- Once confetti is in place, gently press it down.
- Apply a thick, generous top coat to smooth over the confetti and secure it. You might need two layers of top coat.
Where to Find Confetti: You can find nail art confetti specifically designed for this purpose at most beauty supply stores or online retailers. Look for tiny, flat shapes in vibrant colors.
Pro Tips for Perfect Gender Reveal Nails
Even with the simplest designs, a few tricks can make your manicure look like it came straight from a salon:
- Prep is Key: Always start with clean, dry nails. Push back your cuticles gently and buff your nails for a smooth surface. This makes a huge difference in how polish applies and lasts.
- Thin Coats are Better: Applying multiple thin coats of polish is better than one thick coat. It dries faster and is less likely to smudge or chip.
- Clean Up Mistakes: Keep a small brush or cotton swab dipped in nail polish remover handy. You can use it to clean up any polish that gets on your skin around the nail for a neat finish. For very precise clean-up, an old, fine-tipped eyeliner brush works wonders!
- Let it Dry (Really!): Patience is a virtue in nail art. Give each coat plenty of time to dry before moving on to the next step. Rushing can lead to smudges and ruined designs.
- Seal the Deal: A good quality top coat is your best friend. It adds shine and protects your design, making it last longer. Consider a quick-dry top coat if you’re short on time. For glitter or confetti designs, a thicker top coat helps smooth out the texture.
- Hydrate: Don’t forget cuticle oil! After your nails are completely dry (wait at least an hour for the top coat to fully cure), apply cuticle oil. It keeps your nails and the skin around them healthy and looking polished.
Gender Reveal Nail Colors & Symbolism Table
Here’s a quick guide to common color choices and what they can represent or how they can be used to hint at the reveal!
| Color | Symbolism/Hint | Best For |
|---|---|---|
| Classic Pink | Girl’s gender, sweetness, femininity | Direct reveal, soft accents |
| Baby Blue | Boy’s gender, calmness, strength | Direct reveal, subtle hints |
| Lavender/Lilac | Mystery, royalty, uniqueness | Intriguing neutral, sophisticated hint |
| Mint Green | New beginnings, freshness, spring | Gender-neutral, subtle and chic |
| Gold/Silver | Celebration, luxury, magic | Accent nails, glitter, elegant hints
|

