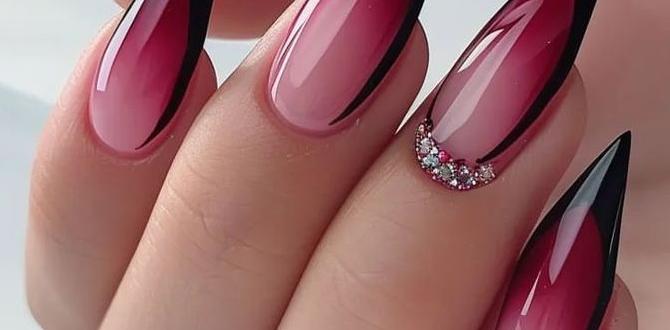
Futuristic metallic nail designs are your ticket to a dazzling, modern manicure. Easy to achieve with simple tools and techniques, these stylish looks add instant shine and edge to any outfit. Get ready to shine!
Hi nail lovers, Lisa Drew here from Nailerguy! Are you ready to add some serious sparkle and edge to your nail game? Futuristic metallic nail designs are all the rage, and for good reason. They’re eye-catching, sophisticated, and surprisingly easy to do yourself! Maybe you’ve seen these shiny, chrome, or holographic looks and thought they were too complicated for a DIY project. Well, I’m here to tell you that’s not the case at all! With the right steps and a little practice, you can create stunning metallic nails that will turn heads. Let’s dive in and make your nails the coolest part of your look!
Why Metallic Nails Are So “Now”
Metallic nails aren’t just a trend; they’re a statement. They bring a futuristic vibe that feels both edgy and elegant. Think sleek, polished chrome, dazzling holographic shimmers, and rich, deep metallics that catch the light with every move. These designs are incredibly versatile, working equally well for a night out, a special event, or even to add a touch of glamour to your everyday style. They’re known for their ability to elevate a simple outfit and convey confidence. Plus, the variety of finishes and colors means there’s a metallic nail look for everyone, no matter your personal style.
Getting Started: Your Essential Metallic Nail Toolkit
Before we jump into creating magic, let’s make sure you have everything you need. Don’t worry, you probably already have some of these items! The beauty of DIY nail art is that you can build your collection over time.
Here’s your must-have list for achieving amazing futuristic metallic nail designs:
- Base Coat: Essential for protecting your natural nails and helping polish adhere better.
- Top Coat: Seals your design, adds shine, and helps your manicure last longer.
- Metallic Nail Polish (or Chrome Powder): This is your star ingredient! You can use specialized metallic polishes or the super-popular chrome powders for an intense shine.
- Nail File and Buffer: For shaping your nails and creating a smooth canvas.
- Cuticle Pusher/Orange Stick: To gently push back and clean up cuticles.
- Cotton Balls/Pads: For cleaning nails and removing polish.
- Lint-Free Wipes: Crucial when using chrome powders to avoid fuzzy streaks.
- Your Choice of Applicator: For chrome powders, this is usually a special silicone brush or eyeshadow applicator.
- Rubbing Alcohol or Nail Prep Dehydrator: To ensure your nails are clean and oil-free for maximum polish adhesion.
- Optional: Nail Art Brushes, Stencils, Rhinestones: For adding extra details and dimension.
The Power of Preparation: Setting the Stage for Shine
A flawless metallic finish starts with flawless prep. This is arguably the most important step for any nail art, but especially for shiny, reflective designs.
Step 1: Clean and Shape
Start by removing any old nail polish. Then, use your nail file to shape your nails to your desired length and shape. Round, squoval, or almond shapes all work beautifully with metallic designs. Gently buff the surface of your nails to create a smooth surface, but don’t overdo it!
Step 2: Cuticle Care
Push back your cuticles gently with a cuticle pusher or orange stick. This makes your nail bed look longer and prevents polish from flooding the cuticle area, which is key for a clean, professional look.
Step 3: Cleanse Your Nails
Wipe each nail with rubbing alcohol or a nail prep dehydrator using a lint-free wipe. This removes any oils from your nails, ensuring your polish or powder will adhere perfectly. Let them dry completely. This step is critical for preventing lifting and ensuring longevity.
Futuristic Metallic Nail Designs: Genius Techniques for Beginners
Now for the fun part! Let’s explore some fantastic futuristic metallic nail designs that are totally achievable, even if you’re new to nail art.
Technique 1: The Classic Chrome Mirror Finish
This is the iconic futuristic look everyone loves! It’s all about that intense, reflective shimmer.
What You’ll Need:
- Base Coat
- Black or Dark Colored Gel Polish (cured)
- Chrome Powder (silver, gold, or iridescent are popular)
- Silicone Applicator Brush or Eyeshadow Sponge
- No-Wipe Top Coat Gel Polish
- UV/LED Nail Lamp
Step-by-Step Guide:
- Apply Base Coat: Apply a thin layer of your base coat and cure it under your UV/LED lamp according to the manufacturer’s instructions.
- Apply Black Gel Polish: Apply a thin layer of black or dark-colored gel polish. This deep base color makes the chrome powder pop even more. Cure it under the lamp. Apply a second coat if needed for full opacity and cure again.
- Apply Chrome Powder: This is where the magic happens! Take your silicone applicator brush or sponge and dip it into the chrome powder. Gently rub the powder all over the cured black gel polish. You’ll see the metallic, mirror-like finish start to appear. Keep rubbing until the entire nail surface is evenly coated and super shiny.
- Brush Off Excess: Use a clean, dry brush (a fluffy makeup brush works great) to gently sweep away any loose chrome powder from the nail and surrounding skin.
- Apply No-Wipe Top Coat: Apply a thin, even layer of a “no-wipe” gel top coat over the chrome powder. This is crucial! A regular top coat might smudge the chrome. Cure this layer under your lamp.
- Admire Your Shine: And voilà! You have a perfect, futuristic mirror chrome nail.
Technique 2: Metallic Ombre/Gradient
Create a seamless blend of metallic shades or a fade from metallic to a sheer color. This looks incredibly sophisticated.
What You’ll Need:
- Base Coat
- Metallic Nail Polishes (2-3 complementary colors)
- Makeup Sponge (fine-pored is best)
- Top Coat
- Cotton Balls/Pads, Cotton Swabs, and Cuticle Protector (optional) for cleanup
Step-by-Step Guide:
- Prep and Base Coat: Prepare your nails as usual and apply a base coat. Let it dry.
- Apply Base Color (Optional): For a softer fade, you can apply a sheer nude, white, or pastel polish on your nails and let it dry.
- Apply Metallic Polishes to Sponge: On your makeup sponge, paint stripes or dots of your chosen metallic polishes. If using two colors, paint one stripe next to the other. If using three, arrange them side-by-side. Work quickly!
- Dab onto Nail: Gently press the sponge onto your nail, starting from the cuticle area and dabbing upwards. The colors will transfer and blend. You might need to dab several times to build up the color intensity.
- Clean Up Edges: Use a small brush dipped in nail polish remover (or a cuticle protector pen) to clean up any polish that got on your skin.
- Seal with Top Coat: Once the polish is dry to the touch, apply a generous layer of top coat to seal the design and add shine.
- Let it Shine: Allow the top coat to dry completely.
Technique 3: Metallic Accents and Art
Use metallic polishes or powders to add pops of shine to a solid base color. This is super easy and effective.
What You’ll Need:
- Base Coat
- Solid Color Nail Polish or Gel Polish (choose a color that contrasts with your metallic)
- Metallic Nail Polish (liquid) OR Chrome Powder and Applicator
- Fine Detail Nail Art Brush OR Silicone Applicator/Sponge
- Top Coat (for liquid polish) OR No-Wipe Top Coat (for chrome powder)
- UV/LED Lamp (if using gel polish)
Step-by-Step Guide (using liquid metallic polish):
- Prep and Base Coat: Prepare nails and apply base coat.
- Apply Solid Color: Apply your chosen solid color polish and let it dry completely. Apply a second coat if needed for opacity.
- Create Metallic Details: Dip your fine detail brush into the metallic nail polish. You can create thin lines, dots, geometric shapes, or even freehand designs like a crescent moon at the cuticle.
- Add Accents: Alternatively, you can use a stencil with the metallic polish for perfect geometric patterns.
- Seal: Once your metallic accents are dry, apply a clear top coat over the entire nail.
Step-by-Step Guide (using chrome powder accents):
- Prep and Base Coat: Prepare nails and apply base coat and your solid color gel polish, curing each layer.
- Apply Chrome Powder to Areas: Apply a thin layer of regular gel top coat (not no-wipe) to only the areas where you want your chrome accent. Cure this for a much shorter time than usual – just enough to make it tacky, not fully dry. A 10-15 second cure is often enough, but check your gel brand.
- Apply Chrome Powder: Gently rub your chrome powder onto those tacky areas using your applicator. Brush off excess.
- Seal: Apply a “no-wipe” gel top coat over the entire nail, making sure to cap the edges. Cure under the lamp.
Beyond the Basics: Elevating Your Futuristic Designs
Want to take your metallic nails to the next level? Here are a few extra ideas:
- Holographic Chrome: Instead of a single metallic color, use holographic chrome powder for a rainbow-like effect that shifts with the light.
- Color Shift Metallics: These polishes and powders change color depending on the lighting and angle.
- Matte Top Coat: Apply a matte top coat over your metallic design for a unique, less shiny but still striking finish.
- Geometric Stencils: Use metallic polishes or powders with geometric stencils for sharp, clean lines. Stencils from places like Amazon are great for this.
- 3D Metallic Elements: Add metallic rhinestones, caviar beads, or small metallic charms for texture and dimension.
- Chrome Tips or Mismatched Nails: Try just chrome French tips, or make each nail a different metallic shade for a bold look.
Caring for Your Futuristic Manicure
To keep your dazzling metallic nails looking their best, a little care goes a long way:
- Wear Gloves: When doing household chores, wear gloves to protect your nails from harsh chemicals and water.
- Moisturize: Keep your hands and cuticles hydrated with a good cuticle oil and hand cream.
- Avoid Using Nails as Tools: Try not to use your nails to pry things open or scrape surfaces.
- Touch-Ups: If you notice any small chips or wear, you can sometimes carefully touch them up with a matching polish or top coat. For gel chrome, this might involve a bit more repair.
Troubleshooting Common Metallic Nail Mishaps
Even with the best intentions, things can sometimes go awry. Here are a few common issues and how to fix them:
| Problem | Possible Cause | Solution |
|---|---|---|
| Chrome powder looks dull or patchy. | Uneven application of powder, too much pressure, or not enough base gel/tacky layer. | Ensure your base is perfectly smooth. Rub powder gently in circular motions until even. For gel chrome, make sure the base gel top coat is tacky enough when powder is applied. Try a different applicator. |
| Chrome powder is smudging after top coat. | Used a regular top coat instead of “no-wipe” gel top coat. | Always use a dedicated “no-wipe” gel top coat over chrome powder. If you used a regular top coat and it smudged, you might need to remove it and reapply with a no-wipe top coat. |
| Metallic polish is streaky. | Polish is too thin, not enough coats, or brush strokes are too heavy. | Apply polish in thin, even coats. Allow each coat to dry completely. For some polishes, a quick, light brush stroke is best. A good base coat can also help. |
| Nail polish lifting or chipping quickly. | Nails weren’t properly prepped (oily surface), base coat/top coat not applied correctly, or not capping the edges. | Thoroughly cleanse nails with alcohol/dehydrator. Ensure base and top coats are applied evenly and cure properly. Always “cap” the free edge of your nail by painting the edge with your base, color, and top coats to seal it. You can find more info on nail prep at the Nail Care HQ. |
Frequently Asked Questions About Futuristic Metallic Nails
Q1: Can I achieve a chrome effect without gel polish?
Yes, you can! While gel polish provides the most intense, long-lasting chrome effect, you can get a shimmery metallic look with regular nail polish. You likely won’t get the mirror-like finish of chrome powder, but beautiful metallic polishes exist that give a great shine.
Q2: How long does a chrome manicure typically last?
When done with gel polish and a no-wipe top coat, a correctly applied chrome manicure can last 2-3 weeks, similar to a standard gel manicure. Regular polish metallic manicures will last much less, usually 3-7 days depending on care.
Q3: Is chrome powder safe for my natural nails?
When applied correctly over a base coat and sealed with a top coat, chrome powder itself is not in direct contact with your natural nail, making it safe. The safety of the manicure is more about the proper application and removal of the gel products used, and avoiding over-filing during prep or removal.
Q4: What colors do futuristic metallic nail designs come in?
The possibilities are vast! Classic silver and gold are popular, but you can find chrome powders and metallic polishes in iridescent shades (shifting through multiple colors), rose gold, bronze, blue, pink, purple, and even black chrome for a dark, moody shine.
Q5: Do I need a UV/LED lamp for all metallic nail designs?
You only need a UV/LED lamp if you are using gel nail polishes or gel “no-wipe” top coats, especially for the chrome powder technique. For simple metallic nail art using regular polishes, a lamp is not necessary.
Q6: How do I remove metallic gel manicures safely?
The safest way to remove gel chrome manicures is by soaking them off with acetone. You can file off the top coat first, then soak cotton balls in pure acetone, place them on the nails, wrap with foil, and let them sit for 10-15 minutes. Gently push off the softened gel with an orange stick. Avoid picking or peeling, as this can damage your natural nails.
Conclusion: Shine On with Your Metallic Masterpiece!
And there you have it! Futuristic metallic nail designs are not just for the salon; they are totally within your reach. Whether you’re aiming for that blindingly brilliant mirror chrome, a dreamy metallic gradient, or just a chic metallic accent, these techniques will help you create stunning looks. Remember, practice makes perfect, and the most important thing is to have fun with it and express your unique style. Your nails are a fantastic canvas for creativity, so don’t be afraid to experiment and let them shine. Go forth and create something dazzling!


