Futuristic Chrome Nail Designs 2025: Stunning Trends are here! Get ready for dazzling, eye-catching chrome manicures that blend sleek metallics with innovative designs for a truly futuristic vibe, perfect for any beginner wanting to elevate their nail game.
Dreaming of nails that look like they’ve stepped right out of a sci-fi movie? You’re not alone! Futuristic chrome nail designs are the hottest trend for 2025, offering a mirror-like shine that’s both bold and unbelievably chic. But sometimes, these shiny looks can seem a bit intimidating to recreate at home. Don’t worry! We’re going to break down exactly how you can achieve these stunning, space-age manicures with simple steps that even a beginner can follow. Get ready to dazzle!
What Are Futuristic Chrome Nail Designs?
Futuristic chrome nail designs are all about a high-shine, metallic finish that looks almost liquid or mirrored. Think of the sleek surfaces of spaceships, the metallic sheen of advanced robotics, or the iridescent glow of alien landscapes. For 2025, these designs are moving beyond a simple solid chrome. We’re seeing them combined with:
- Geometric patterns
- Holographic shifts
- Iridescent finishes
- Minimalist accents
- Abstract art
- 3D elements
The key is the reflective, almost otherworldly quality of the chrome, paired with modern and forward-thinking design elements. It’s a look that’s sure to turn heads and make a statement.
Why Are Chrome Nails So Popular for 2025?
Chrome nails have been a trend for a while, but 2025 is bringing a fresh, futuristic spin. This resurgence is thanks to several factors:
- Visual Impact: The mirror-like finish is incredibly eye-catching and photographs beautifully, making it perfect for social media.
- Versatility: While chrome itself is striking, it acts as a fantastic base for more intricate designs.
- Evolving Technology: New chrome powders and application methods are making it easier and more durable than ever.
- Celebrity Influence: Many celebrities and influencers are sporting chrome manicures, pushing the trend into the mainstream.
- Desire for Innovation: As we look towards the future, our fashion and beauty choices often reflect this sense of advancement and the extraordinary.
Essential Tools and Materials for Chrome Nails at Home
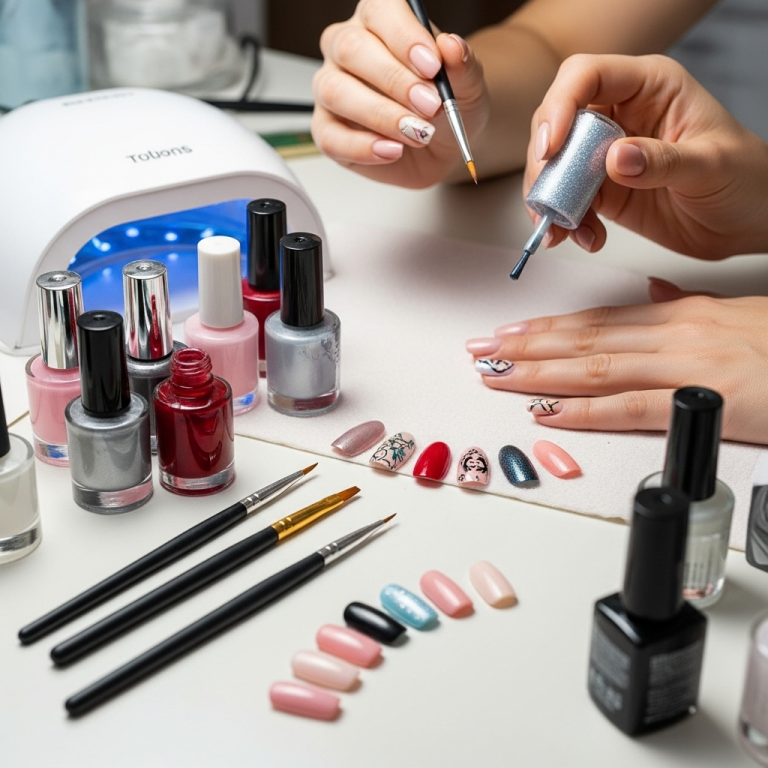
Getting that flawless chrome finish at home is totally doable with the right supplies. Don’t be intimidated by a few extra items; they make all the difference! Here’s what you’ll need to get started:
Must-Have Supplies:
- Base Coat: A good quality base coat is crucial for protecting your natural nails and ensuring smooth polish application.
- Gel Polish Colors: For chrome powder to adhere properly, you typically need to apply a no-wipe gel top coat. This creates a sticky surface for the powder. You can use regular polish, but gel offers a more durable and glossy finish that holds the chrome best.
- No-Wipe Gel Top Coat: This is essential. Regular gel top coats need to be wiped with alcohol after curing; a no-wipe version leaves a tacky layer that the chrome powder grips onto.
- Chrome Nail Powder: This is the star of the show! It comes in a variety of colors, from classic silver and gold to iridescent blues, pinks, and purples. You can find it in ultrafine, shimmering powders.
- Silicone Applicator Tool or Eyeshadow Sponge: These are perfect for smoothly buffing the chrome powder onto the nail. A soft silicone tool is often preferred for an even finish.
- UV/LED Nail Lamp: Gel polish needs to be cured under a UV or LED lamp. Make sure your lamp is powerful enough for your gel products.
- Buffer Block: A soft buffer is needed to gently smooth the nail surface before applying polish.
- Nail File: To shape your nails to perfection.
- Cuticle Pusher/Orange Stick: For neat cuticles, which are key to a professional-looking manicure.
- Acetone or Gel Remover: For cleaning up mistakes and removing polish.
- Lint-Free Wipes: For cleaning the nail surface and tools.
Optional, but Recommended:
- Chrome Powder Organizer: To keep your dazzling collection tidy.
- Brushes for Detail Work: For adding designs on top of or to your chrome base.
Step-by-Step Guide to Achieving Futuristic Chrome Nails
Ready to get your chrome on? Follow these simple steps for a salon-worthy finish. We’ll focus on the most popular method using gel polish and chrome powder, as it provides the best longevity and shine.
Step 1: Prep Your Nails
Proper nail prep is the foundation of any great manicure. It ensures your polish adheres well and lasts longer.
- Cleanse: Wash your hands thoroughly.
- Shape: File your nails into your desired shape.
- Cuticle Care: Gently push back your cuticles using a cuticle pusher or orange stick. Trim any excess dead skin if necessary, but be careful not to cut yourself!
- Buff: Lightly buff the surface of your nails with a buffer block. This removes any natural shine and creates a smooth surface for the polish to grip.
- Cleanse Again: Wipe your nails with a lint-free wipe dipped in acetone or alcohol to remove any dust or oils. This is a crucial step for gel polish adhesion.
Step 2: Apply Base and Color Coat (if using other colors)
Whether you’re going for a full chrome look or planning to add designs, starting with a good base is key.
- Base Coat: Apply a thin layer of your gel base coat and cure it according to the manufacturer’s instructions (usually 30-60 seconds under a UV/LED lamp). Don’t skip this!
- Color Coat (Optional): If you want a color under your chrome (e.g., black for a deeper chrome effect, or another color for a subtle undertone), apply your chosen gel polish color now and cure. You might need two coats for full opacity.
Step 3: Apply the No-Wipe Gel Top Coat
This is where the magic starts to happen. The no-wipe top coat creates the perfect slightly sticky surface for the chrome powder.
- Apply: Apply a thin, even layer of your no-wipe gel top coat over the entire nail, making sure to cap the free edge (paint along the tip of the nail to prevent lifting).
- Cure: Cure this layer under your UV/LED lamp until it’s fully cured but still slightly tacky. This tackiness is what the chrome powder will adhere to. Some brands might have a specific cure time for this step, so check the instructions.
Step 4: Buff the Chrome Powder
Now for the fun part – making your nails shine like a mirror!
- Load the Applicator: Dip your silicone applicator tool or sponge into the chrome nail powder. You don’t need a lot; a little goes a long way.
- Buff It On: Gently and firmly rub the powder over the tacky surface of the cured gel top coat. Work it in a circular or back-and-forth motion, ensuring full coverage. Continue buffing until the entire nail surface has a smooth, metallic, mirrored finish.
- Clean Up Edges: Use a small brush or cotton swab to clean any excess powder from around your cuticles and the sides of your nails before it settles.
Step 5: Seal Your Chrome Creation
To lock in that incredible shine and prevent chipping, a final top coat is essential.
- Top Coat: Apply another layer of your no-wipe gel top coat over the chrome powder. Again, ensure you cap the free edge. This seals the chrome and prevents it from rubbing off during daily activities.
- Cure: Cure this final layer under your UV/LED lamp for the recommended time.
- Final Touches: Once cured, your chrome nails are complete! You can apply cuticle oil to rehydrate your skin.
For more intricate futuristic designs, you’ll repeat some of these steps or add other elements after the initial chrome application and sealing.
Stunning Futuristic Chrome Nail Design Ideas for 2025
Ready to take your chrome game to the next level? These futuristic design ideas will inspire your next manicure.
1. The Liquid Metal Look
This is the purest form of futuristic chrome. It’s a full nail coverage of a single, intense chrome color – typically silver, gold, or an iridescent shade. The effect is so smooth and reflective, it looks like molten metal.
- How to achieve: Follow the steps above using a high-quality, ultrafine chrome powder. Black gel polish underneath often enhances the depth and shine for a true liquid effect.
2. Geometric Chrome Accents
Clean lines and sharp angles scream futuristic. This design involves using chrome powder sparingly over a solid color or a contrasting chrome finish to create geometric shapes.
- How to achieve: Apply a solid gel color (like black, white, or a deep jewel tone) and cure. Apply a regular gel top coat (not no-wipe). Using striping tape or fine brushes, create your geometric pattern with the regular gel top coat, then cure. Buff chrome powder only onto the uncured gel lines. Cap with a no-wipe top coat and cure.
- Pro Tip: Visit resources like the University of Iowa’s Graphic Design program for inspiration on clean, modern geometric forms.
3. Holographic Chrome Shimmer
Holographic chrome powders shift through a spectrum of colors as you move your hands, giving a dazzling, futuristic rainbow effect. This can be applied as a full nail look or as an accent.
- How to achieve: Apply as per the main tutorial, but opt for a holographic chrome powder. Black or deep colored gel polish underneath can make the color shifts even more dramatic.
4. Iridescent Chrome Ombre
This is a softer, more ethereal take on futuristic chrome. An ombre effect blends two or more colors seamlessly, and when done with iridescent chrome powders, it looks like a nebula or an oil slick on water.
- How to achieve: Apply a base gel color. Apply a no-wipe gel top coat and cure. Using two or more iridescent chrome powders and your applicator tool, gently blend them together across the nail, starting from one side and fading into the other. Seal with a no-wipe top coat and cure.
5. Chrome Paired with Negative Space
Negative space designs leave parts of the natural nail or a clear gel base exposed. Combining this with chrome creates a sophisticated, modern, and often very chic futuristic look.
- How to achieve: Apply a base coat. Use gel polish to create your design, leaving some areas untouched or covered only by a clear gel. Cure the colored gel sections. Apply a no-wipe top coat over the entire nail, then buff chrome powder onto the cured gel areas only. Seal with a final no-wipe top coat.
6. 3D Chrome Sculptures
For the truly adventurous! Small, sculpted 3D elements – like chrome spheres, sharp shards, or abstract blobs – applied to a chrome base create a visually stunning, tactile futuristic design.
- How to achieve: First, apply and cure your full chrome nail. Then, use 3D gel or acrylic to sculpt your desired shapes directly onto the nail. You can then apply chrome powder onto these 3D elements if desired, or leave them as-is. Cap carefully with a no-wipe top coat, avoiding filling in any textured areas.
7. Chrome Stiletto with Sharp Angles
The shape of the nail can also contribute to the futuristic feel. Long stilettos or sharp almond shapes, when combined with a full chrome finish, amplify the edgy, forward-thinking aesthetic. Think of sharp, architectural lines.
- How to achieve: Focus on achieving a perfect, flawless chrome application as described in the main tutorial. The power of this look comes from the combination of the mirror shine and the dramatic nail shape. Consider jewel-toned chrome for an extra pop.
Maintaining Your Futuristic Chrome Nails
To keep your futuristic chrome nails looking pristine, a little care goes a long way.
- Be Gentle: Avoid using your nails as tools.
- Moisturize: Keep your cuticles and hands moisturized with cuticle oil and hand cream. Dry skin can make any manicure look less polished.
- Wear Gloves: When doing chores, especially those involving water or harsh chemicals, wear rubber gloves.
- Avoid Harsh Chemicals: Solvents and certain cleaning products can dull the shine or even damage the chrome finish.
Troubleshooting Common Chrome Nail Issues
Even with the best intentions, sometimes things don’t go perfectly. Here are some common problems and how to fix them:
Problem: Patchy or Uneven Chrome Coverage
Cause: Not enough powder, uneven buffing, or an insufficiently sticky no-wipe top coat.
Solution: Ensure your no-wipe top coat is fully cured but still tacky. Use enough powder and buff thoroughly and evenly. If it’s still patchy, you might need to reapply the no-wipe top coat, cure, and buff again.
Problem: Chrome Rubs Off or Dulls
Cause: Insufficient top coat sealing, or using a top coat that isn’t truly “no-wipe” after buffing the powder. Also, not capping the free edge.
Solution: Always apply a generous layer of no-wipe gel top coat to seal the chrome, making sure to cap the free edge. Ensure your lamp is curing properly. If the chrome is already dull, you might need to carefully buff the surface again (if possible without removing all chrome), reapply top coat, and cure.
Problem: Powder Won’t Stick
Cause: The gel top coat wasn’t cured enough, or it was cured for too long. Or, you might be using a “self-sealing” top coat instead of a dedicated “no-wipe” one for the chrome powder step.
Solution: Check your gel lamp’s power and your top coat’s recommended cure time. Experiment with slightly shorter or longer curing times. Make sure you are using a specific “no-wipe” gel top coat for buffing the powder onto.
Problem: Chrome Looks Dull, Not Mirrored
Cause: Low-quality chrome powder, uneven application, or residue left on the nail.
Solution: Invest in good quality chrome powder. Ensure your buffing is consistent and thorough. Cleanse the nail with alcohol after the final top coat cures to remove any tacky residue.
FAQs About Futuristic Chrome Nail Designs
Q1: Can I do chrome nails with regular nail polish?
A1: It’s much trickier and doesn’t yield the same mirrored, long-lasting effect as gel polish. While some kits might offer chrome dust for regular polish, the results are usually less vibrant and prone to smudging. Gel is highly recommended for true chrome.
Q2: How long do chrome nails typically last?
A2: When done correctly with gel polish and proper sealing, chrome gel manicures can last 2-3 weeks without chipping or peeling.
Q3: What color base is best for chrome powder?
A3: Black is fantastic for creating a deep, intense mirror effect for silvers and golds. White can give a lighter, more pastel chrome. Any color can work as a base for a subtle undertone or a specific design intention!
Q4: Is chrome powder safe for my nails?
A4: Yes, the chrome powder itself is not applied directly to the nail but buffed onto a cured gel layer. The main concern is proper application and removal of gel products, which can cause damage if peeled off or if the prep/removal process is rough.
Q5: Do I need a special top coat for chrome nails?
A5: Absolutely! You need a “no-wipe” gel top coat for buffing the powder onto. For the final sealing layer, you can use either the same “no-wipe” top coat or a regular high-shine gel top coat.
Q6: How do I remove chrome gel nails safely?
A6: Soak-off is the best method.


