French Tip With A Twist – Colored Tips: Genius Style
Elevate the classic French tip manicure with a splash of vibrant color! This guide shows beginners how to create chic, colorful French tips that add personality and fun to your nails. Say goodbye to boring white tips and hello to a world of creative, easy-to-achieve nail art.
Hey nail besties! Lisa Drew here from Nailerguy, ready to sprinkle some fun onto your fingertips. We all know and love the classic French manicure – it’s timeless, elegant, and always in style. But what if I told you we could give that iconic look a playful makeover? Get ready to trade in the traditional white for a rainbow of possibilities with the “French tip with a twist – colored tips” manicure. It’s simpler than you think, and the results are seriously genius! Let’s dive in and add some color to your nail game!
What Are Colored French Tips?
Think of the classic French manicure: a nude or sheer pink base with a crisp white line along the tip of your nail. Now, imagine replacing that white line with any color you can dream up! That’s the magic of colored French tips. Instead of the familiar white, you’re using vibrant polishes, pastels, neons, metallics, or even glitters to create that signature smile line. It’s the perfect way to express your mood, match your outfit, or simply inject a dose of fun into your look, all while keeping that elegant French mani silhouette.
Why You’ll Love Colored French Tips
This trend is a total game-changer for several reasons:
- Versatility: From subtle pastels for work to bold neons for a party, the color options are endless.
- Personalization: It’s a fantastic way to show off your unique style and personality.
- Easy Update: It takes the classic French tip and makes it feel fresh and modern without a huge leap in difficulty.
- Confidence Boost: A pop of color on your nails can instantly lift your mood and make you feel instantly more put-together.
- Beginner-Friendly: While it looks super chic, it’s surprisingly achievable for those new to DIY nail art.
Getting Started: Essential Tools and Supplies
Before we get our hands (and nails!) dirty, let’s gather our supplies. Don’t worry, you probably have most of these already!
The Must-Haves
- Base Coat: Protects your natural nails and helps polish adhere better.
- Nude or Sheer Polish: This forms the base color for your nails. Choose a shade that complements your skin tone.
- Colored Polishes: This is where the fun begins! Select one or more colors for your tips.
- Top Coat: Seals your design, adds shine, and helps your manicure last longer.
- Fine-Tipped Brush or Manicure Pen: For precision application of the colored tip. A nail art brush with a very fine point works wonders, or you can opt for a specialized polish pen.
- Nail Polish Remover: For correcting any mistakes.
- Cotton Swabs or Cotton Balls: For cleanup.
- Optional: Nail Art Stencils or Striping Tape: If you want super crisp lines and are still honing your freehand skills.
Choosing Your Colors: A Quick Guide
The beauty of colored French tips is the freedom to experiment. Here are a few ideas to get you inspired:
| Color Palette Idea | Vibe | Occasion |
|---|---|---|
| Pastels (e.g., baby blue, mint green, lavender, pale pink) | Soft, dreamy, refreshing | Everyday wear, spring, bridal |
| Neons (e.g., hot pink, electric yellow, lime green, bright orange) | Bold, energetic, fun | Summer, parties, festivals |
| Jewel Tones (e.g., emerald green, sapphire blue, ruby red, amethyst purple) | Luxurious, sophisticated, rich | Evening events, fall/winter, a chic statement |
| Metallics (e.g., gold, silver, rose gold, bronze) | Glamorous, modern, dazzling | Holidays, date nights, adding a touch of sparkle |
| Monochromatic (different shades of the same color) | Chic, subtle, sophisticated | Work, everyday elegance |
| Contrasting Colors (e.g., blue tip on a pink base) | Playful, bold, eye-catching | When you want to make a statement |
Don’t be afraid to mix and match! You could do a different color on each finger, or even a gradient of colors across the tips. The possibilities are truly endless.
Step-by-Step: Creating Your Colored French Tips
Ready to get those gorgeous colored tips on your nails? Follow these simple steps for a flawless finish. Remember, practice makes perfect, so don’t get discouraged if your first attempt isn’t salon-perfect. That’s what nail polish remover is for!
-
Prep Your Nails
Start with clean, dry nails. Push back your cuticles gently using a cuticle pusher. If needed, file your nails into your desired shape. For the smoothest application, you can lightly buff the surface of your nails to remove any natural shine. This helps the polish adhere better. Wash your hands thoroughly afterward to remove any dust.
-
Apply Base Coat
This is crucial for protecting your nails from staining and for making your manicure last. Apply one thin layer of your favorite clear base coat and let it dry completely. This usually takes about 60 seconds.
-
Apply Your Base Color
Now, apply your chosen nude or sheer polish. You’ll likely need two thin coats for an even, opaque look. Make sure each coat dries completely before applying the next. Thin coats dry faster and look much better than one thick, gloppy coat.
-
Prepare for the Color Tip
Here comes the fun part! Ensure your base color is completely dry. If it’s still even slightly tacky, your colored tip might smudge or bleed. You can use a quick-drying spray or drop to speed this up if you’re impatient!
-
Applying the Colored Tip – Method 1: Freehand with a Brush
This method requires a steady hand but offers the most flexibility. Dip your fine-tipped brush or nail art pen into your chosen colored polish. Wipe off any excess polish from the brush onto the neck of the bottle or a paper towel so you have just a small amount to work with. Starting from one side edge of your nail, carefully paint a curved line across the tip, mimicking the natural shape of your nail or creating a sharper angle if you prefer. Try to connect the line smoothly to the other side. Aim for a consistent thickness. Pro Tip: It’s easier to add a second thin coat to build up coverage than to try and get it perfect in one go.
-
Applying the Colored Tip – Method 2: Using a Stencil or Tape
If freehand isn’t your jam, don’t worry! You can use nail art stencils or striping tape.
With Stencils: Apply the stencil along the line where you want your colored tip to begin. Paint the colored polish over the stencil. Carefully peel off the stencil while the polish is still slightly wet (too dry and it might peel off with the stencil; too wet and it will smudge).
With Tape: Once your base color is completely dry, carefully apply striping tape across your nail where you want the tip to start. Press the edges down firmly to prevent polish from seeping underneath. Apply your colored polish over the tape. Remove the tape carefully while the polish is still wet.
-
Cleaning Up Mistakes
Nobody’s perfect! If you get any polish where you don’t want it, grab a cotton swab dipped in nail polish remover. Gently roll the swab along the edges of your colored tip or cuticle line to clean up any errant marks. This is much easier to do while the polish is still wet!
-
Apply Top Coat
Once your colored tips are completely dry (give them at least a few minutes, especially if you used thicker coats), apply a generous layer of top coat. Cap the free edge of your nails by running the brush along the tip horizontally. This helps prevent chips and keeps your design locked in. Let your nails dry completely – this can take 10-20 minutes, so be patient!
Advanced Techniques & Creative Twists
Ready to take your colored French tips to the next level? Once you’ve mastered the basics, try these fun variations:
- Double French Tips: Use two different colors layered on top of each other or side-by-side for a striking effect.
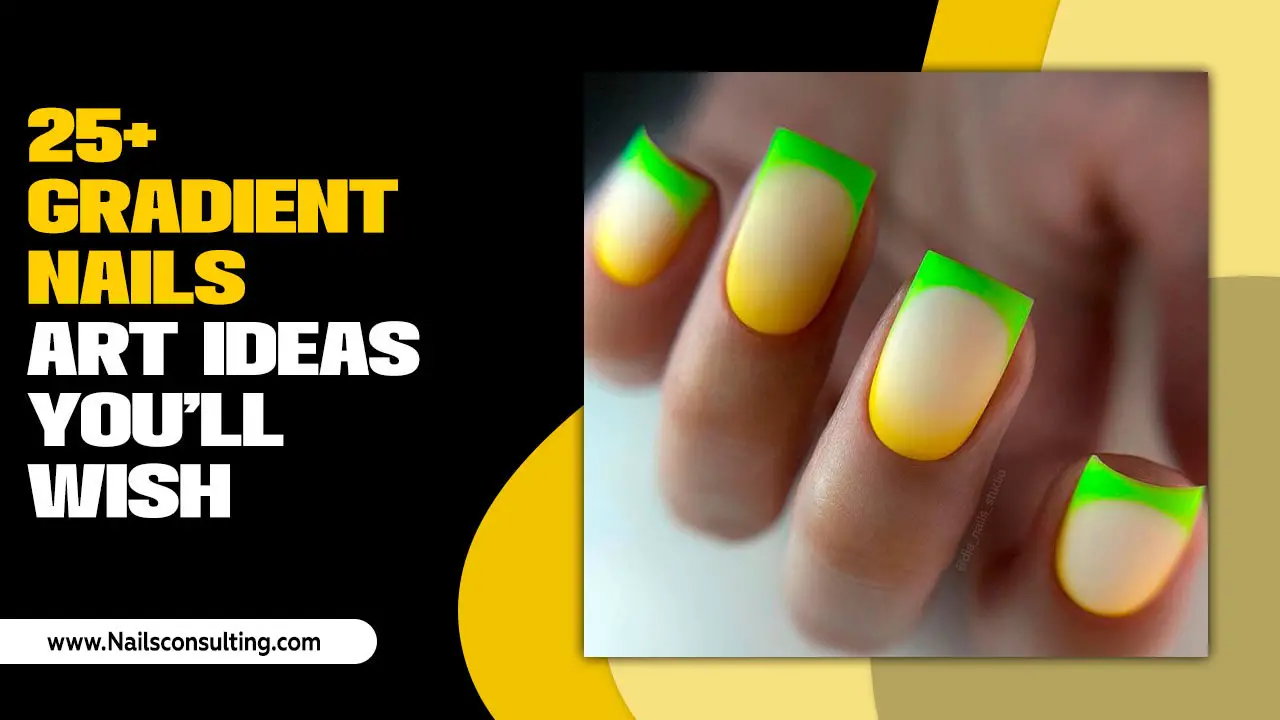
- Ombre Tips: Blend two or more colors together on the tip for a beautiful gradient.
- Glitter Tips: Swap out regular colored polish for glitter polish for extra sparkle.
- Textured Tips: Use flocking powder or fine glitter mixed into your polish to create textured tips.
- Reverse French Tips: Instead of the tip, apply the color to the lunula (the half-moon shape at the base of your nail).
- Asymmetrical Tips: Create diagonal lines or V-shapes instead of the classic curve.
For more advanced nail art inspiration and techniques, resources like NailPro Magazine often feature tutorials and trend reports from industry professionals.
Maintaining Your Colored French Tips
To keep your masterpiece looking fresh and fabulous, follow these simple maintenance tips:
- Wear Gloves: Always wear gloves when doing household chores, especially washing dishes. This protects your nails from harsh chemicals and prolonged water exposure, which can weaken polish.
- Moisturize: Keep your hands and cuticles moisturized. Apply cuticle oil daily and hand cream regularly. Healthy cuticles make for a beautiful manicure.
- Avoid Using Nails as Tools: Resist the urge to use your nails to pry things open, scratch labels, or tap hard surfaces.
- Touch-Ups: If you notice any minor chips or wear, you can often touch up the colored tip or top coat carefully.
- Refresh: Even with perfect care, manicures don’t last forever. Plan to refresh your manicure every 7-10 days for the best look.
Troubleshooting Common Issues
Even with the best intentions, sometimes things go a little awry. Here’s how to fix common problems:
| Problem | Solution |
|---|---|
| Smudged Tip | If the polish is still wet, gently use a clean brush dipped in remover to “erase” the smudge and reapply carefully. If it’s dry, you might need to remove the tip and start that nail again. |
| Uneven Lines | Dip a fine brush or cotton swab in nail polish remover and carefully refine the line. You can also try applying a second, cleaner coat of polish over the uneven line. Using striping tape can help prevent this entirely. |
| Polish Streaky | This usually means the polish itself is a bit old or thin. Apply another thin coat after the first has dried. Using a good quality polish can also help prevent streaking. |
| Tip Too Thick/Too Thin | For too thick, carefully use a clean brush dipped in remover to shave off excess polish from the edge. For too thin, apply another precise coat to build it up. |
| Chip on the Tip | Carefully file the chipped edge smooth with a fine-grit file. Then, apply a thin layer of colored polish to the tip and seal with a top coat. |
Frequently Asked Questions (FAQs)
Here are some common questions beginners have about colored French tips:
Q1: Can I do colored French tips with gel polish?
A1: Absolutely! Gel polish works wonderfully for colored French tips. You’ll follow similar steps but will need a UV/LED lamp to cure each layer of gel polish. Gel often provides a more durable and longer-lasting finish.
Q2: How do I get a really sharp line for my colored tip?
A2: For the sharpest lines, use striping tape or nail art stencils. Ensure the tape is pressed down firmly and the base color is completely dry before applying your colored polish. Remove the tape while the colored polish is still slightly wet.
Q3: My colored tips look messy. What am I doing wrong?
A3: It often comes down to polish consistency and brush control. Make sure your colored polish isn’t too thick or too thin. Wipe excess polish off your brush before applying. Start with thin coats and build coverage. Don’t be afraid to use a cleanup brush with remover!
Q4: What’s the best way to choose colors that go well together?
A4: You can look at color theory! Complementary colors (opposite on the color wheel, like blue and orange) create high contrast, while analogous colors (next to each other, like blue and green) create a harmonious look. Or, simply pick shades you love and know look good on you!
Q5: How long do colored French tips usually last?
A5: With proper application and care, a regular polish manicure can last anywhere from 5-7 days, sometimes longer. Gel polish manicures can last 2-3 weeks. The key is a good base and top coat and avoiding activities that can chip the polish.
Q6: Can I do this on short nails?
A6: Yes! Colored French tips look fantastic on short nails. You’ll just have a thinner colored line, which can be very chic and delicate. Experiment with different angles for the colored tip to find what looks best on your nail shape.
Conclusion
There you have it, nail lovers! The “French tip with a twist – colored tips” manicure is a brilliant way to breathe new life into a classic style. It’s a fantastic canvas for expressing your creativity, from subtle elegance to bold statements. By following these simple steps, gathering the right tools, and practicing a little, you can achieve stunning, salon-worthy results right at home. Remember, nails are your personal canvas for self-expression, so have fun with it, experiment with color, and wear your vibrant tips with confidence!


