French Tip Square Nail Designs with Rhinestones: Add Dazzling Sparkle Easily! Learn how to create chic, modern square French tips adorned with shimmering rhinestones for a touch of glam that’s surprisingly simple to achieve at home. Get ready for runway-ready nails!
Hey nail lovers! Are you dreaming of nails that are both classic and captivating? Perhaps you’ve seen those gorgeous French tip square nails with a touch of sparkle and thought, “Wow, that looks complicated!” Well, I’m here to tell you it’s totally achievable, even if you’re just starting out. We’re going to break down how to get those elegant French tips on square nails and then jazz them up with some irresistible rhinestones. Get ready to feel like a nail pro, and let’s make your nails shine with essential sparkle!
What Exactly Are French Tip Square Nails?
French tip nails are a timeless manicure trend. Traditionally, they feature a nude or sheer pink base with a crisp white tip across the edge of the nail. When we talk about “French tip square nails,” we’re referring to this classic design applied to nails shaped into a square. This means the sides of your nails are straight, and the corners are clean and sharp (or slightly rounded for a softer look). This modern shape gives the classic French manicure a fresh, contemporary feel. Now, imagine adding rhinestones to that – instant glamour!
Why Choose French Tip Square Nails with Rhinestones?
This nail design is incredibly versatile. The square shape is chic and modern, offering a great canvas. The French tip itself is elegant and sophisticated, suitable for any occasion, from a casual day out to a formal event. Adding rhinestones? That’s where the essential sparkle comes in! It elevates the look from simple to stunning, adding a touch of luxury and personality. They’re perfect for:
- Adding a special occasion touch: Think weddings, parties, or holidays!
- Boosting everyday style: Why not add a little sparkle to your daily grind?
- Expressing creativity: Experiment with different rhinestone placements and colors.
- Feeling confident: Beautiful nails can seriously boost your mood and confidence.
Essential Tools for Your Sparkling Creation
Before we dive into the steps, let’s make sure you have everything you need. Having the right tools makes the process so much smoother and the results so much better! Don’t worry, most of these are readily available at drugstores or beauty supply stores.
The Basics:
- Nail Polish Remover: To start with a clean slate.
- Cotton Pads/Balls: For the remover.
- Nail File: To shape your nails into that perfect square. A good nail file is your best friend for achieving clean edges.
- Nail Buffer: To smooth the nail surface.
- Base Coat: Protects your nails and helps polish adhere.
- Sheer Pink or Nude Polish: For the base color of your French manicure.
- White Nail Polish: For the crisp French tip line.
- Top Coat: To seal your design and add shine.
For the Sparkle:
- Rhinestones/Nail Gems: Look for small, flat-backed gems. They come in various sizes, shapes, and colors.
- Nail Glue or Strong Top Coat: To adhere the rhinestones securely. Some top coats have a slightly thicker consistency that works well. You can also find dedicated nail art glue.
- Tweezers (Fine-Tipped): Essential for picking up and placing those tiny rhinestones precisely.
- Dotting Tool or Toothpick: Can be helpful for applying a tiny dot of glue or picking up smaller gems if tweezers are too
clumsy.
Step-by-Step Guide: French Tip Square Nail Designs with Rhinestones
Ready to create some magic? Let’s get started! We’ll go through shaping, the French tip, and then the dazzling rhinestone embellishments.
Step 1: Shape Your Nails into a Perfect Square
This is the foundation of our design! Clean, crisp square tips make all the difference.
- Prepare your nails: Start by removing any old polish. Push back your cuticles gently.
- Start filing: Use your nail file to create straight side walls. File in one direction to avoid weakening the nail.
- Create the edge: Hold the file perpendicular to the nail and file straight across the tip to create a blunt, squared-off edge.
- Soften corners (optional): If you prefer a softer square, gently use the file to round the very sharp corners ever so slightly. Be careful not to make them rounded like an oval; the goal is a soft square.
- Smooth and buff: Use your nail buffer to smooth any rough edges and the nail surface.
Pro Tip: Aim for consistency across all your nails for a professional look. If you’re struggling with natural nail shape, consider press-on nails or acrylics that are already shaped.
Step 2: Apply Base Coat and Color
Now for the polish!
- Base Coat: Apply one thin layer of your base coat. Let it dry completely. This protects your natural nails from staining and helps the polish last longer.
- Main Color: Apply one or two thin coats of your sheer pink or nude polish. Allow each coat to dry thoroughly before applying the next. This provides a beautiful, natural-looking base for the French tips.
Step 3: Create the French Tip
This is where the classic design comes to life. There are a few ways to do this, so choose what works best for you.
Method A: Using a Thin Brush (For precision!)
- Dip a very fine-tipped nail art brush into your white polish. Wipe off any excess on the bottle opening.
- Carefully paint a thin, straight line across the free edge of your nail.
- Fill in towards your cuticle in a “smile” shape, connecting the white line to the sides of your nail.
- Clean up any mistakes with a fine-tipped brush dipped in nail polish remover.
Method B: Using French Tip Guides (For beginners!)
- Once your base color is dry, apply a French tip guide (these are sticky stickers available at most beauty stores) just below where you want your white tip to start. Ensure it’s sealed firmly to prevent polish bleeding underneath. You can find helpful tips on using French manicure guides online.
- Carefully paint the white polish over the tip of your nail, above the guide.
- While the white polish is still wet, carefully peel off the guide. This leaves a clean, crisp line.
- Let the white polish dry completely.
Method C: Freehand with Polish Brush (Requires practice!)
- Wipe most of the white polish off the brush.
- Gently hold the brush at an angle and create a C-shape on the side of your nail, then connect it across the tip, and do the same on the other side to create the smile line.
- It often takes practice to get this looking perfect, so don’t be discouraged if it’s not flawless the first time!
Tip for Clean Lines: Always aim for thin layers. Thicker polish is harder to control and more prone to chipping. Allow the white tips to dry thoroughly before the next step!
Step 4: Add the Essential Sparkle – Rhinestones!
This is the fun part! Let’s bedazzle those nails.
- Decide on placement: Where will your gems go? Popular spots include:
- One small gem at the base of each French tip where it meets the side of the nail.
- A row of small gems along the white tip line.
- A cluster of gems at the cuticle area.
- A single statement gem on one accent nail.
- Apply adhesive: This is crucial for keeping your gems in place. You have a couple of options:
- Nail Glue: Use a tiny dot of nail art glue where you want each rhinestone to go. A dotting tool or a toothpick is perfect for this.
- Thick Top Coat: Apply a small, controlled dab of a thicker top coat to the area for your gem. This works best for smaller, lighter rhinestones.
- Place the rhinestones: Using your fine-tipped tweezers, carefully pick up a rhinestone. Gently press it into the glue or top coat you’ve applied. Don’t press too hard, or you might smudge your polish!
- Work in sections: If you’re adding multiple gems, do one or two at a time to prevent the adhesive from drying out too quickly.
- Repeat: Continue until all your desired gems are placed.
A Note on Rhinestone Types: For beginners, flat-backed rhinestones are the easiest to work with for this type of design. They lie flush against the nail and are less likely to snag.
Step 5: Apply Top Coat and Seal
This is the final, vital step to protect your beautiful design and make it shine!
- Careful application: Once the glue/top coat for your rhinestones is completely dry (wait at least a minute or two), apply a generous layer of your clear top coat.
- Around the gems: Be very careful when applying top coat over and around the rhinestones. You don’t want to flood the gems, which can make them look cloudy or lift them. Try to “cap” the edges of the rhinestones by gently brushing the top coat around them.
- Full coverage: Ensure you cover your entire nail, including sealing the free edge (the tip line of your polish), to prevent chipping.
- Dry thoroughly: Let your nails dry completely. Patience here is key to avoid smudges!
French Tip Square Nail Design Variations to Try
Once you’ve mastered the basic French tip square with rhinestones, there are so many ways to play and personalize!
Color Play:
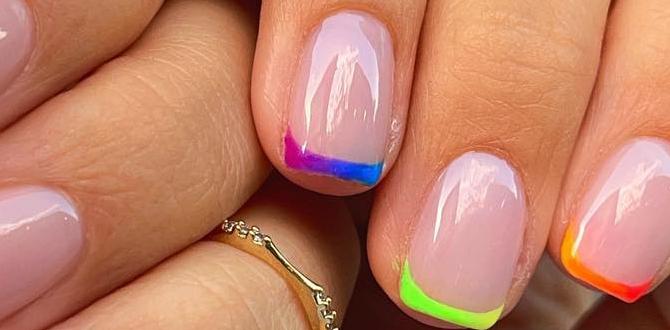
- Colored Tips: Instead of white, try a pastel pink, baby blue, or even a metallic shade for the tip.
- Ombre Tips: Blend a soft color into the white tip for a smooth gradient effect.
- Glitter Tips: Use a glitter polish for the tip instead of plain white for instant shimmer.
Rhinestone Placement & Style:
- Accent Nail Sparkle: Focus all the rhinestones on just one or two nails for a subtler statement.
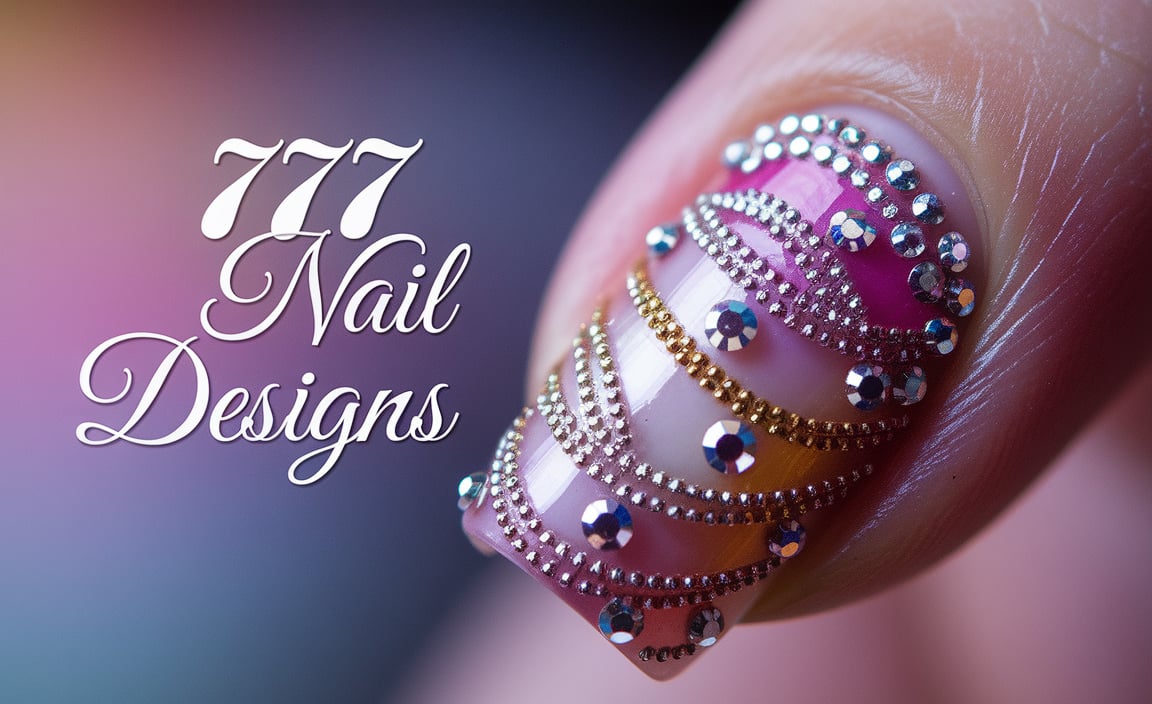
- Full Bedazzle: For a truly dramatic look, cover the entire nail, or a significant portion of the tip, with rhinestones.
- Mixed Media: Combine rhinestones with tiny pearls, glitter, or even hand-painted details.
- Geometric Patterns: Arrange small rhinestones in interesting geometric shapes along the tip.
Matte Finish:
For a sophisticated twist, consider a matte top coat instead of glossy. Apply it carefully over your dried design (after the rhinestones are set) for a chic, velvety finish. The matte texture can make the rhinestones pop even more!
Maintaining Your Sparkling Manicure
To keep your French tip square nails with rhinestones looking fabulous for as long as possible, here are a few tips:
- Be Gentle: Avoid using your nails as tools. They’re for looking fabulous, not for prying or scraping!
- Wear Gloves: When doing household chores, especially washing dishes or cleaning, wear rubber gloves to protect your polish and gems from harsh chemicals and excessive water.
- Moisturize: Keep your hands and cuticles hydrated with a good hand cream and cuticle oil. This helps prevent dryness that can lead to chipping or lifting.
- Touch-Ups: If a rhinestone comes loose, don’t despair! You can reapply it with a tiny dab of nail glue. If the polish chips, a small touch-up with your top coat can often help.
Tables for Quick Reference
Here’s a handy comparison of adhesive options for your rhinestones:
| Adhesive Option | Pros | Cons | Best For |
|---|---|---|---|
| Dedicated Nail Art Glue | Strongest hold, long-lasting. | Can be thick, requires precise application to avoid excess. | Larger gems, heavy embellishments, ensuring maximum durability. |
| Thick Top Coat | Easier to apply, doubles as a finisher. | May not hold very large or heavy gems as securely, can sometimes clump. | Small to medium-sized gems, lighter embellishments, quicker application. |
| Nail Polish (with careful application) | Readily available. | Least durable, requires very careful application to avoid smearing, gems can shift easily. | Tiny gems for very temporary designs, when no other options are available. |
And a quick look at common square nail shape variations:
| Shape Name | Description | Best For |
|---|---|---|
| Square | Straight sides and a sharp, 90-degree corner edge. Offers a modern, clean look. | Shorter to medium-length nails. Can make wider fingers appear slimmer. |
| Squoval (Soft Square) | Straight sides with slightly rounded corners. A softer, more practical version of the square. | Most nail lengths. Less prone to corner chips than a sharp square. |
| Round Square | Very slightly rounded corners, almost square but with softened edges. | Similar to squoval, offers a balance of modern and gentle. |
Frequently Asked Questions (FAQs)
Q1: How do I prevent rhinestones from falling off quickly?
A1: Ensure your nails are completely clean and dry before application. Use a strong adhesive like nail art glue or a thick top coat, and place the gem onto the wet adhesive. Gently cap around the gems with top coat once dry, ensuring it seals the edges without flooding the stones.
Q2: Can I use regular craft store rhinestones?
A2: Yes, you can! Just make sure they are not too heavy or bulky, and that they have a flat back for easier application. Be aware that some craft gems might be made of plastic and could potentially lose their shine over time with exposure to top coat or wear.
Q3: My French tips look messy. How can I get them cleaner?
A3: Practice makes perfect! Using French tip guides can be a lifesaver for beginners. Alternatively, a fine-tipped nail art brush and steady hand, along with a cleanup brush dipped in remover to correct mistakes, will help you achieve sharper lines.
Q4: How long does this type of manicure typically last?
A4: With proper application and care, a well-done French tip square nail design with rhinestones can last anywhere from 7 to 14 days.


