Mastering French tip nail designs is easier than you think! Create chic, timeless manicures with simple tools and techniques. Elevate your look with classic white tips, colored variations, or even playful glitter accents. Get ready to rock salon-worthy French tips at home!
French tip nails are a classic for a reason! They offer a clean, sophisticated look that’s perfect for any occasion. But if you’ve ever struggled to get that perfect white line or found the process a bit tricky, you’re not alone. Many of us have ended up with shaky lines or uneven tips. Don’t worry, though! This guide is here to make French tip nail designs incredibly achievable for everyone. We’ll break down everything you need to know, from essential tools to simple, stunning design ideas. Get ready to fall in love with your French tips!
—
Your French Tip Nail Design Toolkit: The Essentials
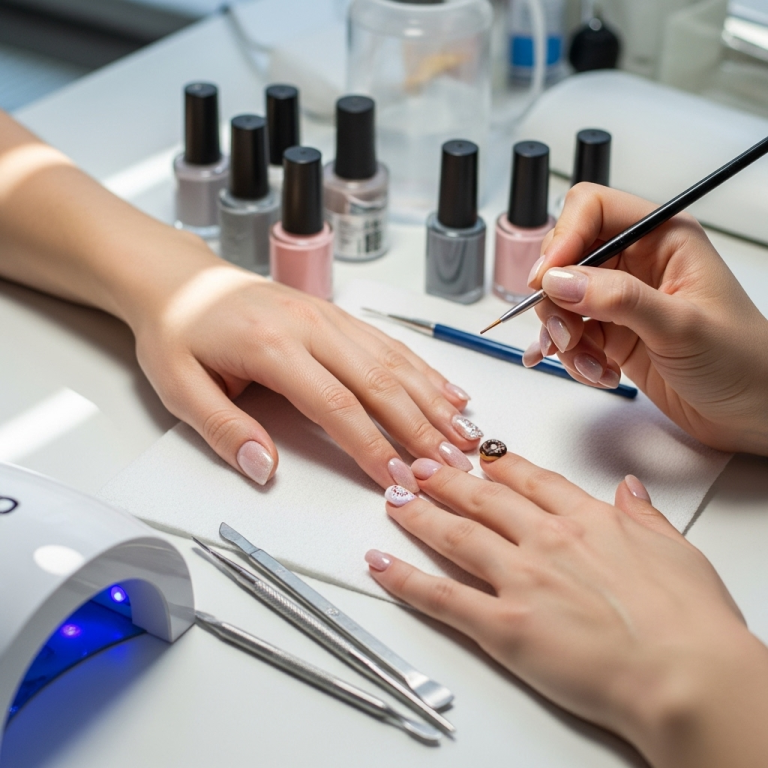
Before we dive into the fun part – the designs! – let’s gather our supplies. Having the right tools makes all the difference in achieving those neat, polished French tips. Think of this as your mini nail salon starter pack.
Essential Tools You’ll Need:
Nail Polish Remover: To clean up any mistakes and prep your nails.
Cotton Pads/Balls: For applying the remover.
Nail File: To shape your natural nails. A fine-grit file is best for smoothing.
Nail Buffer: To smooth the nail surface for a better polish application.
Base Coat: Crucial for protecting your natural nails and helping polish adhere.
Nail Polish Colors:
Sheer Nude or Pale Pink: For the base color.
Opaque White: For the classic tip. (Or any color you choose for modern twists!)
Top Coat: To seal your design and give it a glossy finish.
Your Choice of Tip Guides: This is where the magic happens!
French Tip Guide Stickers: These self-adhesive stickers are incredibly helpful for beginners, creating a stencil.
Thin Nail Art Brush or Liner Brush: For freehanding the tips (a little practice goes a long way!).
Sponge or Makeup Sponge: For a softer, gradient effect or quick cleanup.
Optional (But Helpful!) Tools:
Cuticle Pusher: To gently push back your cuticles for a cleaner nail bed.
Nail Clippers: To trim nails if needed before filing.
Dappen Dish: To pour a small amount of polish for dipping your brush.
Tweezers: To easily place and remove guide stickers.
—
The Classic French Manicure: A Step-by-Step Guide
This is the timeless look everyone loves! It’s chic, simple, and works with any outfit. Follow these steps for a perfect classic French manicure at home.
Step 1: Prep Your Canvas
Start with clean, dry nails. Remove any old polish. Gently push back your cuticles with a cuticle pusher. Shape your nails with a nail file to your desired length and shape – a square or squoval shape is classic for Frenchies, but any shape works! Lightly buff the surface of your nails to remove any shine; this helps the polish grip better.
Step 2: The Base Coat Foundation
Apply one thin coat of your chosen base coat. This protects your natural nails from staining and creates a smooth surface for polish. Let it dry completely.
Step 3: The Base Color
Apply one or two thin coats of your sheer nude or pale pink polish. Let each coat dry thoroughly. This is important so your tips don’t smudge into the base color. Patience is key here!
Step 4: Creating the White Tip – Choose Your Method!
Here’s where you get to decide how you’ll create that iconic white tip.
Method A: Using French Tip Guide Stickers (Beginner Friendly!)
1. Once your base color is completely dry, carefully peel a French tip guide sticker from the sheet.
2. Apply the sticker to your nail, placing it where you want the white tip to begin. Press down firmly along the edges to ensure no polish seeps underneath. The curved edge of the sticker should follow your natural smile line.
3. Make sure the sticker is straight and sealed across the nail.
4. Now, using your opaque white polish, carefully paint over the tip of your nail, above the sticker. Apply one or two coats for opaque coverage, letting each dry slightly between applications.
5. While the white polish is still slightly wet, carefully peel off the guide sticker. Peeling it while wet prevents the polish from chipping or lifting. Use tweezers if it’s easier.
6. Clean up any stray polish with a small brush dipped in nail polish remover.
Method B: Freehanding with a Brush (Practice Needed!)
1. Once your base color is dry, take your opaque white polish. You can use the brush from the bottle for this, but for more control, use a thin nail art brush or liner brush. Dip your chosen brush into the white polish (or pour a little into a dappen dish).
2. Start by painting a smile line across the tip of your nail. You can start in the middle and work your way to the sides, or do the sides first and connect in the middle.
3. Fill in the tip of the nail above the smile line.
4. Apply a second coat of white polish if needed for full opacity.
5. Use a clean brush dipped in nail polish remover to carefully neaten the edges and remove any polish on your skin.
Method C: Using a Sponge for a Soft Edge (Quick & Ethereal)
1. Once your base color is dry, apply a layer of white polish to a small makeup sponge or a regular cosmetic sponge cut into a small piece.
2. Alternatively, paint a strip of white polish onto a piece of foil or a palette.
3. Gently dab the sponge onto the white polish to pick it up.
4. Lightly dab the sponge across the tips of your nails. You might need to do this a few times to build up coverage and get the desired look. This method gives a softer, more blended tip than a crisp line.
5. Clean up any smudges with a brush dipped in remover.
Step 5: The Finishing Touch
Once your white tips are completely dry, apply a generous coat of top coat. This seals everything in, adds shine, and helps your manicure last longer. Make sure to cap the free edge of your nail by swiping the top coat brush along the very tip.
—
Beyond the Classic: Stunning French Tip Nail Design Variations
The French tip is a fantastic starting point for creativity! Once you’ve mastered the basic technique, you can experiment with endless variations. Ready to spice things up?
Colored French Tips
Who says tips have to be white? This is the easiest way to add a pop of personality to your French manicure.
How-To: Simply swap out the opaque white polish for any color you love! Think pastels, neons, deep jewel tones, or even metallic shades. You can use the same application methods as the classic white tips (guides, brush, or sponge).
Stylish Ideas:
Pastel Dreams: Soft lavender, mint green, or baby blue tips on a nude base.
Bold & Bright: A neon pink or electric blue tip for a vibrant statement.
Moody Hues: Deep burgundy, forest green, or navy tips for an elegant, darker vibe.
Glitter French Tips
Add a touch of sparkle and glamour! Glitter French tips are perfect for parties or when you just want to feel a little extra fabulous.
How-To:
1. Apply your base coat and base color as usual.
2. Use French tip guide stickers or a brush.
3. Instead of white polish, use a glitter polish for the tips. Depending on the glitter density, you might need a few coats for full coverage.
4. Alternatively, paint the tip with a colored polish, let it dry, then carefully paint a thin layer of glitter polish just along the edge of the colored tip for an ombré glitter effect.
5. Finish with a good top coat to secure all those sparkles!
Stylish Ideas:
Silver Sparkle: Silver glitter tips on a nude base.
Gold Glamour: Gold glitter on a sheer pink base.
Holographic Hues: Iridescent or holographic glitter for a mesmerizing effect.
Multi-Color Glitter: Mix and match glitter colors on different nails.
Reverse French Tips (Half-Moon Nails)
This design focuses on the base of the nail, creating a “half-moon” shape at the cuticle instead of the free edge tip.
How-To:
1. Apply your base coat and a neutral or colored polish to the entire nail.
2. Once dry, use a thin brush or a small circle guide sticker to paint or fill in a semi-circle shape at the base of your nail, near the cuticle.
3. You can leave the rest of the nail as is, or fill in the remaining portion with a contrasting color or leave it clear for a “negative space” look.
4. Seal with a top coat.
Stylish Ideas:
Classic Contrast: Nude base with a white half-moon.
Chic Monochrome: Black polish with a black half-moon (slightly lighter or darker shade for subtle definition).
Bold Pop: A bright color across the nail with a metallic or white half-moon.
Double French Tips
Add an extra line of color for a modern, two-toned effect.
How-To:
1. Apply your base coat and base color.
2. Create your first French tip (e.g., white). Let it dry completely.
3. Using a thin nail art brush, carefully paint a second, thinner line of a contrasting color just below your first tip, following the curve.
4. Alternatively, use guides for both lines, or paint the second line freehand.
5. Seal with a top coat.
Stylish Ideas:
White tip with a thin black line below it.
Pink tip with a gold or silver line underneath.
Blue tip with a white accent line.
Ombré or Gradient French Tips
This trendy technique involves a smooth transition from one color to another, often from the tip down or across the nail.
How-To:
1. Apply your base coat and base color.
2. For a tip-to-nail gradient: Apply white ( or colored) polish to a sponge. Gently dab the sponge across the free edge of your nail, overlapping slightly with the base color. Repeat to build intensity.
3. For a color transition: Use two colors. Apply one color to the tip, then use a sponge or brush to blend the second color from the cuticle upwards, creating a seamless fade.
4. Clean up edges and apply a top coat.
Stylish Ideas:
White to sheer pink gradient.
Pink to coral gradient.
Blue to purple gradient.
—
Maintaining Your French Tips: Keeping Them Fresh
Your beautiful French tips deserve to last! A little care goes a long way in keeping your manicure looking salon-perfect.
Apply Top Coat Regularly: Reapply a layer of top coat every 2-3 days. This refreshes your manicure, adds shine, and helps prevent chips.
Keep Them Moisturized: Dry nails are prone to chipping. Use cuticle oil daily and hand cream regularly to keep your nails and cuticles healthy and hydrated. For excellent cuticle care, consider products with ingredients like jojoba oil or vitamin E.
Be Gentle: Avoid using your nails as tools. Open cans, scratch labels, or pry things open with your fingertips – this is a quick way to break or chip your polish.
Protect During Chores: Wear gloves when doing dishes, cleaning with harsh chemicals, or gardening. This protects your manicure from water damage and harsh substances. According to the Centers for Disease Control and Prevention (CDC), wearing gloves can protect your skin and nails from irritants.
Touch-Ups: If you get a small chip, you can often do a quick touch-up with a matching polish color and a fine brush to blend it in.
—
Troubleshooting Common French Tip Problems
Even with the best intentions, sometimes things don’t go perfectly. Here are a few common issues and how to fix them when creating French tip nail designs:
Problem: Shaky or Uneven Tip Line
Why it happens: Trying to rush, unsteady hand, polish too thick or too thin.
How to fix:
Use Guides: French tip stickers are your best friend here!
Steady Your Hand: Rest your wrists on a stable surface. Brace your pinky finger on the table.
Brush Control: If freehanding, use a thin liner brush. Load it with moderate polish. Wipe excess off on the bottle neck. Paint in smooth strokes.
Clean Up: Use a small brush dipped in polish remover to carefully shave off any polish that’s gone astray.
Problem: Polish Seeped Under Guide Stickers
Why it happens: Stickers weren’t pressed down firmly enough, or the base color polish wasn’t fully dry, or polish is too thin.
How to fix:
Press Firmly: Ensure sticker edges are completely sealed.
Dry Base: Wait until the base color is completely dry to the touch before applying stickers.
Thick Polish: Apply your white polish in thin coats rather than one thick one.
Neaten: If it’s a small seep, try to gently scrape it away with a toothpick while wet, or carefully clean up with a brush and remover after it dries.
Problem: Tips Are Too Thick or Too Thin
Why it happens: Over-painting, not enough polish on the brush, or using too much polish.
How to fix:
Practice Proportion: Look at your natural nail’s smile line for reference. Aim for a tip that’s about 1/4 to 1/3 of your nail length.
Brush Control: With a brush from the bottle, wipe off excess. With a liner brush, control the amount of polish.
Layering: If you aim for a thin tip, it’s better to do two thin coats than one thick one.
Problem: Polish Smudging or Streaking
Why it happens: Applying polish too quickly, not letting coats dry, or applying top coat too aggressively over wet polish.
How to fix:
Patience: Let each coat dry properly before applying the next. A quick-dry top coat can help speed things up.
Gentle Top Coat: Apply top coat from cuticle to tip in one smooth stroke, avoiding going back and forth too much over wet polish.
—
Frequently Asked Questions (FAQ)
Here are some answers to common questions beginners have about French tip nail designs.
Q1: How long should my French tips be?
A1: There’s no strict rule! The most classic French tips mimic your natural smile line, usually about 1/4 to 1/3 of your nail length. However, you can go shorter for a subtle look or longer for a more dramatic effect. Most importantly, aim for them to be even on each nail!
Q2: Can I do French tips on short nails?
A2: Absolutely! French tips can look incredibly chic on short nails. The key is to keep the white tip (or colored tip) thinner to avoid making your nails look shorter. Aim for a delicate line.
Q3: What’s the best way to get a super crisp line?
A3: The easiest way for beginners is to use French tip guide stickers. For those who prefer freehanding, a very fine liner brush and steady hands are essential. Always ensure your base polish is completely dry before applying your tip color.
Q4: Can I use regular nail polish for French tips?
A4: Yes, you can! While gel polish offers incredible durability and shine, regular air-dry nail polish works perfectly well for French tips. Just be sure to let each layer dry thoroughly and finish with a good top coat to extend wear.
Q5: How do I remove French tips if I want a change?
A5: Simply use a standard nail polish remover and cotton pads, just like you would for any other nail polish manicure. For stubborn colors or glitter, you might need to let the soaked cotton pad sit on your nail for a minute or two before wiping.
Q6: My white tips look streaky. What can I do?
A6: This usually means you need a more opaque white polish or a second coat. Ensure your first coat is completely dry before applying the second. Also, avoid overloading your brush – one or two thin, even coats are better than one thick, streaky one.
Q7: Can I combine French tips with other nail art?
A7: Definitely! French tips are a versatile base. You can add dots, stripes, small


