Freehand nail art is achievable for beginners with essential techniques focused on grip, steady hands, and simple designs. Master these proven methods to create beautiful, custom nails at home with confidence and creativity.
Ever scrolled through gorgeous nail art and thought, “I could never do that”? You’re not alone! Many of us admire intricate freehand designs but feel intimidated to try them ourselves. The good news? You absolutely can! It’s all about learning a few core techniques that steady your hand and boost your confidence. Forget fancy tools for a moment; we’re going back to basics to unlock your inner nail artist.
This guide breaks down the essentials of freehand nail art. We’ll cover how to prepare your nails, choose the right tools, and master those crucial strokes. Get ready to transform your manicure routine into a creative adventure!
Get Started with Freehand Nail Art: Your Essential Toolkit
Before we dive into painting, let’s make sure you have the right gear. You don’t need a professional salon’s worth of supplies to start. A few key items will set you up for success.
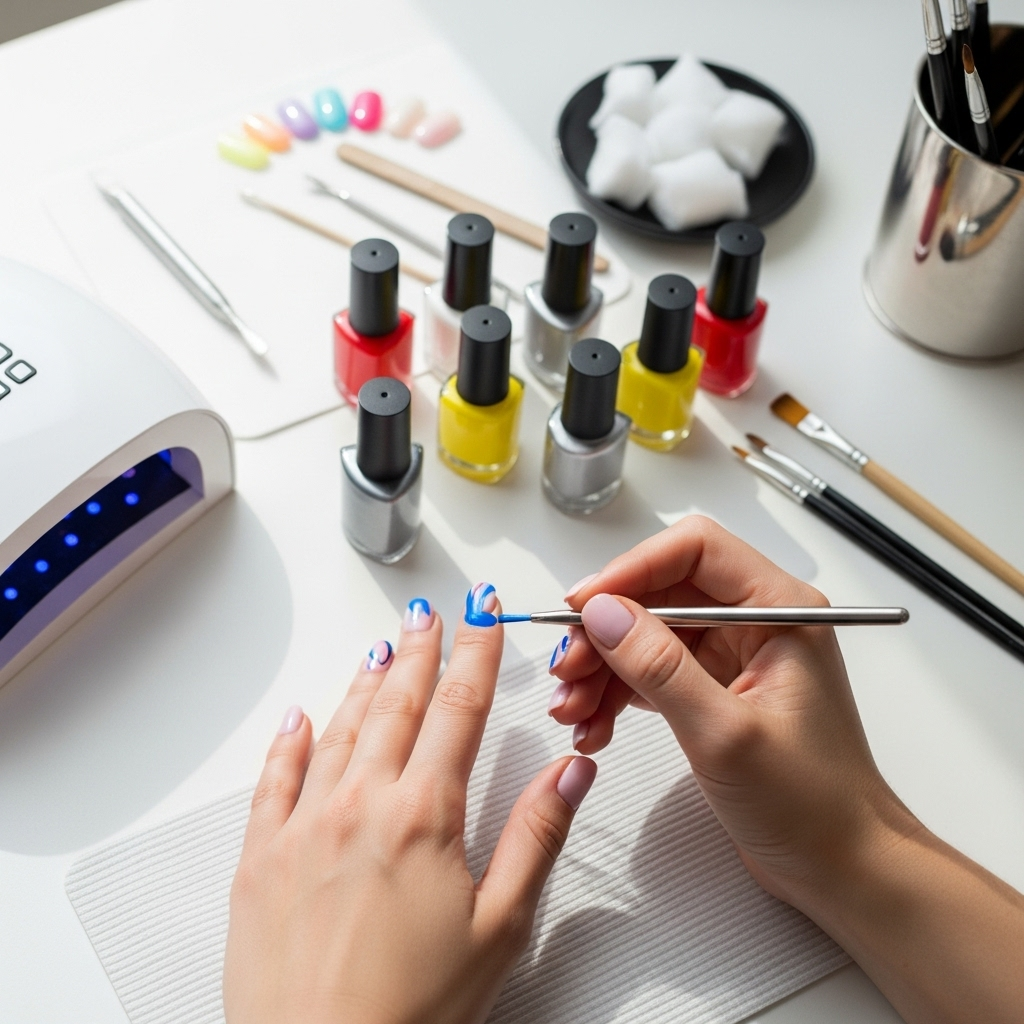
Essential Tools for Beginner Freehand Nail Art
- Nail Polish: Start with a few basic colors. Opaque, good-quality polishes are easier to work with than streaky or super-sheer ones.
- Thin Brushes: These are your magic wand! Look for fine-tip detail brushes specifically designed for nail art. A striping brush (long, thin bristles) and a dotting tool (metal ball at the end) are fantastic for beginners. You can often find affordable sets online or at beauty supply stores.
- A Steady Surface: Find a place where you can rest your elbows or forearms. This is crucial for stability. A desk or table works perfectly.
- Cotton Swabs & Nail Polish Remover: Mistakes are part of learning! Keep these handy for quick cleanups and perfecting your lines.
- Top Coat: A good top coat seals your design and adds a beautiful sheen.
- Base Coat: Protects your natural nails and helps polish adhere better.
Preparing Your Canvas: The Foundation for Flawless Art
Just like any great masterpiece, your nail art needs a smooth, clean surface to shine. Proper nail prep makes a huge difference in how easily you can create designs and how long they last.
- Clean Nails: Start with clean, dry nails. Remove any old polish thoroughly. Wash your hands to get rid of any oils.
- Shape and Buff: File your nails into your desired shape. Gently buff the surface to create a slightly smooth canvas. This helps polish adhere better, preventing chips.
- Cuticle Care: Gently push back your cuticles. Tidying up the cuticle area gives you more space to work and makes your designs look neater.
- Base Coat Power: Apply a thin, even layer of base coat. Let it dry completely. This step is non-negotiable for protecting your nails from staining and ensuring your art stays put.
Mastering the Grip: Your Key to Steady Strokes
The biggest hurdle for beginners in freehand nail art is often shaky hands. The secret? It’s all in how you hold your brush and position yourself. Think of it like learning to write or draw – comfort and control are key!
Finding Your Anchor: The Elbow-Rest Technique
This is your proven secret weapon. Resting both your elbows on a stable surface allows your arms to be stabilized, drastically reducing natural hand tremors. It’s like giving your painting arm a bit of extra support.
- Place your elbows firmly on your desk or table.
- Lean in slightly so your forearms are supported.
- This stable base allows your wrist and fingers to move more freely and with greater control.
The Brush Grip: Less Squeeze, More Glide
How you hold your brush impacts your control. You don’t need to grip it tightly!
- Pencil Grip (Modified): Hold your brush loosely, similar to how you’d hold a pencil for drawing. Don’t clench.
- Angle Matters: Experiment with different angles. Often, a slight tilt of the brush, rather than holding it straight up and down, can lead to smoother lines.
- Use the Brush Tip: For fine details, use only the very tip of your brush. For broader strokes, use a bit more of the bristle length.
Light Pressure, Consistent Movement
When applying polish, use the lightest pressure possible. Let the polish and the brush do the work. Jerky movements will create gaps or blobs. Aim for smooth, fluid strokes. If you need to make a long line, try to do it in one continuous motion rather than stopping and starting.
Exploring Essential Freehand Nail Art Techniques
Now that you’re prepped and have your grip down, let’s get to the fun part – creating designs! We’ll start with simple, impactful techniques that are perfect for beginners.
1. The Dotting Technique: Your First Steps to Precision
Dots are the building blocks of many nail art designs. They’re simple to create and incredibly versatile. A dotting tool is your best friend here, but a bobby pin or the end of a toothpick can also work in a pinch!
- Load Your Tool: Dip the tip of your dotting tool (or bobby pin) into a small amount of nail polish. Don’t overload it; a little goes a long way.
- Touch and Lift: Gently touch the polish-laden tip to your nail where you want the dot.
- Lift Straight Up: Pull the tool straight up. This creates a clean, uniform dot.
- Vary Sizes: Use different sized dotting tools or vary the pressure slightly to create dots of different sizes.
- Create Patterns: Arrange dots in lines, clusters, flowers, or even simple smiley faces.
Tips for Perfect Dots:
- Wipe excess polish off your tool onto a piece of paper towel between dots to keep them clean and consistent.
- If you’re aiming for perfectly spaced dots, you can use a ruler or even sketch out a guide on paper first.
- For larger dots, you might need to reload your tool more often.
2. Simple Lines and Swirls: Adding Flair with Your Brush
Lines and swirls add dynamism to any manicure. Patience and a steady hand are key here, but remember, practice makes perfect!
- Load Your Fine Brush: Dip the very tip of your thin nail art brush into polish. Wipe off any excess on the side of the bottle or a paper towel. You want enough polish to create a line, but not so much that it’s gloppy.
- Position Your Brush: Hold your brush at a slight angle to the nail.
- Draw Your Line: Gently touch the tip of the brush to the nail and glide it across in a smooth, steady motion. Try to keep the pressure consistent.
- For Thicker Lines: You can go over a line again once the first layer is slightly dry, or use a brush with slightly more bristles.
- Creating Swirls: Start with a dot and gently pull it into a curve, or draw a wavy line.
Beginner-Friendly Line Designs:
- French Tips: Use a fine brush to draw a crisp white or colored line along the tip of your nail. You can use tape for a perfect edge, but freehand is great for a more artistic look!
- Stripes: Vertical or horizontal stripes are classic and easy. Aim for even spacing.
- Simple Geometric Shapes: Triangles, squares, or even just outlines.
- V-Shapes: A simple V at the cuticle area or the tip looks chic.
3. Ombre and Gradients: Blending Colors Like a Pro
Ombre, the art of color fading, looks more complex than it is. While a sponge is common, you can achieve a beautiful freehand gradient effect with a bit of clever brushwork.
- Apply Base Color: Paint your nails with your base color and let it dry completely.
- Map Your Colors: On a piece of paper or a palette, paint two or three colors you want to blend next to each other, touching.
- Load Your Brush: Take a clean, slightly damp brush (a fan brush or a wide flat brush works well here) and gently pick up a bit of each color where they meet.
- Blend on Paper: Gently swirl the brush on a clean section of your palette or paper to blend the colors together on the brush.
- Apply to Nail: Lightly dab or brush the blended colors onto your nail where you want the fade to begin. You might need to reload and repeat to build up the intensity.
- Clean Up: Use a brush dipped in nail polish remover to clean up the edges and refine the gradient.
4. Stencils and Guides: Perfecting Edges for Beginners
Even for “freehand,” sometimes a little help to get clean lines is appreciated! Specialty nail art stickers, tape, or even crafting tape can be your best friends.
- Apply Stencil: Place your chosen stencil (e.g., a chevron sticker, a striping tape) firmly onto your dried nail polish. Ensure there are no air bubbles.
- Paint Over: Apply your next color of polish over the stencil.
- Peel Immediately: While the top polish is still slightly wet, carefully peel off the stencil. This prevents the polish from lifting with the stencil.
- Result: You’ll have crisp, clean lines or patterns left behind.
Popular & Achievable Freehand Designs for At-Home Artists
Ready to put those techniques into practice? Here are some super achievable designs that look amazing and are perfect for your first freehand attempts.
Floral Fun: Simple Petals and Centers
Flowers don’t have to be complicated. Think simplified shapes!
- Method: Use your dotting tool. Make five small dots in a circle. Connect them with tiny lines or just leave them as dots for a daisy effect. Use a contrasting color for the center dot.
- Tips: Try drawing just a few petals with your fine brush – a simple curved line for each.
Geometric Glitz: Lines, Dots, and Angles
Modern and chic, geometric designs are forgiving and stylish.
- Method: Use your striping brush to create clean lines. A single diagonal line, criss-cross patterns, or simple triangles. Combine with dots for added interest.
- Tips: Use painter’s tape or striping tape for perfectly straight lines, then add freehand details around them.
Marble Magic: Effortless Elegance
The marble effect looks luxurious but is surprisingly easy freehand.
- Method: Paint your nail a base color. While still wet, add a few random veins of a contrasting color using your fine brush. Gently swirl these veins with a clean brush or toothpick.
- Tips: Don’t over-blend! A few distinct veins create the best look.
Minimalist Accents: Subtle Sophistication
Sometimes, less is more. A single dot, a thin line, or a tiny symbol can elevate a plain manicure.
- Method: A single metallic dot at the cuticle, a thin line across a nude nail, or a tiny heart.
- Tips: These are perfect for practicing your steadiness.
Maintaining Your Masterpiece: Extending the Life of Your Art
You’ve put in the effort to create beautiful freehand nail art, so let’s make it last!
The Crucial Top Coat
A good top coat is your art’s best friend. Apply a thin, even layer over your entire nail, making sure to cap the free edge (paint a little bit of the top coat on the very edge of your nail). This seals in your design and protects it from chipping and smudging.
Daily Care to Protect Your Polish
Treat your nails gently! Avoid using them as tools to open cans or scratch labels. Wear gloves when doing household chores, especially washing dishes or cleaning with harsh chemicals. This protects both your natural nails and your beautiful artwork.
When to Touch Up or Redo
Even with the best care, nail art can chip over time, especially on well-used nails. Don’t be afraid to touch up small chips with a bit of polish or to simply remove and start fresh when you’re ready for a new design. The beauty of DIY is that you can change it whenever you like!
Troubleshooting Common Freehand Nail Art Issues
Every artist encounters a few bumps in the road. Here’s how to handle common problems:
| Problem | Solution |
|---|---|
| Bumpy or Uneven Lines | Ensure your brush is cleaned of excess polish. Use lighter, more consistent pressure. You can go over lines with a clean brush dipped in polish remover to refine them. |
| Polish Smudging | Allow each layer of polish (base color, design, and top coat) to dry completely before applying the next. Be extra patient with your final top coat. |
| Brush Strokes Showing | Use less polish on your brush. Apply thinner coats. For lines, try a single, confident stroke rather than multiple short ones. Make sure your base colors are fully opaque. |
| Dots are Blobby or Uneven | Wipe excess polish off your dotting tool before each dot. Aim for a clean, straight dip into the polish. Lift the dotting tool straight up. Practice makes perfect for consistent size. |
| Painters Tape Lifting Polish | Ensure the polish underneath is completely dry before applying tape. Peel the tape off slowly and carefully while the top coat is still slightly wet. |
FAQ: Your Freehand Nail Art Questions Answered
Q1: What is the easiest freehand nail art for beginners?
A1: Dots and simple lines are the easiest. You can create many beautiful designs using just these two techniques. Try making polka dots or single stripes.
Q2: How do I get my lines perfectly straight?
A2: It takes practice! Resting your elbows for stability is key. For super-straight perfection, you can use nail art tape or stencils as guides. Freehand will naturally have a slightly organic feel.
Q3: Can I use regular makeup brushes for nail art?
A3: While you can use very small, stiff makeup brushes, dedicated nail art brushes are designed for polish and offer much better control and precision. You can often find inexpensive sets that work great.
Q4: How long does a freehand nail art design typically take?
A4: For simple designs like dots or stripes, 10-20 minutes per hand after polish is dry. More intricate designs can take 30 minutes or longer. Patience is important.
Q5: What’s the best way to clean my nail art brushes?
A5: Clean them immediately after use! Swish them in nail polish remover until all polish is gone, then rinse with soap and water. Reshape the bristles and let them air dry flat or on a brush guard.
Q6: My nail polish is too thick/thin for freehand art. What should I do?
A6: For thin polish, let your base color dry completely and apply thin layers for your design. For thick polish, it can be difficult to control. You might need to add a drop of nail polish thinner (not remover!) to revive old polish. However, starting with good quality, fresh polish is always best.
Q7: How do I avoid getting polish on my skin?
A7: You can apply a thin layer of liquid latex or a special peel-off base around your nails before you start painting. For clean-up, a small brush dipped in nail polish remover is very effective. Make sure to work on a stable surface and be deliberate with your strokes.
Embark on Your Creative Manicure Journey
Freehand nail art is a journey, not a destination. With these essential techniques, you’ve got a solid foundation to build upon. Remember to be patient with yourself, celebrate every small win, and most importantly, have fun! Your nails are a fantastic canvas for self-expression, and mastering even a few simple freehand designs can boost your confidence and creativity immensely.
So grab your favorite colors, find that steady spot, and start creating. You might be surprised at just how beautiful and unique your own nail art can be. Happy painting!