Foil flakes over pastel nails offer a dazzling, affordable way to elevate your manicure. They add a professional, salon-quality shimmery finish that’s surprisingly easy for beginners to achieve at home, transforming simple pastels into something truly special and eye-catching with minimal effort.
Pastel nails are a dream for spring and summer, but sometimes they can feel a little… soft. We love that delicate, pretty vibe, but what if you want a little more? More sparkle, more dimension, more wow? Enter foil flakes! These tiny, shimmering pieces are the secret weapon to transforming your sweet pastels into show-stopping nails. If you’ve ever seen gorgeous, multidimensional metallic accents on nails and wondered how it’s done, wonder no more! This guide will walk you through everything you need to know to master foil flakes over your favorite pastel shades. Get ready to add some serious glam to your DIY manicures!
What Are Foil Flakes, and Why Do They Shine Over Pastels?
Foil flakes, also known as nail foil transfer pieces or holographic foil glitter, are small, irregular-shaped particles of metallic or iridescent foil. They’re designed to catch the light and create a stunning, fragmented, almost shattered-glass effect on your nails. Unlike glitters that are uniform in shape, flakes have a natural, organic look that makes them incredibly versatile and beautiful.
But why do they look so amazing over pastel nails? Pastels provide the perfect canvas. Their light, airy pastel base allows the vibrant shimmer and multifaceted colors of the foil flakes to truly pop. The contrast between the soft pastel and the intense metallic shine creates a beautiful depth and dimension that’s simply captivating. Think of a pale lavender base with shards of rose gold foil – it’s pure magic!
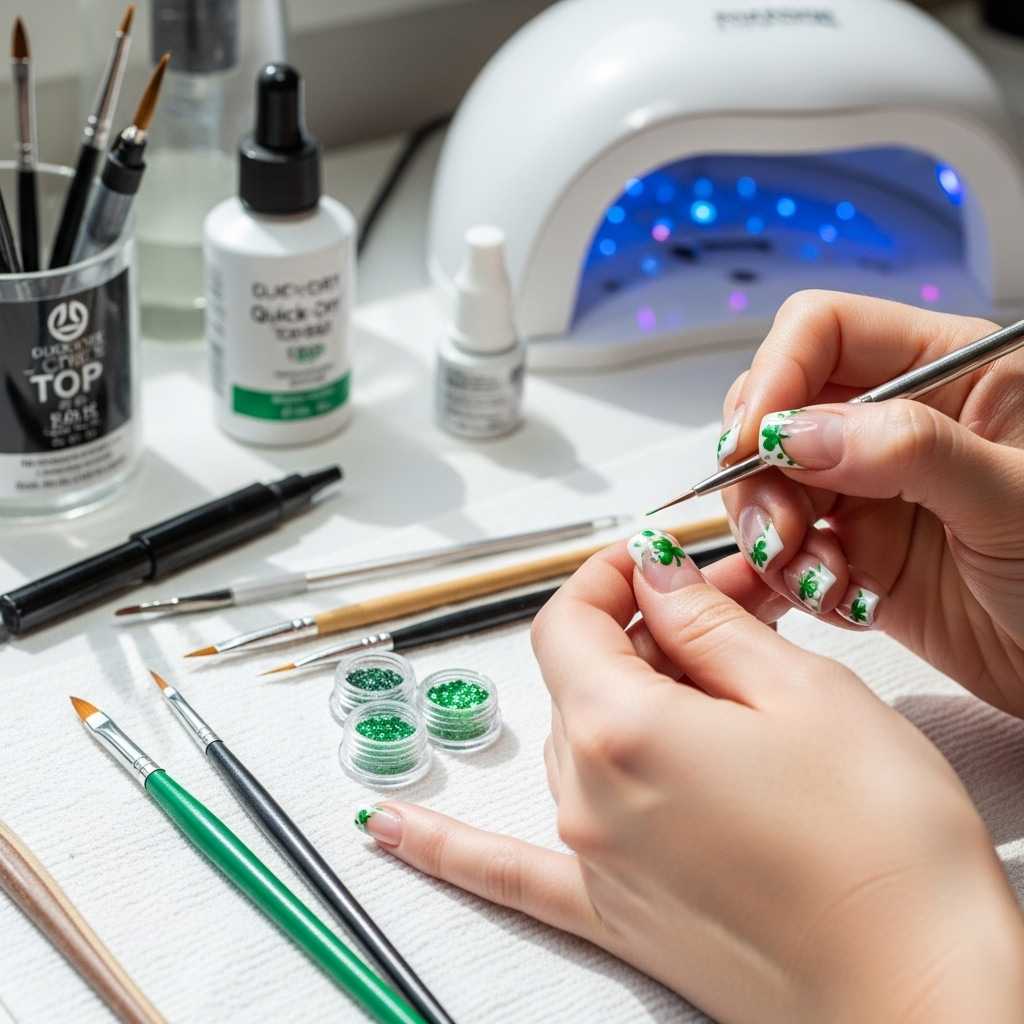
Essential Tools for Foil Flake Perfection
Gathering your supplies is the first step to a flawless manicure. Don’t worry, you likely have most of these already if you do your nails at home! Having the right tools makes the process so much smoother and the results so much prettier.
What You’ll Need:
- Your favorite pastel nail polish: This can be regular polish, gel polish, or even dip powder.
- Nail foil flakes: These come in countless colors and finishes!
- Nail foil glue or gel: This is crucial for the flakes to adhere. Special foil glues are designed to be tacky when ready. Gel polish (if using a gel system) also works as a base for the foil.
- Tweezers or an orangewood stick: For picking up and placing the flakes precisely.
- Top coat: A good quality top coat seals everything in and adds shine.
- Optional: Base coat
- Optional: LED/UV lamp (if using gel polish)
- Optional: Rubbing alcohol or nail polish remover (for cleaning up mistakes)
- Optional: A small brush or sponge (for diffusing flakes if desired)
Pros and Cons of Nail Foil Flakes
Like any nail art technique, foil flakes have their advantages and a few things to keep in mind. Understanding these can help you decide if they’re the right choice for your next DIY masterpiece.
| Pros | Cons |
|---|---|
| Stunning visual appeal: Creates a unique, shimmering, and dimensional effect. | Can be messy if not careful: Flakes can scatter if you’re not gentle. |
| Versatile: Works with various colors and nail art styles, from subtle accents to full-on glam. | Requires a specific adhesive: Standard nail glue might not work as well. |
| Relatively easy for beginners: Application is straightforward once you get the hang of it. | Can be difficult to remove completely: Sometimes tiny flakes can cling to the nail or cuticle area. |
| Affordable way to upgrade nails: Much cheaper than professional application for a similar look. | Can add thickness to nails: If too many layers are applied or not sealed well, they can feel bulky. |
| Durable: Once properly applied and sealed, they can last as long as your manicure. | Requires practice for ombre/gradient effects: Achieving a smooth transition takes a bit more skill. |
Step-by-Step Guide to Foil Flakes Over Pastels
Ready to get decorating? This guide breaks down the process into simple, easy-to-follow steps. We’ll cover both regular polish and gel polish methods, so you can use your favorite system!
Method 1: Using Regular Nail Polish & Foil Glue
This is a fantastic starting point for beginners because it doesn’t require a UV/LED lamp. The key is waiting for the foil glue to become tacky!
- Prep your nails: Start with clean, dry nails. Push back your cuticles and gently buff your nails to create a smooth surface. Apply a base coat and let it dry completely.
- Apply your pastel polish: Paint your nails with 1-2 coats of your chosen pastel polish. Let the final coat dry completely. This is important – if it’s still wet, it will smudge the foil.
- Apply nail foil glue: This is where the magic begins! Apply a thin, even layer of specialized nail foil glue over the area where you want the flakes to stick. Some glues change color when they’re ready, while others just become tacky. Allow the glue to dry until it’s clear and tacky to the touch (but doesn’t transfer to your finger). This usually takes a minute or two, but check your specific product instructions. Rushing this step is a common mistake!
- Apply the foil flakes: Using tweezers or an orangewood stick, gently pick up a few foil flakes. Press them onto the tacky foil glue. You can place them randomly for a scattered look, pack them together for a more solid metallic effect, or press them only on certain areas for an accent. Don’t worry if they’re not perfect; the irregular shapes are part of their charm!
- Seal the deal: Once you’re happy with the placement of your flakes, let them sit for a minute. Then, carefully apply a generous layer of your favorite top coat over the entire nail, making sure to completely encapsulate the flakes. This is crucial for preventing them from peeling off and for smoothing the surface. Apply a second layer of top coat if needed to ensure a super smooth finish.
- Clean up: Use a small brush dipped in nail polish remover to clean up any stray flakes or polish around your cuticle area.
Method 2: Using Gel Polish & a UV/LED Lamp
Gel polish offers a longer-lasting finish, and the tackiness of a gel top coat (before curing) is perfect for adhering foil flakes.
- Prep your nails: Clean and prep your nails. Apply a base coat and cure it under your LED/UV lamp according to the manufacturer’s instructions.
- Apply pastel gel polish: Apply 1-2 thin coats of your pastel gel polish, curing each coat as directed.
- Apply a gel top coat NO WIPE: This is key! Apply a thin layer of a no-wipe gel top coat over your pastel gel color. Do NOT cure it yet. The uncured sticky layer of the no-wipe top coat is what the foil will adhere to. If you don’t have a no-wipe top coat, you can use a regular gel top coat, cure it, and then gently wipe off the inhibition (sticky) layer with rubbing alcohol.
- Transfer the foil: Cut a piece of transfer foil to size. Place the colored side of the foil down onto the uncured (or wiped-down) gel top coat. Press down firmly and smoothly. You can use a silicone tool, your fingertip, or even a cotton swab.
- Peel off the backing: Gently peel off the backing paper of the foil. The metallic design should have transferred to your nail. If there are patchy spots, you can sometimes go back with a bit more uncured gel (if you didn’t wipe it off) or a touch of foil glue and reapply a piece of foil.
- Seal and cure: Once you’re happy with the transfer, apply another layer of no-wipe gel top coat over the entire nail to encapsulate the foil. Cure this final layer under your LED/UV lamp per product instructions.
- Clean up: If any gel got on your skin or cuticles, clean it up before curing.
Tips for Perfect Foil Flake Application
Even with a step-by-step guide, a few pro tips can make all the difference:
- Less is often more: Especially when starting, try using just a few flakes to get the hang of it. You can always add more!
- Work in small sections: If you’re aiming for a full-coverage metallic look, apply flakes to one nail at a time to prevent your glue or gel from drying out.
- Experiment with placement: Try placing flakes on just the tips, along the cuticle, or in a specific pattern.
- Use fine-tip tweezers: This gives you more control over picking up and placing tiny flakes.
- Seal thoroughly: Don’t skimp on the top coat! A good seal prevents lifting and makes your design last longer. Make sure to cap the edges of your nails as well.
- Clean up smudges immediately: If you’re using regular polish, a small cleanup brush with remover is your best friend. For gel, clean up the surface while it’s still uncured.
- Consider the nail shape: Shorter, squoval, or almond nails often show off foil flakes beautifully, but they look great on any shape!
Creative Ways to Style Foil Flakes with Pastels
Pastel nails are already a statement, but foil flakes can take them to a whole new level of artistry. Here are some ideas to spark your creativity:
Subtle Accents
For a touch of sparkle without going overboard, apply a few flakes strategically. Think about placing them just along the free edge of the nail (like a metallic French tip) or near the cuticle for a modern halo effect. This is perfect for everyday wear or when you want a hint of glam.
Ombre and Gradients
Create a stunning ombre effect by blending a softer application of flakes at the cuticle into a denser application towards the tip of the nail. You can even use two complementary foil colors for an even more dynamic look. Diffuse the edges with a dry brush or sponge for a seamless transition.
Full-Coverage Shimmer
For a seriously glamorous statement, cover the entire nail in foil flakes. Choose a bold foil color like iridescent silver, holographic gold, or deep rose gold. This is perfect for special occasions or when you want your nails to be the star of the show!
Geometric and Pattern Play
Use tape or stencils to create geometric shapes on your pastel base, then apply flakes only within those shapes. Alternatively, pick up individual flakes with a detail brush and carefully place them to create abstract designs, lines, or even tiny dots.
Mix and Match Foils
Don’t be afraid to combine different foil colors and finishes on different nails, or even on the same nail! A base of pale pink with accents of rose gold and champagne foil can be incredibly sophisticated and unique.
Foil Flakes and Other Nail Art
Foil flakes don’t have to be the only element! You can pair them with subtle hand-painted details, tiny rhinestones, or even stamped designs on accent nails for a truly complex and artistic look.
Choosing the Right Foil Flakes
The world of nail foil flakes is vast and exciting! When you’re starting out, you might feel overwhelmed by the choices. Here’s a little guidance to help you pick the perfect flakes for your pastel creations:
Types of Foil Flakes
- Iridescent: These reflect light and shift colors depending on the angle, offering a rainbow-like sheen. They’re stunning over any pastel.
- Holographic: These create a vivid spectrum of colors when light hits them, often with a distinct, sharp rainbow effect. Holographic flakes are incredibly eye-catching.
- Metallic: Classic gold, silver, rose gold, bronze, and even colored metallics. These provide a bold, solid shimmer.
- Shaped Flakes: Beyond the irregular shards, you can sometimes find flakes in shapes like squares, circles, or hexagons for a more structured look.
Color Combinations to Try:
Pastel colors are so forgiving, but here are some popular and stunning pairings:
- Pale Blue/Mint Green + Silver/Holographic Foil: Creates a cool, icy, ethereal vibe.
- Baby Pink/Lavender + Rose Gold/Champagne Foil: Ultra-feminine and romantic.
- Peach/Coral + Gold/Bronze Foil: Warm and radiant, perfect for a summer glow.
- Soft Yellow + Iridescent White/Silver Foil: Bright, sunny, and playful.
- Any Pastel + Multicolored Holographic Foil: For a bold, dynamic, and fun look that goes with everything.
Maintaining Your Foil Flake Mani
Once your stunning foil flake pastel nails are complete, you’ll want them to last! Proper care is key:
- Be gentle: Avoid using your nails as tools. Don’t scrape or pick at things, as this can lift the foil or the top coat.
- Wear gloves: When doing household chores involving water or harsh chemicals (like washing dishes or cleaning), wear rubber gloves. This protects your beautiful nails.
- Moisturize regularly: Keep your hands and cuticles hydrated with cuticle oil and hand cream. Healthy skin around your nails helps your manicure look its best.
- Avoid acetone on the tips: If you need to use nail polish remover for any reason, focus it on the tips and edges and try not to scrub vigorously, especially if you’ve used regular polish. Gel polish is more resistant to regular removers.
Frequently Asked Questions About Foil Flakes Over Pastel Nails
Q1: Can I use any kind of glue for foil flakes?
A: It’s best to use specialized nail foil glue or a gel polish system. Regular craft glue or white school glue won’t work properly; they don’t have the right tackiness or drying properties for smooth foil transfer and durability. For gel polish, the uncured sticky layer of a no-wipe top coat is designed for this purpose.
Q2: How do I prevent my foil flakes from peeling off?
A: Proper application and sealing are crucial! Ensure your pastel base is completely dry before applying glue or your gel top coat. Make sure the foil glue is tacky but not dry. When applying flakes, press them down firmly. Most importantly, seal them completely with a generous layer of top coat, making sure to cap all the edges of your nails.
Q3: Can I use foil flakes over regular nail polish, or only gel?
A: You can absolutely use foil flakes with regular nail polish! The key is using a suitable nail foil glue and ensuring your pastel polish is completely dry before applying the glue. The process is