Fall nail art doesn’t have to be complicated! Discover stunning, easy-to-achieve designs using rich autumn colors, simple patterns, and essential tools. Get inspired to create beautiful seasonal manicures that express your unique style, even if you’re a beginner.
Hello, nail lovers! As the leaves start to turn those gorgeous shades of red, orange, and gold, it’s the perfect time to refresh your manicure. Feeling like your nails need a cozy, autumnal makeover? You’re in the right place! Many of us think intricate nail art is only for the pros, but I’m here to show you how easy it can be to rock some stunning fall nail art. We’ll explore beautiful ideas that are perfect for beginners and add that special touch to your autumn look. Get ready to fall in love with your nails all over again!
Why Fall Nail Art is a Must
Autumn brings a unique vibe, and your nails can totally capture that! Think warm, cozy colors, textured finishes, and designs inspired by nature’s beauty. It’s a fantastic way to express yourself and embrace the season. Plus, let’s be honest, who doesn’t love a fresh, stylish manicure? It’s an easy confidence booster!
Essential Tools for Stunning Fall Nail Art
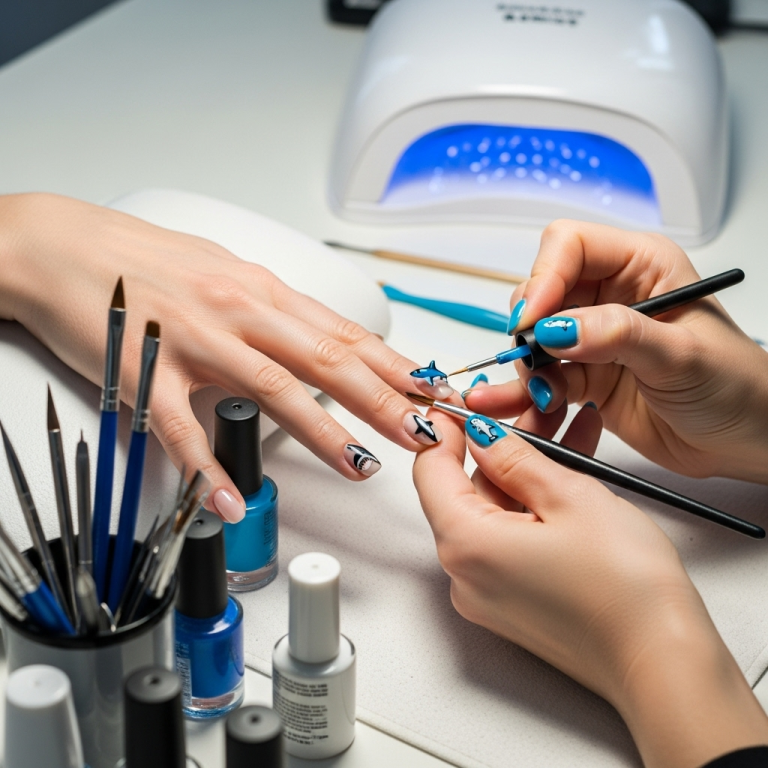
Before we dive into the designs, let’s gather our toolkit! You don’t need a salon full of fancy gadgets. A few key items will get you started on your fall nail art journey:
Here are some must-have tools:
- Nail Polish: A collection of fall-appropriate shades (see below for color ideas!).
- Base Coat and Top Coat: Crucial for protecting your natural nails and making your design last.
- Dotting Tools: These have little balls on the end and are perfect for creating dots and simple patterns.
- Thin Nail Art Brush: Great for lines, swirls, and delicate details.
- Orange Stick or Cuticle Pusher: For cleaning up edges and pushing back cuticles.
- Nail Polish Remover and Cotton Pads: For correcting mistakes and cleaning up.
- Optional: Stencils or Nail Wraps: If you want extra help with defined shapes or quick designs.
The Perfect Fall Nail Polish Colors
The colors of autumn are incredibly inspiring! When choosing polishes for your fall nail art, think about the warm, earthy tones you see around you.
Here’s a palette to get you started:
- Deep Reds & Burgundies: Like mulled wine or falling maple leaves.
- Warm Oranges & Terracottas: Think pumpkin spice and cozy sweaters.
- Rich Browns: From chocolate to chestnut, these add a sophisticated touch.
- Mustard Yellows & Golds: For a pop of warm sunshine.
- Muted Greens: Olive, forest green, or sage evoke autumn foliage.
- Creamy Neutrals: Beige, taupe, and cream provide a perfect backdrop.
- Sparkling Accents: Gold, copper, or bronze glitter polishes for that extra shimmer.
Beginner-Friendly Fall Nail Art Ideas
Now for the fun part! These designs are simple, stylish, and totally achievable for anyone.
1. The Classic Gradient (Ombre)
Ombre nails look super chic and are easier than you think! It’s all about blending colors.
How to Create a Fall Gradient:
- Prep Your Nails: Start with clean, dry nails. Apply a base coat to protect them.
- Apply Base Color: Paint your nails with your lightest fall shade. Let it dry completely.
- Get Your Sponge Ready: Take a makeup sponge or a craft sponge and cut off a small piece. Apply two or three fall colors next to each other on the sponge. For example, a deep red, an orange, and a brown.
- Dab onto Nail: Gently dab the sponge onto your nail, pressing down so the colors blend. You might need to reapply polish to the sponge and dab a few times to get an even color payoff.
- Clean Up: Use a brush dipped in nail polish remover to clean up any polish that got on your skin.
- Seal It: Once dry, apply a top coat to seal the design and add shine.
Pro-Tip: For a smoother blend, you can apply a thin layer of Vaseline around your nail before sponging. This will catch any excess polish and make cleanup a breeze!
2. Cozy Dot Manicure
Dots are your best friend when you’re starting out with nail art. They’re versatile and always look cute!
How to Create a Dot Manicure:
- Base Coat: Apply your favorite solid fall color as a base. Let it dry thoroughly.
- Choose Your Dotting Tool: Select a dotting tool size you like. For a fall look, try accenting one or two nails with dots.
- Dip and Dot: Dip the ball end of your dotting tool into a contrasting polish color. Gently press it onto your nail to create a dot.
- Create Your Pattern: You can make a simple row of dots, spaced-out polka dots, or even create tiny leaf shapes by overlapping dots. For a “falling leaves” look, use shades of brown, red, and orange dots.
- Repeat: Continue adding dots until you achieve your desired design.
- Top Coat: Finish with a protective top coat.
3. Simple Leaf Accents
Bring a touch of nature to your fingertips with easy leaf designs.
How to Create Leaf Accents:
- Base Color: Paint all your nails with a base color like a deep brown or a creamy beige.
- Leaf Palette: Have your accent colors ready – think shades of green, red, and orange.
- The “C” Stroke: Using your thin nail art brush, load it with an accent color. Start at the cuticle area and paint a curved stroke upwards, like a “C”.
- Complete the Leaf: From the tip of that stroke, paint another curved stroke back down to the cuticle to form a leaf shape.
- Add a Vein (Optional): With a touch of a darker shade or brown, gently draw a line down the center of the leaf for definition.
- Placement: Place one or two leaves on an accent nail, or scatter them across a few nails.
- Seal Your Art: Apply a clear top coat.
Expert Tip: Instead of freehanding, you can use leaf-shaped stencils for perfectly defined shapes! Simply place the stencil on your nail, paint over it, and carefully peel it off when the polish is still slightly wet.
4. Textured “Sweater Weather” Nails
Cozy up with nails that look like your favorite fall sweater! This effect is surprisingly simple.
How to Achieve the Sweater Texture:
- Base Color: Paint your nails with a rich, opaque fall color like deep red, navy, or forest green. Apply two coats for full coverage.
- Apply Top Coat: Apply a thick, non-wipe (no-sticky-residue) top coat over the colored polish. Make sure it’s a generous layer.
- Add the Texture: While the top coat is still wet, use an acrylic powder (a nude, white, or matching color works well) or a fine glitter. You can gently sprinkle it over the entire nail, or use a brush to pat it on.
- Cure (If Using Gel): If you’re using gel polish and top coat, cure your nails under a UV/LED lamp as usual.
- Shake Off Excess: Once cured or dry, gently tap or brush off any excess powder/glitter.
- The Magic: You’ll be left with a raised, matte, textured finish that mimics a knit sweater!
This technique works beautifully for solid colors and gives a subtle, sophisticated texture perfect for fall.
5. Minimalist Stripes and Geometric Lines
Sometimes, less is more! Thin lines and simple geometric shapes add a modern, elegant touch.
How to Create Chic Lines:
- Solid Base: Start with a clean, neutral base color on all nails.
- Choose Your Accent: Pick a metallic polish (gold, copper) or a contrasting dark shade.
- Get Your Fine Brush: Load your ultra-fine nail art brush with the accent polish.
- Draw Your Lines: Carefully draw thin vertical, horizontal, or diagonal lines across one or two accent nails. You can also create simple squares or triangles.
- Keep it Clean: Aim for clean, straight lines. If you make a mistake, quickly clean it up with a pointed cotton swab dipped in remover.
- Seal: Apply a good quality top coat.
Pro-Tip: Striping tape is your friend here! Apply small strips of tape onto your dry base color, paint over them, and peel off the tape once the polish is dry for perfectly straight lines.
Seasonal Nail Art Trends for Fall
Beyond the basics, a few trends are really popular for fall nail art this year, making it easier than ever to stay stylish.
The “Chunky Glitter” Accent
Instead of all-over glitter, try a single accent nail with chunky, festive glitter in gold, bronze, or a deep jewel tone. It’s a dazzling focal point that’s super easy to achieve.
Matte Finishes
Matte top coats are perfect for fall. They give your polish a sophisticated, velvety look that complements earthy tones beautifully. Try a matte finish over a deep berry or brown polish.
“Tortoiseshell” Effect
This looks intricate, but with the right technique, it’s beginner-friendly! It involves layering translucent amber, brown, and black polishes with a fine brush to mimic the pattern of tortoiseshell. A quick online search for “easy tortoiseshell nails” will show some great visual guides!
Subtle Sparkle
A sheer polish with fine, scattered holographic or metallic flecks can give your nails a magical, ethereal shimmer without being over the top. It’s perfect for adding a little something special to a neutral base.
Fall Nail Care Tips
Seasonal changes can affect your nails and hands. Here’s how to keep them looking and feeling their best:
Key Fall Nail Care Practices:
- Moisturize, Moisturize, Moisturize: Cooler, drier air can wreak havoc on cuticles and skin. Apply hand cream and cuticle oil daily, especially after washing your hands.
- Hydrate from Within: Drink plenty of water! Hydration starts from the inside out.
- Gentle Filing: File your nails in one direction to prevent splitting. Avoid sawing back and forth.
- Protect Your Nails: Wear gloves when doing chores like washing dishes or gardening to protect your nails and skin from harsh chemicals and the elements.
- Healthy Diet: A diet rich in vitamins and minerals like biotin, vitamin E, and zinc can contribute to stronger nails. For more on nail health, check out these tips from the American Academy of Dermatology Association on nail care.
FAQ: Your Fall Nail Art Questions Answered
Q1: What are the best colors for fall nail art?
A1: Think warm, earthy, and rich tones! Deep reds, oranges, browns, mustard yellows, olive greens, and creamy neutrals are perfect. Don’t forget metallic accents like gold and copper for a touch of glam.
Q2: I’m a total beginner. Which fall nail art design is the easiest?
A2: The dot manicure is fantastic for beginners! Using a dotting tool or even the tip of a bobby pin, you can easily create simple, cute patterns. Falling leaves using dotted accents is also very forgiving.
Q3: How can I make my nail art last longer?
A3: Always start with a good base coat to protect your nails and help polish adhere. Finish with a high-quality top coat to seal in your design and add shine. Reapply top coat every couple of days if needed.
Q4: My nail polish always chips quickly. What can I do?
A4: Ensure your nails are clean and completely dry before applying polish. Apply thin coats rather than thick ones. Crucially, “cap” the free edge of your nail with your top coat – paint a little bit of polish over the very tip of your nail to seal it.
Q5: Can I do fall nail art without special tools?
A5: Absolutely! You can use a toothpick or the end of a bobby pin for dots, a fine-tipped pen (if it’s a special nail art pen) or even careful brush strokes for lines. Makeup sponges work great for gradient effects.
Q6: How do I clean up messy nail polish mistakes?
A6: Dip a small, pointed brush (like an old eyeliner brush) or a sharpened orange stick into nail polish remover. Carefully trace around your cuticle to remove any polish that has bled beyond your nail.
Conclusion
There you have it – a world of stunning fall nail art ideas that are perfectly suited for beginners! From cozy gradients and simple dots to chic minimalist designs and textured finishes, your nails can truly become a canvas for the autumn season. Remember, nail art is all about self-expression and having fun. Don’t be afraid to experiment with colors, techniques, and patterns. With these simple tips and inspiration, you’re ready to create beautiful, seasonal manicures that will have you feeling stylish and confident all through fall. So grab your polishes, gather your tools, and let your creativity flow. Happy polishing!


