Quick Summary
Discover gorgeous everyday nail designs that are simple, stylish, and easy to achieve! Learn essential techniques and stunning looks perfect for any occasion.
Feeling like your nails are a little… ordinary? You love a beautiful manicure, but the elaborate designs you see online seem way too complicated to do yourself. Maybe you’ve tried a few times and ended up with a smudged mess that made you want to hide your hands. Don’t worry, you’re not alone! Achieving chic and updated nails doesn’t require a professional artist’s touch or hours of your time. It’s totally achievable with the right inspiration and a few simple tricks.
In this guide, we’ll break down how to create stunning, everyday nail designs that are both beautiful and practical. We’ll cover everything from basic prep to easy-to-master techniques, proving that you can have fabulous nails, even on your busiest days. Get ready to transform your nail game with looks that are as easy as they are eye-catching!
h2Personalizing Your Everyday Nail Style: The Foundationh2
Before diving into designs, let’s talk about making your nails the best they can be. It’s like preparing a canvas before painting – a little prep goes a long way! Healthy, well-maintained nails will make any design look even better. Plus, a good nail care routine is crucial for preventing breakage and keeping your manis looking fresh.
h3The Essential Nail Prep Routineh3
Here’s a simple routine to get your nails ready for any design:
- Cleanse: Wash your hands thoroughly to remove any oils or old polish.
- Shape: Use a good quality nail file to gently shape your nails. Consider a classic round, squoval, or a soft almond shape for an elegant look. Aim for smooth edges to prevent snags. Your chosen file should be fine-grained, like a 240-grit file, to avoid damaging the nail.
- Cuticle Care: Gently push back your cuticles with an orange stick or a cuticle pusher. Avoid cutting them, as this can lead to infection. If you have dry cuticles, apply a cuticle oil and massage it in.
- Buff (Optional): A light buff can smooth out ridges, but don’t overdo it. About once a week is plenty.
- Clean Again: Wipe your nails with nail polish remover (even if you didn’t have polish on) to ensure they are free of any dust or oils. This helps your polish and designs adhere better.
h3Choosing Your Color Paletteh3
For everyday wear, classic and versatile colors are your best friends. Think neutrals, soft pastels, deep berries, and classic reds. However, the beauty of everyday nail design is that your favorite color is always an option!
- Neutrals: Creams, beiges, greys, and muted nudes are effortlessly chic.
- Pastels: Soft pinks, blues, lavenders, and mint greens are lovely and light.
- Timeless Tones: Classic crimson, deep burgundy, and sophisticated navy are never out of style.
- Muted Earth Tones: Think olive green, terracotta, and sandy browns for a chic, grounded feel.
Don’t be afraid to experiment! The best everyday color is one that makes you feel confident and happy.
h2Effortless Everyday Nail Designs: Step-by-Steph2
Now for the fun part! These designs are all about adding a touch of flair without being overly complicated. We’ll focus on techniques that are easy to master, even for beginners.
h31. The Chic French Manicure Remixedh3
Forget the stark white tips of yesteryear. The modern French manicure is softer, more customizable, and super stylish.
What you’ll need:
- Base coat
- Sheer nude or pink polish
- A complementary color for the tips (e.g., a soft pastel, a metallic, or even a deeper shade of your base color)
- A fine-tipped brush or a striping tool
- Top coat
Steps:
- Apply a base coat and let it dry completely.
- Apply two thin coats of your sheer nude or pink polish. Let it dry thoroughly. This creates a beautiful, natural-looking base.
- Now for the tips! Instead of a thick white line, use your fine-tipped brush or striping tool dipped in your accent color to paint a thin, curved line along the free edge of your nail. Keep it delicate!
- Alternatively, try a “reverse French” by painting the line at the cuticle base, or a “side-swipe” by painting a thin line just along one edge.
- Carefully clean up any mistakes with a small brush dipped in nail polish remover.
- Finish with a generous layer of top coat.
Pro Tip: If freehand drawing isn’t your strong suit, use thin nail art striping tape (available at most beauty stores) to create clean lines. Apply the tape after the base color has dried, paint over it, and then carefully peel the tape away before the polish is fully cured.
h32. The Subtle Speckled Lookh3
This design adds texture and interest with minimal effort. It’s perfect for a slightly edgy, modern vibe.
What you’ll need:
- Base coat
- A solid color polish (your favorite!)
- A contrasting polish for speckling (black, white, or a metallic often works well)
- An old makeup brush (like a stiff eyeshadow or blush brush) or a stiff toothbrush
- Top coat
Steps:
- Apply base coat and let dry.
- Apply two coats of your solid color polish and let it dry completely until it’s not tacky to the touch. This is important for the speckles to adhere properly.
- Dip the very tip of your old makeup brush or toothbrush into the speckling color.
- Hold the brush a little distance away from your nail (about 6-10 inches) and lightly tap the handle or flick the bristles. This will create fine splatters. Start with a light hand; you can always add more!
- Repeat on all nails, or just on an accent nail for a subtler look.
- Let the speckles dry thoroughly before applying a top coat. This seals the design and smooths out any texture.
Why it works: This technique is forgiving and looks intentional, even if your splatters aren’t perfectly uniform. It’s a great way to use up small amounts of polish, too!
h33. The Minimalist Dot or Line Designh3
Sometimes, less is more. A single dot or a delicate line can elevate your manicure instantly.
What you’ll need:
- Base coat
- Your chosen polish color(s)
- A dotting tool (available at beauty stores) or the tip of a bobby pin
- A fine-tipped brush (for lines)
- Top coat
Steps for Dots:
- Apply base coat and let dry.
- Apply one or two coats of your main polish color. Let it dry completely.
- Dip your dotting tool or bobby pin tip into a contrasting polish.
- Place a single dot near the cuticle, on the tip, or anywhere you like on the nail.
- For an extra touch, add a few more evenly spaced dots, or create a small cluster.
- Seal with top coat.
Steps for Lines:
- Apply base coat and let dry.
- Apply your main polish color. Let it dry completely.
- Dip your fine-tipped brush into a contrasting polish.
- Draw a thin, straight line either vertically down the center of the nail, horizontally across the middle, or diagonally.
- Alternatively, create a thin outline around the edge of your nail, or a thin line just at the tip.
- Clean up any wobbles with a brush and remover.
- Finish with top coat.
Tip: For incredibly precise lines, consider using water-based nail art pens, which allow for easy application and removal of mistakes before they dry.
h34. The Gradient (Ombre) Nails Made Easyh3
Ombre nails look intricate but can be surprisingly simple with a sponge!
What you’ll need:
- Base coat
- Two or three complementary polish colors (e.g., light pink fading to darker pink, or blue fading to purple)
- A makeup sponge (the kind you’d use for foundation, with a fine texture)
- A small piece of cardboard or plastic to work your polish on
- Top coat
- Cuticle barrier (optional, but recommended) like petroleum jelly or liquid latex
Steps:
- Apply base coat and let dry.
- Optional but Recommended: Apply a thin layer of petroleum jelly or liquid latex around your cuticles and sidewalls. This will catch any excess polish and make cleanup a breeze. Visit The National Cancer Institute for general skin health information. While not directly related to nail polish, maintaining healthy skin is paramount.
- Squeeze a small amount of each polish color side-by-side onto your cardboard or plastic surface.
- Gently dab your makeup sponge into the polish, picking up all the colors.
- Lightly dab the sponge onto your nail, pressing down and then lifting. You might need to reapply polish to the sponge and press onto the nail a few times to build up the gradient effect.
- Work quickly before the polish on the sponge dries out.
- Repeat on each nail.
- If you used a cuticle barrier, carefully peel it off now. Clean up any smudges with a small brush and nail polish remover.
- Once dry, apply a generous top coat to blend the colors slightly and give a smooth finish.
Another Way: If you don’t have a sponge, you can use a makeup wedge. Also, some gel polishes are formulated for seamless blending with heat or specific LED lamps, offering an alternative to traditional polish.
h35. The Subtle Metallic Accent Nailh3
A touch of metallic polish can make any manicure feel special. Applying it as an accent is a stylish way to incorporate it without being overwhelming.
What you’ll need:
- Base coat
- Your favorite everyday polish color
- A metallic polish (gold, silver, rose gold, or a jewel tone)
- Top coat
Steps:
- Apply base coat and let dry.
- Apply one or two coats of your everyday color to all nails, letting each dry completely.
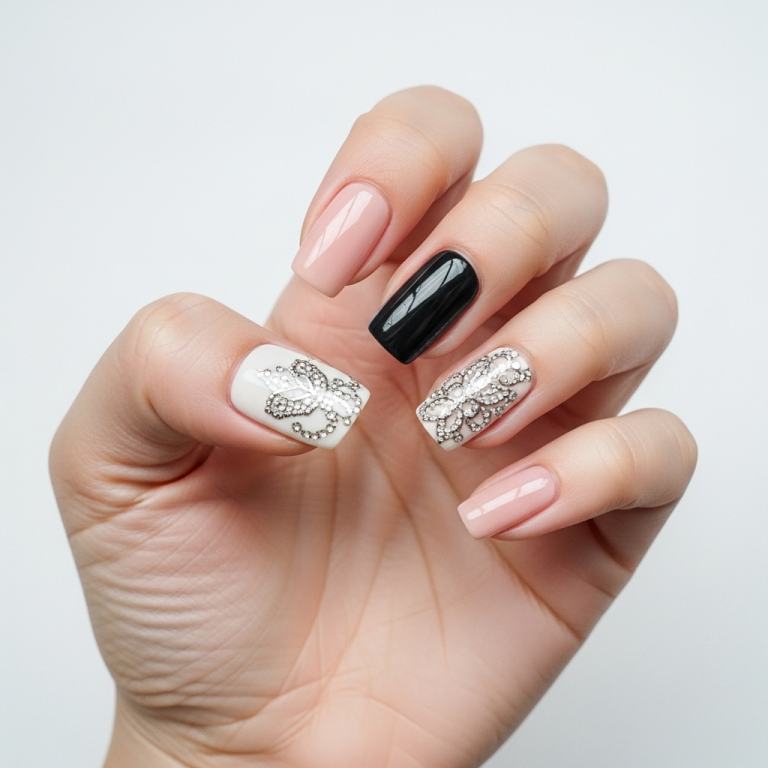
- On one accent nail (usually the ring finger), apply your metallic polish. You can do a full coat, or try painting a geometric shape (like a half-moon at the base, a diagonal stripe, or just the tip).
- If you’re painting a specific shape, let the metallic polish dry a bit before committing to a top coat to avoid smudging.
- Apply top coat to all nails to seal the look.
Styling Tip: Coordinate your metallic accent with jewelry for a polished, put-together look.
h2A Quick Guide to Everyday Nail Design Tools and Techniquesh2
You don’t need a nail salon’s worth of tools to create beautiful everyday designs. Here are a few essentials that can make a big difference:
| Tool | What it’s for | Why it’s great for beginners |
|---|---|---|
| Fine-tipped Nail Art Brush | Creating thin lines, details, dots, and intricate patterns. | Offers more control than a regular polish brush for delicate designs. Even slightly thicker brushes can be used for bolder lines. |
| Dotting Tools | Making perfect dots of various sizes. | Has a rounded ball tip for easy and consistent dot application. Comes in sets with multiple sizes. |
| Striping Tape | Creating clean, straight lines and geometric shapes. | A real lifesaver for achieving sharp lines without freehand skill. You simply place it, paint, and peel. |
| Makeup Sponge (e.g., cosmetic wedge or concealer sponge) | Creating gradients (ombre) or textured effects. | The porous surface diffuses color naturally and is very forgiving. Easy to clean or dispose of. |
| Clean-up Brush | Correcting polish mistakes around the cuticle and sidewalls. | A small, angled brush dipped in nail polish remover can tidy up edges for a pro finish. |
| Top Coat | Sealing the design, adding shine, and prolonging wear. | Crucial for making your designs last and giving them a polished look. Look for quick-dry formulas! |
h3Technique Spotlight: The Clean-Up Brushh3
This is a game-changer for anyone new to nail art. Even the steadiest hands can make a mistake! Here’s how to master the clean-up brush:
- Get a small, synthetic brush. An old, clean eyeliner brush works well.
- Dip the very tip of the brush into your nail polish remover. You don’t want it dripping wet, just damp.
- Gently trace around your cuticle and sidewalls to remove any excess polish.
- Repeat with a clean brush or wipe your brush clean on a paper towel as needed.
This simple step makes a world of difference in how polished and professional your manicure looks. For more details on general nail care and hygiene practices, the Occupational Safety and Health Administration (OSHA) provides valuable information regarding safety standards in cosmetology, which can translate to safe DIY practices at home.
h2FAQs About Everyday Nail Designsh2
What is the easiest nail design for beginners?
Often, the easiest design is a single accent nail. This could be a solid metallic color, a simple dot or line on one nail, or a subtle splatter effect. It adds a touch of flair without requiring complex techniques on all your nails.
How can I make my nail designs last longer?
The key is thorough prep work: clean, shaped nails free of oils. Always use a good base coat, let each layer of polish dry properly, and finish with two layers of a high-quality top coat. Reapply top coat every few days to refresh the shine and add protection.
Can I use regular nail polish for nail art?
Absolutely! While specialized nail art polishes exist, regular polishes in various finishes (cream, metallic, shimmer) are perfect for creating everyday designs. You just need the right tools, like fine brushes or dotting tools, to apply them precisely.
How do I avoid smudging my nail designs?
Patience is key! Ensure each layer of polish, especially the final design, is dry before touching it or applying a top coat. Quick-dry top coats can also help. If a design is particularly delicate, like fine lines or small dots, it’s best to use a formula that dries relatively fast.
What colors are best for everyday wear?
Neutrals, soft pastels, muted earth tones, classic reds, and sheer nudes are universally flattering and practical for daily life. However, the “best” colors are those that make you feel good and confident, regardless of trends.</p

