Engagement Party Nail Designs: Brilliant & Essential
Choosing the perfect engagement party nail designs is key to feeling polished and celebrating your special milestone! For a beginner-friendly approach, opt for classic colors like soft nudes, milky whites, or delicate pinks. Add subtle sparkle with glitter accents or a touch of sophistication with simple French tips. These elegant choices are always chic and easy to achieve, making your nails shine beautifully for your engagement party.
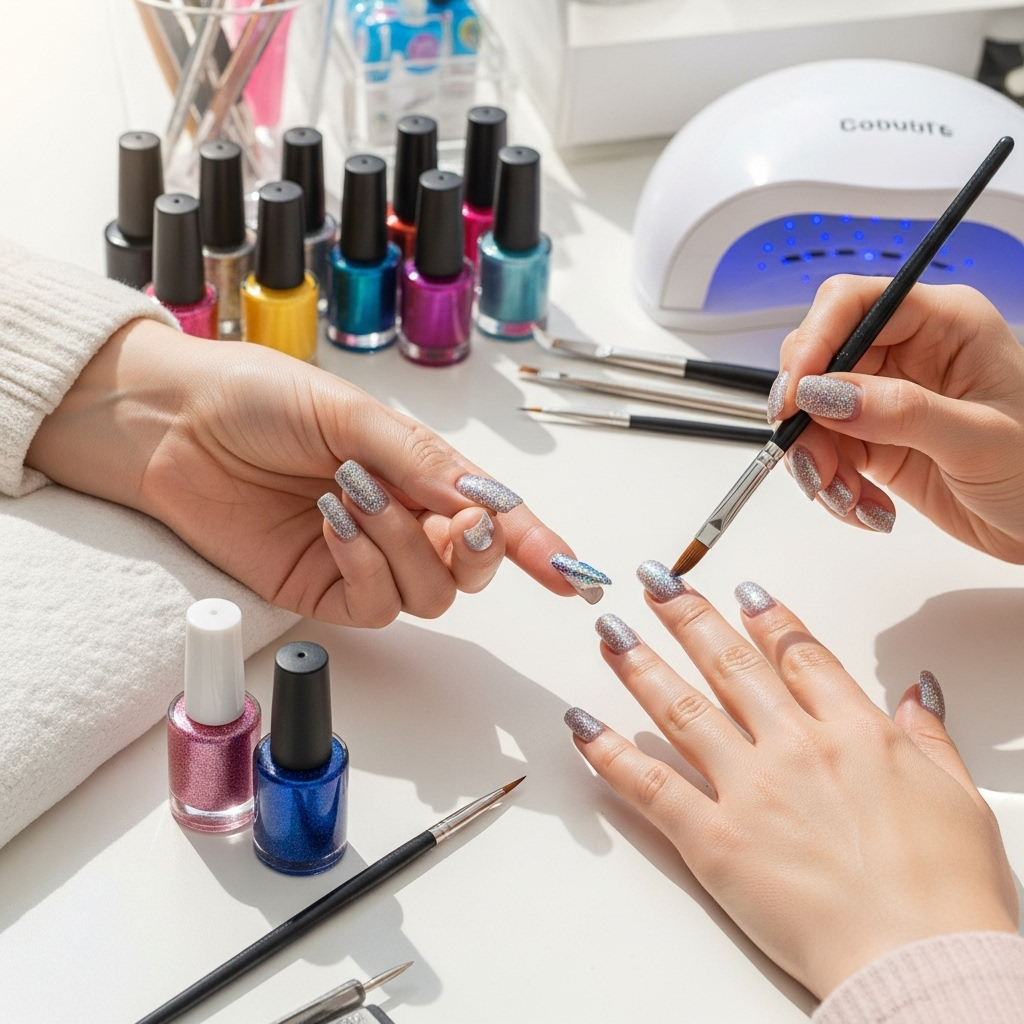
Hey there, lovelies! Lisa Drew here, your nail enthusiast from Nailerguy! So, you’ve got a sparkly ring and a super exciting engagement party coming up? That’s amazing news! One of the fun parts of getting ready for such a special celebration is picking out your nails. It’s like the final touch to your whole look, adding that extra bit of pizzazz. But sometimes, finding the right engagement party nail design can feel a little overwhelming, right? You want something that’s elegant and festive, but also totally you. Don’t you worry one bit! We’re going to dive into some brilliant and essential nail ideas that are perfect for beginners and seasoned nail art lovers alike. From super simple and chic to a little more dazzling, we’ve got your fingertips covered. Get ready to feel absolutely radiant from your head to your perfectly polished nails!
Why Your Engagement Party Nails Matter
Your engagement party is a joyous occasion, a stepping stone to your big day! It’s a chance to celebrate with loved ones, share your happy news, and often, get to know your future in-laws and their friends a little better. Amidst all the excitement, the little details can make a big difference in how you feel. Your nails are front and center for so many moments: clinking champagne glasses, toasting the happy couple, accepting congratulations, and of course, showing off that gorgeous new bling!
Having beautiful engagement party nail designs contributes to the overall polished and celebratory vibe. It’s an expression of your joy and excitement for the future. Plus, let’s be honest, you’ll likely be taking tons of photos! You want your hands to look as radiant as you feel. It’s not about having the most complicated design; it’s about having nails that make you feel confident, beautiful, and perfectly ready to embrace this new chapter.
Essential Engagement Party Nail Design Categories for Beginners
When you’re just starting out with nail designs, or if you simply prefer a more understated elegance, there are some super reliable and stunning options. These designs are foolproof and always look chic. Think of them as your versatile go-to’s for any engagement party!
1. The Classic Elegance: Solid Colors
Sometimes, you just can’t beat the timeless beauty of a perfect solid color. It’s sophisticated, versatile, and always in style. For an engagement party, you can elevate these classics with a sophisticated shade.
- Milky White/Opaque Cream: This is the ultimate sophisticated shade. It’s clean, modern, and provides a beautiful, subtle canvas that makes your ring pop. It’s like a sophisticated cousin to traditional white.
- Soft Nudes & Beiges: These shades are universally flattering and create a smooth, polished look. They’re incredibly chic and pair perfectly with any outfit. Think of it as your “your nails but better” option.
- Blush Pinks: Ranging from gentle pastels to slightly deeper rosy hues, blush pinks are romantic and feminine. They evoke a sense of softness and joy, perfect for a celebration of love.
- Muted Greys & Blues: For a modern bride, sophisticated greys or soft, dusty blues can be incredibly elegant. They offer a subtle pop of color while remaining understated.
- Champagne & Rose Gold: These shimmery, metallic tones are festive without being over the top. They capture the celebratory spirit beautifully and add a touch of glamour.
2. Effortless Chic: French Manicures & Variations
The French manicure has stood the test of time for a reason! It’s clean, classic, and always looks polished. For your engagement party, consider these modern twists.
- Classic French: Crisp white tips on a sheer nude or pink base. It’s eternally elegant.
- Modern French (Colored Tips): Swap the white tips for a soft pastel, a subtle metallic shade, or even a deep jewel tone for a contemporary update.
- Reverse French (Half Moon): Instead of the tips, a different color or finish is applied to the lunula (the half-moon at the base of the nail).
- Baby Boomer Nails: This is a soft, blended gradient from a milky white to a sheer pink, offering a romantic and dreamy look. It’s like a softer, more diffused French.
3. A Touch of Sparkle: Glitter & Shimmer Accents
Engagement parties are all about celebration, so a little sparkle is always welcome! You don’t need to go full disco ball; subtle shimmer can add the perfect festive touch.
- Glitter Gradient: Apply a sheer color to your nail, then blend glitter polish from the tip or base upwards.
- Accent Nail: Paint all your nails a solid color and reserve one finger (often the ring finger!) for a full glitter polish or a more intricate glitter design.
- Subtle Shimmer Polish: Opt for polishes that have a fine shimmer or a frosty finish rather than chunky glitter. These offer a sophisticated glow.
- Glitter French Tips: Replace the white tip of a French manicure with a fine glitter polish for a dazzling edge.
4. Minimalist Magic: Simple Line Art & Dots
If you love clean lines and subtle details, minimalist designs are your best friend. They add a unique touch without being overwhelming.
- Single Line Design: A thin, delicate line of metallic gold, silver, or even a contrasting color drawn horizontally, vertically, or diagonally across a neutral base.
- Tiny Dots: Place a few small dots of metallic polish on the nail, often near the cuticle or along the free edge.
- Negative Space Designs: These designs incorporate unpainted areas of the nail, creating a modern and airy feel. A simple geometric shape or a few strategically placed lines can look incredibly chic.
Brilliant Engagement Party Nail Designs: Beyond the Basics
Ready to explore designs that are a little more statement-making but still totally achievable? These ideas build on the foundations, offering more intricate details and personality for your special celebration.
1. Subtle Glamour: Pearlescent Finishes & Chrome
Pearlescent and chrome finishes can make your nails look ethereal and high-fashion. They catch the light beautifully!
- Pearlescent Sheen: A polish that gives off a soft, iridescent glow, similar to a pearl. It’s dreamy and adds dimension.
- Chrome Powder Accents: Applying chrome powder sparingly to a specific part of the nail, like the tip or a designed shape, can create a stunning focal point.
- Full Chrome Coverage: For the bold and daring, a full nail of mirror-like chrome in silver, gold, or even a pastel hue is incredibly eye-catching.
2. Romantic Touches: Delicate Florals & Blossoms
Embrace the romantic theme of an engagement with subtle floral elements. These can range from tiny, hand-painted buds to delicate outlines.
- Tiny Blossoms: Imagine a few minuscule flowers painted on an accent nail, or even just one on each nail near the cuticle.
- Floral Outline: Using a fine liner brush, create the outline of a simple flower or leaf pattern.
- Water Marbling (Simplified): While complex water marbling can be tricky, simplified versions using only two colors can create an organic, petal-like swirl effect.
3. Geometric Sophistication
Sharp lines and geometric shapes offer a modern, chic edge. They can be as simple or as complex as you like.
- Corner Accents: A small triangle or square of glitter or a metallic polish placed at the cuticle or the tip of the nail.
- Color Blocking: Using tape to create crisp sections of different, complementary colors on your nail.
- Half & Half: Dividing the nail diagonally or vertically with two contrasting colors or finishes.
4. Bridal Bling: Rhinestones & Studs
Add a touch of undeniable sparkle! Small rhinestones or tiny metallic studs can transform a simple manicure into something extraordinary.
- Single Stone Accent: Place a single, small rhinestone or a tiny stud on the cuticle of an accent nail.
- Line of Bling: A subtle line of tiny crystals along the smile line of a French manicure or down the center of the nail.
- Scattered Sparkle: Very sparingly placed tiny gems scattered across an accent nail for a starry effect.
DIY Engagement Party Nail Designs: Step-by-Step for Beginners
Feeling inspired to try some of these designs yourself? It’s more achievable than you think! Here are a few easy-to-follow tutorials, perfect for a DIY bride-to-be.
Tutorial 1: Elegant Glitter Gradient
This design is simple, adds sparkle, and looks super sophisticated!
Materials You’ll Need:
- Your favorite base coat
- Your chosen sheer base polish (e.g., nude, milky white, light pink)
- A glitter polish (fine glitter works best for a softer look)
- A top coat
- Optional: Nail polish remover and a small brush/cotton swab for clean-up
Steps:
- Prep Your Nails: Start with clean, dry nails. Apply a base coat to protect your natural nails and help the polish adhere.
- Apply Base Color: Apply one or two thin coats of your sheer base polish. Let it dry completely. This is crucial for a smooth blend.
- Create the Gradient:
- Option A (Sponge Method): Pour a little glitter polish onto a clean surface (like a piece of paper or a makeup sponge). Dab a makeup sponge lightly into the glitter. Gently dab the sponge onto the tip of your nail, concentrating the glitter where you want it to be most intense. Gradually dab upwards, using less pressure, to create a fade effect.
- Option B (Brush Method): Use the brush from your glitter polish. Apply it to the tip of your nail. Then, use a clean nail brush or a brush slightly dampened with nail polish remover to very gently “push” and blend the glitter upwards, creating a gradient. Be patient and build the effect slowly.
- Add More Layers (If Needed): Once the first layer of glitter is dry, you can add another thin layer of glitter polish to build up the intensity or deepen the fade.
- Final Coat: Once the glitter is completely dry, apply a generous coat of top coat. This will seal in the glitter, smooth out any texture, and give your nails a beautiful shine.
- Clean Up Edges: Use a small brush dipped in nail polish remover to clean up any stray polish around your nails for a flawless finish.
Tutorial 2: Chic Single Line Accent Nail
This modern and minimalist design is incredibly easy and makes a stylish statement!
Materials You’ll Need:
- Base coat
- Your go-to neutral polish (nude, cream, pale pink)
- A fine-tip metallic polish (gold, silver, rose gold) for the line
- Top coat
- Optional: A steady hand!
Steps:
- Prep and Base: Apply base coat to clean, dry nails.
- Apply Neutral Color: Apply one or two coats of your chosen neutral polish. Let it dry completely. This forms your canvas.
- Paint the Line:
- Vertical Line: Using the fine tip of your metallic polish, carefully draw a thin line straight down the center of your nail, from the cuticle to the tip.
- Horizontal Line: Draw a thin line across the middle of your nail.
- Diagonal Line: Draw a thin line from one corner to the opposite corner.
- French Tip Line: Draw a thin line just along the edge of your nail where a French tip would be.
Take your time! If you’re nervous, practice on a piece of paper first.
- Apply Top Coat: Once the line is completely dry, carefully apply a top coat. This will seal your beautiful design.
- Clean Up: Clean up any mistakes around the cuticle with a small brush and remover.
Pro Tip: If freehanding is still a bit daunting, you can use nail striping tape! Apply the tape after your neutral polish is dry, press it down firmly, apply your metallic polish over it, and carefully peel the tape away before the polish fully hardens, then quickly apply top coat.
Tools and Products to Elevate Your Engagement Party Nails (Beginner-Friendly!)
You don’t need a professional salon’s worth of equipment to create gorgeous engagement party nails. A few key items can make a big difference!
Essential Tools:
- Nail File & Buffer: For shaping and smoothing. A fine-grit buffer can help create a smooth surface for polish.
- Cuticle Pusher/Orange Stick: To gently push back cuticles for a clean nail bed.
- Nail Polish Remover & Cotton Pads: Essential for clean-ups and starting fresh.
- Tweezers: Useful for picking up small embellishments like rhinestones.
- Optional but helpful: A fine-tip detail brush or an old makeup brush for clean-ups.
Product Recommendations:
- High-Quality Base Coat: Prevents staining and provides a smooth surface. Look for quick-dry formulas if you’re short on time.
- Good Quality Top Coat: Seals your design, adds shine, and prevents chipping. Gel-like top coats offer extra durability.
- Essie’s Ballet Slippers or Mademoiselle: Classic, sheer pinks that are universally flattering for an elegant base.
- OPI’s Bubble Bath: A beautiful, milky pink.
- Sally Hansen’s Miracle Gel or Insta-Dri lines: These offer great color selection and impressive wear time for being quick-dry options.
- Fine Glitter Polishes: Look for polishes with micro-glitter for a sophisticated sparkle. Brands like Cirque Colors or Holo Taco have beautiful options.
- Metallic Liners: Many brands offer fine-tip polish pens or polishes with slim brushes specifically for nail art lines.
| Design Idea | Beginner Friendliness | Impact | Best For |
|---|---|---|---|
| Classic Solid Color (Nude, Pink, White) | Very Easy | Subtle Elegance | Timeless brides, minimalist style |
| Glitter Gradient | Easy | Festive Sparkle | Adding a touch of celebration |
| Single Line Accent Nail | Easy | Modern Chic | Clean, geometric style lovers (use tape for extra ease!) |
| French Manicure (Classic or Modern Tip) | Medium | Polished Sophistication | Classic brides, polished look |
| Pearlescent/Shimmer Finish | Easy | Ethereal Glow | Dreamy, romantic vibes |
| Tiny Dots | Very Easy | Minimalist Detail | Subtle, artistic touch |
Tips for Flawless Engagement Party Nails
Whether you’re heading to the salon or doing your nails at home, a few tips can ensure your engagement party manicure is picture-perfect.
- Start with Healthy Nails: Hydrated cuticles and smooth nail beds make for a better application. Consider a good cuticle oil in the weeks leading up to the party.
- Don’t Skip the Prep: Clean your nails thoroughly to remove any oils or old polish. Use a nail dehydrator if you find polish lifts easily.
- Thin Coats are Key: It’s always better to apply two or three thin coats of polish than one thick, gloopy one. Thin coats dry faster and look smoother.
- Patience is a Virtue: Let each coat of polish dry completely before applying the next. This is the biggest secret to avoiding smudges and dents!
- Seal the Deal: A good top coat is your best friend. It adds shine, protects your design, and helps your manicure last longer. Reapply a quick-dry top