Ready to find your perfect engagement nails? This guide reveals stunning, easy-to-achieve engagement nail design ideas that are guaranteed to impress. From classic elegance to modern chic, discover the must-have looks that celebrate your special moment.
Thinking about your engagement photos, the proposal, or just that special sparkle you want on your nails? Choosing the perfect engagement nail design can feel a little overwhelming, but it doesn’t have to be! We all want our nails to look amazing for this exciting time. Sometimes, it’s hard to know where to start with all the trends out there. Don’t worry, I’m Lisa Drew, and with Nailerguy, we’ll make this super simple and fun. I’ll guide you through beautiful, easy-to-wear designs that will make your hands shine. Let’s get your nails ready to dazzle!
This article is your go-to for all things engagement nails. We’ll explore timeless elegance, modern twists, and how to pick a design that truly reflects your personal style and the significance of this beautiful occasion. Get ready to be inspired!
The “Must-Have” Qualities of Engagement Nail Design Ideas
When you’re picking out engagement nail designs, what really makes them “must-have”? It’s more than just a pretty color or a bit of sparkle. These designs need to feel special, last through all the excitement, and, of course, look incredible in photos and up close. Let’s break down what makes an engagement nail design truly stand out:
- Timeless Appeal: They should look beautiful now and still feel classic in your engagement photos for years to come.
- Photo-Ready Polish: The design needs to photograph well, catching the light just right and complementing your engagement ring.
- Durability: Engagement season often means lots of celebrating! Your nails should hold up beautifully.
- Personal Touch: The best designs reflect you – your personality, your style, and your love story.
- Ring Accentuation: Great engagement nails enhance, not compete with, your stunning engagement ring.
Top Engagement Nail Design Ideas: A Beginner’s Guide
Finding the perfect engagement nail design is all about balancing elegance with personal flair. These ideas are beginner-friendly, stunning, and perfect for your special moments.
1. The Classic French Manicure: A Timeless Choice
You can’t go wrong with a classic French manicure. It’s sophisticated, clean, and lets your engagement ring be the star. This look features nude or sheer pink polish on the nail bed with a crisp white tip.
- Why it’s perfect: It’s universally flattering and incredibly elegant. It never goes out of style and always looks polished.
- Who it’s for: Anyone who loves a clean, understated, and classic look.
- Pro Tip: Ask for a “modern” French tip, which can be slightly thicker or have a soft, rounded edge for a contemporary feel.
2. The Milky White or Creamy Nude
A soft, opaque milky white or a delicate creamy nude is pure elegance. This shade offers coverage without being stark and provides a beautiful, smooth canvas that highlights your ring. It’s a step up from a sheer polish, giving a polished, “your-nails-but-better” vibe.
- Why it’s perfect: It’s sophisticated, chic, and pairs beautifully with any metal finish for your engagement ring.
- Who it’s for: Those who prefer a minimalist, clean, and modern aesthetic.
- Pro Tip: Look for shades with a subtle pink or peach undertone to complement your skin tone.
3. Subtle Sparkle: Glitter Accents
Who says subtle can’t sparkle? A touch of glitter can elevate your nails without being over the top. This could mean a full glitter accent nail, a glittery gradient, or just a dusting of fine shimmer on the tips.
- Why it’s perfect: It adds a festive, celebratory feel, catching the light beautifully for photos.
- Who it’s for: Brides-to-be who want a hint of glamour and celebration.
- How to wear it:
- Choose a soft neutral base color.
- Apply glitter polish to one or two accent nails (e.g., ring finger).
- Alternatively, use a clear topcoat with subtle glitter over a neutral base for a softer shimmer.
4. The “Blurry” or “Ombre” Effect
A soft ombre or blurry nail design creates a dreamy, diffused look. This can be achieved by blending two neutral shades or a neutral with a hint of shimmer. The effect is subtle yet eye-catching, with a gradient that mimics a soft glow.
This technique often involves using a sponge to gently blend two polish colors together. For beginners, a professional nail technician can achieve this beautifully. It’s a modern take on elegance that’s incredibly photogenic.
Key Elements:
- Soft color transitions.
- Often uses shades of white, pink, beige, or light grey.
- Can incorporate a hint of shimmer for added dimension.
5. Minimalist Chrome or Metallic Accents
For a modern, edgy feel, consider a minimalist chrome or metallic accent. This could be a thin metallic line along the cuticle, a geometric shape, or a full chrome accent nail paired with a neutral base.
- Why it’s perfect: It’s chic, contemporary, and adds a unique touch of shine that’s different from traditional glitter.
- Who it’s for: The fashion-forward bride who wants a modern, sophisticated look.
- Application Tip: Chrome effects often use a special powder applied over a gel polish base.
6. The “Clean Girl” Aesthetic: Sheer & Glossy
The “clean girl” aesthetic is all about looking effortlessly polished. For nails, this translates to sheer, glossy polishes in shades of pale pink, peach, or clear coats with just a hint of shimmer. Think “your-nails, but super hydrated and healthy-looking.”
- Why it’s perfect: It’s understated, chic, and always looks sophisticated. It emphasizes healthy-looking nails.
- Who it’s for: Anyone who loves a natural, minimalist, and put-together look.
- Essential Tool Tip: A good cuticle oil is key for this look, keeping your nail beds looking healthy and hydrated. You can explore options from brands like The Society for Investigative Dermatology’s guidance on skin care for general principles.
7. Delicate Nail Art: Tiny Hearts or Dots
Sometimes, the smallest details make the biggest impact. Tiny, hand-painted designs like delicate hearts, simple dots, or a single line can add a personal and whimsical touch to your engagement nails.
- Why it’s perfect: It’s a subtle way to add personality and charm without being overwhelming.
- Who it’s for: Those who appreciate delicate details and a touch of sweetness.
- DIY Friendly: Even beginners can try this with a fine-tipped brush or a dotting tool and a steady hand.
Nail Shape & Length: Complementing Your Design
The shape and length of your nails play a huge role in how your chosen engagement nail design looks. Here’s a quick guide to popular choices and how they work with different styles:
| Nail Shape | Description | Best For Pairing With Designs | Beginner Tips |
|---|---|---|---|
| Squoval (Square with rounded corners) | A practical and universally flattering shape. Offers a decent surface area for designs. | French tips, solid colors, minimalist art. | Easy to maintain at home with a good file. |
| Round | Follows the natural curve of the fingertip for a soft look. | Sheer polishes, nudes, and subtle ombre. | Very low maintenance and less prone to breaking. |
| Almond | Tapered to a soft point, elongating the fingers. | Glitter accents, chrome finishes, delicate line art. | Can be prone to breaking if too long; consider gel or acrylic for strength. |
| Square | Has sharp, straight edges. Can make fingers appear shorter. | Bold colors, geometric designs, graphic lines. | Requires careful filing to avoid snags; a French tip looks very sharp on this shape. |
| Stiletto / Coffin (Ballerina) | Long, pointed shapes. Dramatic and statement-making. | Intricate 3D art, full glitter immersion, ombre. | Requires professional application and care; significant maintenance. |
Length Considerations:
- Short to Medium Length: These are usually the easiest to manage and maintain for most people. Great for natural-looking designs, French tips, and subtle sparkle. They’re also less likely to chip or break during busy periods.
- Longer Lengths: Offer more space for intricate designs or statement looks like full glitter or ombre. However, they require more careful handling and might need professional upkeep to prevent breakage.
Tools and Products for Achieving Engagement Nail Designs
You don’t need to be a pro to create beautiful engagement nails! Here are some essential tools and products that will make your DIY manicures shine, suitable for beginners:
Essential DIY Nail Kit
- Nail File & Buffer: Crucial for shaping and smoothing the nail surface. A good quality file prevents snagging, and a buffer gives that perfect smooth finish before polish.
- Cuticle Pusher / Orange Stick: Gently push back cuticles for a clean nail bed. This makes any polish application look more professional.
- Base Coat: Protects your natural nails from staining and helps polish adhere better, preventing chips.
- Top Coat: Seals your polish, adds shine, and extends the life of your manicure. A quick-dry top coat is a lifesaver!
- Nail Polish Remover & Cotton Pads: For cleaning up mistakes and removing old polish. Non-acetone removers are gentler.
- Your Chosen Polishes!
Optional Tools for Added Flair
- Dotting Tools: For creating perfect dots (think minimalist art!) or swirl designs.
- Fine-Tipped Brushes: Essential for creating thin lines, French tips, or small accents.
- Nail Art Pens: Easiest for beginners to draw lines, dots, or simple shapes.
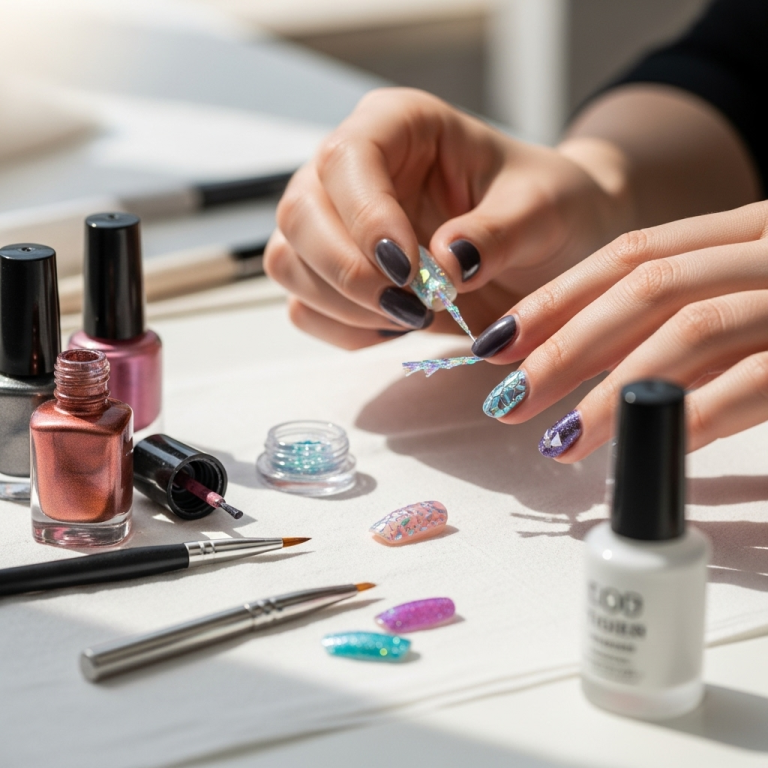
- Glitter Polish or Loose Glitter: For that touch of festive sparkle.
- Stickers/Decals: Peel-and-stick nail art offers a super simple way to add designs.
- UV/LED Nail Lamp (for Gel Polish): If you opt for gel polish for extra durability, this is a must. Gel polish offers incredible longevity and a high-shine finish. You can learn more about nail care best practices from resources like the CDC’s guidelines on handwashing and hygiene, which extend to nail care.
DIY Engagement Nail Design Tutorial: Easy Glitter Accent
Let’s create a beautiful and simple glitter accent nail that’s perfect for engagement season. This is super beginner-friendly and adds just the right amount of sparkle!
Materials Needed:
- Nail file
- Base coat
- Your favorite neutral polish (e.g., soft pink, nude, creamy white)
- Glitter polish (choose a fine or medium glitter for a more subtle look)
- Top coat
- Optional: Small piece of sponge for a gradient effect
Step-by-Step Guide:
- Prep Your Nails: Start by filing your nails into your desired shape. Gently push back your cuticles. Ensure your nails are clean and dry.
- Apply Base Coat: Apply one layer of base coat and let it dry completely. This protects your nails and helps your polish last longer.
- Apply Neutral Polish: Apply two thin coats of your chosen neutral polish. Make sure each coat is fully dry before applying the next. Let the second coat dry for a few minutes.
- Create the Glitter Accent:
- Option A (Full Glitter Nail): Apply one or two coats of glitter polish to your ring finger (or whichever finger you choose as your accent nail). Let it dry.
- Option B (Glitter Gradient): Apply a thin layer of your neutral polish to a small makeup sponge. Then, dab your glitter polish onto the sponge near the edge of the neutral polish. Gently dab this onto the tip of your accent nail, blending downwards. Repeat for more intensity, but keep it subtle.
- Apply Top Coat: Once the glitter polish is dry, apply a generous layer of top coat over all your nails, including the accent nail. This seals everything in and adds a beautiful shine. For glitter nails, a thicker top coat can help smooth out the texture of the glitter.
- Let Dry & Admire: Allow your nails to dry completely. And voilà! You have a chic engagement nail design.
Maintaining Your Engagement Nails
Your special manicure deserves a little TLC to keep it looking its best. Here’s how to maintain your engagement nail designs:
- Wear Gloves: When doing chores, especially washing dishes or cleaning with chemicals, wear rubber gloves. These tasks can dull polish and weaken nails.
- Moisturize Regularly: Apply cuticle oil daily and hand lotion frequently. This keeps your nails and the skin around them healthy and prevents dryness and breakage.
- Avoid Using Nails as Tools: Resist the urge to use your nails to open cans, scrape off labels, or pry items open. This is a surefire way to chip or break them.
- Touch-Ups: For minor chips on solid color nails, you can try a careful touch-up with your polish color and a fine brush. For more intricate designs, it might be best to go to a salon for a quick repair or a full redo.
- Be Gentle: During your busy engagement period, be mindful of your hands. Avoid unnecessary rough handling.
Engagement Nail Design Ideas: Color Palettes & Combinations
Choosing the right colors can make all the difference for your engagement nail designs. Here are some popular and beautiful palettes:
Classic Neutrals
- Shades: Soft pinks, milky whites, creamy beiges, light nudes, pale greys.
- Pairing Suggestions:
- Milky white with a subtle silver or rose gold glitter accent.
- Creamy nude with a fine gold line design at the cuticle.
- Pale pink with a soft, blended ombre effect.
- Vibe: Timeless, elegant, sophisticated, versatile.
Soft Pastels
- Shades: Baby blue, mint green, lavender, blush pink, peach.
- Pairing Suggestions:
- Lavender with a slightly darker lavender dot accent.
- Baby blue with a delicate white floral design.
- Peach with a subtle shimmer topcoat.
- Vibe: Romantic, sweet, spring-like, youthful.
Elegant Metallics
- Shades: Rose gold, champagne gold, silver, pearlescent white.
- Pairing Suggestions:
- Rose gold full color on all nails.
- Champagne gold accent nail with a neutral base.
- Silver chrome details on a milky white nail.
- Vibe: Glamorous, modern, luxurious, celebratory.
Color Combinations to Try:
Here’s a table with popular color combinations that work beautifully for engagement nails:
| Base Color | Accent Color/Design | Occasion Vibe |
|---|---|---|
| Sheer Pink | Fine Silver Glitter Tip | Delicate & Dazzling |
| Creamy White | Thin Rose Gold Line at Base | Modern Chic |


