Embellished nail designs are a fantastic way to express your creativity and add sparkle to your look! These designs use gems, glitter, charms, and more to elevate simple manicures into eye-catching art. Perfect for beginners, you can achieve stunning results with a few simple techniques.
Do you ever look at your nails and wish they had a little more pizzazz? Maybe you see those gorgeous, sparkly designs online and think, “I could never do that!” Well, I’m here to tell you that you absolutely can! Embellished nail designs are all about adding that extra touch of magic, and they’re more accessible than you might think.
Sometimes, a plain nail color just feels a little… plain. You want something that reflects your personality, adds a bit of glam to an outfit, or just makes you smile every time you catch a glimpse of your hands. But learning complex nail art can feel overwhelming, and you might be worried about making a mess. Don’t you worry! Today, we’re going to break down embellished nail designs into simple, fun steps.
We’ll cover everything from the basic tools you’ll need to easy techniques for applying those show-stopping gems and glitter. Ready to transform your nails from simple to stunning? Let’s dive in!
What Are Embellished Nail Designs?
Embellished nail designs are manicures that go beyond just polish. They incorporate various decorative elements to make nails stand out. Think of them as tiny canvases for creativity! These additions can range from subtle touches to full-on dazzling displays.
The beauty of embellished nails lies in their versatility. You can choose from a wide array of items to adorn your nails, including:
- Glitter (fine, chunky, holographic)
- Rhinestones and gems (various shapes, sizes, and colors)
- Pearls
- Studs and metal accents
- Charms (tiny 3D objects)
- Foil flakes
- Nail stickers and decals
- Cabochons (flat-backed decorative stones)
These elements add texture, dimension, and a unique flair to any nail color or design. They’re perfect for special occasions, adding a pop of fun to your everyday look, or simply indulging your creative side.
Why Try Embellished Nail Designs?
As Lisa Drew of Nailerguy, I believe your nails are a fantastic way to express yourself! Embellished nail designs offer a unique opportunity to do just that. They’re not just pretty; they’re also incredibly fun and accessible, even for beginners.
- Self-Expression: They let your personality shine through your fingertips.
- Trend-Forward: Embellishments are a huge trend right now, from subtle pops of glitter to elaborate 3D charms.
- Easy to Customize: You can create looks that are perfectly suited to your style, mood, or outfit.
- Boosts Confidence: A beautifully designed nail can make you feel polished and put-together.
- Accessible for Beginners: Many techniques are surprisingly easy and don’t require advanced art skills.
- Affordable Glamour: You can achieve salon-worthy looks at home without breaking the bank.
You’ll find that once you start experimenting with embellishments, your creativity really takes off. It’s a rewarding way to enhance your natural beauty and have a little fun!
Essential Tools for Embellished Nails
Getting started with embellished nail designs is easier than you think, especially when you have the right tools. Don’t worry; you don’t need a whole professional kit to begin. Here are some essential items to have on hand:
Base Essentials:
- Nail Polish or Gel Polish: Your base color or design canvas.
- Top Coat: Crucial for sealing in your design and adding shine.
- Base Coat: Protects your natural nails and helps polish adhere better.
Embellishment Application Tools:
- Tweezers: The most important tool for picking up small embellishments like gems and studs. Fine-tipped, angled tweezers are ideal for precision.
- Wax Pencil / Dotting Tool: These sticky-tipped tools are excellent for picking up and placing rhinestones and pearls. They’re very beginner-friendly!
- Small Brush or Toothpick: Useful for applying small amounts of glue or top coat.
Adhesives:
- Nail Glue: Essential for securing heavier or larger embellishments that might not stay put with just top coat. Look for a good quality nail glue.
- Clear Nail Polish / Top Coat: For lighter embellishments like fine glitter or small flat-back gems, a dab of top coat or clear polish can be enough to hold them.
Embellishments Themselves:
- Gems & Rhinestones: Crystal, AB (Aurora Borealis), colored, and pearl varieties are popular.
- Glitter: Fine, chunky, iridescent – the options are endless!
- Studs & Charms: Small metal shapes or 3D figures.
- Foil Flakes: For a metallic, scattered effect.
Having these few items will set you up for success. Remember, you don’t need to buy everything at once. Start with a few basic embellishments and tools and build your collection as you get more comfortable!
Beginner-Friendly Embellished Nail Techniques
Ready to add some sparkle? Let’s walk through some super easy techniques that will give you stunning results. These methods are perfect for anyone just starting out with embellished nails.
1. Glitter Accent Nail
This is a classic for a reason – it’s simple, elegant, and instantly adds glamour!
- Paint all your nails your desired base color. Let it dry completely.
- On one accent nail, apply a layer of clear top coat or nail glue.
- While the top coat/glue is still wet, dip your finger gently into a pot of glitter, or use a brush to carefully sprinkle glitter over the wet adhesive.
- Gently tap off the excess glitter.
- Once dry, carefully brush away any stray glitter.
- Apply a generous layer of top coat over the glitter nail to seal it in. Make sure to cover the edges of the glitter too, to prevent it from snagging!
Pro Tip: For a more controlled sparkle application, use a small brush or an old makeup brush to pick up glitter and gently place it on the wet top coat.
2. Rhinestone & Gem Clusters
Adding a few strategically placed gems can elevate any manicure!
- Paint your nails and let them dry completely.
- Using a wax pencil or the tip of your tweezers, pick up a tiny bead of top coat or nail glue and place it on your nail where you want the gem to go.
- Carefully pick up a rhinestone or gem with your tweezers or wax pencil and place it onto the wet glue/top coat.
- Repeat to create a small cluster or pattern.
- Once all gems are in place and the glue/top coat is dry, carefully apply another thin layer of top coat around the gems, not directly over them (unless they are flat-backed and designed to be coated). This helps secure them and prevents them from lifting.
Beginner’s Best Friend Table: Gem Placement Tools
| Tool | Best For | Pros | Cons |
|---|---|---|---|
| Wax Pencil | Rhinestones, gems, pearls | Sticky tip picks up gems easily, beginner-friendly. | Can sometimes leave a little wax residue if not cleaned. |
| Tweezers (Fine-Tipped) | All embellishments, especially studs and charms | Precise control, good for small or oddly shaped items. | Can be tricky for very tiny, flat-backed gems if you’re not steady. |
| Dotting Tool (Dampened Tip) | Rhinestones, small gems | Picks up items well when slightly dampened. | Requires a little practice to get the technique down. |
3. Simple Foil Flake Accents
Metallic flakes add a trendy, shattered glass effect that looks super chic!
- Apply your base color and let it dry completely.
- Apply a thin layer of top coat where you want the flakes.
- Using tweezers or a small brush, pick up small pieces of the foil flakes and press them gently onto the wet top coat. You can place them randomly for a scattered look or arrange them in a pattern.
- Once you’re happy with the placement, let the top coat dry thoroughly.
- Apply a generous top coat over the entire nail to encapsulate the flakes and smooth the surface. This prevents them from snagging.
4. Pearl Borders
Adding pearls along the cuticle or free edge creates a sophisticated look.
- Paint your nails and let them dry fully.
- Apply a small amount of nail glue along the cuticle line or the tip of your nail where you want the pearls to sit.
- Use a wax pencil or tweezers to pick up tiny pearls and place them one by one onto the wet glue, creating a defined line.
- Allow the glue to dry completely.
- Carefully apply a top coat around the pearls to help secure them. Avoid coating the pearls directly if possible, as it can dull their shine.
These techniques are just the beginning! Don’t be afraid to mix and match elements or try new things. The goal is to have fun and create nails you love.
Designing & Planning Your Embellished Look
Before you dive headfirst into sticking things on your nails, a little planning goes a long way! Thinking about your design beforehand can save you time and ensure you get the stunning result you’re after.
Consider Your Base
Your nail polish color or design is the foundation. Will you go for a solid color, a French tip, or a gradient? Darker bases often make gems and glitter pop more, while lighter bases can create a more delicate, ethereal look. Think about what will complement your chosen embellishments.
Gather Inspiration
Pinterest, Instagram, and even fashion magazines are overflowing with nail art ideas. Save photos of designs you love. Notice what elements are used: Are there lots of gems? Is it mostly glitter? Are there charms? This helps you understand what you’re drawn to.
Think About Placement & Balance
- Less is often more: A small cluster of gems on an accent nail can be just as impactful as covering the whole nail.
- Symmetry vs. Asymmetry: Do you want the same design on every nail, or do you want to mix it up? An asymmetrical design, like a single gem on one nail and a strip on another, can be very chic.
- Placement matters: Gems near the cuticle can look elegant. Placing them along the free edge can give a sophisticated French tip vibe.
- Avoid overcrowding: Too many embellishments can look messy and may not adhere well.
Match Your Embellishments to Your Style
Are you going for a subtle sparkle or a bold statement? Delicate pearls suit a classic or romantic style, while chunky glitter and bold charms are great for a more playful or edgy look.
A good rule of thumb for beginners is to focus on 1-2 nails for embellishments, often the ring finger or thumb, while keeping the others simpler. This creates a focal point without overwhelming the overall design.
Sealing & Protecting Your Embellished Nails
You’ve spent time creating a beautiful embellished nail design – now you want it to last, right? Proper sealing is key to keeping those gems in place and preventing chips or snags, especially for busy hands! This is where top coat and strategic application come in. For a comprehensive understanding of nail care and polish longevity, resources like the American Academy of Dermatology offer valuable insights into nail health and maintenance.
The Power of Top Coat
A good quality top coat is your best friend. It not only adds shine but also acts as a protective barrier.
- Apply generously: For nails with embellishments, a slightly thicker layer of top coat can help encapsulate them and provide a smoother surface.
- Cap the edges: Always swipe your top coat brush along the free edge (the tip) of your nails. This seals the polish and any embellishments, preventing lifting and chipping.
- Avoid direct coating on certain elements: While you want to seal around pearls and metal charms to secure them, coating them directly can sometimes dull their finish. Focus on getting the top coat right up to their edges.
When to Use Nail Glue
For heavier or larger embellishments like 3D charms, chunky stones, or larger gems, nail glue is essential. Relying solely on top coat might not be strong enough.
- Apply glue to the nail first: Place a small dot of nail glue where the embellishment will sit.
- Press the embellishment firmly: Gently press the charm or gem into the wet glue.
- Let it dry: Allow the glue to cure completely before applying top coat.
- Seal around it: Once the glue is dry, apply top coat around the edges of the embellishment to further secure it and blend the look.
Maintenance Tips
- Be mindful: When doing chores, consider wearing gloves. Avoid using your nails as tools (e.g., prying open cans).
- Touch-ups: If a gem comes loose, simply reapply a tiny bit of nail glue and press it back, then seal around it.
- Gentle removal: When it’s time to remove the polish, use a good quality acetone-based nail polish remover. For gel polish, use the appropriate removal method.
By taking these steps, you’ll ensure your beautiful embellished nails stay looking fabulous for as long as possible!
Embellished Nail Design Ideas for Every Occasion
Want some inspiration? Whether you’re heading to a wedding, a casual brunch, or just want to add some sparkle to your workday, there’s an embellished design for every moment. Here are a few ideas to get you started:
1. Everyday Elegance: Subtle Sparkle
Concept: Focus on one or two nails, using small, sophisticated embellishments.
- Look: A nude or pastel base polish with a few tiny pearls or crystals placed delicately along the cuticle line of the ring finger nail.
- Why it works: It’s chic, understated, and adds just a touch of glamour without being over-the-top. Perfect for work or when you want a polished feel.
2. Classic Glamour: Gemstone Accents
Concept: Use rhinestones or gems to create a focal point.
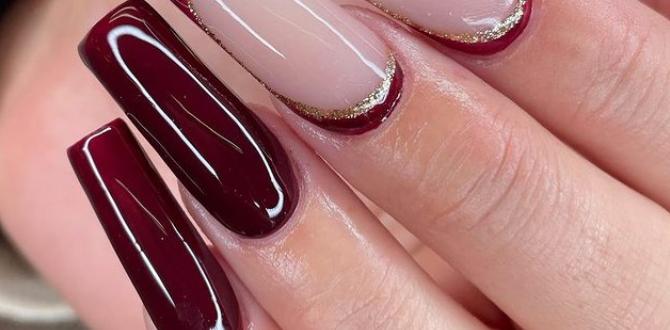
- Look: A classic red or deep jewel-toned polish. On an accent nail, create a simple pattern with rhinestones – perhaps a small cluster near the cuticle, a straight line down the center, or outlining the free edge.
- Why it works: This is timeless! It’s perfect for dinners, holidays, or any event where you want to feel a bit more dressed up.
3. Playful & Fun: Glitter & Charms
Concept: Embrace bolder colors and fun embellishments.
- Look: A bright, solid color polish. On one nail, go all-out with chunky glitter, or add a small, cute charm (like a heart, star, or tiny fruit) secured near the base.
- Why it works: Ideal for parties, festivals, or just when you want your nails to reflect a fun-loving mood.
4. Modern Chic: Metallic Flakes & Foil
Concept: Utilize metallic elements for a contemporary look.
- Look: A dark base polish (black, navy, deep green) with scattered holographic or metallic foil flakes. Or, try using foil to create abstract shapes.
- Why it works: This is trendy and can be surprisingly versatile. It adds a sophisticated metallic sheen that catches the light beautifully.
5. Bridal Bliss: Pearls & Delicate Details
Concept: Soft, romantic embellishments perfect for a wedding or special occasion.
- Look: A sheer, milky white, or soft pink base. Apply various sizes of small pearls along the cuticle and/or free edge to create a delicate border or a scattering pattern. Maybe add a tiny crystal accent.
- Why it works: The pearls mimic traditional bridal jewelry, offering a timeless and elegant bridal manicure.
Don’t

