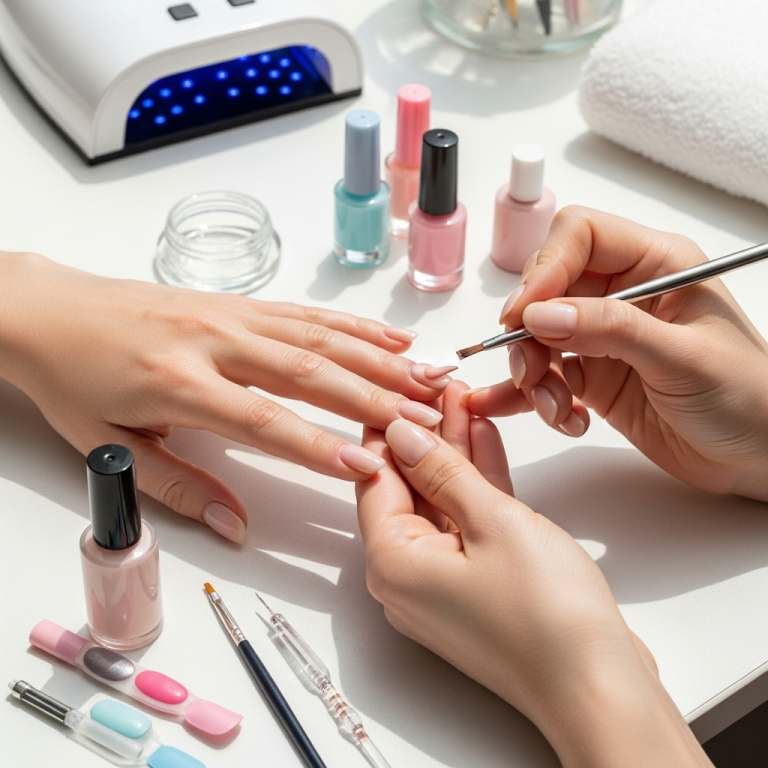
Elegant nail designs are achievable for everyone! Discover simple techniques, essential tools, and inspiring ideas to create stunning manicures at home, transforming your nails with chic and sophisticated flair that boosts your confidence and personal style.
Ever look at those perfectly polished nails and think, “That’s just not for me”? Many of us feel that way! We want our nails to look polished and pretty, but the thought of intricate art can feel overwhelming. It’s frustrating when you try a new design and it ends up looking a bit… messy. But what if creating elegant nail designs was actually super simple and fun? Get ready to unlock the secrets to effortless chic, because we’re about to dive into easy-to-follow steps and breathtaking ideas that will make your nails the talk of the town. Let’s get your fingertips looking fabulous!
Your Guide to Effortless Elegance: Essential & Stunning Nail Designs
Welcome to the world of elegant nail designs! If you’re new to nail art or just looking to elevate your at-home manicures, you’re in the right place. Elegance isn’t about complicated patterns; it’s about clean lines, beautiful colors, and a touch of subtle flair. We’re going to break down everything you need to know, from the basic tools you’ll want in your kit to simple yet stunning designs that you can master in no time.
Think of your nails as a blank canvas. With a few simple tricks, you can transform them into tiny works of art that reflect your mood, your outfit, or just your desire to feel a little more polished. We’ll focus on designs that are achievable for beginners, meaning you won’t need a steady hand like a surgeon or a closet full of professional-grade polish. Our goal is to empower you to create beautiful nails that make you feel confident and stylish every single day.
Why Choose Elegant Nail Designs?
Elegant nail designs are more than just pretty polish; they’re a way to express yourself without saying a word. They can:
- Boost Your Confidence: A well-manicured hand instantly makes you feel put-together.
- Complement Any Style: Elegant designs are versatile, fitting perfectly whether you’re dressing up for a special occasion or keeping it casual.
- Be Surprisingly Simple: Many sophisticated looks require just a few basic techniques.
- Offer a Creative Outlet: It’s a fun and rewarding way to explore your creative side.
The Essential Toolkit for Elegant Manicures
Before we dive into designs, let’s talk tools. You don’t need a professional salon’s worth of equipment. A few key items will get you started on your journey to beautiful nails. Having the right tools makes the process smoother and the results so much better!
Must-Have Nail Tools:
- Nail File: For shaping your nails. Look for a fine-grit file for a smooth finish.
- Nail Buffer: A multi-sided block that smooths ridges, buffs the nail surface, and adds shine.
- Cuticle Pusher/Orange Stick: To gently push back your cuticles for a clean nail bed.
- Base Coat: Protects your natural nails and helps polish adhere better.
- Top Coat: Seals your polish, adds shine, and prevents chipping. Crucial for longevity!
- Nail Polish Remover: To clean up mistakes and remove old polish.
- Cotton Pads/Balls: For polish removal.
- Tweezers or Dotting Tool: For precise placement of small embellishments or creating dots.
- Thin Striping Brush: Perfect for drawing fine lines.
Gathering these basics is the first step to professional-looking nails at home. Remember to keep your tools clean! After each use, wipe them down with rubbing alcohol to prevent the spread of germs and bacteria.
Mastering the Basics: Prep for Perfection
The secret to any stunning nail design, elegant or otherwise, is proper preparation. Think of it as priming a canvas before painting. Taking a little time to prep your nails will make a huge difference in how your polish looks and how long it lasts.
Step-by-Step Nail Prep:
- Remove Old Polish: Make sure all traces of previous polish are gone using nail polish remover and cotton pads.
- Trim and File: If needed, trim your nails to your desired length. Then, file them into your preferred shape (square, round, oval, almond). Always file in one direction to avoid weakening the nail. A gentle, consistent stroke is key. You can find great tips on nail shaping from reputable sources like the National Library of Medicine.
- Soften and Push Back Cuticles: Apply a cuticle oil or cream to soften them. Gently push back the cuticles with a cuticle pusher or orange stick. Avoid cutting your cuticles, as this can lead to infection.
- Buff Your Nails: Use the smooth side of a nail buffer to gently buff the surface of your nails. This removes ridges, creates an even texture, and helps polish adhere better. Don’t over-buff, as this can thin your nails.
- Cleanse: Wipe your nails with a damp cotton pad or a nail cleanser to remove any dust or oils. This ensures a clean slate for your polish.
- Apply Base Coat: This is a non-negotiable step! A good base coat protects your nails from staining (especially with darker polishes) and creates a smooth surface for your color. Let it dry completely.
Taking your time with these steps will make all the difference. A clean, smooth surface is the foundation for elegant nail art!
Elegant Nail Designs: Easy Techniques for Stunning Results
Now for the fun part! We’re going to explore some gorgeous, elegant nail designs that are surprisingly easy to do at home. These are perfect for beginners and can be adapted to your favorite colors.
1. The Sophisticated Single Stripe
A single, clean stripe can add an instant touch of modern elegance. It’s minimalist and chic.
- How-To:
- Apply your base coat and let it dry.
- Paint your nails with your chosen polish color. Apply two thin coats for full opacity. Let the second coat dry almost completely.
- Using a striping brush or a fine liner polish, carefully paint a single, straight line down the center of one or two accent nails (like your ring fingers). You can also place it off to one side for a more modern look.
- If you make a mistake, gently clean it up with a fine brush or toothpick dipped in nail polish remover.
- Once dry, seal with a top coat for shine and protection.
Pro-Tip: For a super straight line, try using nail tape as a guide. Apply the tape to your dried polish, paint over it, and carefully peel the tape away before the polish fully dries.
2. The Classic French Manicure Refresh
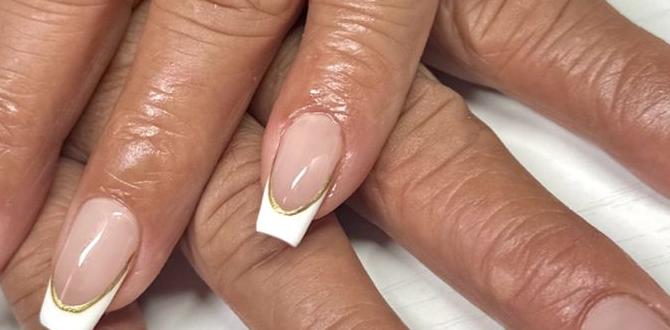
The French manicure is timeless, but we can give it a modern twist to keep it feeling fresh and elegant.
- How-To (Modern French):
- Prep nails and apply base coat. Paint nails with a sheer nude, pink, or milky whitepolish. Let dry.
- Instead of a stark white tip, use a metallic polish (gold, silver, rose gold) or a deep jewel tone (emerald, sapphire) for the tip.
- Use a fine brush or a steady hand to paint a thin line along the free edge of your nail.
- For an “under the tip” French, apply a thin line of your accent color just beneath the natural white tip.
- Seal with a top coat.
Variations: Try a reversed French (color at the cuticle line) or a diagonal French tip.
3. The Chic Color Block
Bold yet sophisticated, color blocking uses two complementary or contrasting colors to create a striking design.
- How-To:
- Apply base coat and your first color to all nails. Let it dry completely.
- Decide where you want the division line. For a half-and-half look, you might divide the nail horizontally or diagonally.
- Use nail tape to create a clean line separating the two colors. Press the tape down firmly to avoid polish seeping underneath.
- Paint the second color in one section.
- Carefully remove the tape while the polish is still wet.
- Let dry, then apply a top coat.
Color Combos: Navy and grey, blush pink and gold, black and metallic silver.
4. The Subtle Accent Gem
Sometimes, a little sparkle is all you need for an elegant touch. A single, well-placed gem can elevate any manicure.
- How-To:
- Complete your nail polish application and let it dry.
- Apply a tiny dot of nail glue or a dab of your top coat to the spot where you want to place the gem (usually centered on the nail, towards the cuticle, or on the edge of a French tip).
- Using tweezers or a dotting tool, carefully pick up a small rhinestone or stud and place it on the dot of glue or polish.
- Gently press it down.
- Apply a bead of top coat around the gem to secure it and prevent it from snagging. Be careful not to cover the gem itself if it’s designed to be sparkly.
Placement Tips: One gem on the ring finger is classic. You can also place a line of tiny gems along the cuticle or the tip.
5. The Gradient (Ombre) Effect
A soft transition of color creates a beautiful, modern, and elegant look.
- How-To:
- Apply base coat and let it dry. Paint nails with your lightest color. Let dry.
- For a simple gradient, use a makeup sponge. Place a few streaks of your target color(s) next to each other on a piece of foil or plastic.
- Dab the sponge onto the polish streaks.
- Gently dab the sponge onto your nail, building up the color gradually. You might need several applications.
- Clean up any polish on your skin with a brush dipped in remover.
- Once dry, apply a top coat.
Beginner Ombre Tip: Use two shades of the same color family for a seamless transition. For example, a light pink fading into a deeper rose.
Nail Shape Matters: Adding to the Elegance
The shape of your nails plays a significant role in the overall “elegance factor.” While personal preference is key, some shapes tend to read as more sophisticated and are known for enhancing the look of elegant designs.
Popular Elegant Nail Shapes:
| Shape | Description | Best For |
|---|---|---|
| Oval | Slightly tapered sides with a rounded tip. Elongates fingers. | Shorter to medium nail lengths. Works with most designs. |
| Squoval | A square shape with softly rounded corners. A classic, practical choice. | All lengths. Versatile for any design. |
| Almond | Tapered sides that gently narrow to a soft point. Very elegant and lengthens fingers. | Medium to long nails. Looks stunning with French tips and clean lines. |
| Round | Follows the natural curve of the fingertip with a perfectly round edge. | Short nails. Easy to maintain and clean. |
When choosing a shape, consider your nail health and lifestyle. Strong, healthy nails hold shape better. For more on nail health, the American Academy of Dermatology offers excellent advice.
Color Palettes for Timeless Elegance
The right color choice can instantly transform a simple design into something truly elegant. Think muted tones, classic shades, and sophisticated metallics.
Elegant Color Suggestions:
- Neutrals: Creamy beiges, soft greys, milky whites, and delicate nudes are universally flattering.
- Deep Tones: Rich navy, Hunter green, deep berry, and classic black can be incredibly chic.
- Pastels: Soft blush pinks, muted lavenders, powdery blues, and mint greens offer a gentle elegance.
- Metallics: Gold, rose gold, silver, and bronze add instant glamour.
- Sheer Finishes: Sheer pinks, peaches, and nudes offer a clean, polished look that’s always in vogue.
Consider the occasion and your outfit when selecting colors. For everyday elegance, neutrals and soft pastels are safe bets. For a bolder statement, jewel tones or metallics can be stunning.
Elevating Elegance: Advanced Touches (Still Beginner-Friendly!)
Once you’re comfortable with the basics, try these slightly more advanced, yet still achievable, elegant design elements:
1. The Subtle Glitter Fade
Instead of full glitter nails, create a soft fade from the tip or cuticle.
- How-To:
- Apply your base polish color and let it dry completely.
- On an accent nail, apply a thin layer of top coat.
- Dip a dry brush into a fine glitter polish. Tap off the excess glitter.
- Gently brush the glitter onto the tip of your nail, feathering it down towards the cuticle. The density of the glitter will be highest at the tip and fade as it gets closer to the cuticle.
- Repeat with a second light layer if needed, focusing the glitter on the very tip.
- Seal with a top coat, ensuring it caps the Glitter fade.
2. Two-Tone Cuticle Line
This is a subtle twist on the French manicure, drawing a thin line of color right at the cuticle.
- How-To:
- Paint your nails with your desired base color and let them dry.
- Using a very fine striping brush or a polish with a thin applicator, carefully draw a thin, precise line of your accent color directly along the cuticle line.
- Clean up any wobbles with a fine brush and remover.
- Apply top coat.
Tip: Practice on a piece of paper first to get a feel for the brush and steady your hand.
3. Negative Space Designs
Leave a portion of your nail “naked” (without polish) for a modern, airy, and elegant look.
- How-To:
- Apply base coat.
- Use nail tape to create shapes on your nail (geometric patterns, stripes, crescent moons).
- Paint over the taped sections with your chosen polish color.
- Carefully remove the tape while the polish is still wet.
- Let dry thoroughly and apply top coat.
Elegance Factor: The contrast between the polished and unpolished areas creates a sophisticated effect.
Troubleshooting Common Nail Design Woes
Even the most elegant designs can hit a snag. Here’s how to fix common problems:
Common Issues & Solutions:
| Problem | Solution |
|---|---|
| Chipped polish before it fully dries | Wait longer between coats! Thicker polish or rushing the process is a recipe for smudges. Use a quick-dry top coat. Invest in a good quality quick-dry top coat, like those found from reputable beauty brands, and ensure you cap the free edge to seal it in. |
| Streaks or uneven color | Apply thinner coats. Two to three thin coats are better than one thick, streaky one. Ensure your polish isn’t too old or dried out; if it is, add a drop of nail polish thinner. |
| Polish bleeding under tape | Ensure your base polish is completely dry before applying tape. Press tape down firmly. Remove tape carefully while the second color is still wet. |
| Bubbles
|

