Edgy nail art offers bold, expressive designs that transform your look with fierce creativity. From subtle accents to dramatic statements, learn essential techniques and fun ideas to create stunning, unique manicures that boost your confidence and showcase your personal style.
Want to add a little daring flair to your fingertips? Edgy nail art is all about expressing your unique personality and stepping outside the usual manicure box. It can feel a bit intimidating if you’re new to nail art, but trust me, it’s totally achievable and incredibly fun! Whether you’re aiming for a subtle wink of rebellion or a full-on statement, there’s an edgy design that’s perfect for you. Forget boring nails; let’s dive into how you can create some fierce and fabulous looks right at home.
Nail art is a fantastic way to experiment with your style without making a permanent commitment. It’s a canvas for creativity, and “edgy” just means embracing designs that are a little bolder, a little more unconventional, and a lot more YOU. Think beyond basic polish colors and explore textures, shapes, and artistic patterns that speak your language. We’ll break down everything you need to know, from essential tools to super simple design ideas that even beginners can master.
What Makes Nail Art “Edgy”?
Edgy nail art isn’t just about dark colors, though those can certainly be part of it! It’s more about the attitude and the design elements. Think sharp lines, contrasting colors, unconventional patterns, and a sense of daring. It’s about embracing individuality and making a statement that says you’re confident and in control. It can incorporate elements like:
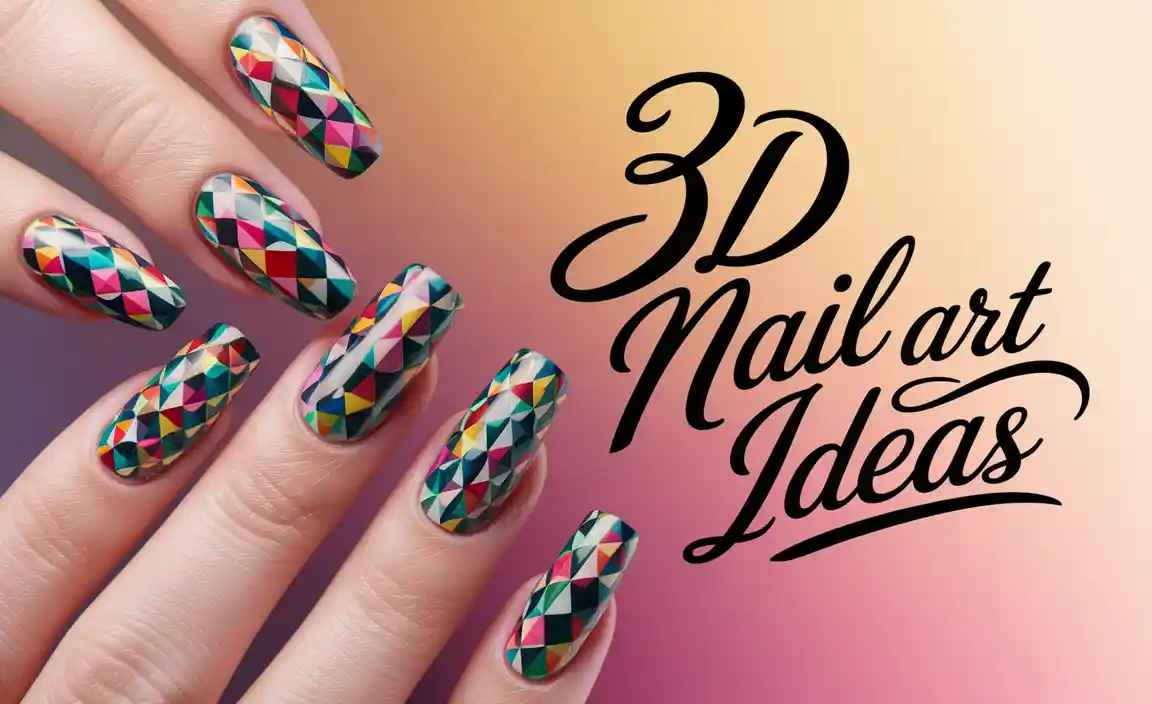
- Geometric shapes with sharp angles
- Abstract splatters and drips
- Darker color palettes mixed with metallics or neons
- Asymmetrical designs
- Incorporating textures like matte finishes or subtle glitter
- Negative space designs
- Anything that breaks the traditional mold in a stylish way!
Getting Started: Your Edgy Nail Art Toolkit
You don’t need a professional salon to create killer edgy nail art. A few key tools and some basic supplies will set you up for success. Don’t worry if you don’t have everything at once; you can build your collection as you get more into it.
Must-Have Supplies:
- Base Coat: This protects your natural nails and helps polish adhere better. A good quality one is essential for longevity.
- Top Coat: Seals your design, adds shine (or a matte finish!), and prevents chipping.
- Nail Polish in Various Colors: Think beyond the basics! Metallics (silver, gold, chrome), deep jewel tones (emerald, sapphire, ruby), classic black, white, and vibrant neons are great for edgy looks.
- Nail Polish Remover: For those oops moments and for cleaning up edges.
- Cotton Pads or Balls: For remover application.
Essential Tools for Edgy Designs:
- Fine-Tip Detail Brushes: These are your best friends for drawing thin lines, dots, and intricate details. You can find synthetic ones that are easy to clean.
- Dotting Tools: Perfect for creating dots of various sizes. They come in sets with different ball sizes on the ends.
- Striping Tape/Nail Tape: Creates super crisp, straight lines. It’s a game-changer for geometric designs. You can find it in metallic colors too!
- Stencils: For quick, repeatable patterns like chevrons, leopard spots, or geometric shapes.
- Tweezers: Useful for placing nail studs, rhinestones, or dried flowers with precision.
- Nail Art Gems, Studs, or Rhinestones: Add dimension and sparkle to your designs.
- Clean-up Brush: A small, angled brush (you can sacrifice an old makeup brush or buy a dedicated one) with a fine tip is perfect for cleaning up polish around your cuticle and sidewalls. Dip it in remover and carefully neaten the edges.
Nail Prep: The Foundation for Fierce Nails
Before you even think about design, proper nail prep is crucial. This ensures your polish looks smooth, lasts longer, and your nails stay healthy.
- Clean and Shape: Start by removing any old polish. Then, file your nails to your desired shape. Edgy designs often suit sharper shapes like squoval, almond, or even stiletto, but any shape can be made edgy!
- Push Back Cuticles: Gently push back your cuticles using a cuticle pusher. This creates a clean canvas and makes your nail bed appear longer. Avoid cutting them unless absolutely necessary, as they protect your nails from infection.
- Buff (Optional but Recommended): Lightly buff the surface of your nails to smooth out any ridges and create a slightly tacky surface for polish to adhere to. Don’t over-buff, as this can weaken your nails.
- Cleanse: Wipe your nails with rubbing alcohol or a nail cleanser to remove any oils or dust. This is super important for polish longevity.
- Apply Base Coat: Apply one thin layer of your base coat and let it dry completely.
Easy Edgy Nail Art Designs for Beginners
Ready to get creative? Here are some beginner-friendly edgy designs that pack a punch!
1. The “Sharp Line” Geometric Accent
This design uses simple straight lines to create a modern, edgy feel. It’s super versatile and looks chic with almost any color!
What You’ll Need:
- Your favorite polish color(s)
- Striping tape or a fine-tip brush
- Base coat and top coat
How To Do It:
- Apply your base coat and let it dry.
- Paint your nails with your chosen polish color(s). Let this layer dry completely – this is important for the tape to peel off cleanly.
- Using Striping Tape: Carefully place strips of tape onto your dried polish to create geometric shapes (lines, chevrons, triangles). Press the edges down firmly.
- Using a Fine-Tip Brush: If you’re brave, freehand your lines! Dip your brush in polish and draw crisp lines around the nail.
- Once your lines are in place (or dried if freehand), carefully apply a layer of top coat over the entire nail. This seals the design and gives it a polished finish.
- For a super edgy look, try metallic striping tape!
2. The “Negative Space” Chic
Negative space is when you intentionally leave parts of the nail bare or use a sheer polish. It’s minimalist yet incredibly stylish and sophisticated.
What You’ll Need:
- A sheer nude or white polish (optional)
- A dark or metallic polish for contrast
- Fine-tip brush or striping tape
- Base coat and top coat
How To Do It:
- Apply base coat.
- Paint your nails with a sheer nude or white polish if you want a subtle base, or leave them bare for a true negative space effect. Let it dry.
- Option 1 (Brush): Use your detail brush and the dark/metallic polish to paint a sharp line, a geometric shape, or an abstract design in a corner or across the nail, leaving the rest of the nail bare.
- Option 2 (Tape): Apply striping tape to create a boundary, paint a section of the nail on one side, and then carefully remove the tape.
- Finish with a clear top coat, making sure to coat the painted areas and the edges of the tape line if used.
3. The “Matte & Shiny” Contrast
Playing with finishes is an easy way to add an edgy vibe without complex designs. Matte finishes are super trendy and look amazing contrasted with shiny elements.
What You’ll Need:
- Your chosen polish color(s)
- Matte top coat
- Regular glossy top coat
- Fine-tip brush or striper tool (optional)
How To Do It:
- Apply base coat and paint your nails with your desired color. Let them dry completely.
- Option 1 (Full Matte): Apply a matte top coat over all your nails for a sophisticated, edgy look.
- Option 2 (Partial Contrast): Paint all your nails with your color, let dry. Then, use a fine-tip brush to paint a thin, glossy line or a small glossy dot over the matte finish.
- Option 3 (Color Contrast): Paint your nails with color A, let dry. Apply matte top coat. Then, use a fine-tip brush and color B (glossy) to add a line or design.
- Ensure all layers are dry before proceeding.
4. The “Abstract Splatter” Vibe
Perfect for embracing controlled chaos! This looks intentionally messy but incredibly cool.
What You’ll Need:
- A dark base color (black, navy, deep red)
- White or contrasting splatter colors
- A stiff brush (like an old toothbrush or a dedicated splatter brush) or a fine-tip brush for control
- Base coat and top coat
- Paper towels or a paper plate to test the splatter
How To Do It:
- Prep and paint nails with base coat and your chosen dark color. Let dry thoroughly.
- Dip the tip of your brush into the splatter color.
- For Toothbrush Splatter: Hold the brush about 6-10 inches above your nail and run your thumb over the bristles to flick the polish onto the nail. Practice on a paper towel first to control the amount of splatter.
- For Fine-Tip Brush Control: Load a small amount of polish onto the brush and carefully flick it or dab for a more controlled splatter effect.
- Repeat with different colors or layers for more depth.
- Once dry, apply a generous layer of glossy top coat to seal everything in and give it a uniform shine.
5. The “Bold Accent Nail”
If full-on edgy every day is a bit much, focus the drama on one or two accent nails! This is a fantastic way to dip your toes into bolder designs.
What You’ll Need:
- Your main polish color
- A contrasting or metallic polish for the accent nail
- Chosen design elements (e.g., studs, striping tape, foil)
- Base coat and top coat
How To Do It:
- Paint all your nails except the accent nail(s) with your main polish color.
- On your accent nail(s), apply your base coat and then your chosen contrasting color.
- While the accent nail polish is still wet (or use a dot of top coat as glue), carefully place studs, rhinestones, or apply nail foil.
- Alternatively, use striping tape on the accent nail for sharp lines over the contrasting color.
- Once everything is dry and in place, apply top coat over all nails, being careful around any raised embellishments on the accent nail.
Advanced Edgy Techniques to Try
Once you’re comfortable with the basics, these techniques can elevate your edgy nail art even further!
1. Chrome and Metallic Foils
Chrome powder and foil transfers are incredibly popular for an instant high-impact, futuristic, or rebellious look. They catch the light beautifully!
What You’ll Need:
- Base coat and a specific color polish (often black or white works best as a base for chrome)
- Specialized sticky top coat or gel polish for foil transfer (check product instructions!)
- Chrome powder or metallic foil flakes/transfer paper
- Silicone tool or cotton swab for applying chrome powder
- Top coat
How To Do It (General Guide – always follow specific product instructions!):
- Prep and paint nails with base coat.
- Apply your base color polish and let it dry completely.
- Apply a specialized top coat or cure a layer of gel polish (this gives the powder something to stick to).
- For Chrome Powder: Rub the chrome powder onto the sticky layer using a silicone tool or cotton swab until you achieve a full, mirror-like finish. Gently brush off excess powder.
- For Foil Transfer: Place the foil shiny-side-up onto the sticky layer and press down firmly. Quickly peel off the foil.
- Apply a top coat to seal the design. Be careful as chrome can sometimes lose its mirror finish if over-top-coated too heavily. Gel top coats are often recommended for longevity.
You can find excellent tutorials on how to use chrome powder and foil transfers online, which often include specific product recommendations.
2. Negative Space with Stencils
Combine the elegance of negative space with sharp, repeatable patterns using stencils. These are readily available and easy to use.
What You’ll Need:
- Base coat and your polish colors
- Nail stencils (geometric, tribal, abstract patterns work well)
- Top coat
How To Do It:
- Prep and apply base coat.
- Paint your nails with your base colors, or leave them bare for true negative space. Let dry completely.
- Carefully peel a stencil from its backing and apply it firmly to your nail. Ensure all edges are sealed down to prevent polish bleed.
- Paint over the stencil with your contrasting color.
- While the polish is still wet, carefully peel off the stencil. This is key for crisp lines!
- Let the polish dry, then apply your top coat to seal the design.
3. 3D Embellishments
Take your edgy look to a new dimension with studs, spikes, gems, or even charms! It adds serious attitude.
What You’ll Need:
- Base coat and polish colors
- Nail glue or a thick layer of top coat/gel
- Embellishments (spikes, studs, rhinestones, chains, charms)
- Tweezers
- Top coat
How To Do It:
- Prep and paint your nails. Let the polish dry completely.
- Apply a small dot of nail glue or a generous amount of top coat/gel where you want to place your embellishment.
- Using tweezers, carefully pick up your embellishment and place it onto the wet glue or polish. Press gently.
- Place embellishments strategically for maximum impact – think along the cuticle line, at the tip, or creating a specific pattern.
- Once all embellishments are in place and the glue/polish is dry, carefully cap the edges of your nails with top coat. For gems, try to avoid getting top coat over the whole surface if you want to maintain their original sparkle, but ensure the base is sealed.
For more structured 3D elements, consider nail product safety, ensuring all items are designed for cosmetic use. Nail supply websites often have detailed guides on applying various embellishments.
Color Palettes for Edgy Nails
While you can make any color edgy, some palettes naturally lean into that vibe:
- Dark & Moody: Black, deep burgundy, forest green, navy, charcoal grey.
- Metallic Mania: Silver, gold, rose gold, gunmetal, especially when paired with black or white.
- High Contrast: Black and white, neon contrasting with black, red and black.
- Jewel Tones: Emerald, sapphire, amethyst, ruby, often with a metallic accent.
- Gothic Romance: Black with deep reds, purples, or deep blues.
- Industrial Chic: Greys, metallic concrete textures, muted blues.
Caring for Your Edgy Masterpieces
Edgy nail art can be delicate, especially with added embellishments or fine details. Here’s how to keep them looking fierce:


